


Why does salon glitter stay locked in place all night while yours ends up under your eyes by the second drink? The answer is almost never the glitter itself; it is the glue, the order you work in, and the size of the flake. Get those three right and sparkle stops being a fallout nightmare and starts being the easiest way to look expensive under any light.
These 15 glitter looks run from a barely-there micro-shimmer lid to a full festival gem moment, each with the technique that keeps it put and the honest note on who it flatters. I will also flag the safety rules that matter, because the eye area is no place for the wrong kind of sparkle.
Glitter That Stays Put
- Use a proper glitter glue or a sticky cream base, not just shadow, so flakes cling instead of scattering.
- Always do your eye glitter first, then clean up the fallout and do your base and cheeks last.
- Press glitter on with a flat brush or a fingertip; swiping is what sends it flying.
- Only use cosmetic-grade, eye-safe glitter near the eyes, never craft glitter, which can scratch the cornea.
- Remove it gently with a balm or tape rather than scrubbing, and glitter can be a regular part of your kit.
A Twinkling Soft Cut Crease
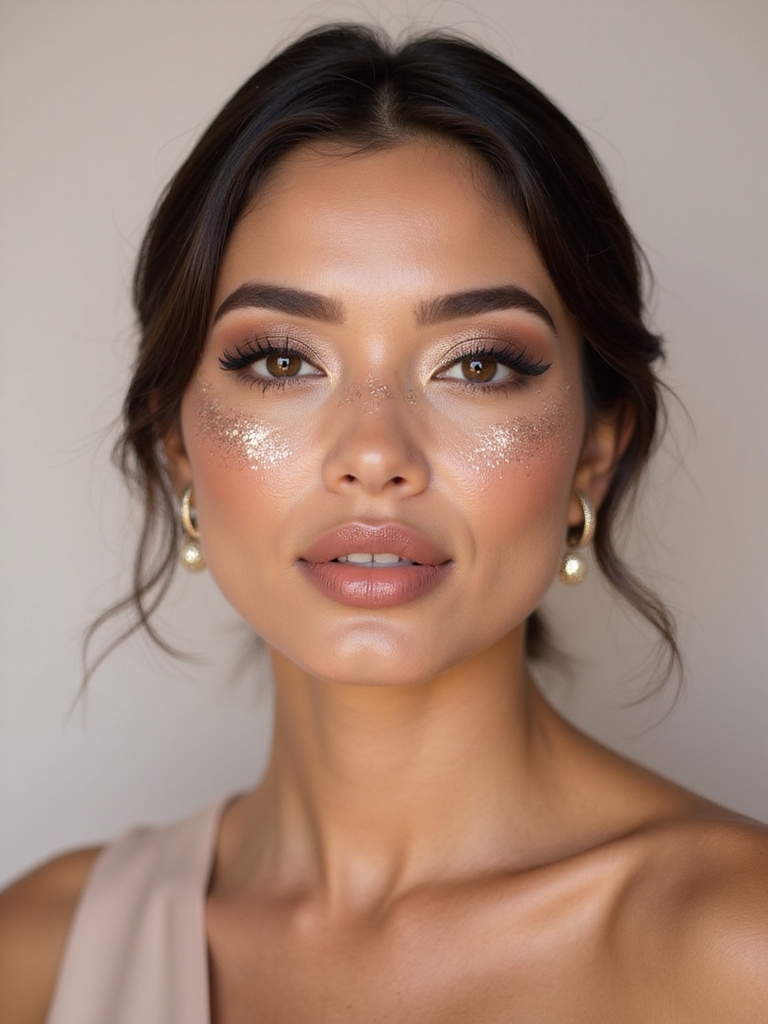
Setting glitter into a soft cut crease is the most flattering way to wear a full lid of sparkle, because the carved socket frames it and makes the eye look bigger. The blended crease does the shaping while the glitter does the shining, so it looks glamorous instead of childlike, a sparkly cousin of my smokey eye makeup looks. This is my favorite way to introduce a nervous client to a whole glitter lid.
- Carve a soft crease with a neutral matte shade to frame the lid.
- Pat glitter glue across the lid and wait until it turns tacky and clear.
- Press the glitter on with a flat brush, packing it dense for a solid, twinkling finish.
An Icy Inner-Corner Sparkle Pop
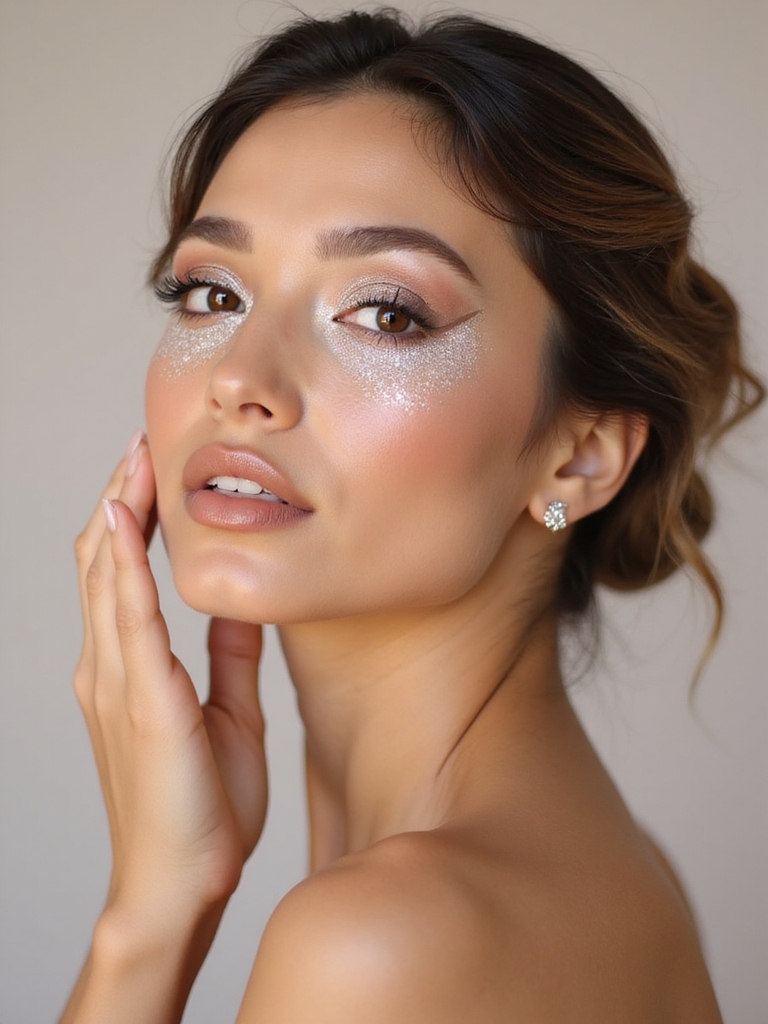
If a full glitter lid feels like a lot, an icy sparkle in the inner corners gives you the payoff with none of the commitment. It is the ten-second trick that opens and brightens the eye, making you look wide awake in every photo. It works over any eye look and takes almost no skill, which is why it is the glitter everyone can wear.
- Finish your eye look first, then add the sparkle last so it stays the focal point.
- Dab a tiny bit of glue into the inner corners and press on a fine icy glitter.
- Warm the shade for deep skin, since a champagne or gold sparkle lights up richer complexions more than a stark silver.
A Prismatic Holographic Halo Eye
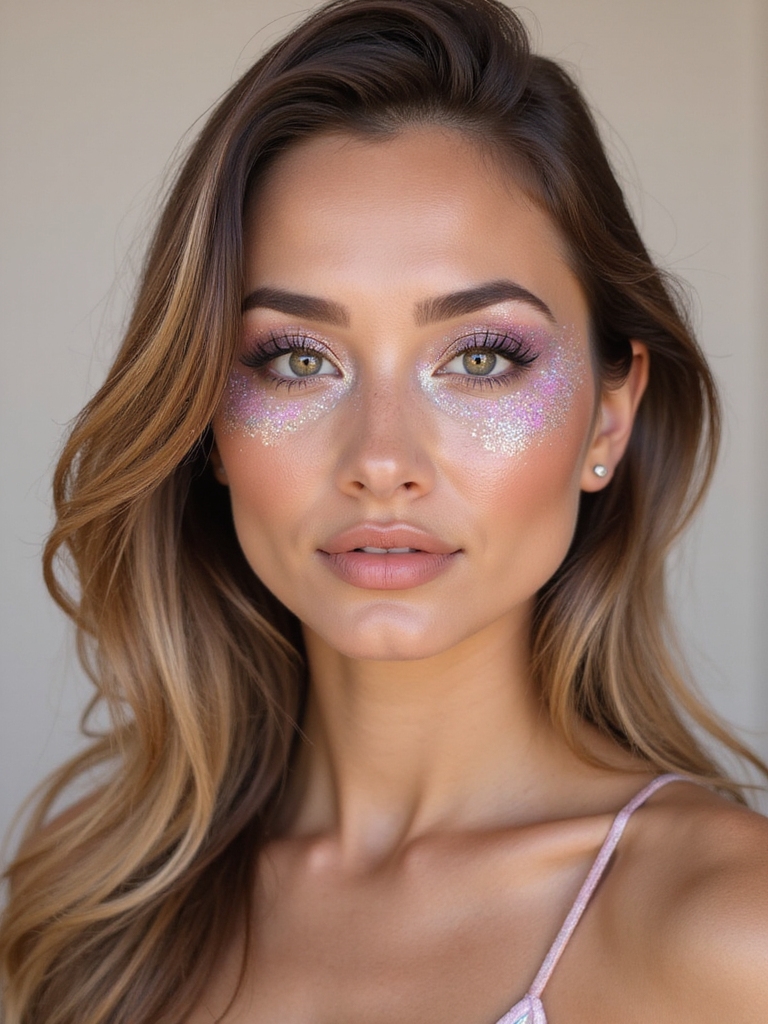
The halo eye concentrates the brightest glitter in the center of the lid and fades it out toward the corners, and in a prismatic holographic finish it practically changes color as you move. It is the look that photographs like magic, all shifting pinks, blues, and greens catching the light. The halo placement is what makes it flattering on every eye shape.
Why the Halo Flatters
Build a darker shade at the inner and outer corners first, then place the holographic glitter dead center over glue so the light bounces from the middle of the eye.
Holographic glitter is a gift for deep skin, where the color-shift lands especially vivid against a rich base, as my natural makeup for deep skin guide explores; the key is a dense, tacky glue so nothing scatters.
The single thing that separates salon glitter from glitter that ends up on your cheeks is the glue. A dedicated glitter glue or a sticky cream base, applied and left until tacky, is what makes a flake cling for twelve hours instead of two.
A Sparkling Sharp Winged Liner
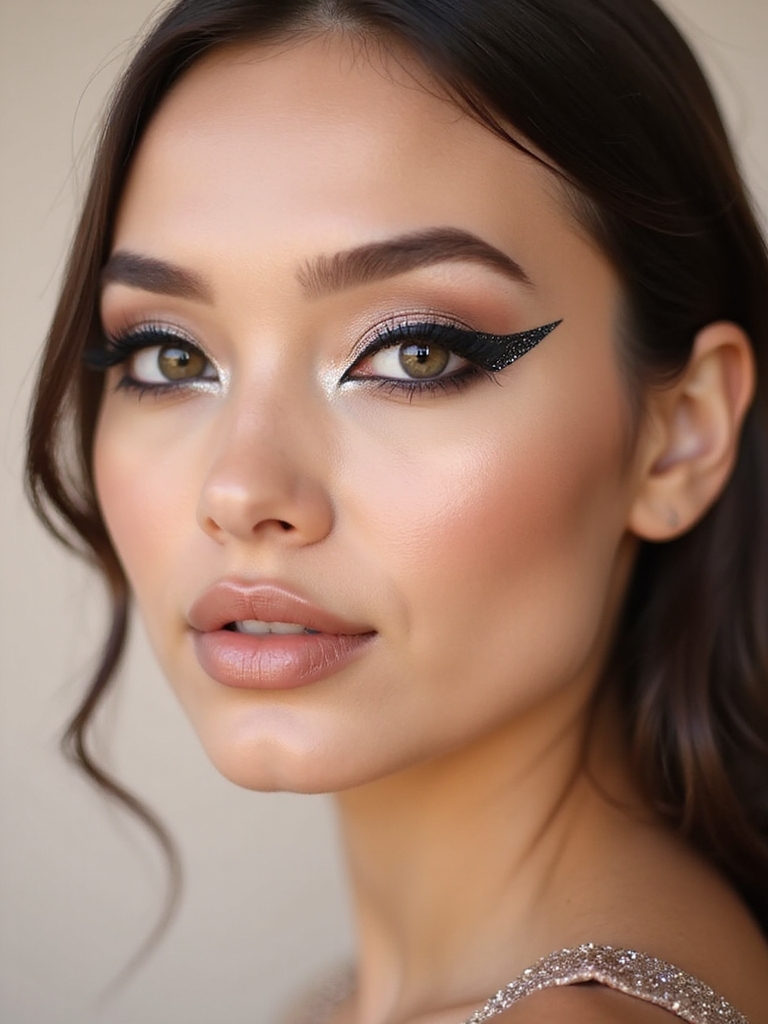
A glitter wing is the easiest way to dip into sparkle if a full lid is not your thing, and it keeps the graphic drama of a classic flick with an extra hit of shine. A glitter liner or a fine glitter pressed over a gel wing gives a crisp, sparkling line that still looks polished.
The trick is to lay down your wing shape first in a regular liner, let it set, then trace glitter over the top so the edge stays sharp. Glitter alone is too loose to make a clean line.
It suits anyone who loves a winged eye but wants it dialed up for a party, and it works in any glitter color, from classic silver to a bold electric blue.
A Single-Stroke Molten Chrome Lid
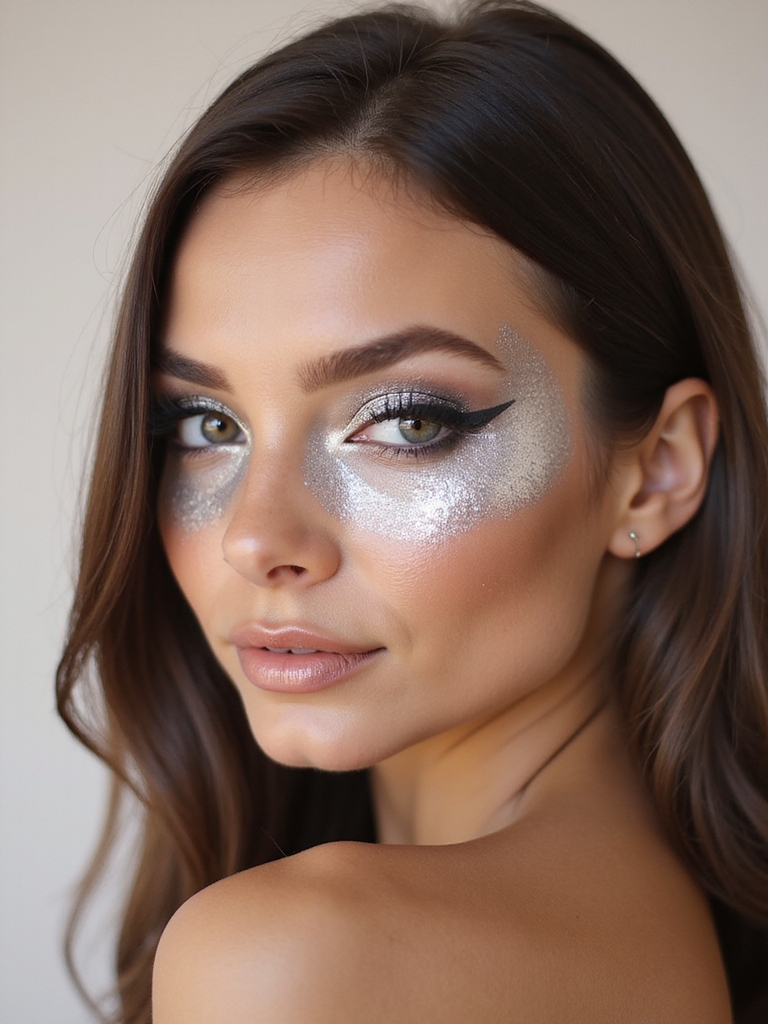
For a high-shine look that is technically glitter’s smoother cousin, a molten chrome lid gives a liquid-metal finish in a single stroke. It uses a chrome or foil pigment rather than loose flakes, so there is no fallout at all, which makes it the low-maintenance way to look drenched in light. One swipe over a sticky base and you are done.
Chrome flatters everyone when you pick the tone: cool silver and pewter on fair skin, warm gold and bronze-chrome on deep skin so it glows like real metal. Keep the rest of the face soft, in the spirit of my natural makeup looks, so the mirrored lid stays the star, and pack the pigment on damp for the wettest, most reflective finish.
Dewy Iridescent Faux Freckles
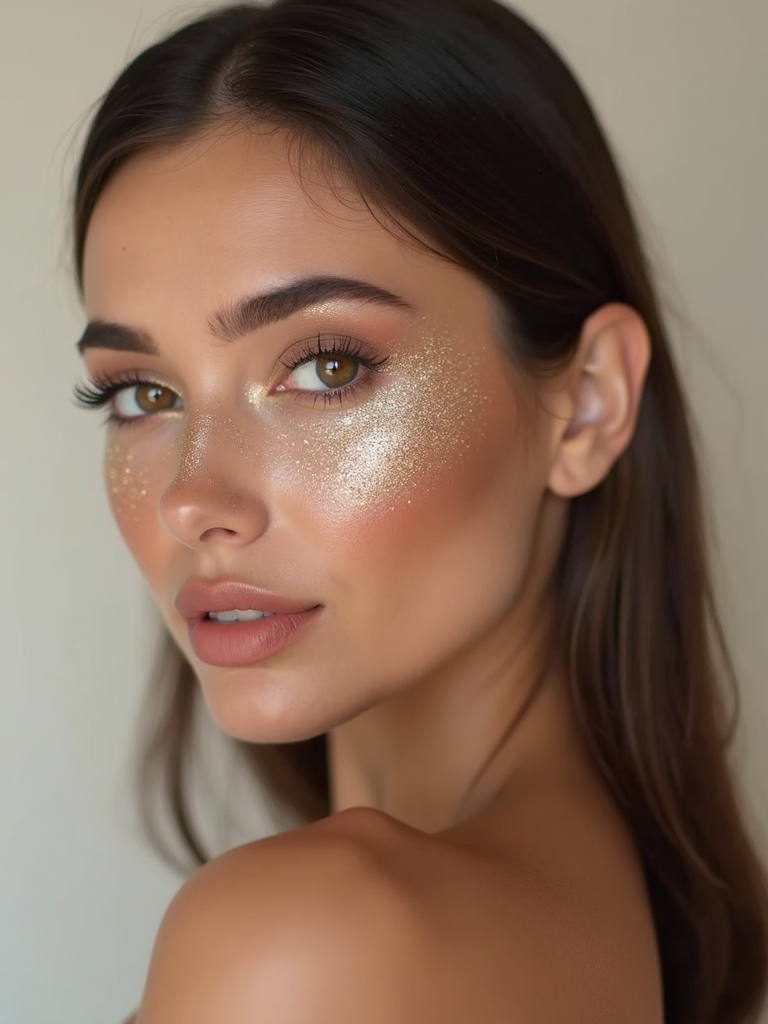
This is glitter at its most playful and modern: tiny iridescent faux freckles scattered across the tops of the cheeks and nose over dewy skin. It looks fresh and festival-ready, never costumey, giving a dusting of magic that catches the light when you smile. It is a favorite for summer and outdoor events where you want a hint of shine.
The effect works best with a light hand and a fine, multi-tonal glitter so the freckles look like flecks of light, not stickers.
- Dot a brown pencil first for the freckle base, then tap iridescent glitter on top.
- Keep the skin dewy and bare so the freckles are the only sparkle.
- Scatter them naturally, heavier over the nose and fading out across the cheeks.
Lacquered, Glittered Long-Lasting Lips
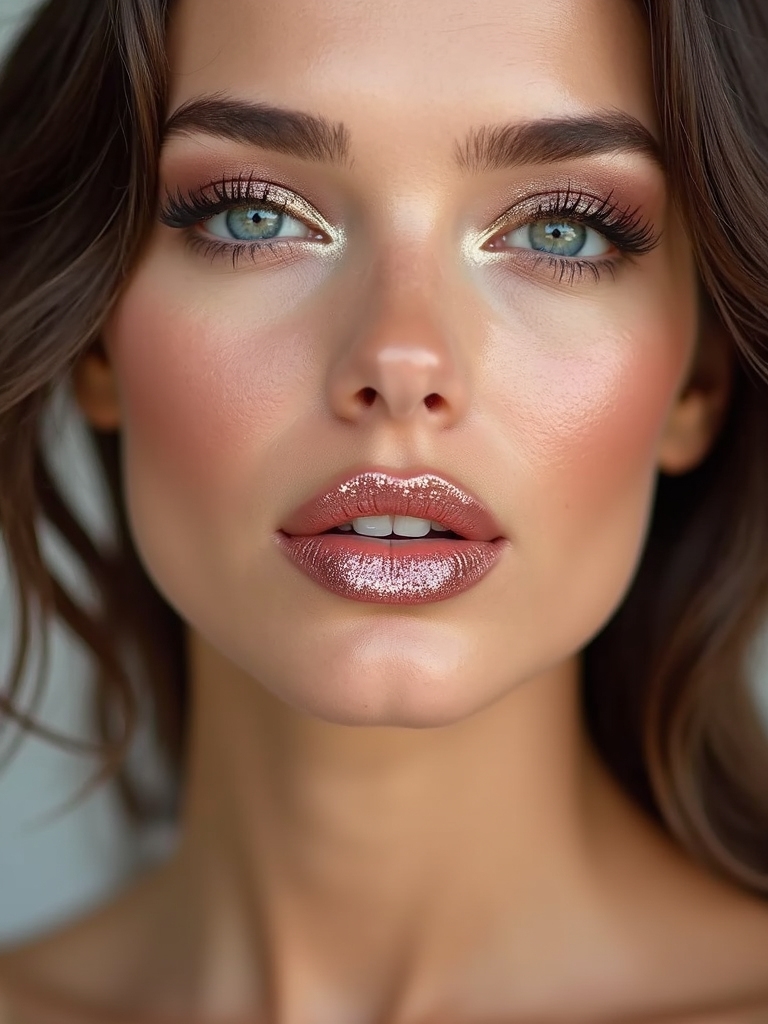
A glittered lip is a bold, disco-ready statement, and the trick to making it last through a night is building it on a color base so the shimmer has something to grip. Worn over a rich lip color, glitter turns an ordinary lip into a lacquered, light-catching focal point. It is high commitment but high impact, perfect for New Year and party season.
- Line and fill with a lip color first so the base color survives even as glitter fades.
- Press a lip-safe glitter or glitter gloss on top, patting it, not swiping.
- Deepen the base on deep skin with a berry or brown so the sparkle has rich color to bounce off.
Eye Safety
Only ever use cosmetic-grade, eye-safe glitter near your eyes. Craft or nail glitter has sharp, irregular edges that can scratch the cornea and cause real damage. Keep even fine glitter off the inner waterline, and if any gets in your eye, flush it with water and see a professional if irritation lasts.
Icy-to-Gold Luminous Cheekbones
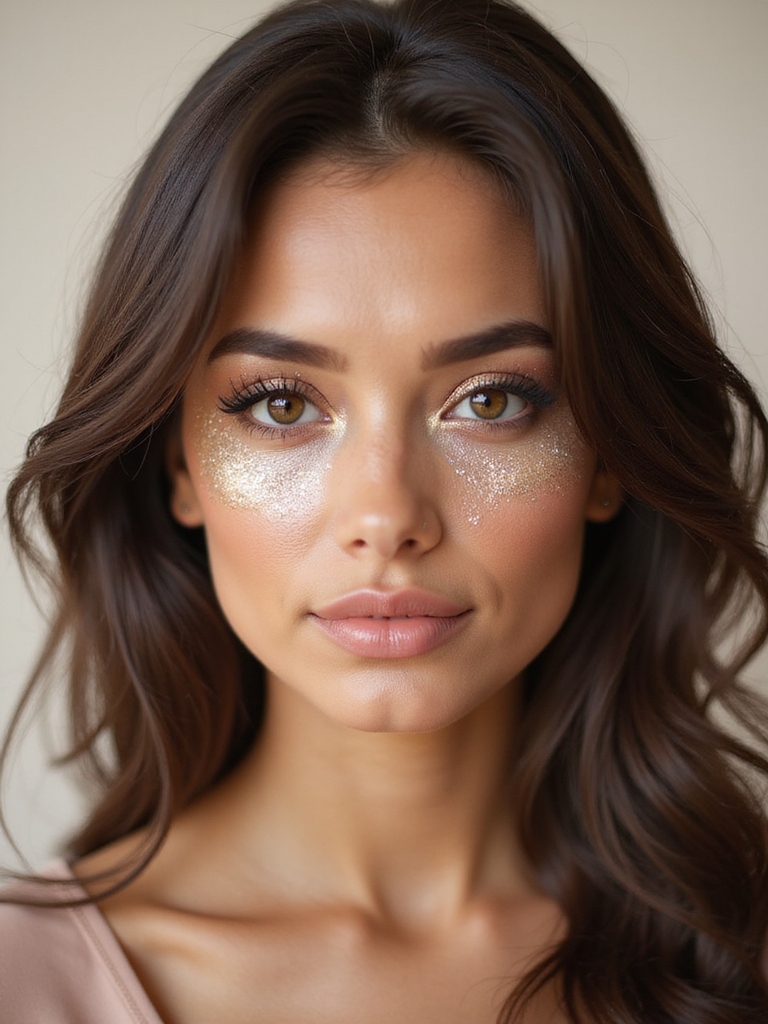
A glitter highlight that melts from icy at the top of the cheekbone to gold below is next-level luminosity for a special night. Instead of a flat powder highlight, this fine gradient of sparkle gives dimension and a lit-from-within glow that a single shade cannot. It is subtle enough for a wedding yet special enough to feel like an event look.
Blending the Gradient
Use a fine, pressed glitter or a liquid glitter highlighter and blend the two tones where they meet so there is no hard line.
The gradient is endlessly adaptable to skin tone: lean more gold and bronze on deep skin, where warm sparkle reads richer than an icy white.
A Sparkling Lower Lash Line
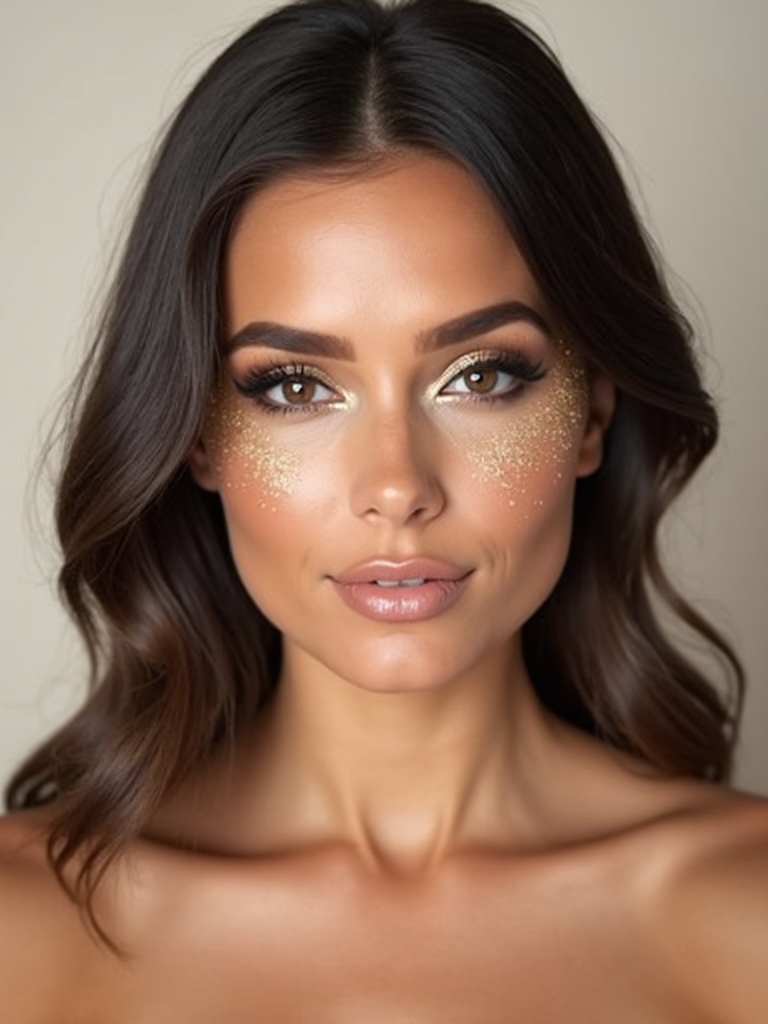
Placing a fine line of glitter along the lower lash line is an unexpected, editorial way to wear sparkle that instantly makes the eyes look bigger and brighter. It draws attention up to the eyes and looks high-fashion, light, and deliberate, especially with an otherwise clean face. The catch is precision and safety, since this sits close to the eye.
- Use only fine, cosmetic-grade glitter here, never a chunky or craft flake near the waterline.
- Apply with a damp flat brush just under the lower lashes, staying off the waterline itself.
- Keep the lid simple so the sparkling lower line is the whole statement.
A Molten Glitter Smoky Eye
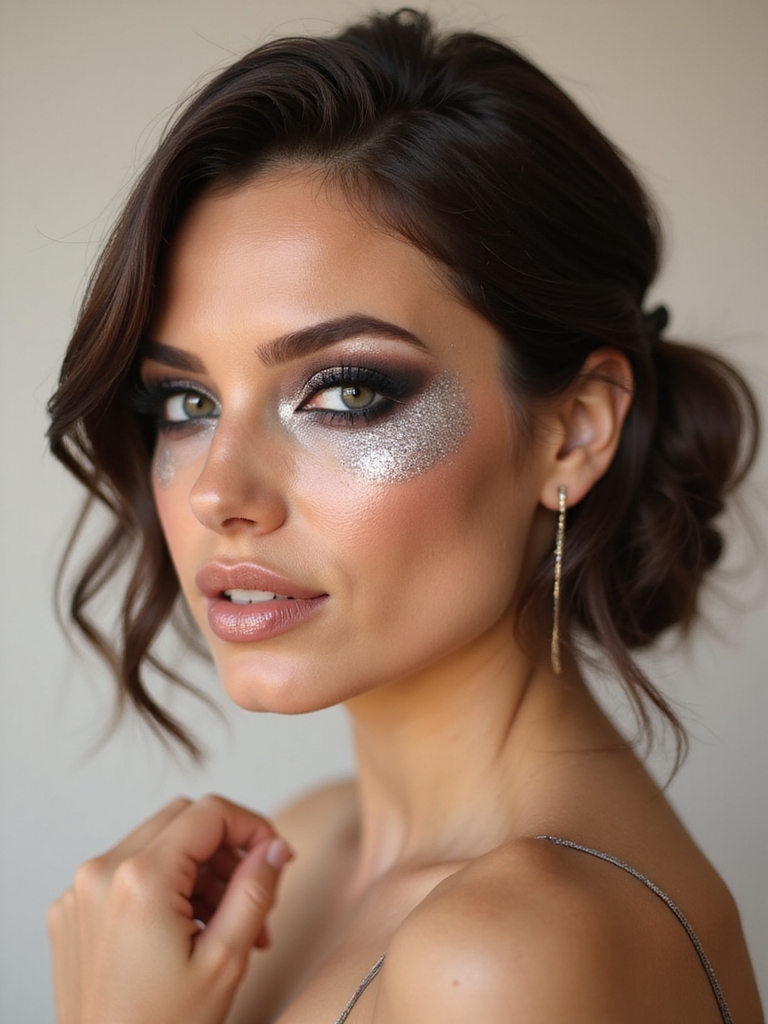
Layering glitter over a classic smoky eye gives you depth and dazzle at once, the sultry darkness of smoke with a molten, wet-looking shine on top. The smoke does the sculpting while the glitter catches every bit of light, which makes it the most glamorous, evening-appropriate way to wear a full glitter lid. It is a knockout for a night out.
Build a full smoky eye first, as in my glam makeup guide, then press a matching or contrasting glitter into the center of the lid over glue. On deep skin, a warm gold or bronze glitter over a deep brown smoke lands especially rich, while cooler tones suit lighter skin. Keep the lower lash line smudged to wrap and balance the eye.
Gem-Clustered Festival Sparkle
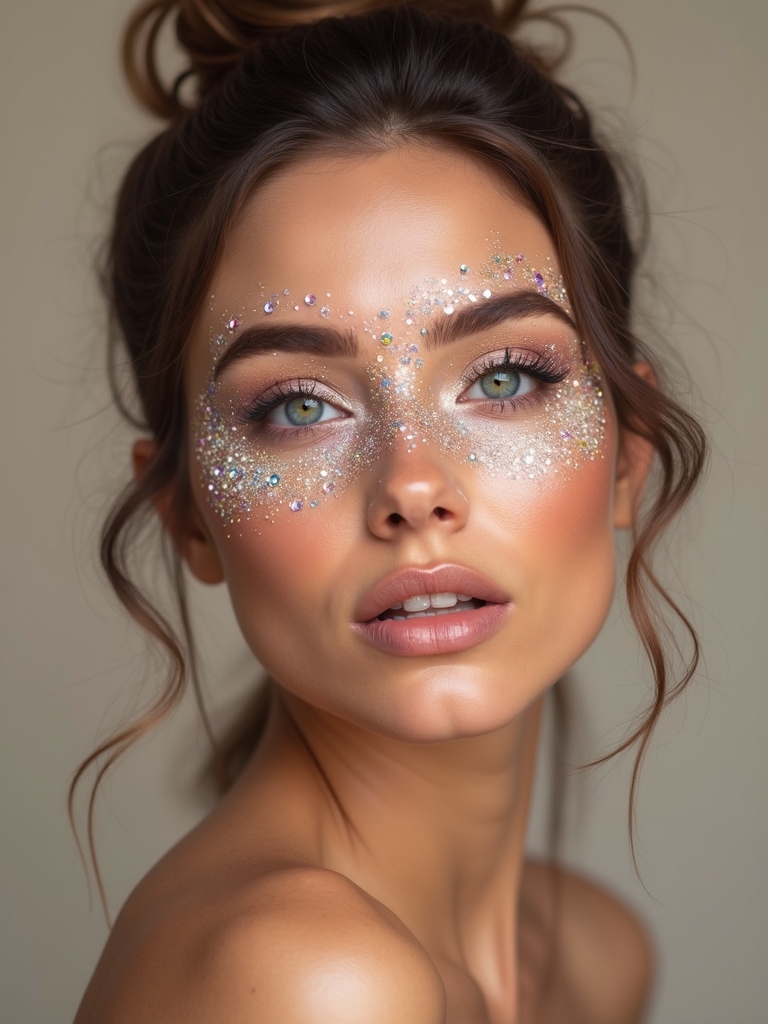
For festival season or a costume night, clustering rhinestones and gems with glitter pushes a look into full editorial territory. Gems and sparkle together photograph incredibly, a staple of my prom makeup looks, and let you build something artful around the eyes and temples. They sit best over a simple, glowy base so the clusters stay the focal point and do not compete with a busy eye.
- Finish your eye look and glitter first, then place gems last with tweezers.
- Use lash glue or a gem adhesive so the stones stay put through dancing.
- Cluster at the inner corner or temple and let a few stray gems trail out for an artful scatter.
Two quick glitter troubleshooting checks:
1Your glitter keeps falling onto your cheeks. What is the fix?
You are likely swiping it on and skipping the glue. Use a proper glitter glue, wait until it is tacky, and press the glitter on with a flat brush or fingertip; do not drag a brush.
2You did your foundation first and now it is full of fallout. What went wrong?
Order of operations. Always do eye glitter first, then clean up any fallen flakes, and apply your foundation and cheeks last so nothing lands in wet base.
Subtle Glitter Tightline Drama

Not all glitter shouts. Tightlining with a hint of sparkle, tucking a fine glitter liner right into the upper lash roots, adds a barely-there twinkle that makes lashes look thicker and eyes more defined without a full glitter moment. It is the most wearable, work-appropriate way to sneak sparkle into a daytime look.
Use a glitter-infused gel liner rather than loose flakes here, since a creamy formula presses cleanly into the lash line and stays close to the eye safely. The effect is quiet in a photo but catches the light in person, which makes it a lovely everyday upgrade for anyone who thinks glitter is not for them.
Gloss-Drenched Micro-Glitter Lids
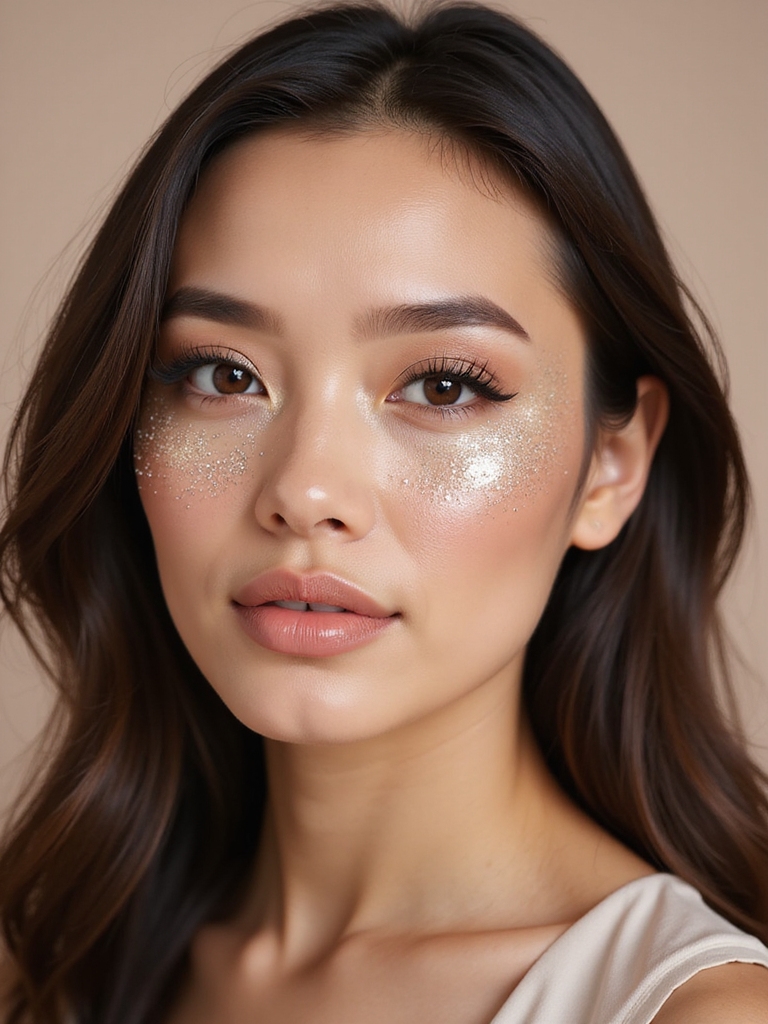
The gloss-drenched lid is the trendiest, most editorial glitter finish right now: a sheer, wet-looking wash of fine micro-glitter that makes the lid look glazed. It feels modern and cool rather than heavy, since the glitter stays fine and the finish is glossy, not dense. The trade-off is that it can crease, so it suits a photo or a shorter event more than an all-nighter.
A micro-glitter gloss or a glitter topper pressed over a cream base holds that drenched look the longest.
- Choose micro-glitter, not chunky flakes, for the smooth, glazed finish.
- Press over a cream shadow base so the gloss has something to hold onto.
- Save it for events, not marathons, since glossy lids crease faster than matte.
💡Removal Tip
Never scrub glitter off. Press a cleansing balm or micellar-soaked pad over the area to dissolve the glue, then lift stray flakes with the sticky side of a piece of tape or a damp cotton pad. Scrubbing drags glitter across delicate eye skin and does more harm than the glitter ever could.
Holographic Star-Studded Brows
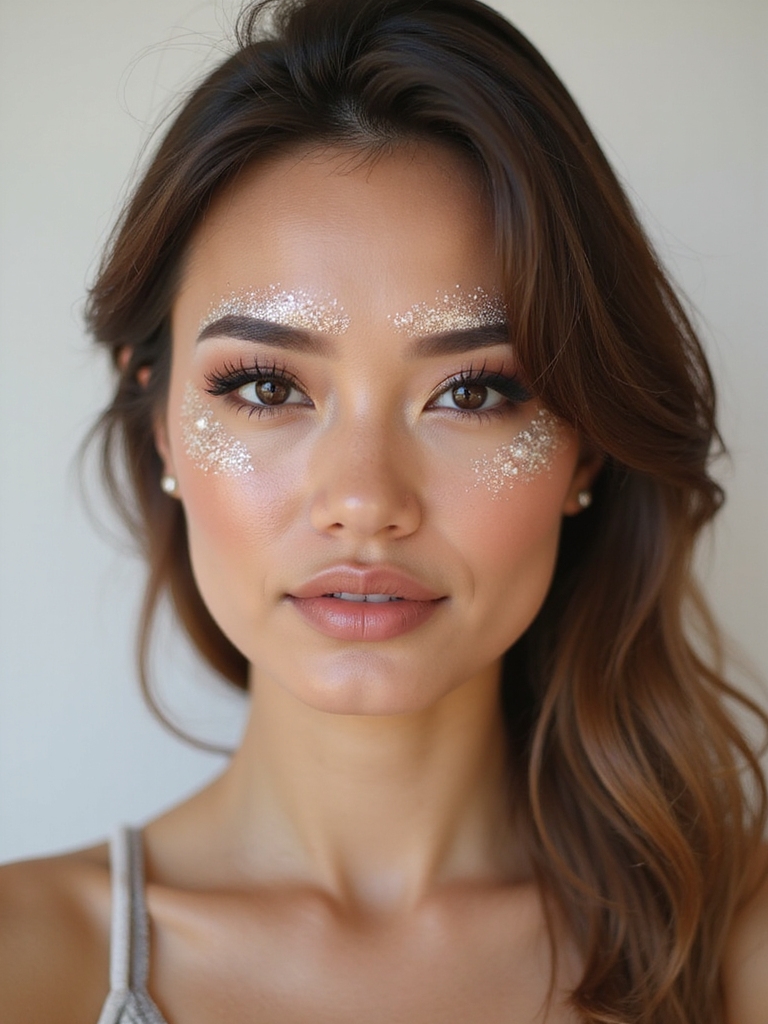
Statement brows dusted with holographic sparkle and dotted with tiny star gems are pure festival fantasy, the kind of look built for a photo and a good time. This is unapologetically playful, taking the brows from a supporting role to the star of a costume or rave look. It is not for the office, and that is the whole point.
Building a Statement Brow
Brush the brows up and set them first, then dust holographic glitter over the top and press a few small star gems along the arch with adhesive.
Because it is such a bold statement, keep the rest of the face relatively simple, letting the sparkly brows and maybe a glossy lip carry the look.
Moonlit Shimmer on Shoulders
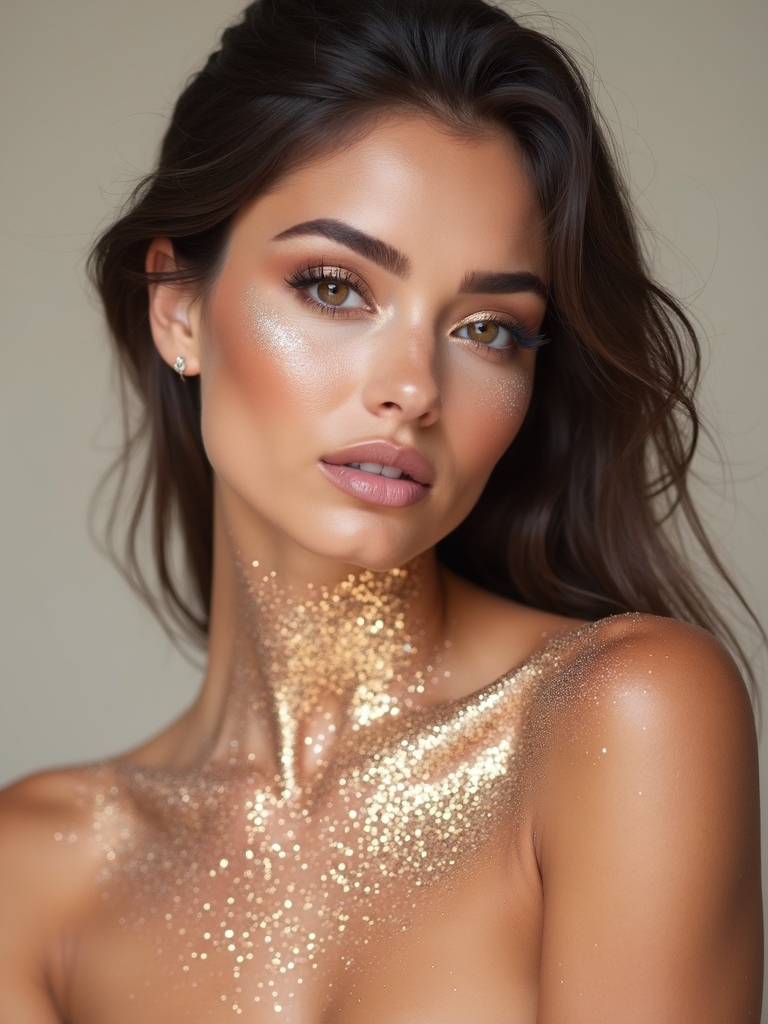
Glitter is not only for the face, and a wash of moonlit shimmer swept across the shoulders and collarbones is glamour that takes a look from finished to unforgettable. Body shimmer catches the light with every movement, drawing the eye to the shoulders in a strappy dress or off-the-shoulder top. It is the finishing touch on a special-occasion look.
Use a dedicated body shimmer, a lotion, oil, or spray, rather than face glitter, since these are formulated to spread smoothly and cling to a larger area. A gold or bronze shimmer looks especially warm and lit on deep skin, while a pearl or champagne suits fair. Apply it sparingly on the high points of the shoulders and collarbones where light would naturally hit.
Who It Suits Best
Here is the honest truth: glitter suits everyone, but the version that flatters you depends on your comfort level and the occasion more than your features. If you are glitter-shy, start small with an inner-corner pop, a tightline, or a micro-glitter gloss; these give the light-catching payoff with almost no risk of a look you regret in daylight.
If you love drama, a full molten smoky lid, a chrome finish, or festival gems are where the real fun lives. Deep skin especially glows in warm gold, bronze, and holographic sparkle, which reads richer than a stark icy white.
Whoever you are, the rules that make glitter work are the same. Reach for eye-safe, cosmetic-grade glitter near the eyes, use a proper glue so it stays put, do your eyes first and your base last, and remove it gently with a balm or the tape trick so you never scrub delicate skin. Follow those and glitter stops being an occasional disaster and becomes a reliable, light-catching tool you can pull out any time you want to sparkle.
Glitter Makeup, Answered
?How do I stop glitter from falling all over my face?
Three things: use a dedicated glitter glue or sticky cream base instead of plain shadow, press the glitter on with a flat brush or fingertip rather than swiping, and do your eye glitter first so any fallout is cleaned up before you apply foundation and cheeks.
?Is regular craft glitter safe to use on my eyes?
No. Craft and nail glitter have sharp, irregular edges that can scratch the eye and cause real damage. Only use cosmetic-grade, eye-safe glitter near your eyes, keep it off the inner waterline, and flush your eye with water if any gets in.
?What is the best way to remove glitter makeup?
Gently. Press a cleansing balm or a micellar-soaked pad over the area to loosen the glue, then lift stray flakes with the sticky side of tape or a damp cotton pad. Avoid scrubbing, which drags glitter across the delicate skin around your eyes.
Go Catch the Light
Glitter has a reputation for being difficult, but almost every glitter disaster traces back to the same few fixable mistakes: no glue, wrong order, chunky flakes, or a rough removal. Nail those, and the fifteen looks here go from intimidating to surprisingly easy, whether you want a whisper of inner-corner shine or a full festival gem moment.
So pick the one that made you want to sparkle, grab a proper glitter glue, and give it a practice run before the big night. Once you have the technique down, catching the light becomes the easy, joyful part, and you will wonder why you ever left glitter to the professionals.
More to Browse


