


The best Halloween look is the one you will actually wear, not the impossible tutorial you save and never attempt. So this list leans toward ideas you can actually pull off at your kitchen mirror, from a wine-lipped vampire you could keep on for a dinner to a spiderweb eye that takes five minutes.
There are fourteen here, sorted loosely from wearable to wild, and each comes with a rough sense of how long it takes, what it costs, and, just as important, how well it lasts a full night. Because a look that slides off by nine o’clock is not really a look you want to try.
Before You Start
Match the idea to your evening and your patience. A vampire lip or a spiderweb eye is a five-minute add-on to your normal makeup; a sculpted skull or a glitched doll wants half an hour and a reference photo. There is no wrong choice, only a wrong amount of time budgeted.
Whatever you pick, prep and set it. A primed face grips paint better and comes off cleaner, and a setting spray is the difference between a look that lasts to the last photo and one you are patching up all night. Care matters as much as the look itself.
A Porcelain Vampire With Wine Lips
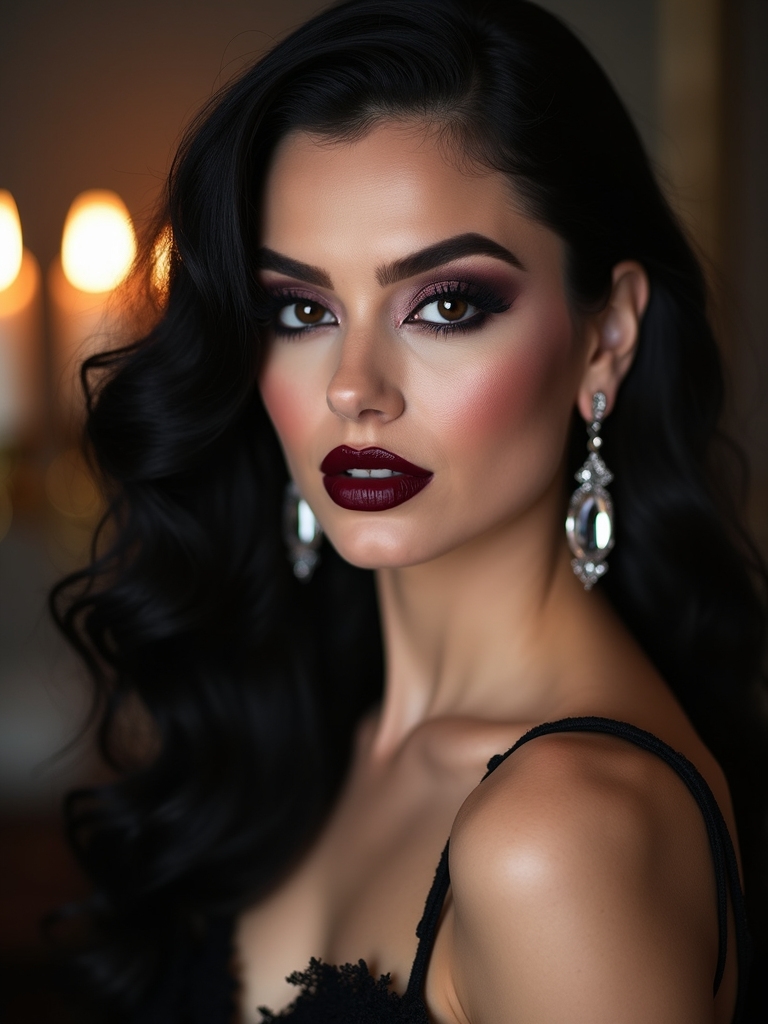
This is the most wearable idea on the list, and the one I do on myself most Halloweens. You pale the skin a touch, keep a soft smoky eye, and let a deep wine lip do the whole job, so it reads vampire up close but passes as a dramatic evening look from across the room.
It takes ten minutes and lasts beautifully:
- Cool your foundation a shade and add a little gray under the cheekbones for a slightly gaunt look.
- Line the lips first, then fill with a wine or oxblood shade so it does not bleed.
- Set with a spray so the lip and the pale skin survive a night of talking and drinking.
A Dew-Kissed Forest Fairy
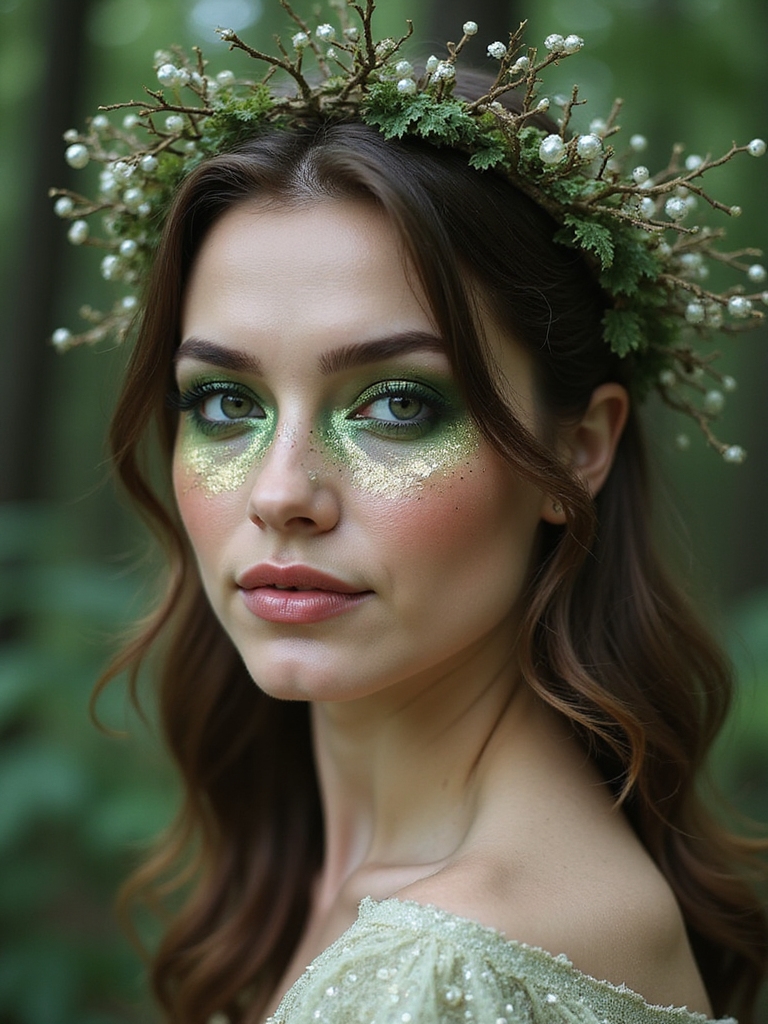
The forest fairy is soft, pretty, and almost entirely made of highlighter. There is no scary contouring, just luminous skin, a wash of woodland green or gold on the eyes, and a few gems near the brows, which makes it a lovely low-stress option.
Layer a dewy highlighter over the high points, sweep a soft mossy or gold shadow across the lids, and dot a handful of small crystals at the inner corners or along the browbone. A little green liner traced like a delicate vine finishes the woodland feel.
It is an easy, forgiving look that suits any skin tone; on deeper complexions, a gold or bronze highlighter glows warmer and brighter than an icy one. It lasts well since there is no heavy paint to crease. Fairies, it turns out, are low-maintenance.
Pick your idea by how far you want to go tonight.
🎯Barely a costume
Wine-lip vampire, star-freckle constellations, or a spiderweb eye. A five-minute add-on to your normal makeup, fully wearable.
🎯Glam with a theme
Forest fairy, copper cut crease, cosmic holographic, or mermaid eyes. Pretty first, spooky second; nothing scary to scrub off.
🎯Full transformation
Sculpted skull, glitched doll, undead glam, or the devil. Set aside half an hour, a reference photo, and a cream palette.
A Neon Cyberpunk Baddie
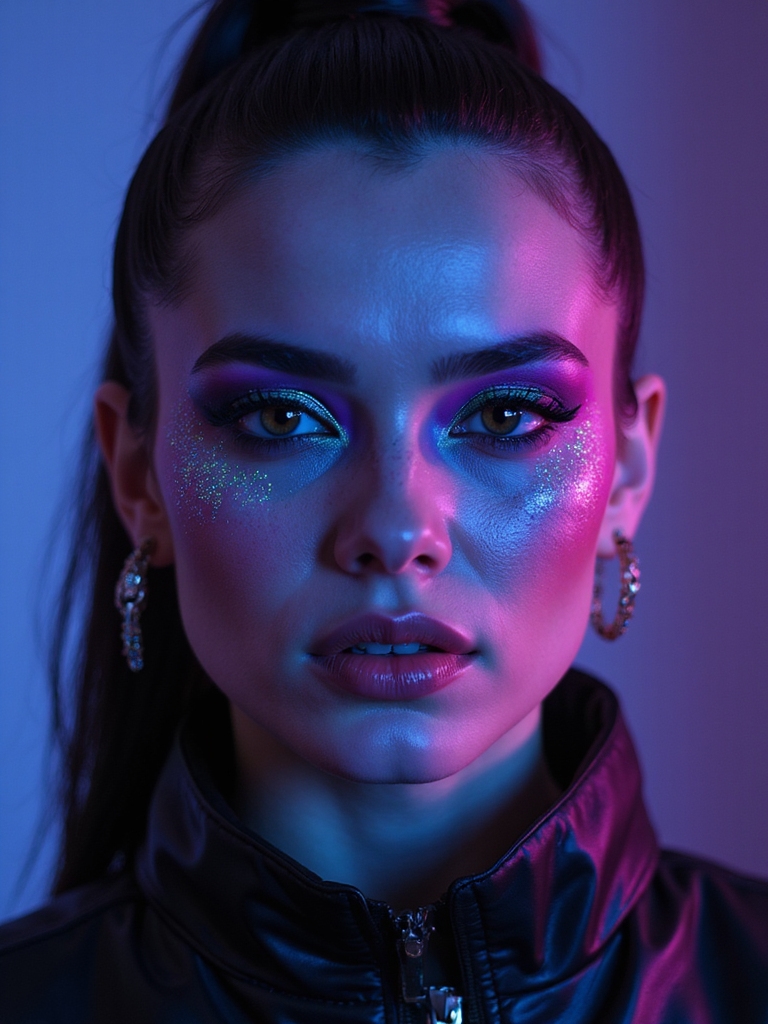
The cyberpunk baddie is glam with an edge: a razor-sharp graphic liner, neon accents, and chrome on the high points, more futuristic runway than scary. It is a favorite of the younger crowd and photographs like a music video.
Here is how it comes together:
- Draw a razor-sharp graphic liner in a bold neon or electric shade over a white base so it stays vivid.
- Add chrome or metallic highlight on the cheekbones and cupid’s bow for a machined shine.
- Keep the rest of the face clean and matte so the neon and chrome do all the shouting.
Starry Freckle Constellations
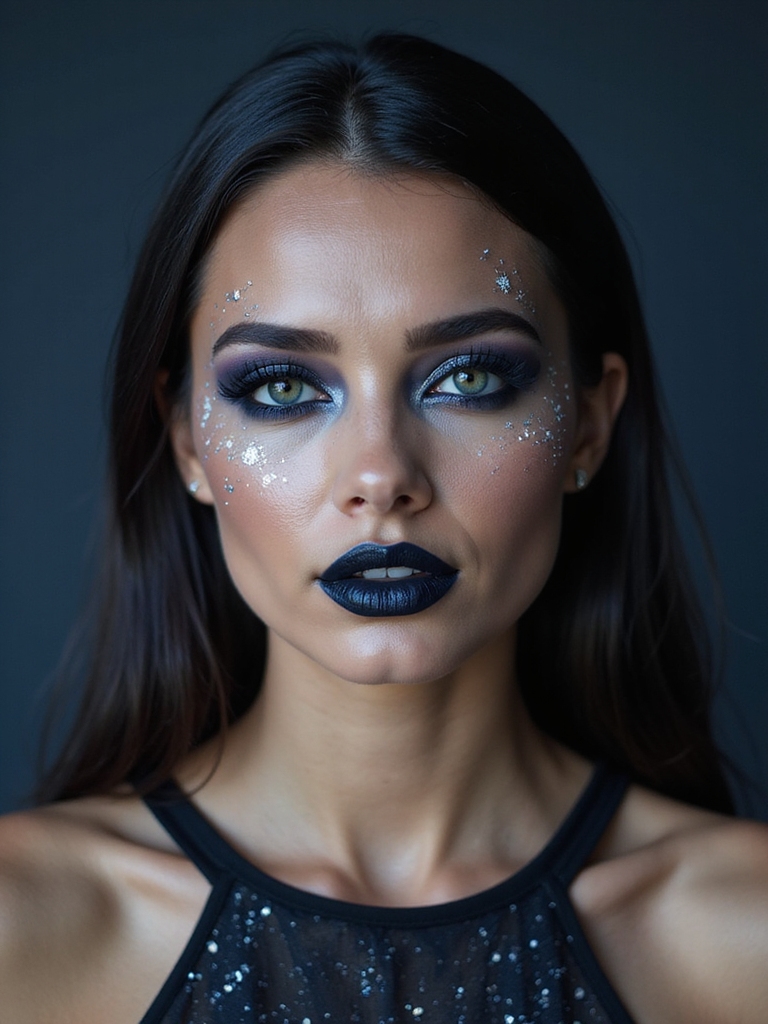
This is the five-minute idea that looks like you tried for an hour: tiny star-shaped freckles scattered across the nose and cheeks, a few joined into little constellations. It is barely a costume. That is exactly the appeal.
The whole thing is dots and patience:
- Use a fine brown or gold liner to dot star-shaped freckles of different sizes.
- Connect three or four into a small constellation with hairline-thin lines.
- Add a touch of shimmer over the top so they twinkle; skip everything else and keep the face fresh.
📋Make It Last the Night
- ✓Prime before any paint so it grips and lifts off cleanly.
- ✓Set cream products with translucent powder, then a spray.
- ✓Line lips before filling so a bold shade does not bleed.
- ✓Pack cotton swabs and a mini spray for touch-ups.
A Retro Pop-Art Comic Face
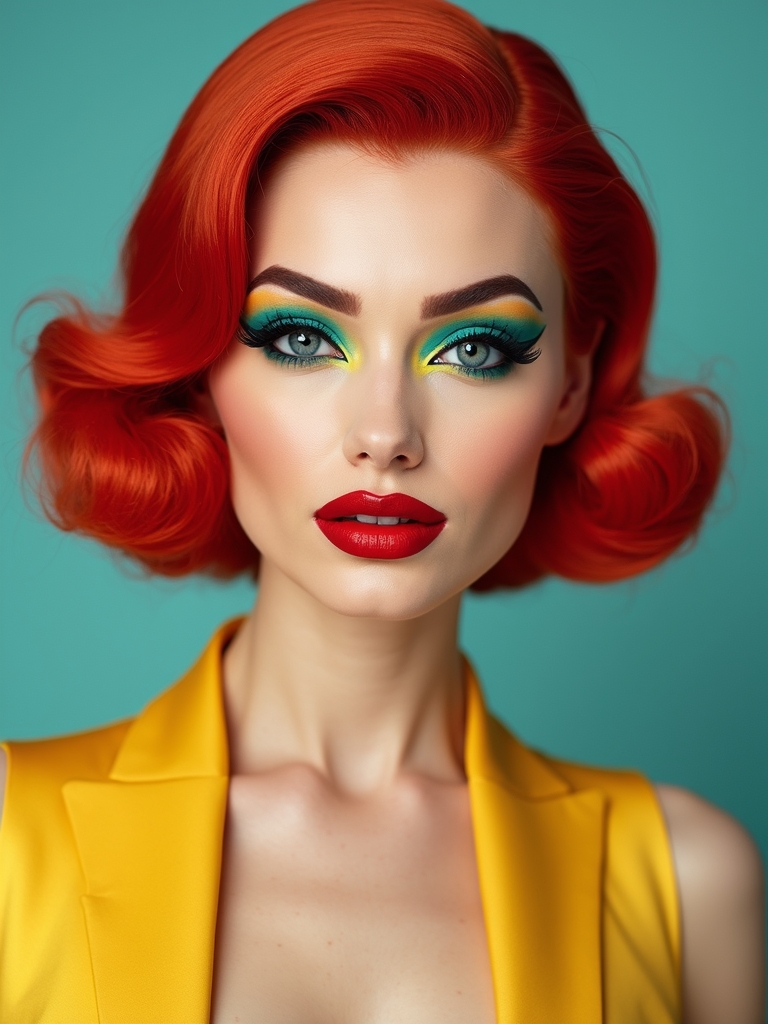
The pop-art face is the loud, fun idea that is far easier than it looks, because comic art is supposed to be flat and graphic. Bold outlines and a couple of dot patterns turn you into a walking cartoon panel.
The building steps:
- Outline your features in thick black liner for that drawn-on comic look.
- Add a patch of even dots on one cheek with the end of a brush.
- Keep the color flat and bright, and a block of white highlight suggests a comic shine.
A Glitched Pastel Doll
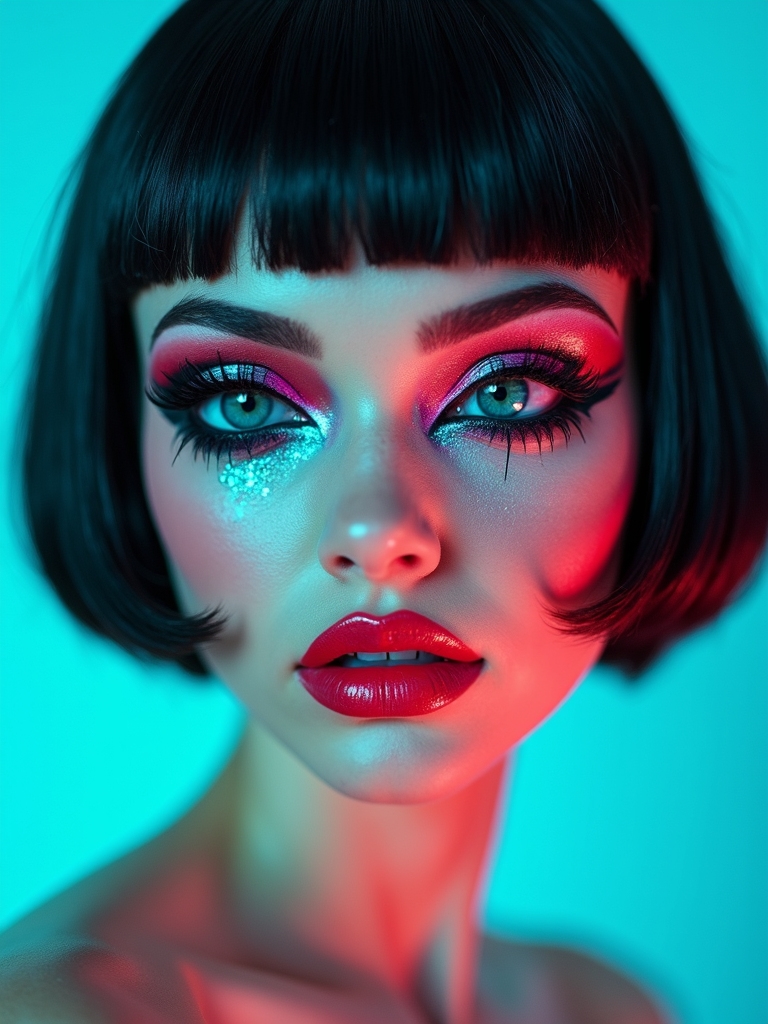
This modern doll adds a digital twist: a sweet pastel doll face broken up by a pixelated glitch effect, like a corrupted image. It is fresh, unusual, and a real conversation starter. Build it in order:
- Do a soft pastel doll base with rounded blush and big eyes.
- Paint small squared-off pixel blocks in a shifted color (cyan, magenta) along one edge of the face.
- Offset a duplicate brow or lip line slightly for that glitched, double-exposure effect.
A Smoky Sculpted Skull
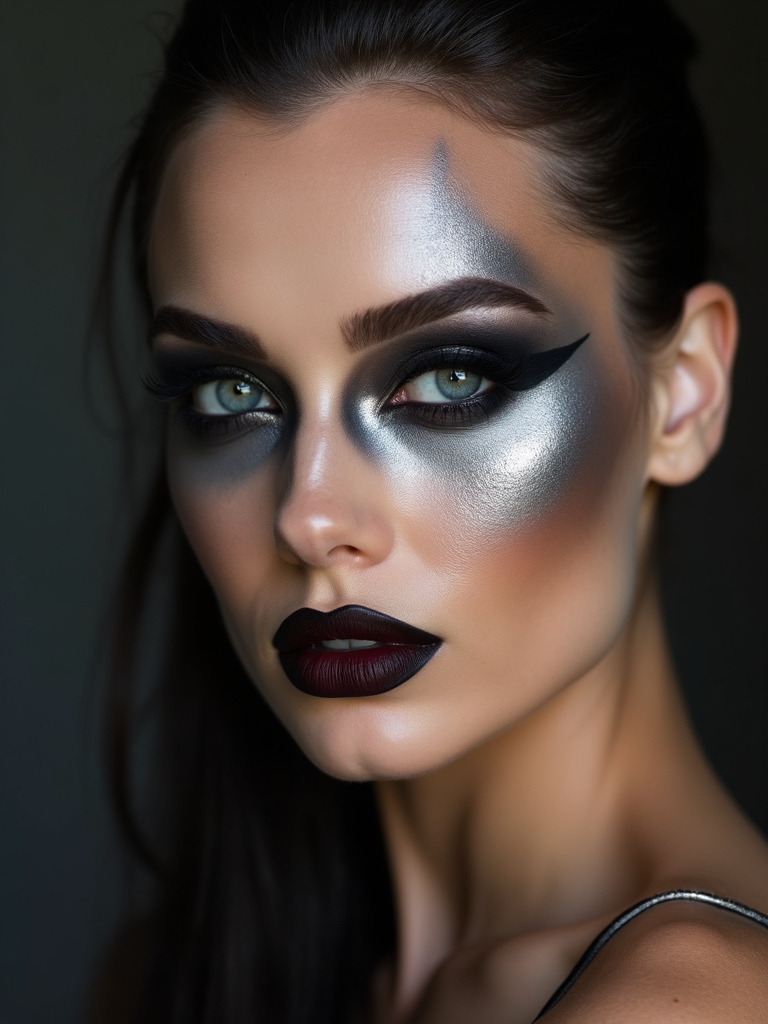
This is a skull done with shadow instead of stark paint, softer and more wearable than a hard black-and-white version. You sculpt the sockets and hollows with smoky brown and gray so it looks like a skull emerging from the shadows.
Deepen the eye sockets, the under-cheek hollows, and the temples with a smoky taupe and gray, then add a subtle nose shadow and soft stitched lips. Because it is blended rather than painted in flat black, it is more forgiving and photographs with real dimension.
It is the skull I paint on clients who want spooky but still recognizable. A smoky eye technique is the same skill you are using in the sockets.
Iridescent Mermaid Eyes
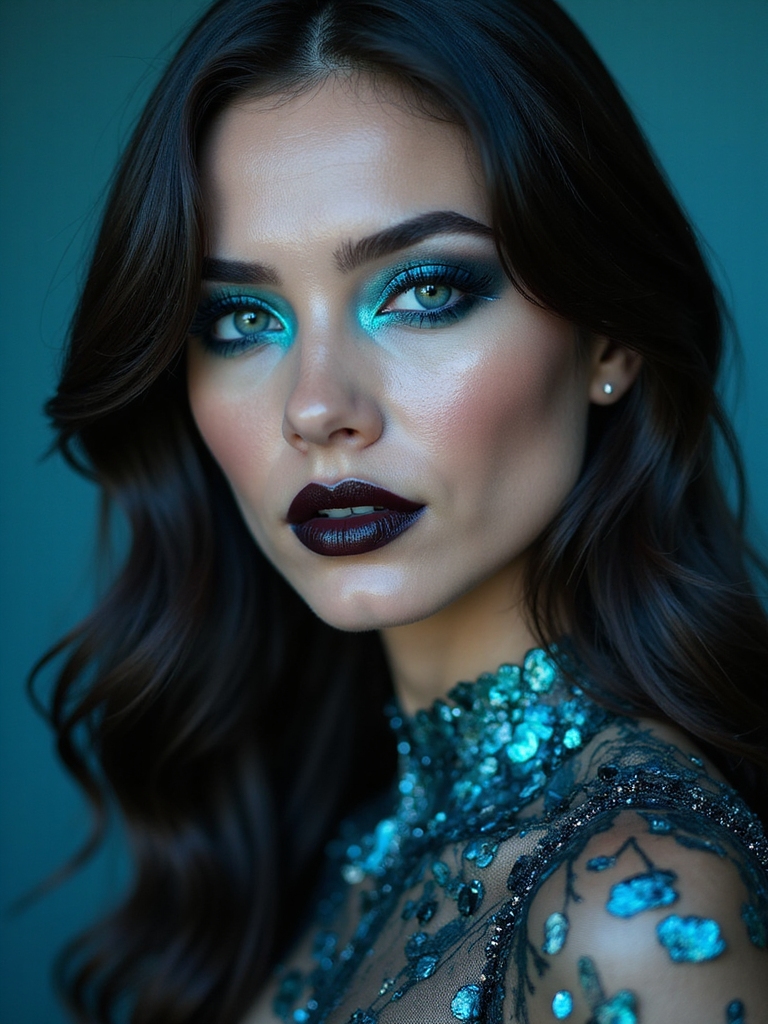
Instead of scaling the whole face, this idea puts all the mermaid magic in the eyes: iridescent teal, lilac, and pearl shadow blended into a wet, shifting shimmer. No face paint needed. It is quicker than a full siren face and just as striking in a photo.
Wash iridescent sea tones across the lids and blend up, then press a duochrome or pearl shimmer into the center so it catches light and shifts color. A little liner and a lash finish it; the eyes carry the whole theme, so the rest of the face stays simple.
Not sure which to try? Answer one question.
1Do you want people to recognize you?
Then stay wearable: vampire, fairy, cut crease, or constellations keep your face yours with a themed twist.
2Do you want to disappear into a character?
Go full-face: the skull, glitched doll, or undead glam transform you completely. Budget the time and set it hard.
A Copper Autumn Cut Crease
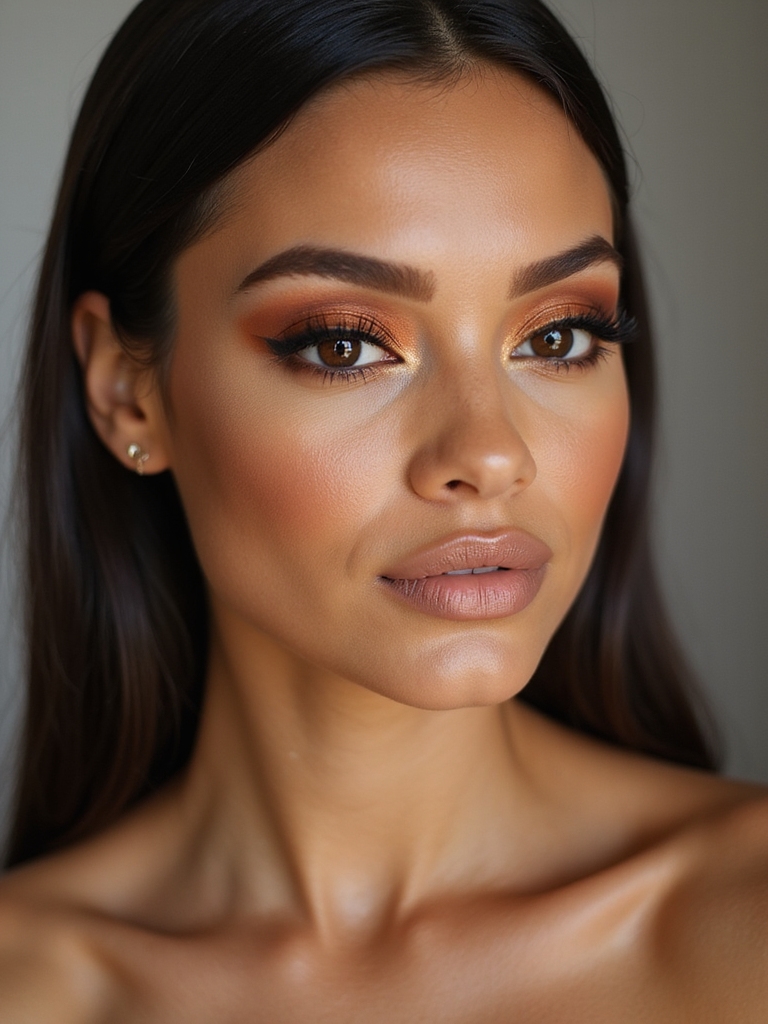
Not every Halloween look has to be a character. This copper cut crease is just a rich, autumnal glam eye taken up a notch, warm enough for the season and dressy enough for any party. It is the idea for anyone who wants to feel done, not costumed.
For a clean cut crease:
- Carve a sharp copper crease with a small brush and a little concealer to define the line.
- Pack a warm copper or bronze shimmer onto the lid for shine.
- Add a wing and a lash; keep the skin warm and glowing to match.
A Holographic Cosmic Look
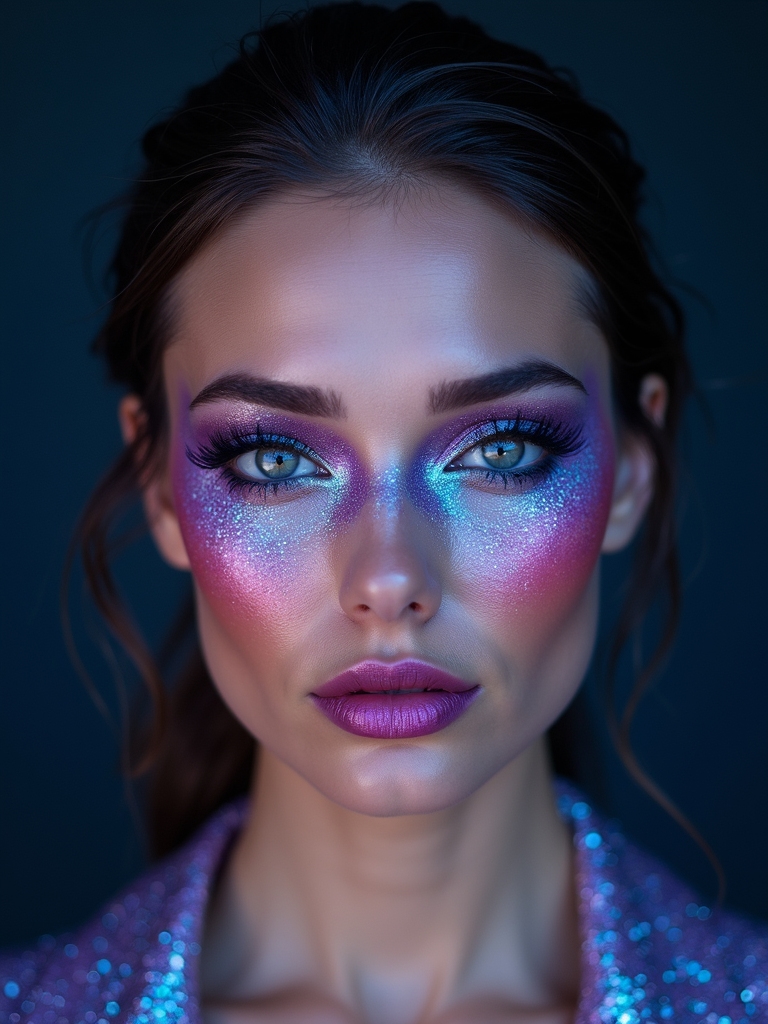
The cosmic look bathes the face in holographic, color-shifting shimmer, like starlight on skin. It is glam and futuristic, and while it seems advanced, it is mostly about layering shimmer well rather than any tricky lines.
Start with a luminous base, then press a holographic or duochrome shimmer over the lids, cheekbones, and cupid’s bow so the whole face shifts color as you move. A deep cosmic-blue or purple in the outer eye grounds all that light, and a few tiny star-dots tie it to the sky.
It photographs beautifully under any light. Shimmer lovers, this is your look. It stays put well, too, since it is powder and cream, not wet paint.
Two things stop people trying looks they would love.
❌ Myth: You need talent to do the bold ones.
✅ Reality: You need a reference photo and patience, not talent. The skull and devil use the same shading as everyday contour; the glitched doll and pop art are supposed to look graphic, so precision matters more than artistry.
❌ Myth: Bright and white paint will not work on my skin tone.
✅ Reality: It works on every tone, but only over an opaque cream base. Pat the base down first and layer color on top; on deep and rich skin especially, that base is what makes neon and white read true instead of patchy, and a warm gold highlight glows better than an icy silver one.
A Molten Crimson Devil
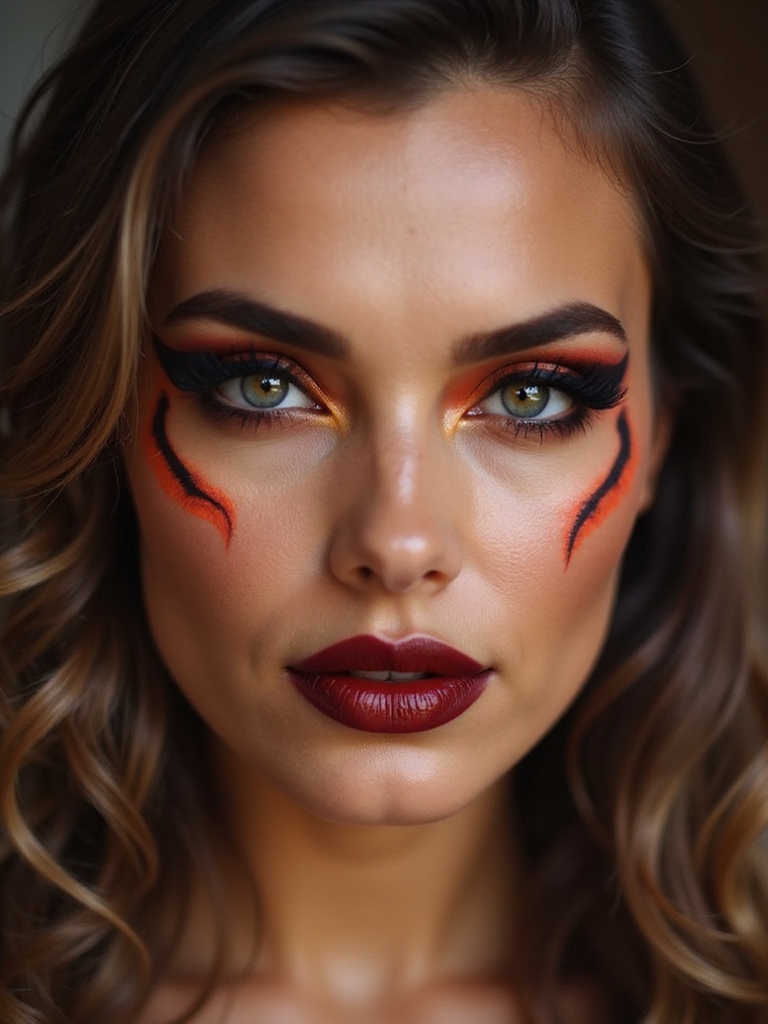
The devil is the fierce, sultry idea: molten crimson and red blended through a sharp, sculpted eye, with small horns drawn at the hairline. It is bold and grown-up. Clients book this one when they want to feel powerful, not spooky.
Blend crimson and red shadow into a lifted, smoky eye and sculpt the cheekbones hard for a fierce structure. Draw small horns at the hairline in a matching red or black, keep the lip deep and matte, and let the burning eye be the whole story. It is medium effort with a lot of impact.
A Sorrowful Glittered Clown
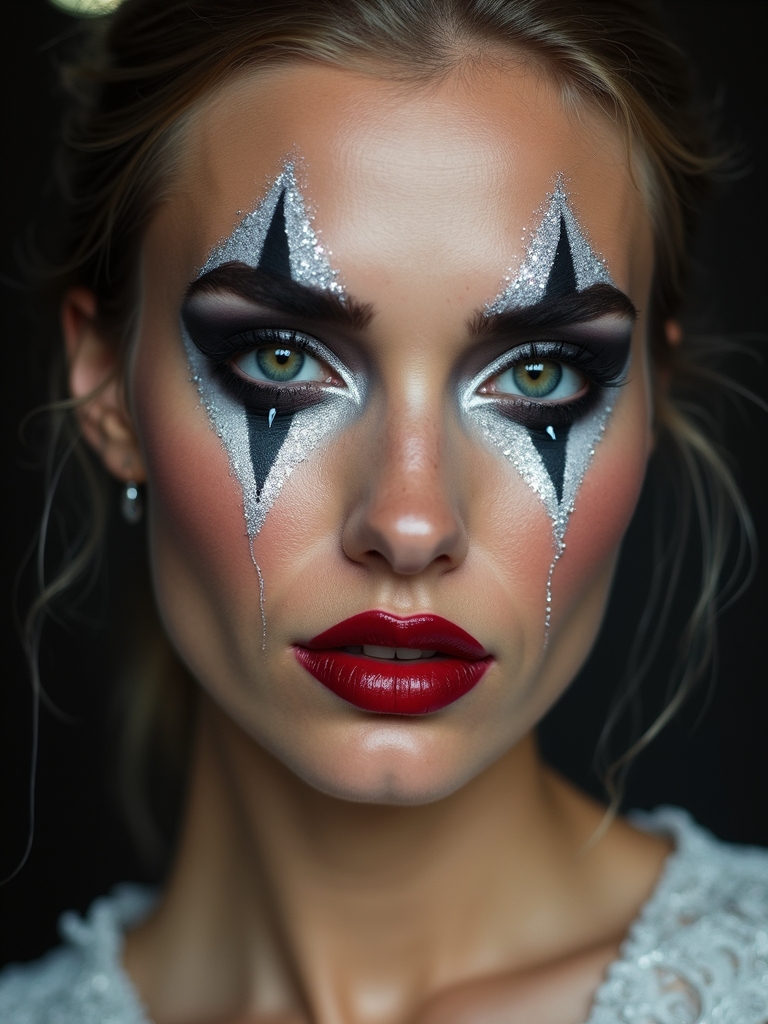
This clown is melancholy rather than menacing: a pale, pretty face with a downturned expression, a single painted tear, and glitter where the sadness would fall. It is oddly beautiful, and the emotion is what makes it memorable.
Let the Sadness Sparkle
Do a soft pale base with delicate features, a small red nose or heart, and a gently downturned painted mouth. Then place a glittered tear under one eye and trail a little sparkle down the cheek, so the sorrow catches light.
It is a fresh, artful take for anyone tired of scary clowns. Keep the glitter cosmetic-grade and off the waterline, and it stays sweet, not spooky.
An Ashy Undead Glam
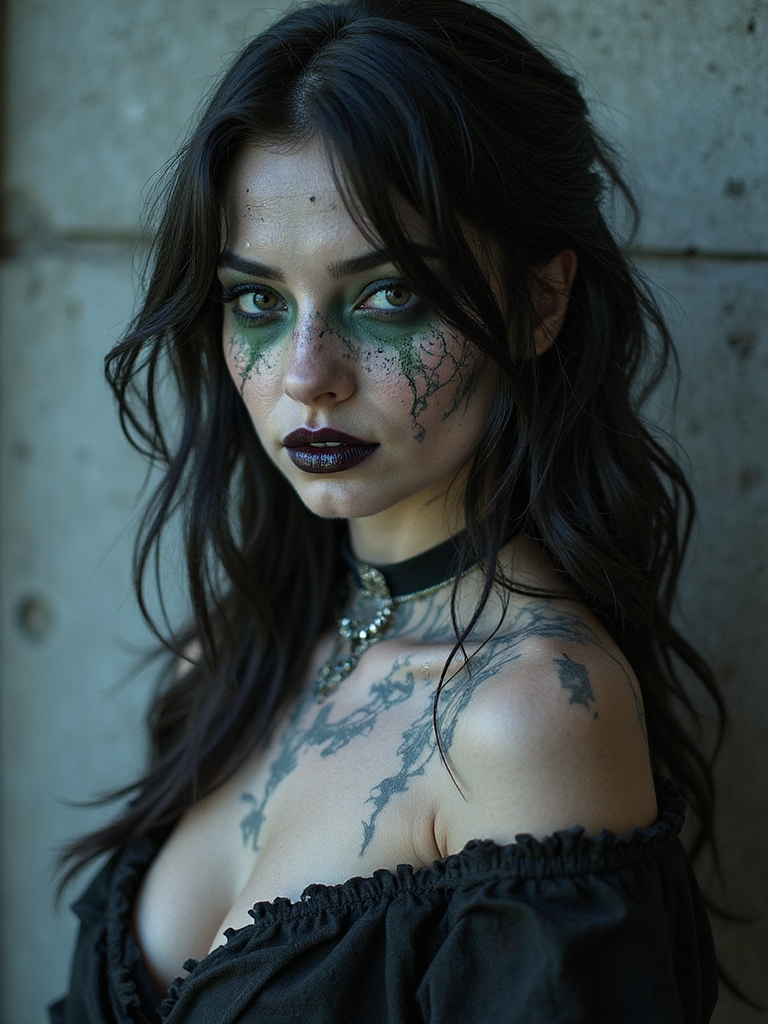
This undead look is glam rot: an ashy, drained complexion paired with a polished metallic eye, so you look freshly risen but still dressed for the party. The contrast between the corpse-pale skin and the shiny eye is the whole idea.
Corpse Skin, Party Eye
Drain the skin with an ashy gray-toned base and hollow the cheeks and eyes, then do a clean metallic silver or pewter eye on top. A dark, slightly cracked lip finishes the undead feel while the metal keeps it glam.
It suits anyone who wants zombie without full gore. Do the metallic eye first so the ashy base does not dull it, and set it well since the pale base can go patchy as you move.
A Spiderweb Smoky Eye
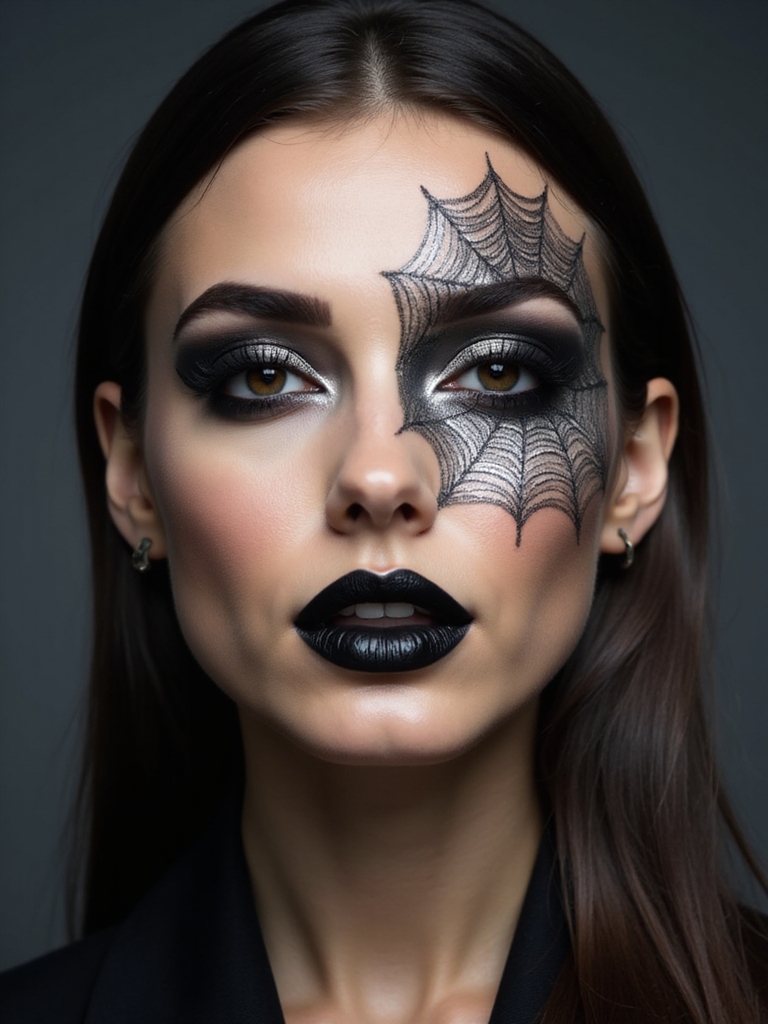
The last idea is the quickest with the biggest theme-per-minute payoff: a normal smoky eye with a fine spiderweb drawn at the outer corner. Five minutes on top of your usual makeup and you are unmistakably Halloween.
The web is all that is new here:
- Do your usual smoky eye, then take a fine liquid liner.
- Draw a few curved anchor lines fanning from the outer corner, then connect them with small arcs for the web.
- Add a tiny spider dangling on a thread if you want the extra detail. A fresh smoky base makes the web pop.
Maintenance & Care
A look you want to try is only worth trying if it survives the night, so treat the after-care as part of the plan. Prime before you paint, apply cream products in thin layers, and dust translucent powder over anything that might crease before you finish with a setting spray. Carry a few cotton swabs and a little spray for quick fixes, and blot rather than wipe if you get warm, so you tidy the look instead of smearing it.
Taking it off matters just as much for your skin. Start with an oil cleanser or micellar water to dissolve cream paint and glitter, wiping gently instead of scrubbing, then follow with your normal cleanser and a moisturizer. A setting spray ($10 to $15) up front and an oil cleanser at the end are the two products that make heavy Halloween makeup kind to your face, and they are worth more than any single fancy paint.
Halloween Makeup Ideas, Answered
?Which Halloween makeup idea is easiest for beginners?
Start with the wine-lip vampire, star-freckle constellations, or the spiderweb smoky eye. Each is a five-minute addition to your everyday makeup with almost nothing to go wrong, and all three are fully wearable, so you can practice the harder looks later without pressure.
?How long do these looks take to do?
The wearable add-ons (vampire lip, constellations, spiderweb) take about five to ten minutes on top of your normal makeup. Glam looks like the cut crease or cosmic shimmer run fifteen to twenty. Full transformations, the sculpted skull, glitched doll, or undead glam, want a solid half hour and a reference photo.
?How do I keep Halloween makeup from sliding off?
Prime first, apply cream products in thin layers, powder over anything that creases, and finish with a setting spray. Line your lips before filling a bold shade so it does not bleed, and carry a mini spray and cotton swabs for touch-ups. Blot, do not wipe, if you get warm.
?What is the safest way to remove heavy Halloween makeup?
Use an oil cleanser or micellar water first to dissolve cream paint and glitter, wiping gently rather than scrubbing, then follow with your usual cleanser and a moisturizer. A second oil pass lifts stubborn paint far more kindly than rubbing, which protects the delicate skin around your eyes.
Try the One That Feels Like You
If you remember one thing, let it be this: the idea worth trying is the one that matches your night and the time you actually have, not the hardest look you can find. A five-minute wine lip you wear with confidence beats a half-finished skull you gave up on at eight o’clock.
So pick the one that feels like you, prep and set it so it lasts, and treat your skin kindly when you take it off. Bookmark this for next year too, because the wearable ones become a rotation once you learn them.
Don’t Miss These


