


Walk into a party in a good Halloween face and you feel the room turn before you have said a word. That double-take is the whole goal here, and it comes from one or two bold, well-executed details, not from piling on every product you own until the look turns muddy.
So these fifteen are built to make people look twice, from a blood-red vampy glam to a neon skull that lights up under blacklight. Each one has the actual steps, a rough cost, and a note on where the drama should sit, plus how to keep bold pigment looking sharp all night on any skin.
Showstoppers at a Glance
| Vibe | Try this | Effort |
|---|---|---|
| Glam and elegant | Vampy glam, ice queen, celestial | Low to medium |
| Scary and dramatic | Neon skull, demon, drippy clown | Medium to advanced |
| Pretty and eerie | Haunted bride, siren scales, poison ivy | Medium |
Deep-Crimson Vampy Glam

Vampy glam is the head-turner that takes the least skill, which is why it opens the list. You are really just doing a beautiful, dramatic evening face and pushing it darker: a smoky eye, sculpted cheeks, and a deep blood-red lip that does most of the talking.
Keep the eyes smoldering and cool, then let a true crimson or oxblood lip carry the drama; a liner under it stops it bleeding as the night goes on. A dab of pale highlight on the inner eye keeps your gaze piercing against all that depth.
This is the one I love painting because it looks expensive, not costume-y, and it works for anyone who wants impact without face paint. A red-toned eye pushes it further if you want more color.
A Neon UV Skull Illusion
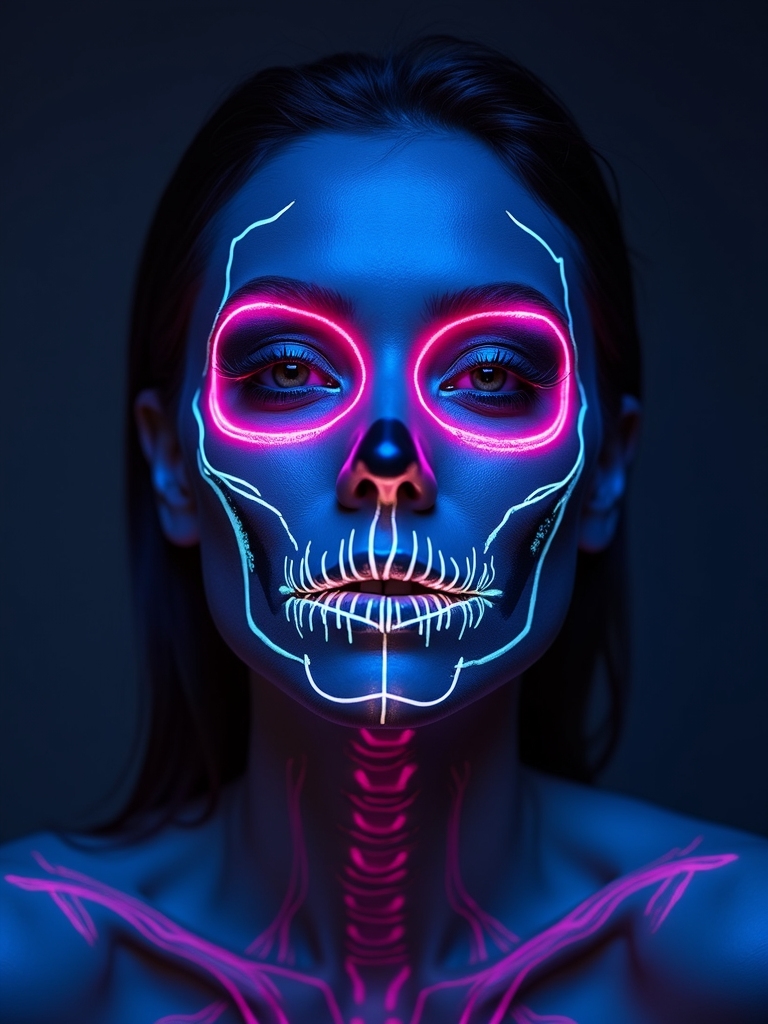
The neon skull is pure spectacle: a skeletal design painted in UV-reactive color that erupts under blacklight while looking bright and graphic in normal light too. It is the one I get asked to paint before every blacklight party. It owns a dark dance floor.
Base First, or the Neon Falls Flat
Shade the sockets and cheek hollows as you would any skull, then paint the bone lines in neon shades instead of white. For the color to pop true, and this is the single thing most people skip, lay a white cream base down first everywhere the neon goes; without it the paint looks dull, and on deeper skin it barely shows at all.
Set it hard, because a skull is detailed and sweat is its enemy. Powder the design, then finish with a setting spray so the lines stay crisp.
A Cosmic Prismatic Witch

This is a witch dragged into the future: instead of green and warts, you go prismatic, all iridescent shimmer, holographic highlight, and a deep cosmic eye. It is glam-scary, the witch as celestial being.
Blend a deep purple or midnight-blue smoky eye, then layer an iridescent, color-shifting shimmer over the lids and cheekbones so the light fractures when you move. A few painted stars or a crystal at the brow finishes the cosmic story without a single wart.
| Look type | Put the focus on | Keep simple |
|---|---|---|
| Vampy, ice queen | A bold lip or frosted skin | The rest of the face |
| Neon skull, android | Crisp painted detail | Color palette (2 to 3 shades) |
| Haunted bride, doll | One emotional detail (tears, cracks) | Everything else, kept pale |
Siren Scales With Wet-Look Shine

The siren is a mermaid with an edge: iridescent scales trailing up the cheekbones and a wet, glassy finish that catches every light. The scale texture looks intricate but comes from a simple net trick, and the shine is what makes strangers stare.
Here is how the effect comes together:
- Hold fishnet or a mesh bag taut on the cheek and dab teal and lilac over it for instant scales.
- Layer an iridescent shimmer into the scales so they shift color.
- Finish with a clear lip gloss or glossy balm on the high points for that wet, glassy sheen.
A Midnight Smoky Feline

The smoky panther is cat makeup turned all the way up to glamour: a deep, lifted smoky eye, sculpted cheekbones, and a sharp feline flick, with just a whisper of nose and whiskers. It is sultry rather than cute. Build it like this:
- Pack a charcoal or espresso shadow into a lifted, blown-out smoky eye.
- Contour hard to carve the cheekbones into a feline angle.
- Add a razor liner flick and one or two soft whiskers. Full cat makeup ideas go deeper on the theme.
💡Make It Photograph
A showstopper look lives on people’s cameras, so build for the lens. Add slightly more contrast and definition than looks right in the mirror, since flash and low light flatten detail. Matte where you want depth (sockets, cracks) and shine only where you want a highlight, so the two do not fight in photos.
A Porcelain Doll With Cracked Cheeks

The cracked doll is creepy-pretty, and the cracks are what make people lean in: a smooth, matte doll face broken by fine porcelain fractures. The contrast between sweet and shattered is the whole hook.
Do a smooth, pale doll base with round rosy cheeks and oversized eyes, then paint thin, branching cracks from the hairline or one eye in gray and a touch of shadow so they look recessed, not drawn on. Keep the cracks delicate; a few convincing ones beat a shattered mess.
A Fiery Demon With Charred Embers

This demon smolders like a dying fire: charred black around the edges of the face fading into glowing ember orange and red at the center, as if you are lit from inside. It is fierce and striking on camera.
Blacken the outer face and temples with deep charcoal, then blend ember orange and red through the center and up from the inner eye so it seems to burn. A little cracked-skin texture at the jaw, drawn in black over an orange base, sells the charred effect.
Sharpen the brows and add small horns at the hairline if you want them. It is bold, so keep the lip muted and let the burning eyes lead.
A Chrome Android With Neon Veins
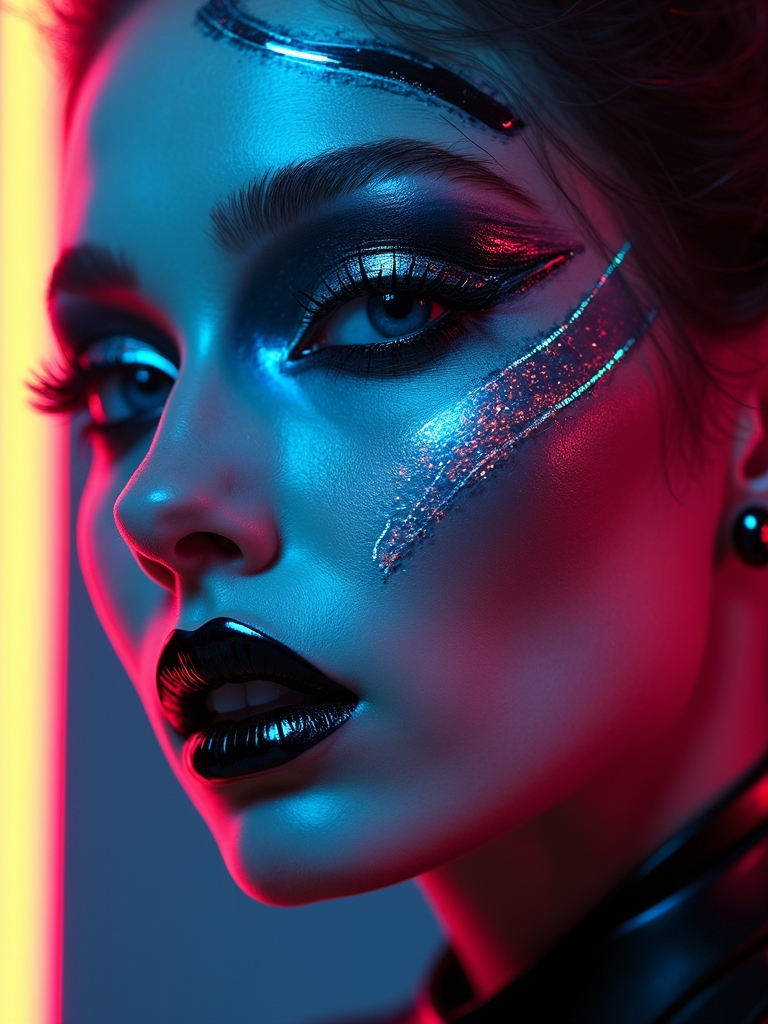
The android turns you half-machine: chrome panels and neon veins running under peeled-back skin, like something powering up. It is graphic, futuristic, and rewards a steady hand and reference photos. Layer it up:
- Map chrome and silver panels along one cheek, jaw, and temple with a fine brush.
- Paint thin neon veins glowing out from the seams over a white base so they read bright.
- Add bolts, a peeled-skin edge showing circuitry, and keep the other half of the face humanly clean for contrast.
A Pumpkin Jack-o’-Lantern Glow

The jack-o’-lantern is the warm, friendly showstopper: orange-washed skin with a carved grin and a lit-from-within candle glow. It is the crowd-pleaser that reads instantly and works for all ages.
The essentials:
- Wash a sheer warm orange over the face so it looks lit, not flat.
- Paint the classic triangle eyes and nose plus a jagged carved grin from the mouth.
- Add a gold or ember glow under the design to suggest the candle inside.
A Monochrome Mime

The mime is proof that black and white alone can stop a room. Clients are always surprised how grown-up it looks. A stark white base, sharp black details, and one dramatic accent, done cleanly, looks high-fashion, a world away from a kids-party clown.
Clean Edges Do the Work
Lay a smooth white base, then add crisp black brows, a diamond or teardrop over one eye, and a defined black-and-white lip. The whole thing lives on clean edges, so take your time with the fine lines and set it well so nothing smudges.
Keep it graphic and restrained; the power is in the contrast, not in adding more. It is a striking, low-cost look for anyone with a steady hand.
ℹ️Good to Know
Any bold, white, or pastel paint needs an opaque cream layer beneath it to show its real color; laid straight onto skin it goes thin and patchy, and it fades fastest on deep, rich complexions. So pat down a base wherever you want vivid color, and lean toward gold and warm metallics over icy silver on deeper skin, where the warmer shine simply reads brighter.
An Emerald Leafy Poison Ivy

Poison Ivy is the botanical villain: emerald and forest-green shadow, dewy skin, and vines with tiny leaves creeping across the temples. It is glam and a little wicked, a green look that stays pretty. Here is the core:
- Blend emerald and moss shadow into a lush, smoky green eye.
- Trail thin vines with small leaves from the outer eyes up toward the brows.
- Keep the skin dewy and add a berry or red lip so the green pops.
A Haunted Bride With Tear Streaks

The haunted bride is beautiful and tragic: a pale, ethereal face with a smudged, tear-streaked eye that tells a whole ghost story. The emotion in it is what makes people stare, more than any single product.
Do a pale, slightly gaunt base with hollowed cheeks, then a soft gray smoky eye you deliberately drag downward into streaks, as if the mascara has run with tears. A washed-out lip and a few painted cracks or veins deepen the ghostly feel.
Pair it with a veil and loose, undone hair. It is a mid-effort look with a huge emotional payoff, and it photographs hauntingly in low light.
Celestial Moon and Star Freckles

For a softer showstopper, the celestial look scatters tiny star freckles and a small crescent moon across a shimmering face. It is the prettiest, most wearable option here, and one of the easiest, since a scattered sky is meant to look imperfect.
A Sky Is Meant to Look Scattered
Over a luminous base, place white and gold star-dots of varying sizes across the cheekbones and nose, paint a small crescent moon on one cheek, and press a little holographic shimmer on the high points so it twinkles.
It is the gentle option for anyone who wants to turn heads without going scary, and it flatters every skin tone with a shimmer that catches the low party light beautifully.
A Lacquered Drip Clown Grin
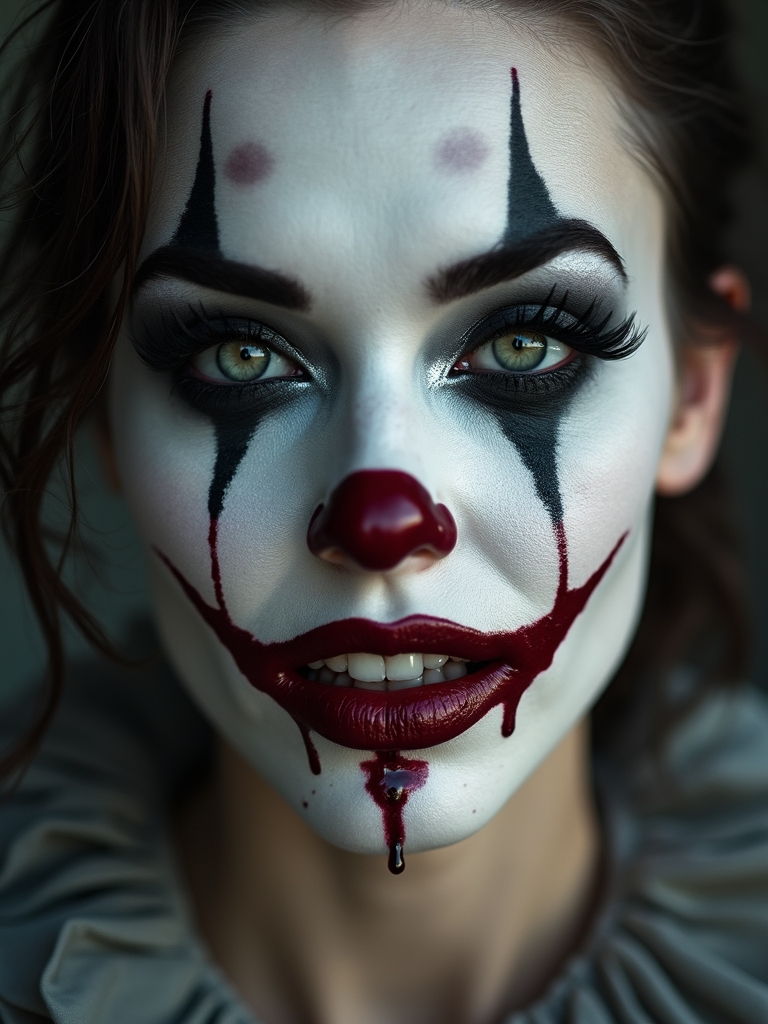
This is horror-clown, not birthday-clown: a sharp painted face with a grin that appears to drip like wet lacquer down the chin. The glossy, dripping detail is unsettling in the best way. Build it in order:
- Lay a pale base and paint sharp, exaggerated clown features in red and black.
- Extend the grin past the mouth, then add glossy red drips running down from it.
- Gloss the drips so they look wet and fresh; a clear gloss over red paint does it.
📋Showstopper Night Kit
- ✓A small cream face-paint palette and a fine detail brush.
- ✓A white cream base for anything bright or white.
- ✓Setting powder and spray so detail survives the night.
- ✓One statement extra: fake blood, gems, or a bold lip.
An Icy Pearlescent Ice Queen
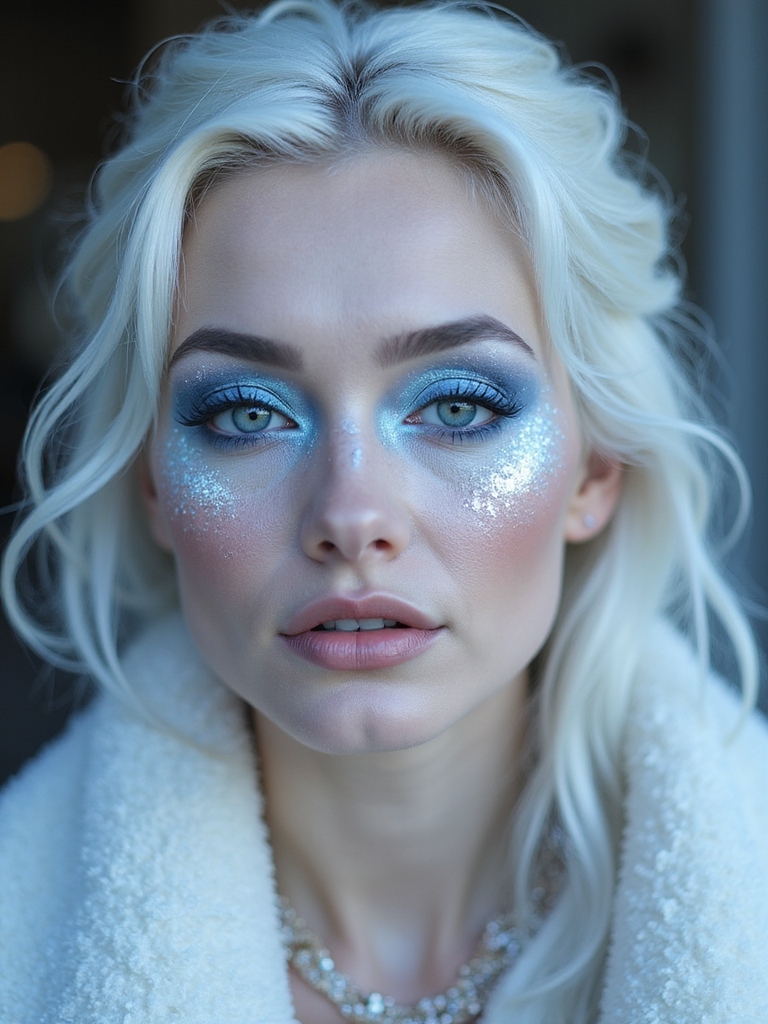
The ice queen closes the list on pure frost: pearlescent skin, icy blue and silver tones, and crystalline detail like frost creeping across the skin. Cold never looked so regal. It is quietly dramatic and endlessly photogenic.
Layer a pearl highlighter over frosted blue and silver shadow, then use a fine brush and white to paint delicate frost or snowflake lines at the temples and brows. A few rhinestones catch the light like ice. Keep the skin luminous so the whole face looks touched by cold.
Showstopper Makeup, Answered
?How do I make Halloween makeup last all night?
Prime first, apply cream paint in thin layers, then powder over it and finish with a setting spray. Powder the areas that move most, around the eyes and mouth, and carry a little spray for a mid-night refresh. Blot rather than wipe if you get warm, so you do not smear the detail.
?Do I need special SFX products for the scarier looks?
For most here, no. The demon, clown, and doll rely on regular cream paint, liner, and a clear gloss for wet effects. Only textured wounds or heavy prosthetics need SFX wax or latex; a little tissue and lash glue fakes cracked or raised skin for a few dollars.
?How much does a showstopper look cost to do at home?
A cream face-paint palette runs about $10 to $20, and a white base, gems, or fake blood add a few dollars each. Most looks here use products you likely own for the eyes and lips, so the real spend is one palette and a setting spray, well under $40 total.
?How do I take heavy makeup off without wrecking my skin?
Start with an oil cleanser or micellar water to dissolve the cream paint, wiping gently instead of scrubbing. Follow with your normal cleanser, then moisturize. A second oil pass lifts stubborn paint and glitter far more kindly than rubbing at your skin.
Turn Heads, Not Just Corners
The looks that make a room turn are almost never the busiest ones; they are the ones with a single bold idea executed cleanly, a blood-red lip, a glowing skull, a grin that drips. Pick the one detail you want people to remember and build the rest of the face to support it.
Match the look to your night and your nerve, lean on a good base for anything bright, and set the whole thing so it is as sharp in the last photo as the first. Do that, and you will feel the room turn the moment you walk in.
More Ideas Here


