There is a moment every spring when the salon chairs fill up with people holding the same kind of photo: a tiny bloom painted on a soft, milky nail. Flower nails are the manicure equivalent of the first warm day, the one that makes you want to open the windows and wear color again.
What I love about florals is the range. A single hand-painted daisy is doable at home in ten minutes, while sculpted 3D peonies are a salon afternoon. Below are the ideas I reach for most, sorted loosely from beginner-friendly to showpiece, with honest notes on what each one takes to wear and keep.
Key Takeaways
- Flower nails range from a two-minute daisy to a sculpted 3D bloom, so there is a version for every skill level and budget.
- A milky or sheer base makes painted florals look soft and professional, and the grow-out stays subtle.
- Negative space keeps floral art light and modern, letting the bare nail do half the work.
- On deep skin, pigment-rich petals and a bright or chrome center show up far better than pale pastels.
- Hand-painted blooms last longest as a gel set sealed under a glossy top coat.
Sheer Blush Painterly Peonies
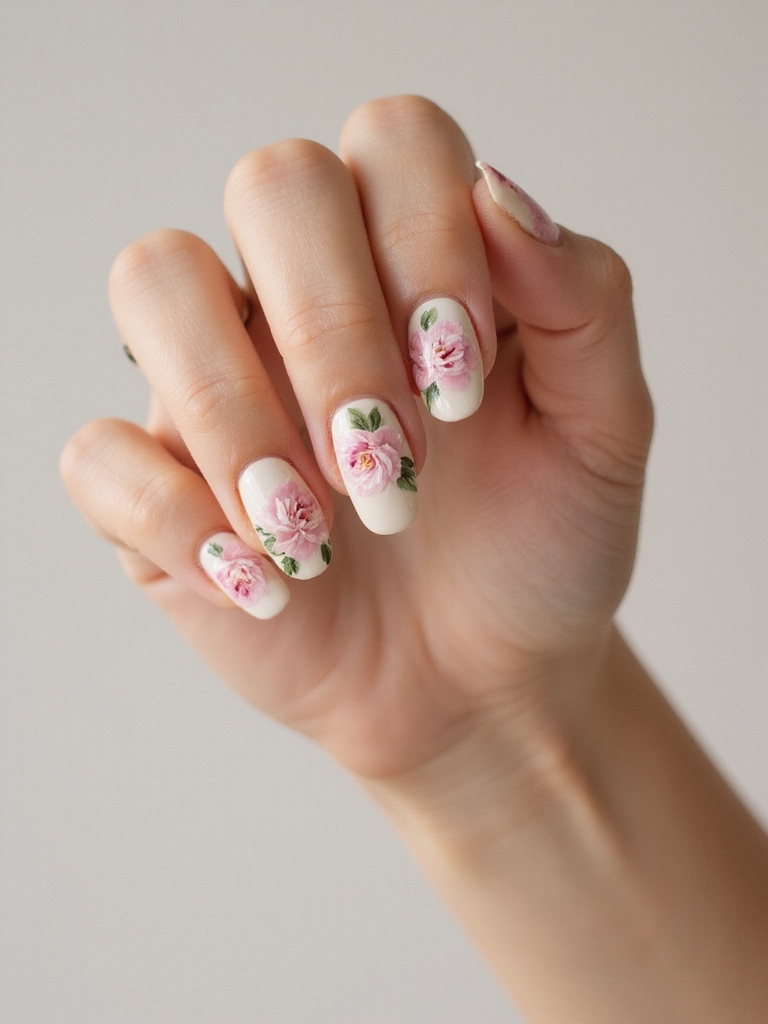
Painterly peonies are the romantic showpiece of floral nails. Over a sheer blush base, layered petals are built up in soft, brushy strokes so the flower looks painted with watercolor rather than stamped. The effect is dreamy and a little undone, which is exactly the charm.
The technique leans on a loose hand. You start with a pale blob of color for the center, then feather darker petals outward with a fine brush, letting the strokes stay visible. Perfection is not the goal here. A slightly imperfect peony looks more like a real flower than a tidy one does.
This is a look I usually recommend booking with a nail artist, since the brushwork takes practice. If you want to try a simpler version at home first, build confidence on the daisies further down before attempting full peonies.
Pressed Petals Under Sheer Gel
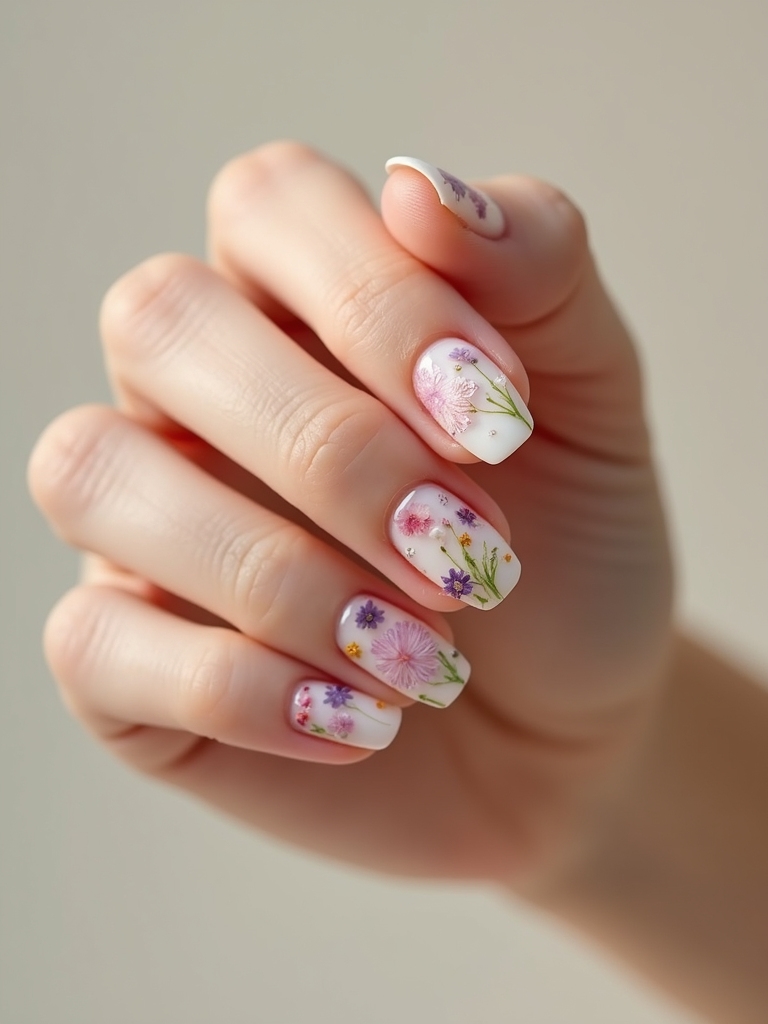
For a look that feels like a little keepsake, real dried flowers are pressed onto the nail and sealed under layers of clear gel. Tiny dried blooms, baby’s breath, or single petals get encased like pressed flowers in a book, and the glassy gel over the top gives them depth.
The key is using properly dried, flat flowers, which you can buy in nail-art packs, since fresh petals trap moisture and lift. Place them on a tacky gel layer, then build clear gel over the top so nothing catches on clothes or hair.
Because the flowers are encased rather than painted, this look is surprisingly durable and looks intricate with almost no painting skill. It is one of my favorite ways to get a delicate, organic result without a steady brush hand.
Delicate Sculpted Floral Charms

When you want flowers you can almost feel, sculpted 3D charms are the answer. Built up in gel so the petals rise off the nail, they turn a manicure into tiny wearable sculptures. This is full salon territory, dramatic and special-occasion worthy.
- Keep the 3D flowers to one or two accent nails, since raised art on every finger snags on everything.
- Ask for a secure, well-cured build so the charms do not pop off mid-week.
- Pair them with simple nails elsewhere, letting the sculpted flower be the clear star.
Airy Negative-Space Florals

Negative space is what makes floral nails feel modern instead of fussy. Instead of covering the whole nail, you leave much of it bare and let a single flower or a trailing vine frame the empty space. The result is light, editorial, and very current.
It also has a practical upside. With less polish on the nail, the grow-out is barely there, so you can stretch the time between appointments. A few line-drawn flowers along the edge of an otherwise clear nail is one of the chicest, lowest-effort versions of this whole trend.
💡Stylist Tip
If sculpted 3D flowers feel like too much commitment, ask your tech for press-on floral charms instead. You get the raised, dimensional look, and they can be removed without the long soak-off a fully built design needs.
Chrome-Centered Pastel Florals

Swap the usual dotted center of a flower for a tiny hit of chrome and the whole look shifts from sweet to a little futuristic. Soft pastel petals surround a mirror-finish gold or silver center, so the flower catches the light from its core outward.
Why The Metallic Center Works
The contrast is the appeal: gentle, matte-soft petals against one sharp metallic point. The chrome center is small, so it adds shine without tipping the look into heavy metallic territory. It is floral for someone who finds straight-up pretty a bit too sweet.
Getting the metal center right takes the same care as any chrome work, a cured base and powder pressed on cleanly. My fall chrome nails guide covers that mirror finish in more detail if you want to nail the center.
Milky Watercolor Blurred Blooms

Blurred blooms look like flowers seen through frosted glass, soft, out-of-focus shapes of color melting into a milky base. There are no crisp outlines, which makes this one forgiving and dreamy, perfect for anyone who finds detailed petals intimidating. You are painting impressions of flowers, not the flowers themselves.
- Start with a milky, semi-sheer base so the colors have something soft to sit in.
- Dab on color and blur it immediately with a clean brush or a touch of top coat.
- Keep the palette gentle, two or three watery pastels that bleed into each other.
Milky Pastel Garden French
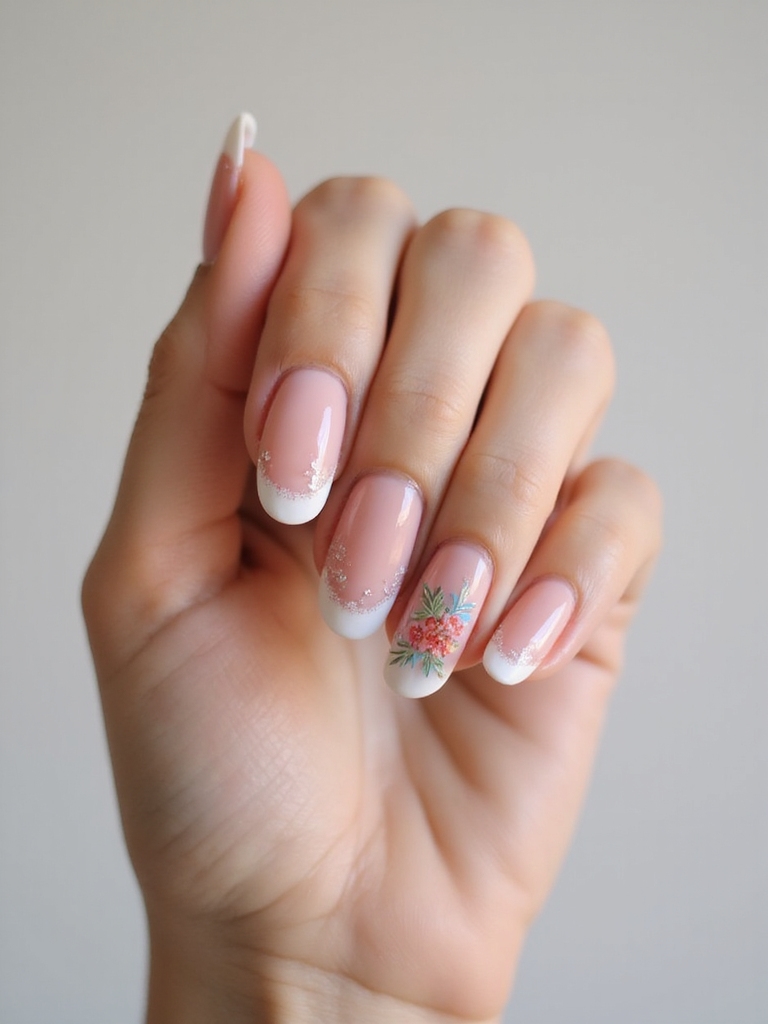
Take the timeless French tip and plant a little garden on it. A milky pastel base with tiny flowers scattered along the tip keeps the clean French structure while adding spring charm. It is the bridge between classic and playful, which makes it endlessly wearable.
- Lay a soft milky base and a pale tip before adding any flowers.
- Cluster the tiny blooms toward the tip so the design follows the French line.
- Use a dotting tool for the flower centers to keep them even and small.
| Technique | Difficulty | Best Done |
|---|---|---|
| Tiny daisies, dotted flowers | Beginner | At home |
| Watercolor blooms, negative space | Intermediate | At home or salon |
| Painterly peonies, sculpted 3D | Advanced | Salon |
Negative Space Glossy Black Florals
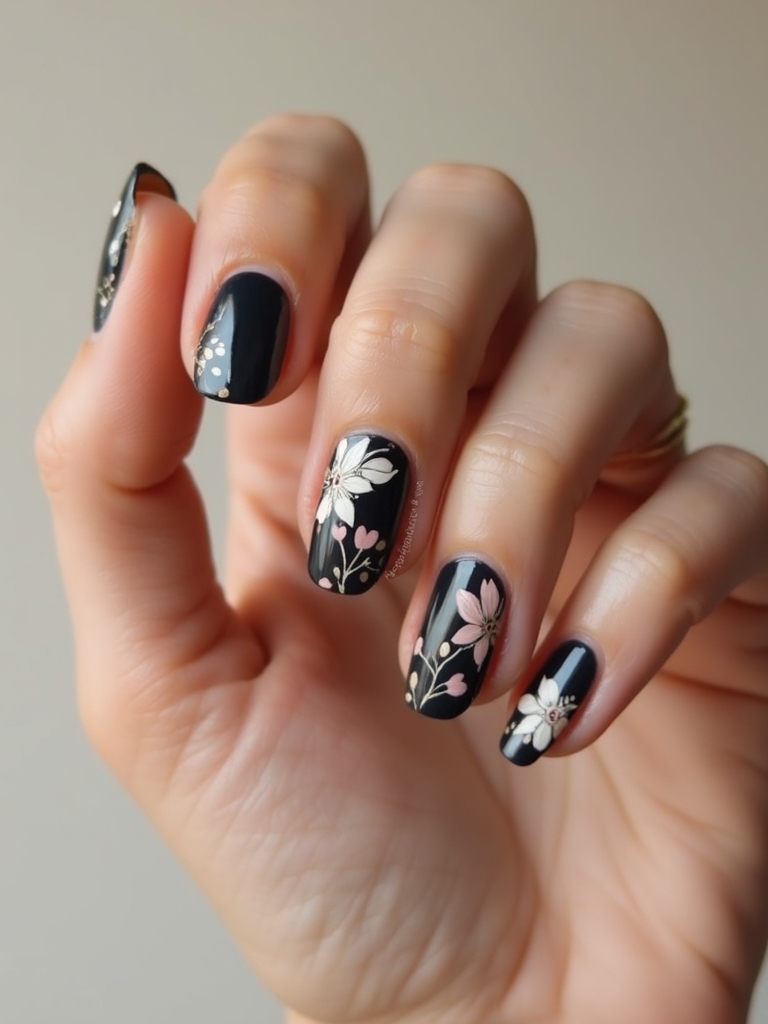
Not all flower nails are soft and pastel. Glossy black florals painted over bare, clear nails give a striking, almost gothic take on the trend. The black line work against the natural nail is graphic and grown-up, the floral look for people who do not do pink.
Because there is no color base, the design lives entirely in the line work, so clean black flowers and a high-gloss top coat are everything here. It is bold without being loud, and it works beautifully year-round rather than just in spring.
- Use a fine brush and a true black gel for crisp, opaque lines.
- Leave plenty of bare nail so the black flowers stand out.
- Finish glossy, since the shine against matte skin is what makes it look intentional.
Neon Petals With Chrome Contrast

For maximum impact, bright neon flowers set against a metallic or chrome background turn florals up to full volume. This is the loud, joyful end of the trend, and it photographs like nothing else, especially on deep skin where the saturated neons truly glow.
Making Neons Pop On Every Skin Tone
The contrast between hot, electric petals and a cool reflective base gives the design serious pop. Neons need layering to show up true, so build the petals in a couple of thin coats over the metallic to keep them bright rather than patchy.
This look proves florals do not have to be delicate. If your style runs bold and you want flowers that read from across a room, this is the one. Pair it with simpler shades from my fall nail colors guide on your off-weeks to give your eyes a rest.
Tiny Daisies On Sheer Gloss
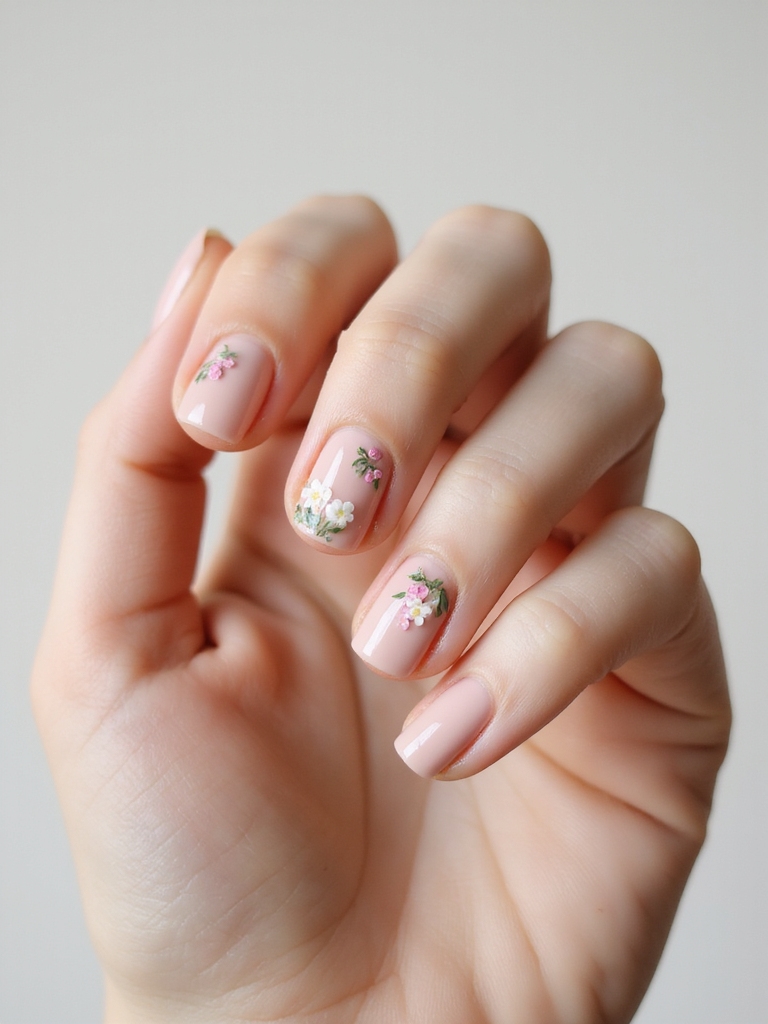
If you do one flower look at home, make it tiny daisies. Small white petals with a yellow center, dotted over a sheer or milky nail, are the most beginner-friendly floral there is, and somehow never go out of style. Cheerful, clean, and quick.
- Make five small dots in a circle with a dotting tool for each set of petals.
- Add a yellow dot in the middle once the white is touch-dry.
- Scatter just a few daisies rather than crowding the nail, then seal with gloss.
🅰️Hand-Painted
Fully custom and one of a kind, with brushwork you cannot fake. Takes skill and time, so it is best left to a nail artist for detailed blooms.
🅱️Decals or Stamping
Faster, more consistent, and beginner-friendly, but the designs repeat and look less organic. Great for tiny flowers and quick at-home sets.
Pastel Mixed Floral Mani

When you cannot pick just one, the mix-and-match mani lets every nail be its own little flower. Different pastel blooms on each finger, tied together by a shared soft palette, look like a hand-picked bouquet. It is playful, personal, and a great way to use up the floral ideas you love most. For length and shape that suits detailed art, my notes on fall almond nails are a helpful starting point.
- Keep one element consistent, like the base color, so the mismatched flowers still look cohesive.
- Vary the flower type per nail, a daisy here, a blurred bloom there, a single petal elsewhere.
- Balance busy nails with one or two simple ones so the hand does not feel crowded.
Maintenance & Care
Floral art lives and dies by its top coat. Because so many of these looks have raised paint or fine line work, a thick glossy seal is what protects the design and keeps it from chipping or catching. Refresh the top coat over the tips every few days, and for sculpted 3D pieces, be gentle with your hands and avoid picking, since raised charms are the first thing to snag and pull off.
Hand-painted florals last longest as a gel set, often two to three weeks with care, while painted designs over regular polish wear faster. Keep cuticles oiled so the whole nail looks fresh, wear gloves for chores, and resist peeling gel when it lifts, which takes a layer of natural nail with it. For more design ideas to rotate through the seasons, my fall nail ideas guide has plenty to borrow from.
Frequently Asked Questions
?What is the easiest flower nail design for beginners?
Tiny daisies are the most beginner-friendly. Make five small dots in a circle for the petals with a dotting tool, add a yellow center, and scatter just a few over a sheer base. They look clean and cheerful with almost no skill required.
?How long do flower nails last?
Hand-painted florals sealed as a gel set can last two to three weeks with care. Sculpted 3D flowers may need gentler handling since raised pieces snag first, and painted designs over regular polish wear faster than gel.
?Which flower nail looks best on deep skin tones?
Pigment-rich and bright petals show up beautifully on deep skin, especially neon florals against a chrome base or bold blooms with a metallic center. Very pale pastels can disappear, so lean into saturated color for the most impact.
?Can I do flower nails at home without an artist?
Absolutely. Daisies, watercolor blooms, pressed dried flowers under gel, and simple negative-space designs are all doable at home with a dotting tool and a fine brush. Save painterly peonies and sculpted 3D work for a nail artist.
Let Your Nails Bloom
Flower nails are proof that nail art does not have to be complicated to feel special. Whether you dot on a few daisies at your kitchen table or book a set of sculpted peonies for a wedding, the charm is in the softness and the personality. Pick the version that matches your patience and your week.
Start simple if you are new to it, build up to the showpieces, and do not worry about perfect petals. A flower that looks a little hand-painted is the whole point. Go plant a little garden on your hands and enjoy watching it catch the light.