There is a specific little thrill in turning your hand under a light and watching the sparkle shift and flare. Glitter nails have come a long way from the gritty, one-note polish of years past; today the interesting looks are all about finish, whether that is glitter suspended in clear gel like amber, a magnetic shimmer that moves, or foil shattered across a smoky fade. The flake is only half the story now.
These 10 glitter looks lean into those modern finishes, each with the technique that creates it, who it flatters, and the honest note on how it wears. If your idea of glitter nails is still a chunky silver full-set, these will change your mind about what sparkle can do.
Modern Glitter Nails, in Short
- The finish is everything now: encapsulated, magnetic, foil, and jelly-over-glitter all behave differently and wear differently.
- Gel and builder gel are what make the newer finishes possible, since they suspend and seal glitter flat and glossy.
- Smoother finishes like magnetic or jelly-over-glitter are far kinder to snags than raised chunky flakes.
- Warm gold, iridescent, and jewel-toned glitter reads richest against deep skin, so lean into saturation.
- Expect $50 to $80 for an intricate glitter gel set, two to three weeks of wear, and a longer soak-off than plain gel.
A Sheer, Smoky Holographic Halo
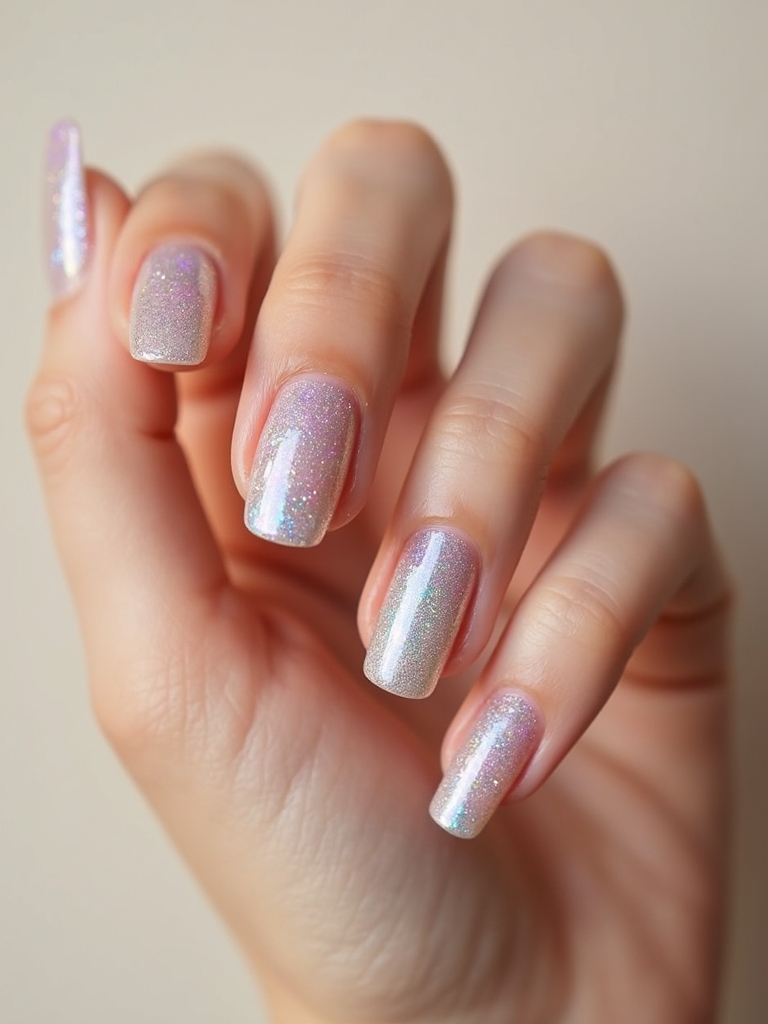
This look borrows the aura-nail idea and gives it sparkle: a soft, smoky halo of holographic glitter diffused across a sheer nail so it glows from the center. Rather than a solid coat, the glitter is concentrated in the middle and blurred out toward the edges, which gives it that hazy, lit-from-within quality that photographs so well. It is sparkle for people who find full glitter too much.
The smoky effect comes from keeping the base sheer and building the holographic shimmer in thin, diffused layers, never one dense hit. A blurring top coat or a sheer wash over the top softens it further.
It suits every skin tone because it is so soft, and on deep skin a warm, gold-leaning holographic glitter glows richer than a cool silver one. My aura nails guide covers the same diffused technique without the sparkle.
Mirrored Chrome French Tips
Chrome is glitter’s smoother, high-shine relative, and swapping a white French tip for a mirrored chrome one is the sleekest way to sparkle without a single loose flake. The tip becomes a band of liquid metal that catches the light like a mirror, which reads futuristic and expensive against a sheer or nude base. There is no fallout and no texture, just pure reflective shine.
The finish depends on a fully cured, no-wipe top coat under the chrome powder, which is then buffed in until it flashes. This is a job worth booking a pro for, since a smooth mirror finish is hard to get even at home.
Chrome flatters everyone when you choose the tone: cool silver on fair skin, warm gold and rose-chrome on deep skin so the tip glows like real metal. See my chrome nails guide for the full-nail version.
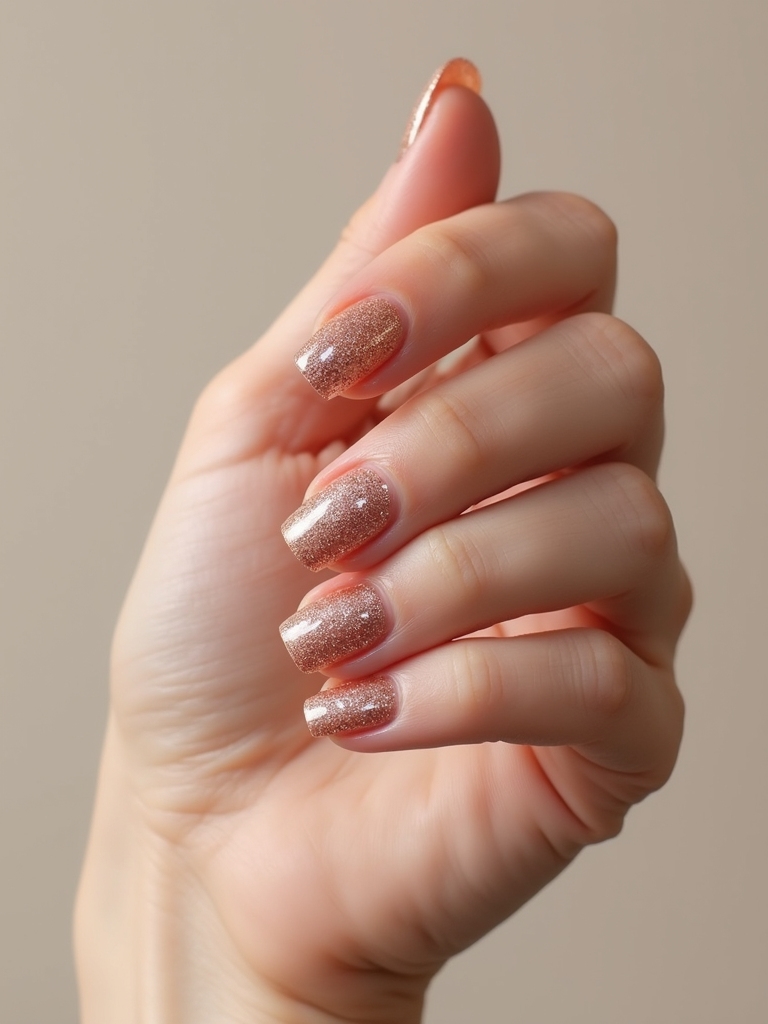
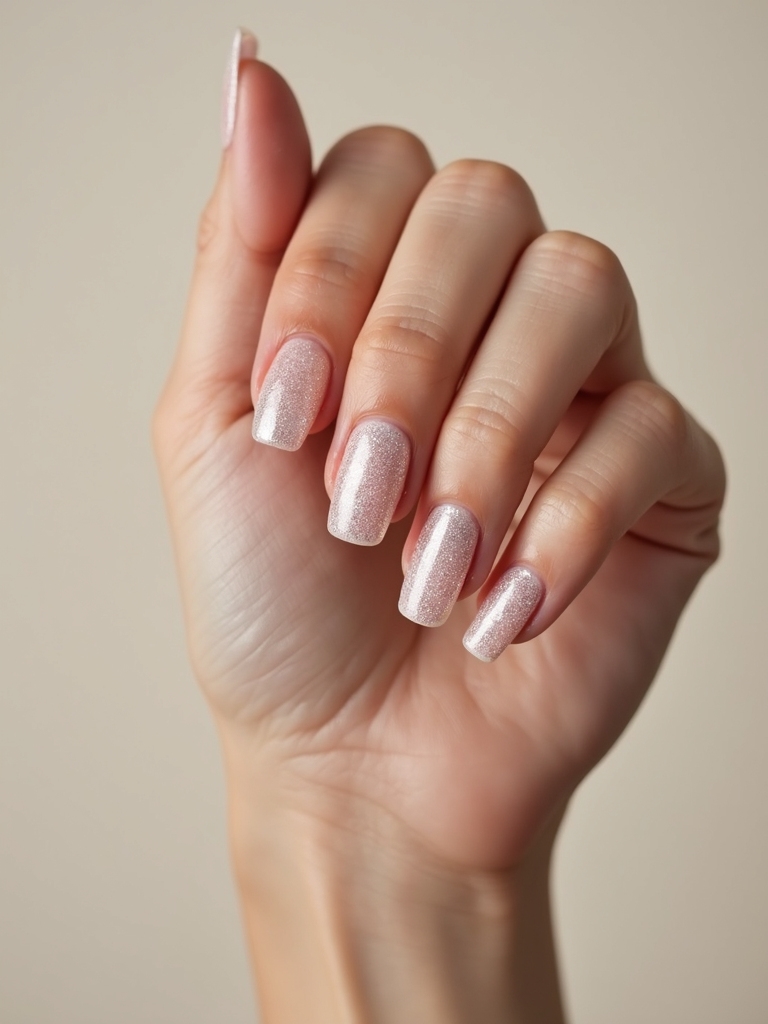
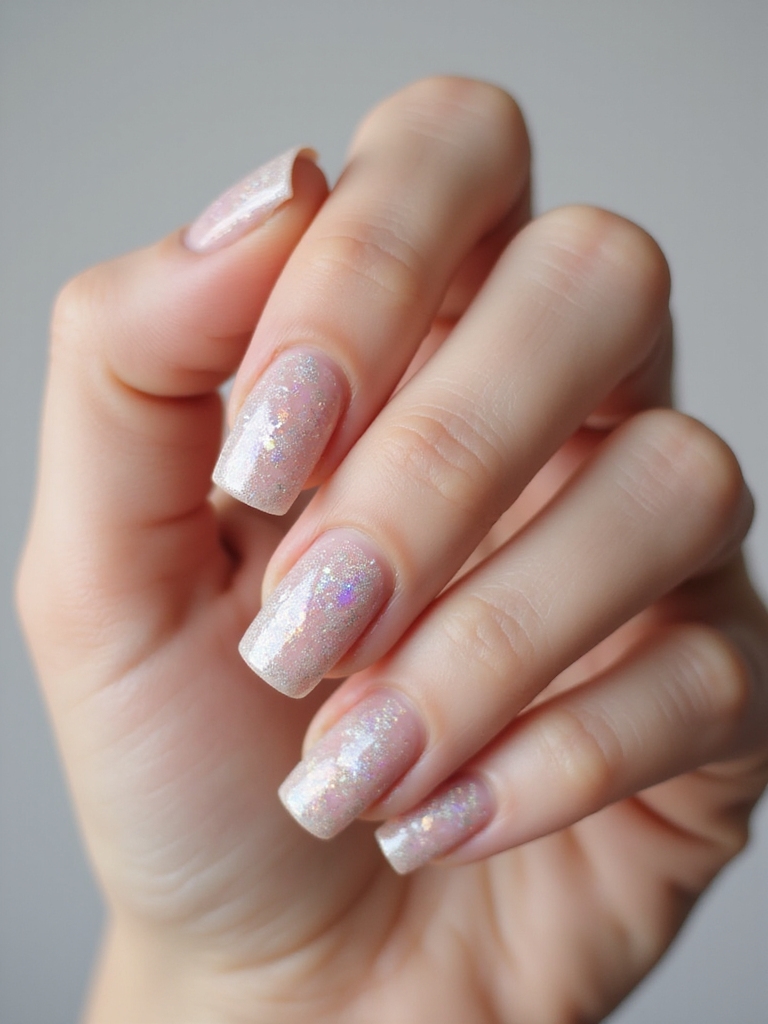
Encapsulated Chunky-and-Micro Glitter
Encapsulated glitter is the technique that finally makes chunky sparkle actually wearable. Instead of sitting on top where it snags, the glitter is sealed between layers of clear builder gel so the surface stays glass-smooth while the flakes float inside like amber. Mixing chunky and micro flakes gives it depth, so the nail looks packed with light from every angle.
Why Encapsulation Works
Because the glitter is fully encased, there is none of the roughness or catching you get with a normal chunky glitter, which is the whole appeal. It also wears beautifully, since nothing can peel off the top.
It is a builder-gel job, so it takes skill and time to apply smoothly, but the payoff is a durable, dimensional sparkle. Any glitter color works, and jewel and gold tones look especially rich on deep skin.
👍Smooth-finish glitter (encapsulated, magnetic, jelly)
- +Glass-smooth surface that never snags on hair or fabric
- +Wears longer since nothing can peel off the top
- +Reads modern and expensive, never gritty
👎Raised-finish glitter (chunky, foil)
- –Bumpy texture that catches on everything
- –Foil and chunky edges lift first and need heavy sealing
- –Higher fallout and a rougher feel day to day
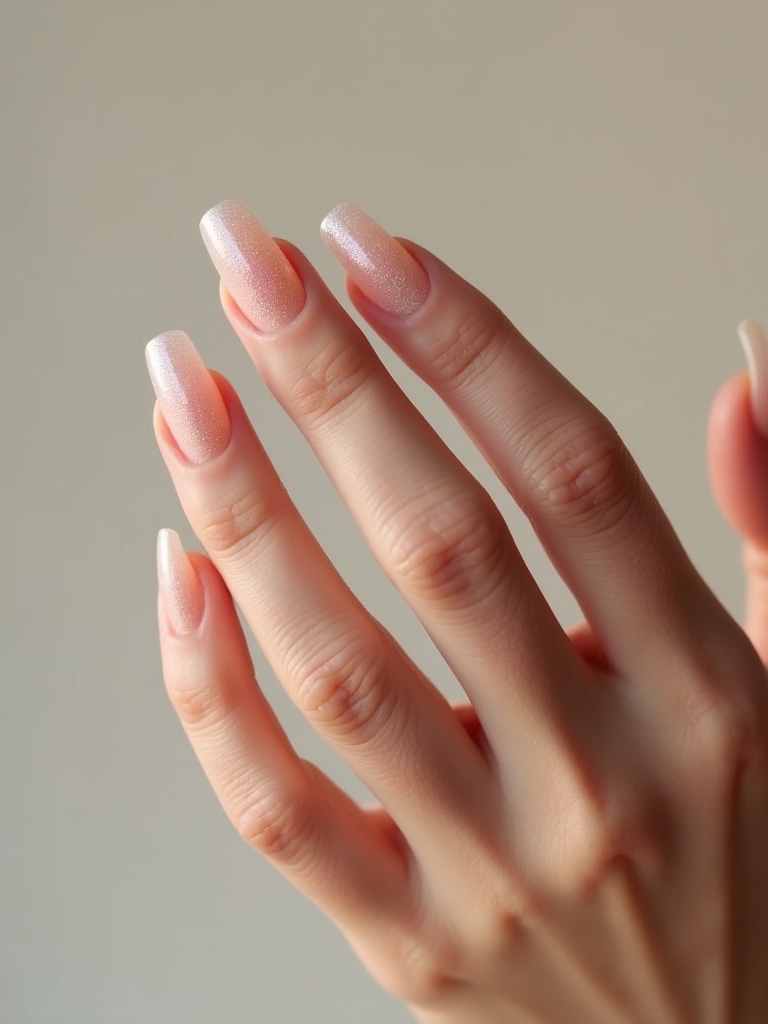
A Dense-Tipped Ombre Glitter Fade
A glitter ombre concentrates dense sparkle at the tips and fades it down toward the cuticle, so the nail goes from solid glitter to bare. It flatters more than almost any glitter placement, since the gradient stretches the nail and the clear cuticle area makes grow-out almost invisible. This is the reliable workhorse glitter look for parties, weddings, and the whole holiday season.
- Start with a sheer or nude base across the whole nail.
- Sponge glitter densely at the tip, tapping it lighter as you move toward the middle.
- Seal well and cap the edge, since the packed tip is where an ombre chips first.
Glossy Nude With Confetti Accents
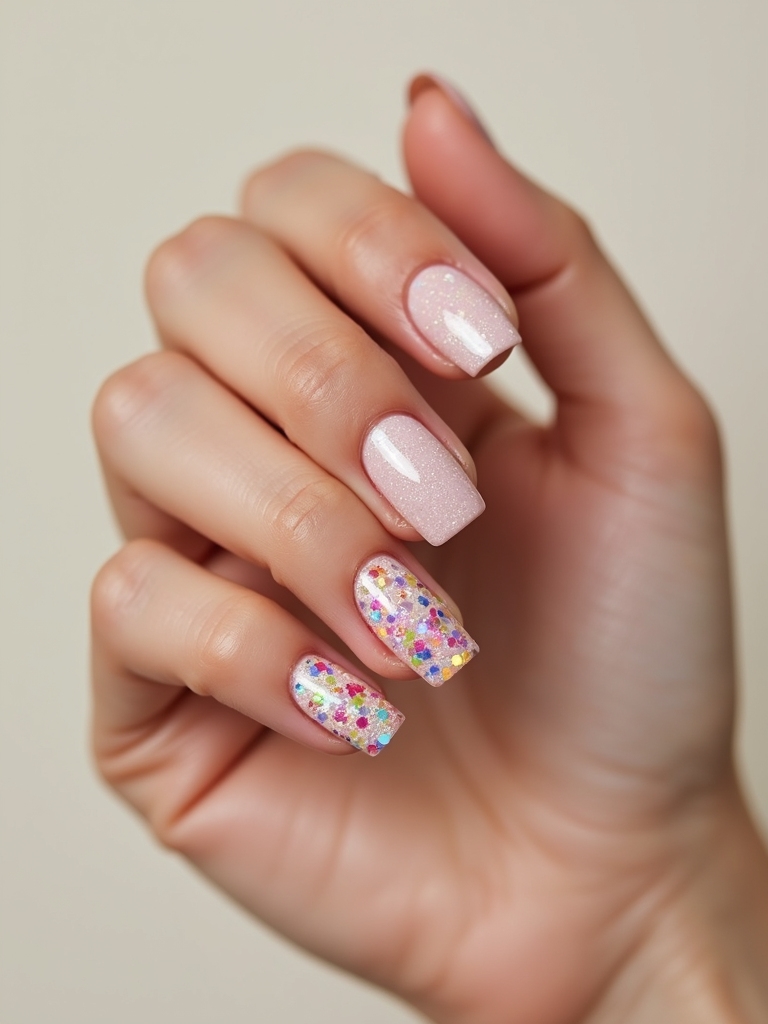
The most office-friendly glitter of all pairs a clean, glossy nude with a light scatter of confetti flakes, so it reads polished with just a hint of play. The nude does the heavy lifting of looking put-together, while a few translucent confetti pieces catch the light when you gesture. It is glitter for people who think they cannot wear glitter to work.
The trick is restraint: a handful of confetti flakes suspended in the top coat, not a dense layer. Space them out so each one reads as a deliberate fleck rather than a crowd.
A nude keyed to your skin makes it: soft rose-beige on fair, warm caramel on medium, and rich mocha on deep skin so the base looks intentional and the confetti pops. My funky nails guide has bolder accent ideas if you want more.
A few modern glitter terms worth knowing:
📖Encapsulated glitter
Glitter sealed between layers of clear builder gel so the surface stays smooth while the flakes float inside.
📖Magnetic (cat-eye)
Polish with tiny magnetic flecks that a magnet pulls into a bright, moving line of light across the nail.
📖Foil
Thin metallic transfer sheets that give broken, mirror-like shards rather than fine, even sparkle.
A Shattered-Foil Smoky Gradient

Foil is a different beast from glitter, giving broken, mirror-like shards where glitter gives fine sparkle, and laid over a smoky gradient it looks like cracked precious metal. The irregular, shattered pieces catch the light in big flashes, which makes it feel edgy and editorial. It is the glitter-adjacent look for someone who wants drama with a harder edge.
The smoky base gives the foil something moody to sit against, and the random placement of the shards is what keeps it looking like shattered metal, all irregular flashes.
- Sponge a smoky gradient in grey, plum, or bronze from cuticle to tip.
- Press torn transfer foil on unevenly with a sticky base for the shattered effect.
- Seal thoroughly, since foil edges lift without a generous top coat.
Sheer Jelly Over Glitter
Layering a sheer jelly color over a glitter base is one of the prettiest tricks in the book, muting and tinting the sparkle so it glows through a wash of color like light through stained glass. The jelly softens a glitter that might otherwise be too much, giving a squishy, dimensional, candy-like finish. It is a clever way to tone down a bold glitter you already have.
- Lay down a glitter base and seal it smooth first.
- Wash a sheer jelly color over the top, building the tint slowly so it stays translucent.
- Keep it thin and glossy, since the whole effect depends on seeing the glitter through the jelly. My jelly nails guide covers the sheer layering.
Negative-Space Geometric Glitter
Using glitter inside crisp geometric shapes against bare nail is the most modern, gallery-like way to wear sparkle. A glitter triangle at the base, a sparkling half-moon, or a thin glitter stripe with lots of clear space around it turns glitter into graphic design. The negative space is what keeps it minimal and editorial, light on the nail, so a little sparkle goes a long way.
- Map the shapes with striping tape for clean, sharp glitter edges.
- Fill only the shape with glitter, leaving generous bare or sheer space around it.
- Keep the design simple, since one strong geometric accent per nail beats a busy set.
| Finish | Best For | Snag Factor |
|---|---|---|
| Encapsulated / magnetic | Everyday wear, long-lasting sparkle | Very low, glass-smooth |
| Ombre / confetti | Parties, easy grow-out | Low to medium |
| Foil / chunky | Events, bold statements | High, needs heavy sealing |
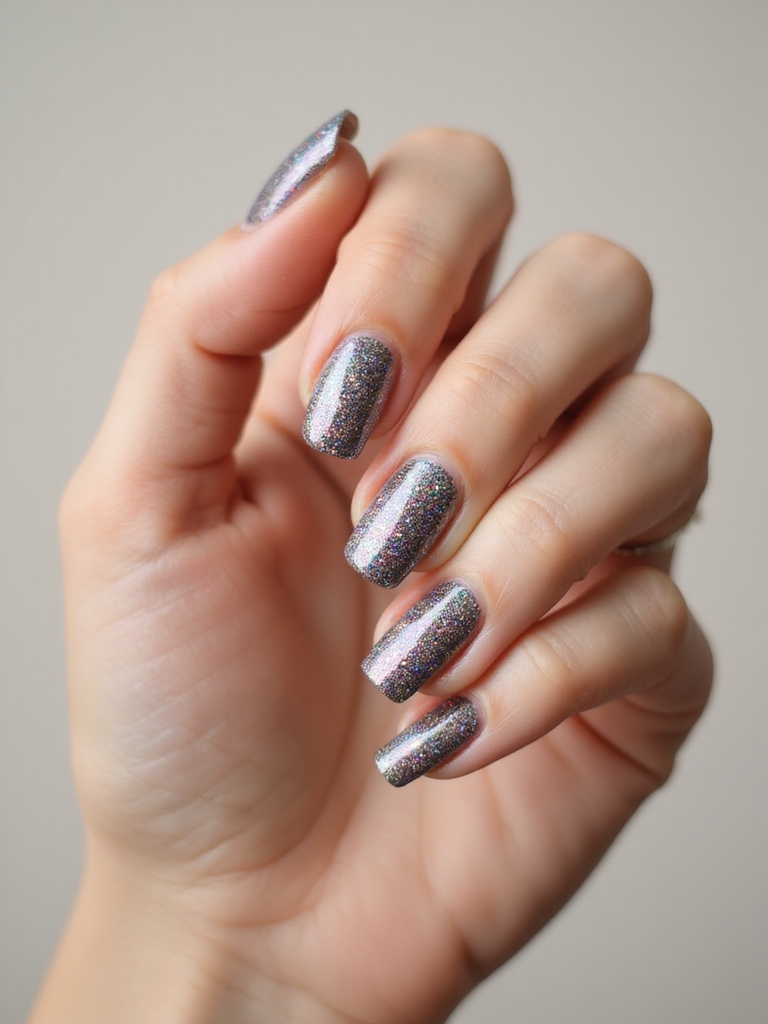
Iridescent Magnetic Cat-Eye Nails
Magnetic cat-eye polish is the finish that looks like it is lit from inside, using tiny magnetic particles that a magnet draws up into a bright, shifting streak of light down the nail. In an iridescent formula it shifts color as your hand moves, giving a deep, three-dimensional shimmer with a completely smooth surface. It is the closest thing to wearing a gemstone, and there is zero fallout since the shimmer is sealed in the gel.
- Apply a magnetic gel and cure all but the last coat.
- Hold a magnet over the wet top coat for a few seconds to draw the flecks into a bright cat-eye stripe.
- Angle the magnet differently per nail for varied light, and choose an iridescent or jewel formula that glows on deep skin.
Velvet Base With Glittered Cutouts
The richest textural glitter look pairs a matte velvet base with glossy glitter revealed in cutout shapes, so the sparkle jumps against the flat, plush finish. Leaving a shape, a heart, a star, a diamond, in glossy glitter while the rest of the nail stays matte is a striking contrast of texture, not just color. It feels luxe and considered, like couture for your nails.
That matte-against-sparkle contrast is what makes it special, so the effect lives on the difference between the two finishes, not on the amount of glitter.
- Set the color with a matte top coat for the velvety base.
- Mask out a shape and fill it with glossy glitter, then gloss only that cutout.
- Keep the cutout small and clean, since the plush matte around it is half the look.
Find the Sparkle That Moves You
The big shift in glitter nails is that finish now matters more than the flake itself. Whether you want the glass-smooth glow of an encapsulated or magnetic look, the moody drama of shattered foil, or the soft haze of a holographic halo, there is a version of sparkle that fits your taste and your lifestyle, snag factor and all.
So pick the finish that made you turn your hand toward the light, and bring a clear reference photo to your nail artist, since these newer techniques are worth putting in skilled hands. Once you see what modern glitter can do, a plain full-set of chunky silver will never tempt you again.