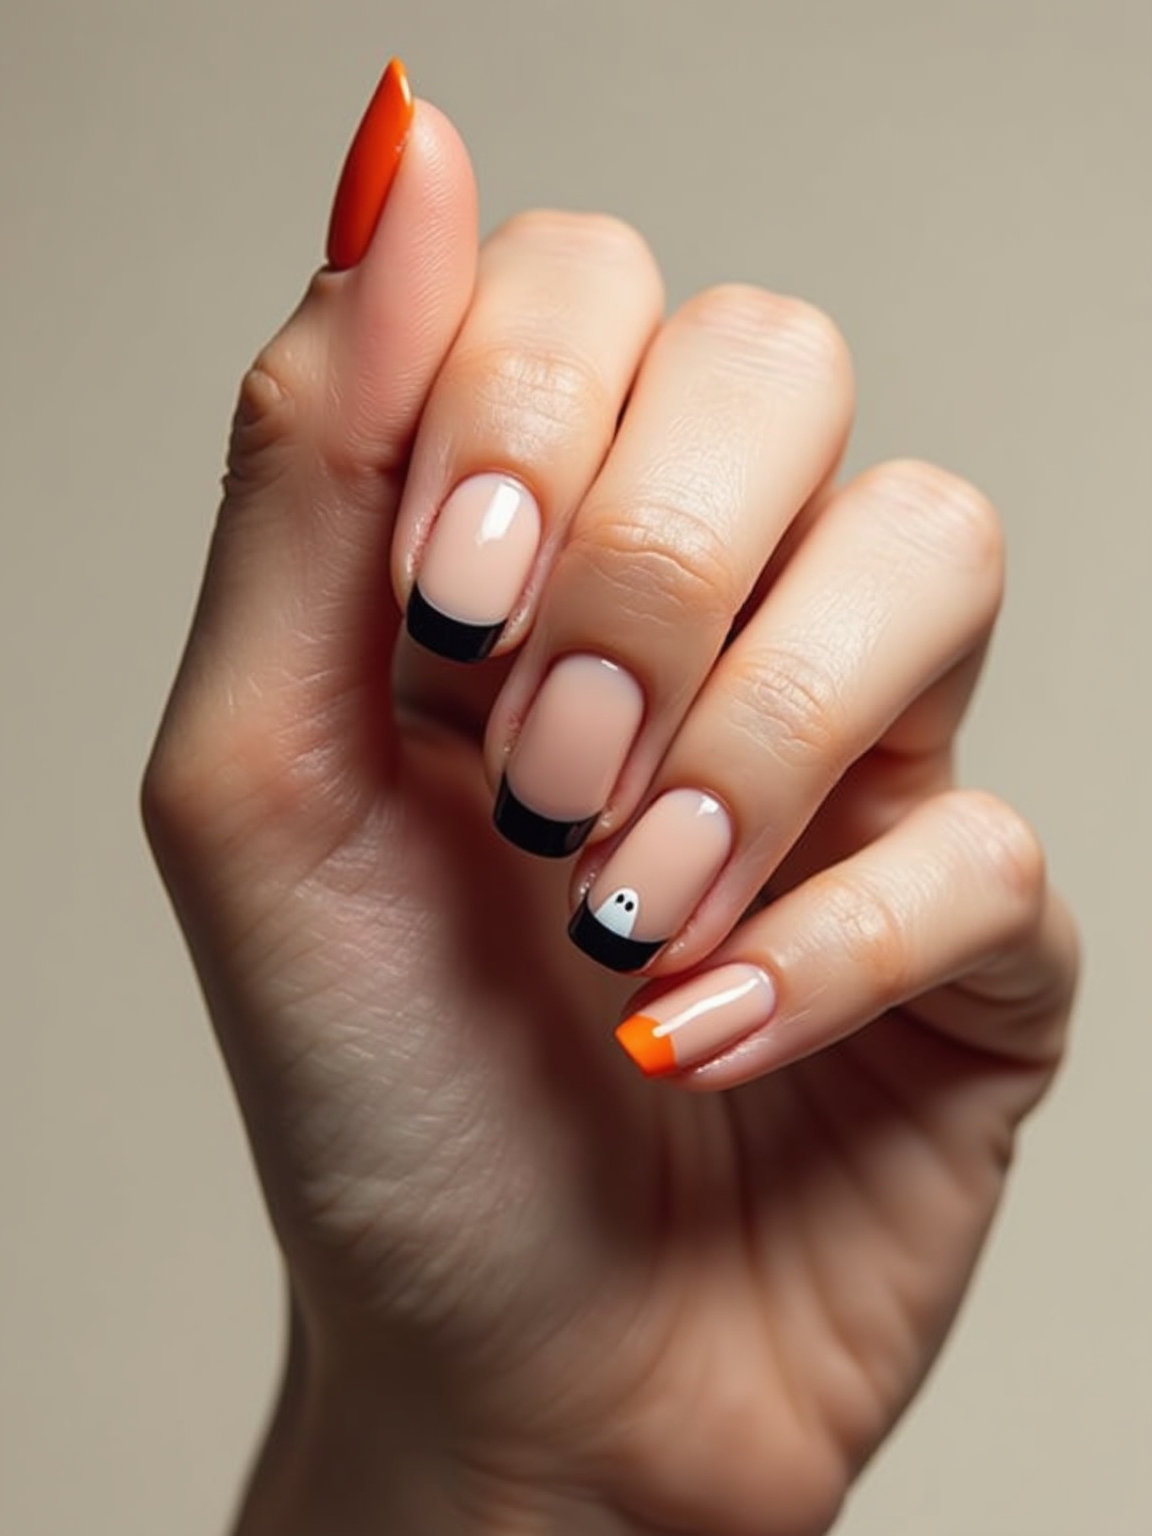
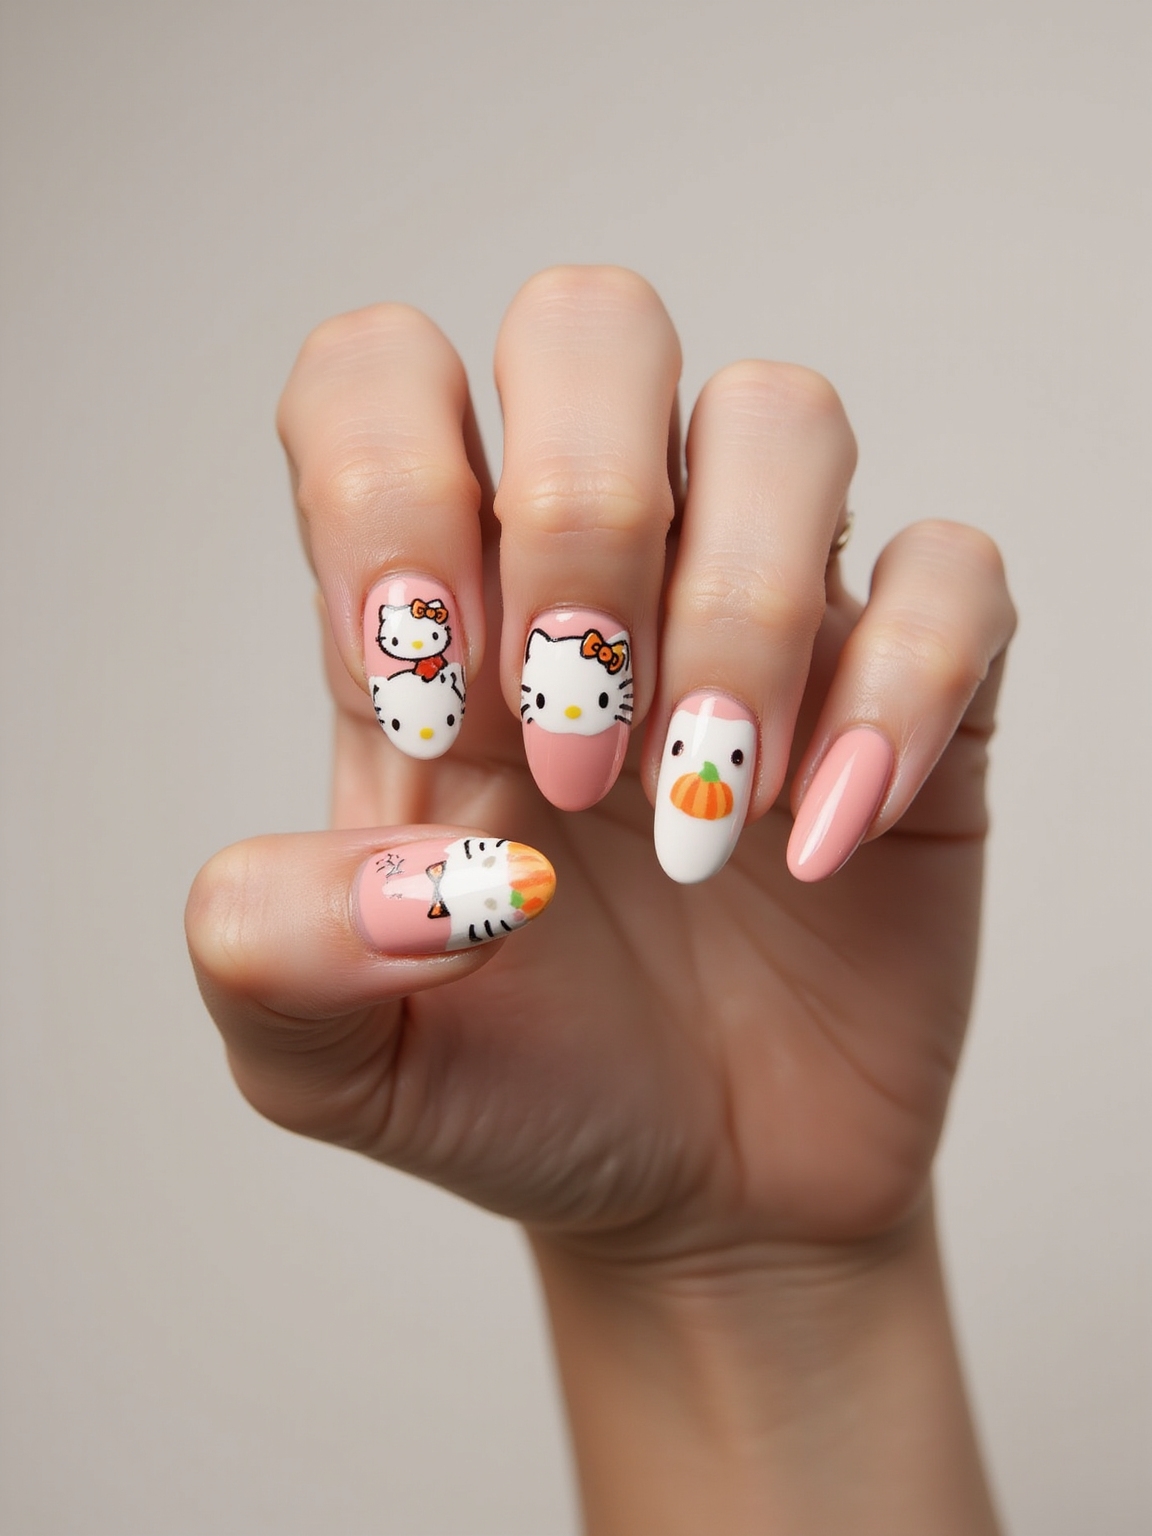
The myth about Halloween nails is that the good ones need a nail artist and a two-hour appointment. Plenty of the prettiest designs here are a base color plus one simple accent you can do at your own kitchen table with a dotting tool and a steady breath.
So these eleven lean spooky-glam rather than costume-craft: blood-drip tips, glow-in-the-dark ghosts, chrome webs, poison-green marble. Each one comes with how to actually do it, roughly what it costs at home versus a salon, and, because chipped spooky nails are their own kind of horror, how to keep them looking sharp for the whole run of parties.
Before You Paint
- Most of these are a base color plus one accent, so you only need to freehand a little; a dotting tool and a thin liner brush cover almost everything.
- Doing it at home costs the price of a few polishes and a top coat (around $15 to $25); a salon gel version runs $35 to $60 depending on the detail.
- Prep and a good top coat matter more than the art: a clean nail, thin layers, and a glossy seal are what keep the design from chipping mid-party.
Glossy Blood-Drip Tips
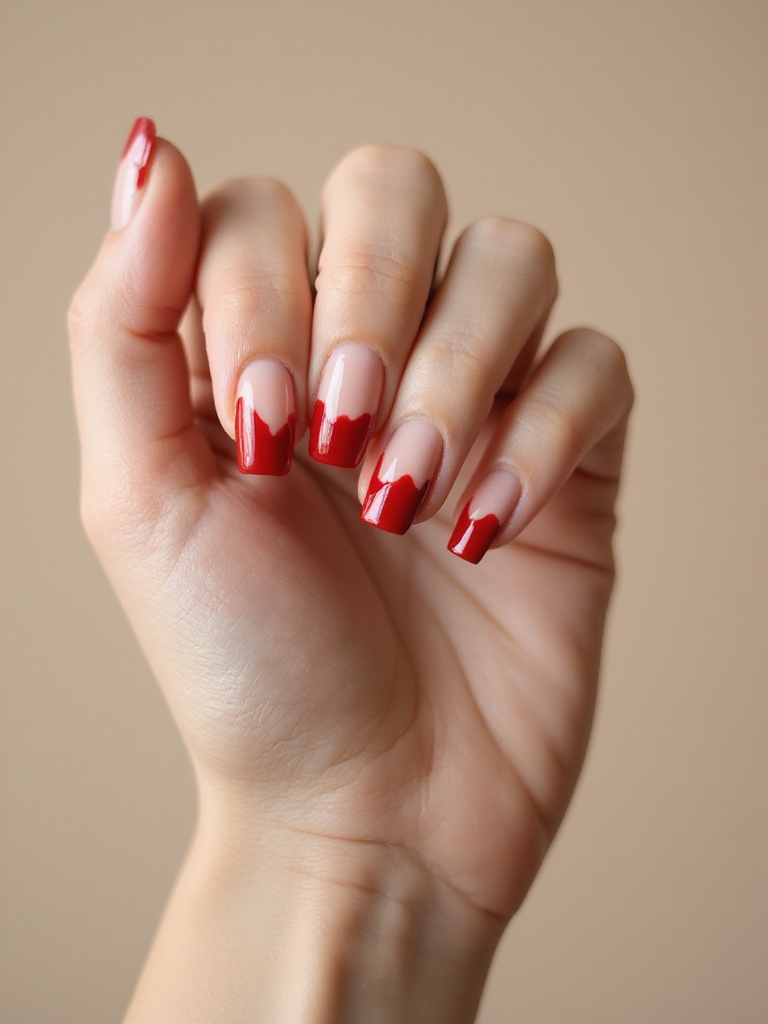
Blood-drip tips are the classic that never gets old, and they are easier than they look: a clear or nude base with red dripping down from the tips like a fresh spill. The gloss is what makes it look wet and gruesome in the best way. Here is the method:
- Paint a sheer nude or clear base so the drips stand out.
- Use a thin liner brush to pull uneven red drips down from the tip, varying the length.
- Finish with a glossy top coat to make the blood look freshly spilled. A bold red base works if you want full-color drama.
A Minimalist Spiderweb Nail
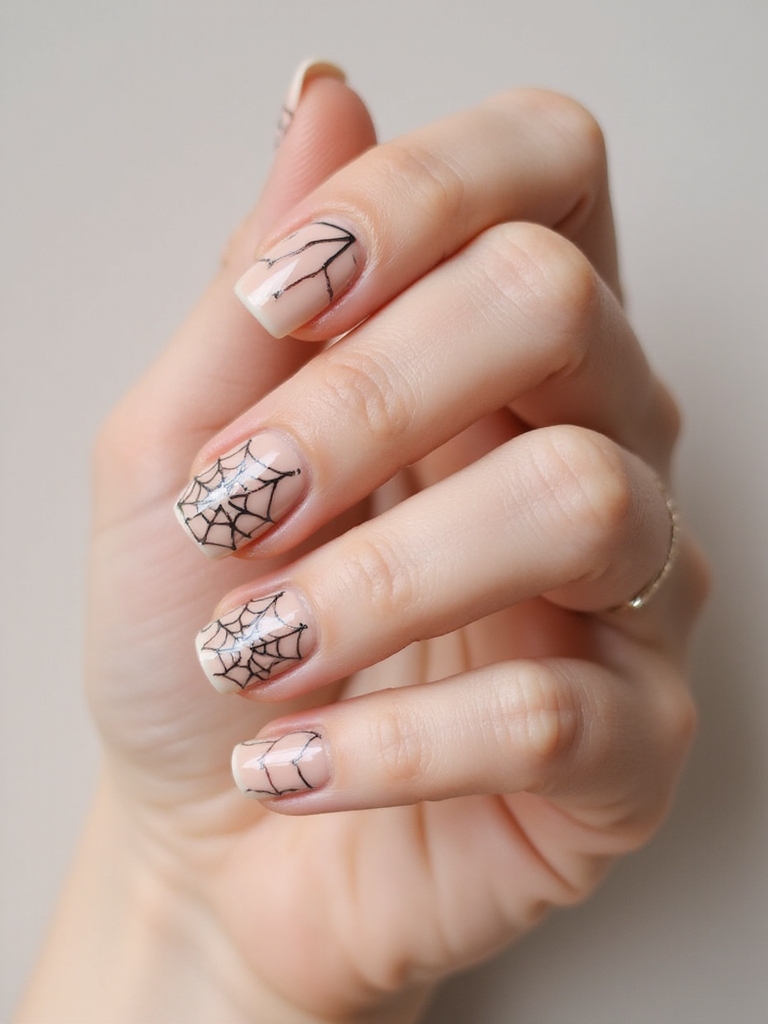
If drip tips feel like too much, a single spiderweb on one accent nail is the understated option: chic, quick, and unmistakably Halloween. The whole design lives on one or two fingers, so the rest of the hand stays clean.
Over a sheer or black base, use a fine liner to draw a few curved anchor lines from one corner, then connect them with small arcs to form the web. Keep the lines thin and let a tiny drawn spider dangle if you want the extra touch. It is the design my subtle-leaning clients ask for most every October.
👍Doing Them at Home
- +Costs a few polishes plus a top coat, not $40 to $60.
- +You can redo or tweak a design freely.
- +Most looks here are base-plus-one-accent, beginner-friendly.
👎Where a Salon Wins
- –Chrome and long-lasting gel really need a salon setup.
- –Freehand detail (haunted house) takes practice.
- –A pro mani lasts two to three weeks; home polish, a few days.
Milky Glow-in-the-Dark Ghosts
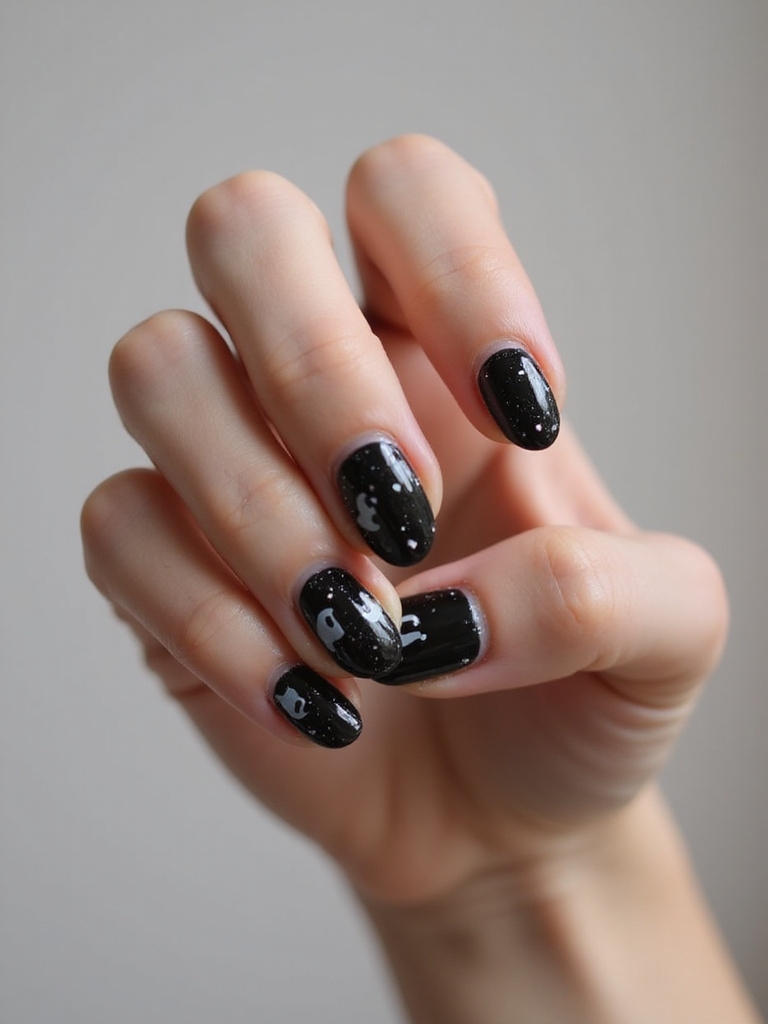
These are the playful crowd-pleaser: a soft milky base with little white ghosts that actually glow once the lights go down, thanks to glow-in-the-dark polish. They are sweet by day and a surprise at night, which kids and adults both love.
Paint a milky, sheer white base, then use a small dotting tool to make simple ghost shapes (a rounded top and a wavy bottom) in glow polish, adding tiny dot eyes in black. Glow polish charges under light, so hold your nails near a lamp before you head out for the best after-dark effect.
Crystal-Studded Midnight Bats
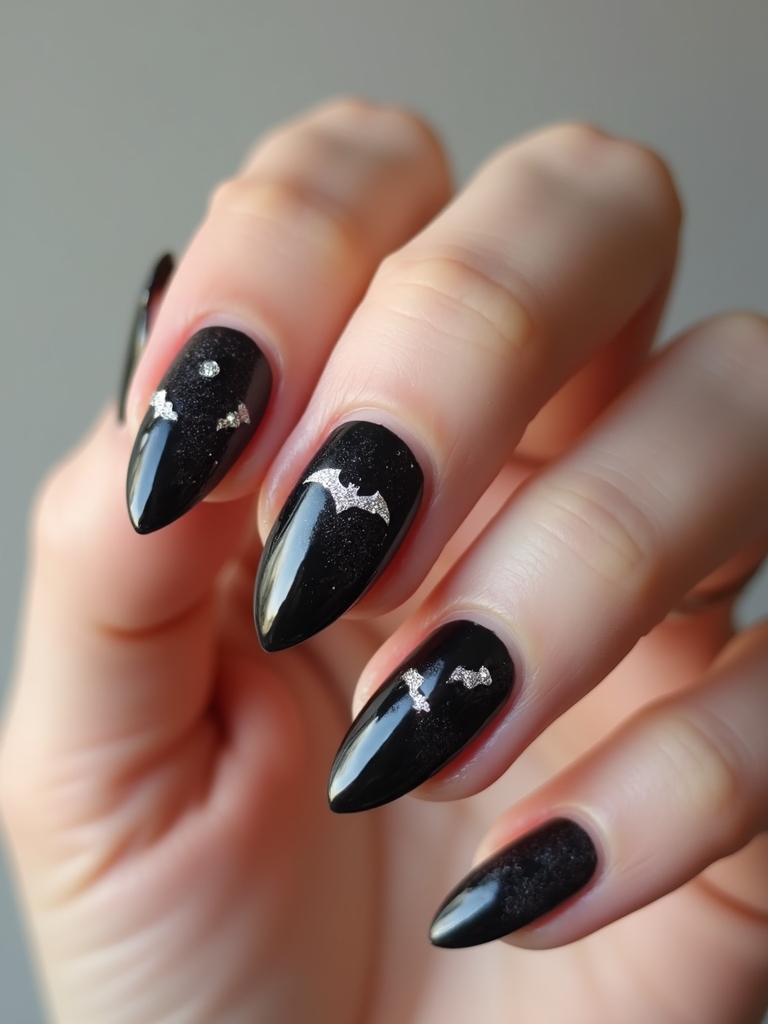
This is the couture end of the list: a deep midnight base with small bat silhouettes and clusters of tiny crystals catching the light. It looks expensive. The crystals do most of the work.
Paint a deep black or navy base, then use a fine brush to add small bat shapes near the cuticle or tip. Press a few tiny rhinestones into a dot of gel or top coat while it is still wet, clustering them rather than spacing them evenly.
It suits anyone who wants glam over gore. A dark base color is your foundation; just seal the crystals well so they survive daily wear.
A Warm Amber-to-Orange Ombre
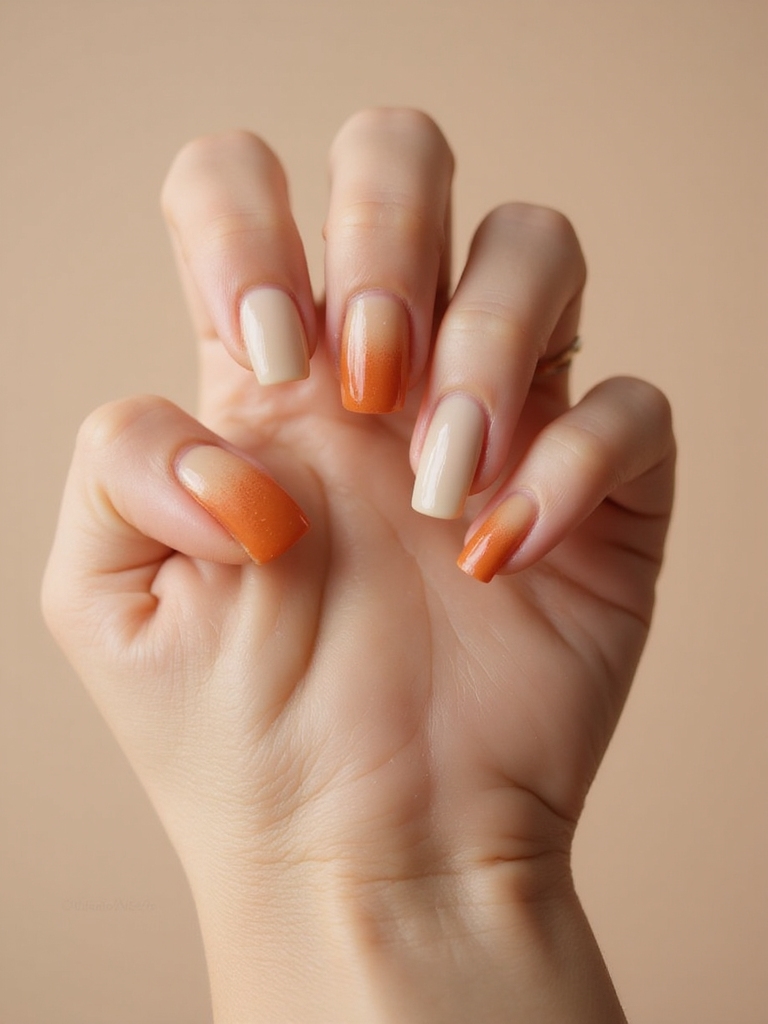
Not every Halloween nail has to be scary. This warm ombre fades from amber to spiced orange, all cozy autumn rather than spooky, and it doubles as a fall look you can wear well past October. It is my pick for anyone who wants the season without the theme.
For a smooth ombre at home:
- Sponge amber and orange side by side onto a makeup sponge and press it onto the nail.
- Dab a couple of times, re-loading the sponge, until the fade looks smooth.
- Seal with a glossy top coat. Pair it with more autumn nail shades for a full seasonal set.
A few nail terms that make these designs easier.
📖Chrome powder
A fine mirror-effect powder rubbed over a cured, tacky gel top coat to create a metallic, reflective finish. It needs a gel base to work, which is why the chrome web is the one design here best done with a gel setup.
📖Ombre sponge
A makeup sponge used to press two polishes onto the nail so they blend into a gradient. Dabbing and re-loading builds a smoother fade than trying to blend with a brush.
📖Capping the free edge
Running your polish or top coat along the very tip of the nail. This seals the edge and is the single most effective habit for stopping chips before they start.
An Inky Black-to-Blood-Red Ombre
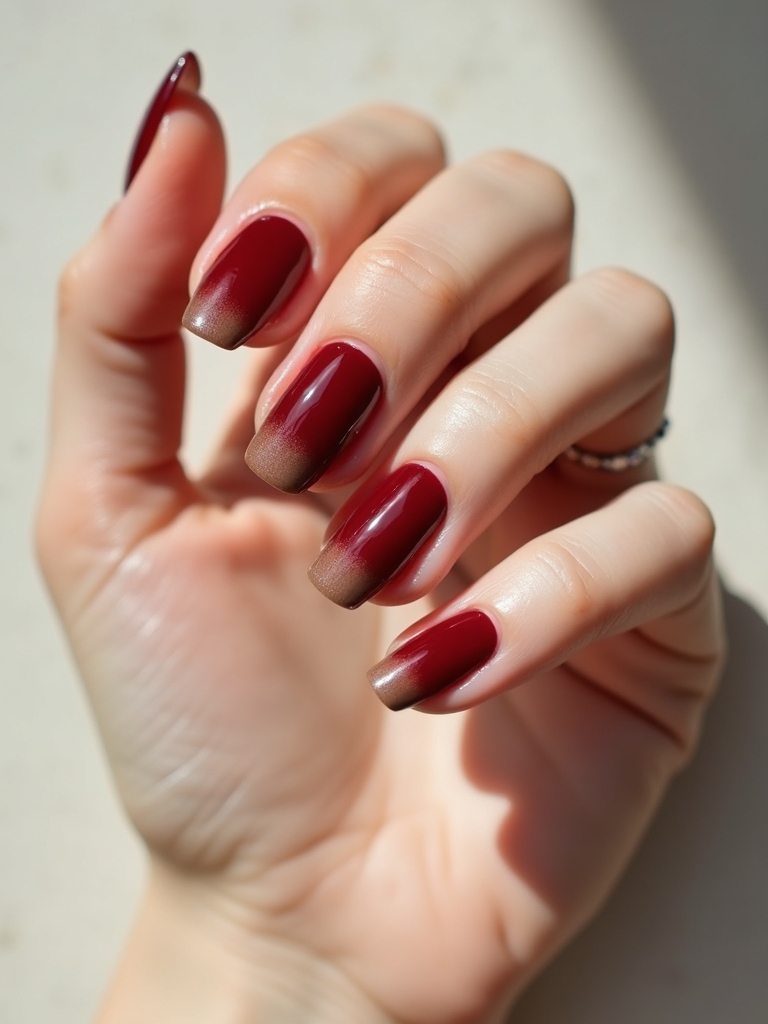
This ombre goes the moody route, fading from inky black at the cuticle to a deep blood red at the tip, for a look that is dramatic without any painted motifs. It is bold, grown-up, and surprisingly wearable to work if you like a dark nail. Build it like this:
- Base the nail in the lighter of the two shades so the gradient stays even.
- Sponge black and blood-red onto a sponge and press, concentrating black near the cuticle.
- Layer a couple of times for a smooth fade, then finish glossy so the depth shows.
Moonlit Haunted House Accents
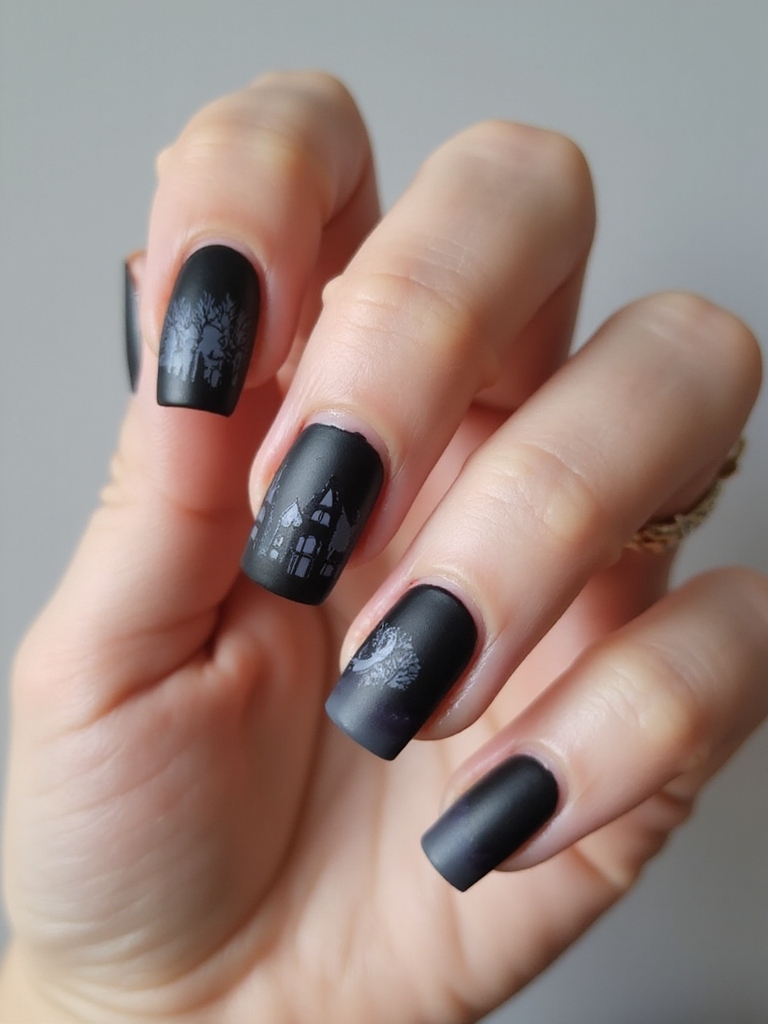
For the detail-lover, a tiny haunted-house scene on an accent nail is a whole little painting: a silhouette house, a full moon, a bare tree. It is the most advanced idea here, but on one or two nails it is manageable.
Keep It a Silhouette
Over a moonlit gray or purple base, paint a pale circle for the moon first, then a black house silhouette and a spindly tree over it with a fine brush. Keeping it a silhouette, all black shapes against the moon, is what makes it look intentional rather than fussy.
Save this for one or two accent nails and keep the rest of the hand simple. It rewards patience and a very fine brush more than any special product.
A Silver Web Chrome Manicure
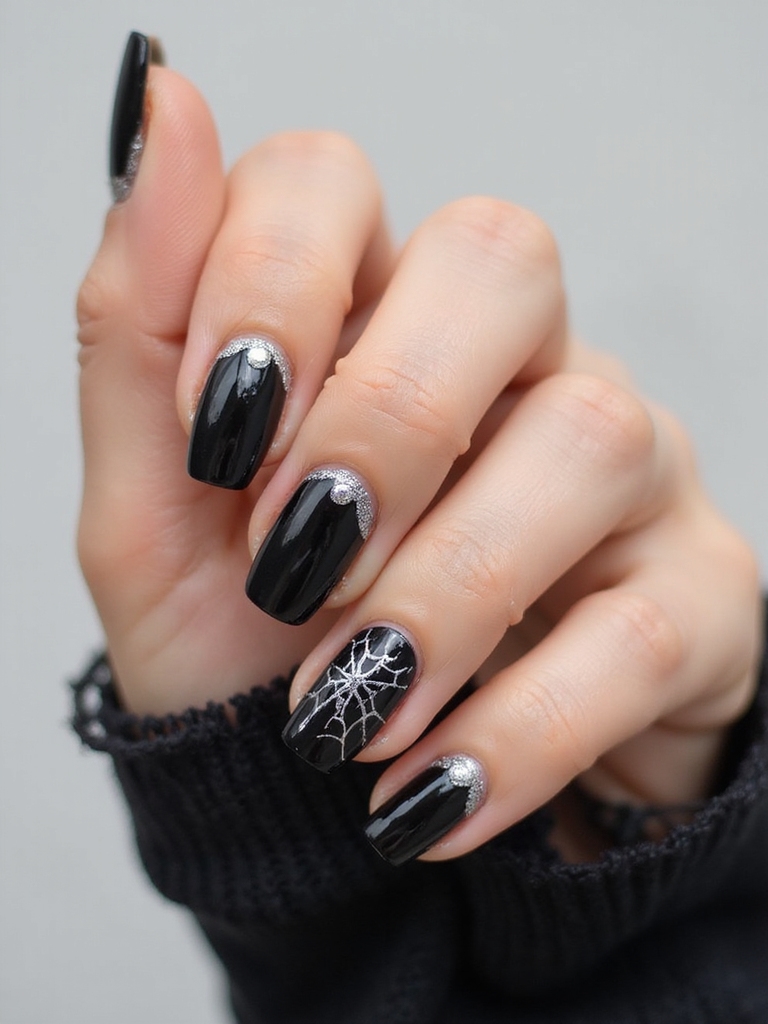
This one brings the shine: a mirror-chrome base with a fine silver web and scattered dots, all metallic and futuristic-spooky. Chrome is the star, and it is easier to apply than people expect once you know the trick.
Chrome Wants a Gel Base
Chrome powder needs a cured gel base to work, so this is the one design here that really wants a gel setup. Rub the chrome powder over a tacky, no-wipe top coat with a soft applicator until it turns mirror-like, then draw the web over it in a slightly darker silver liner.
It is striking and holds up well since gel and chrome are durable. If you love the finish, a full set of chrome nails is worth exploring.
Be Kind to Your Nails
Never peel or pick off gel polish. Doing so lifts part of the nail plate away with it and leaves nails thin and sore. Soak gel off in acetone with foil wraps instead, push back rather than cut your cuticles, and if your nails feel weak after a run of Halloween manis, give them a polish-free week and plenty of cuticle oil to recover.
Razor-Thin Sigil Nails
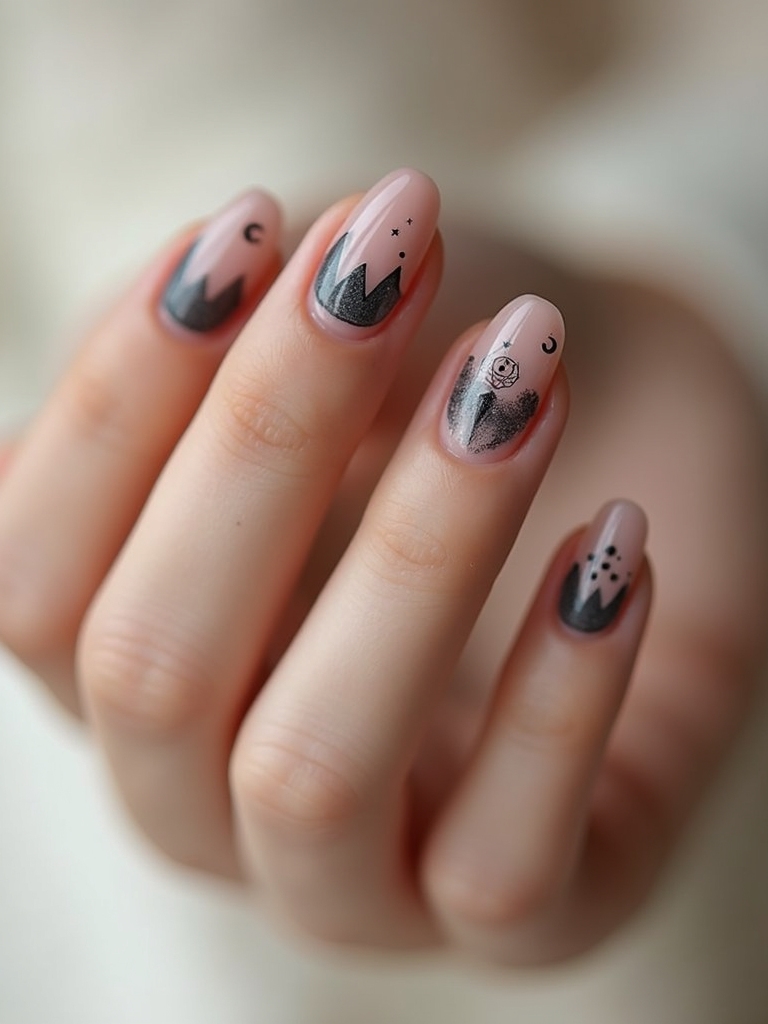
The sigil look is witchy and minimal: razor-thin lines forming little symbols, moons, and stars over a moody base, like something drawn in a spellbook. It is quiet and elegant. It is also very of-the-moment.
Over a deep base, use the finest liner brush or a nail-art pen to draw small symbols, crescent moons, tiny stars, simple line-sigils, keeping every line hair-thin. The delicacy is the whole appeal, so less is more; one symbol per nail beats a crowded hand.
It suits anyone drawn to the mystical rather than the gory. A steady hand and a good pen matter more than any nail skill.
Minimalist Black Cat Silhouettes
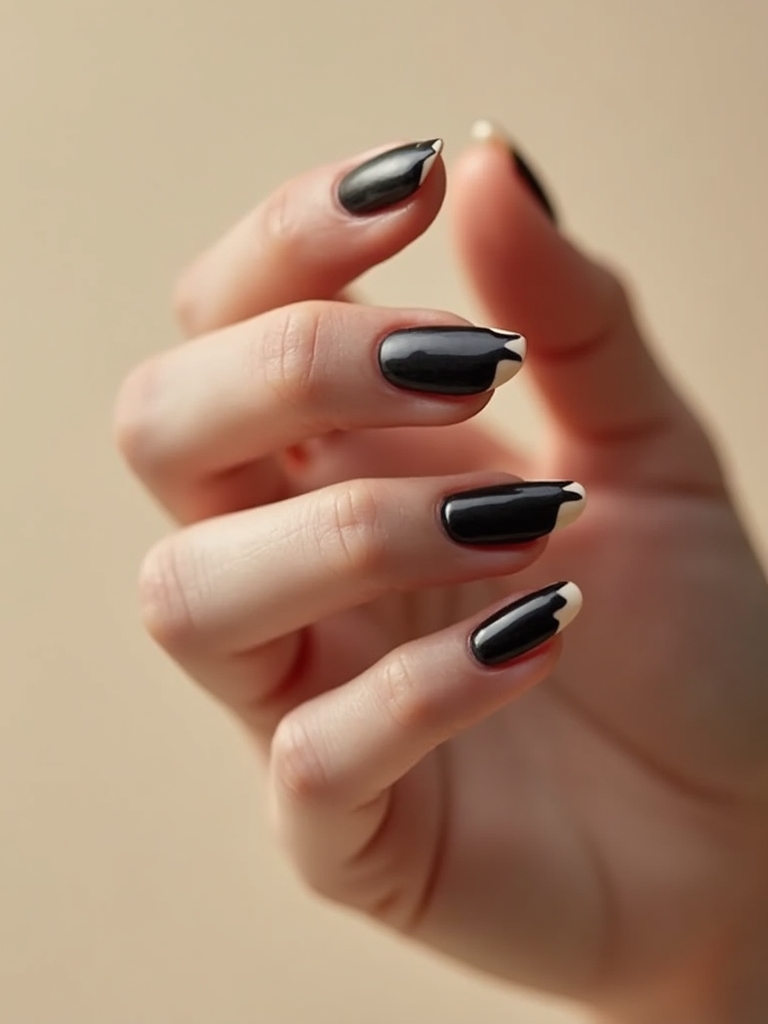
A little black cat silhouette is the cutest low-effort design here, and one of the most recognizable: a simple curled-cat shape on a soft base. It is friendly, quick, and reads Halloween in a single glance.
Over a cream, gray, or soft-orange base, use a small brush to paint a simple black cat silhouette, a rounded body with two pointed ears and a curved tail. You do not need detail; the shape alone does the work, so keep it graphic and smooth.
Do it on one or two accent nails against a simple base. It is beginner-friendly and charming. It is the one I suggest to first-timers who feel shaky with a brush. Truly foolproof.
Poison-Green Marble Nails
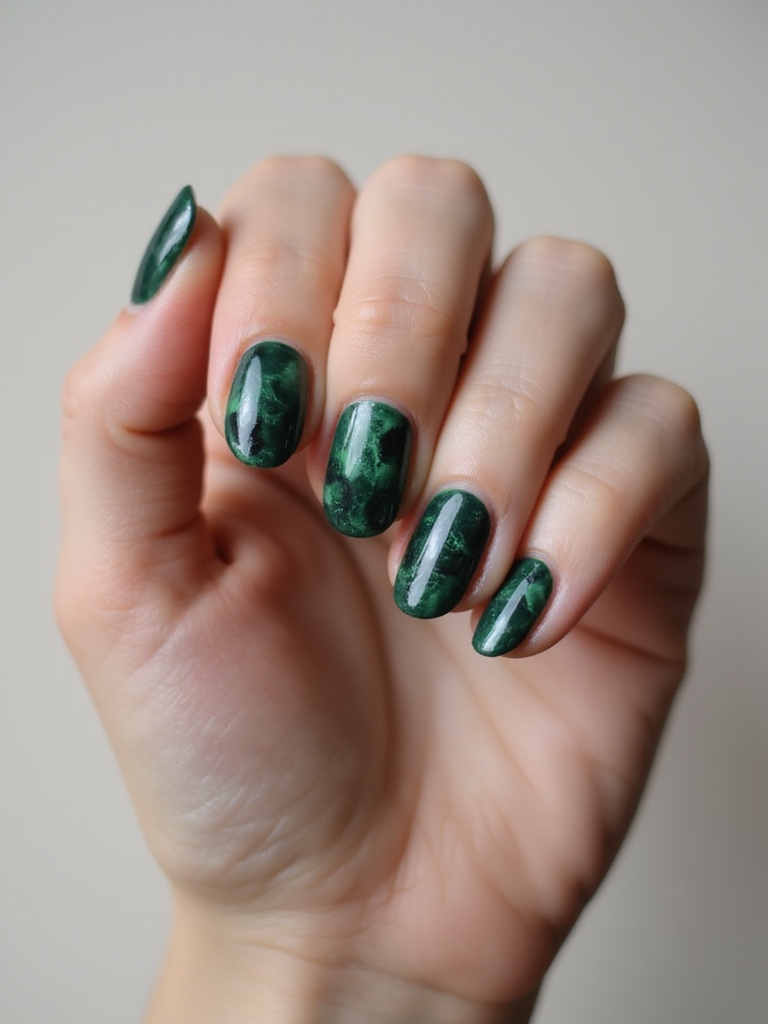
Poison-green marble is the toxic-glam idea: swirls of acid green and black marbled together like something bubbling in a cauldron. The marbling looks complex but comes from a simple drag technique. Here is how:
- Paint a green or black base, then drop small dots of the second color while wet.
- Drag a toothpick or fine tool through the wet dots to swirl them into a marble.
- Work one nail at a time so the polish stays wet enough to swirl, then seal glossy.
Maintenance & Care
A spooky manicure is only glam until it chips, so prep and seal it like you mean it. Start with clean, dry nails, push back (never cut) your cuticles, and buff lightly so polish grips. Paint in thin layers rather than one thick one, let each dry, and always cap the free edge, running your brush along the very tip of the nail, which is the single best trick for stopping early chips. Refresh the top coat every couple of days to keep the gloss and the seal.
Take it off kindly, too, especially if you went gel. Never peel or pick gel off; doing that drags a top layer of the nail plate away and leaves it thin. Soak cotton in acetone, wrap each nail in foil for ten to fifteen minutes, then gently push the softened gel away. Follow with cuticle oil and a hand cream, because healthy nails underneath are what make the next design look good. If your nails feel thin or sore, give them a polish-free week to recover.
Halloween Nail Questions, Answered
?Which Halloween nail design is easiest for beginners?
Start with a single spiderweb or a black cat silhouette on one accent nail, or simple blood-drip tips. Each is a base color plus one easy accent you can do with a dotting tool or fine brush, so there is very little to go wrong, and the rest of the hand stays plain and clean.
?Do I need gel, or will regular polish work?
Regular polish works for almost everything here, from drips to ombre to the cat and web. Only the chrome web really needs a gel base, since chrome powder requires a cured, tacky top coat to turn mirror-like. Gel lasts two to three weeks; regular polish with a good top coat lasts a few days to a week.
?How do I stop my Halloween nails from chipping?
Prep matters most: clean, buffed nails, thin layers, and always cap the free edge by running polish along the tip. Refresh your top coat every couple of days, wear gloves for dishes, and avoid using your nails as tools. Those habits keep a design sharp far longer than any single fancy polish.
Spooky Nails, Zero Stress
The best thing about Halloween nails is how much drama you get from so little: a base color and one accent, a web or a cat or a drip, and your hands are in on the costume too. Start with a simple design like the spiderweb or black cat, and work up to the marble or haunted house once your hand feels steady.
Whatever you choose, prep the nail, keep your layers thin, cap that edge, and take the polish off gently when the season ends. Pick one to try this week and give your nails their moment; the parties will notice.
More to Try