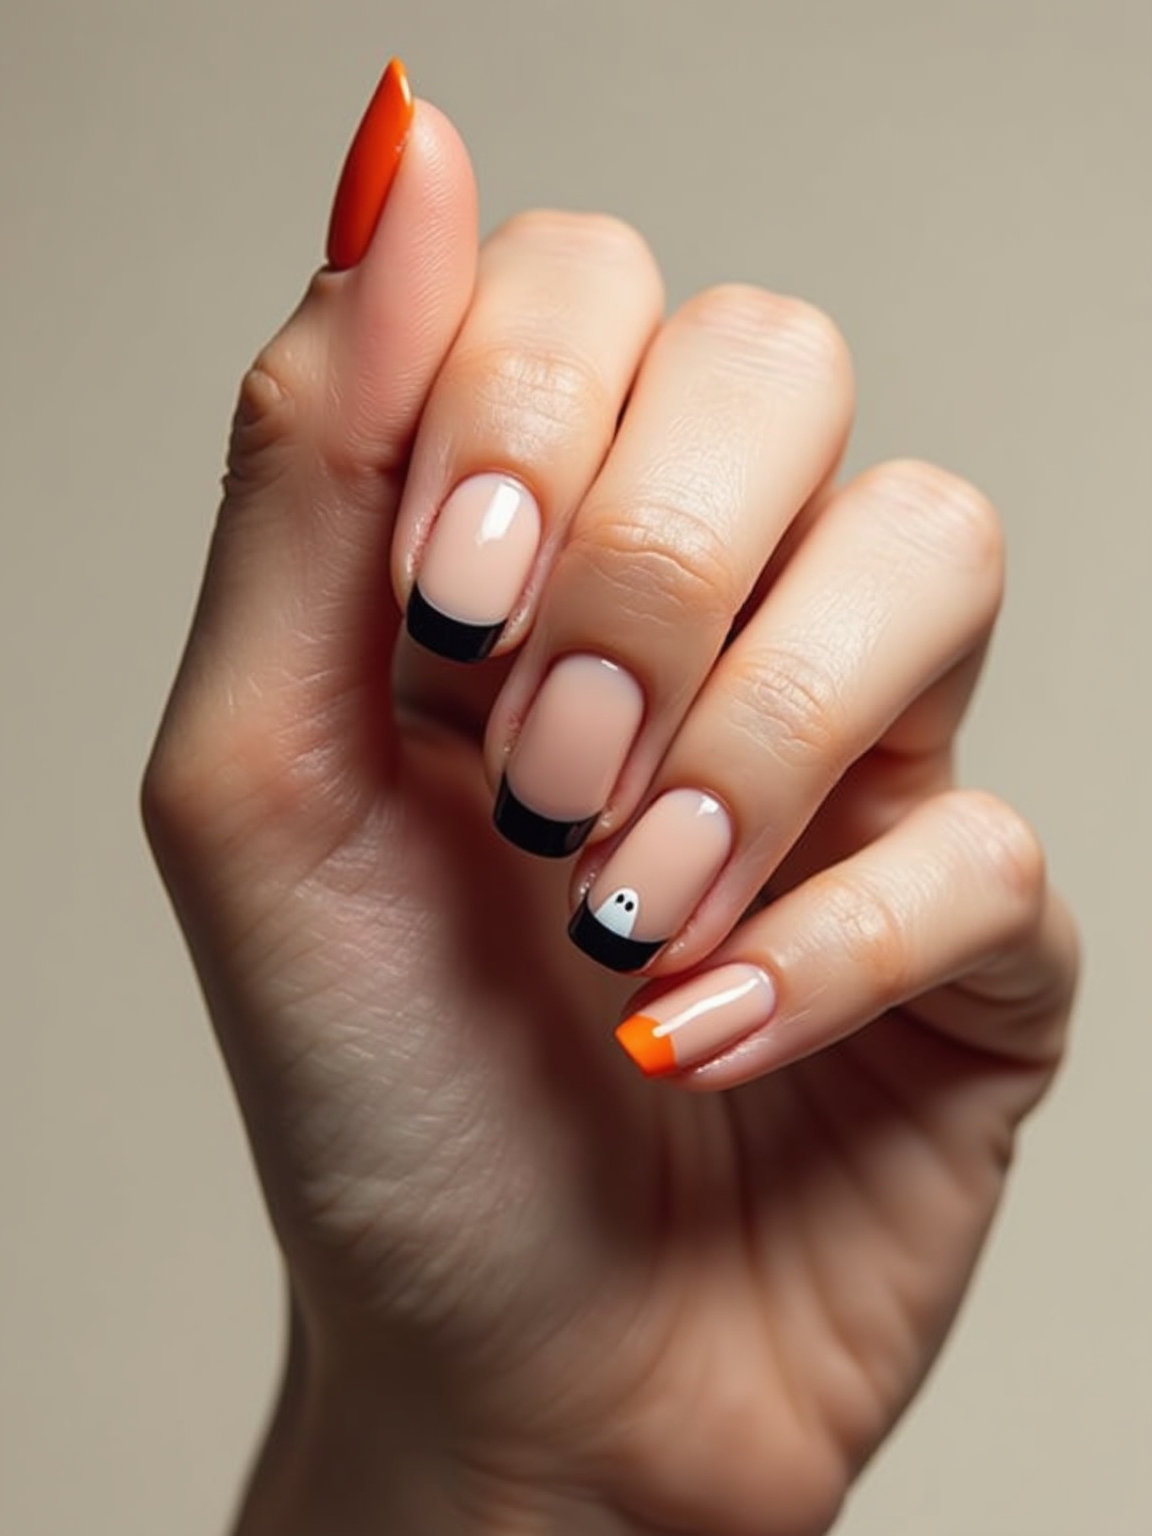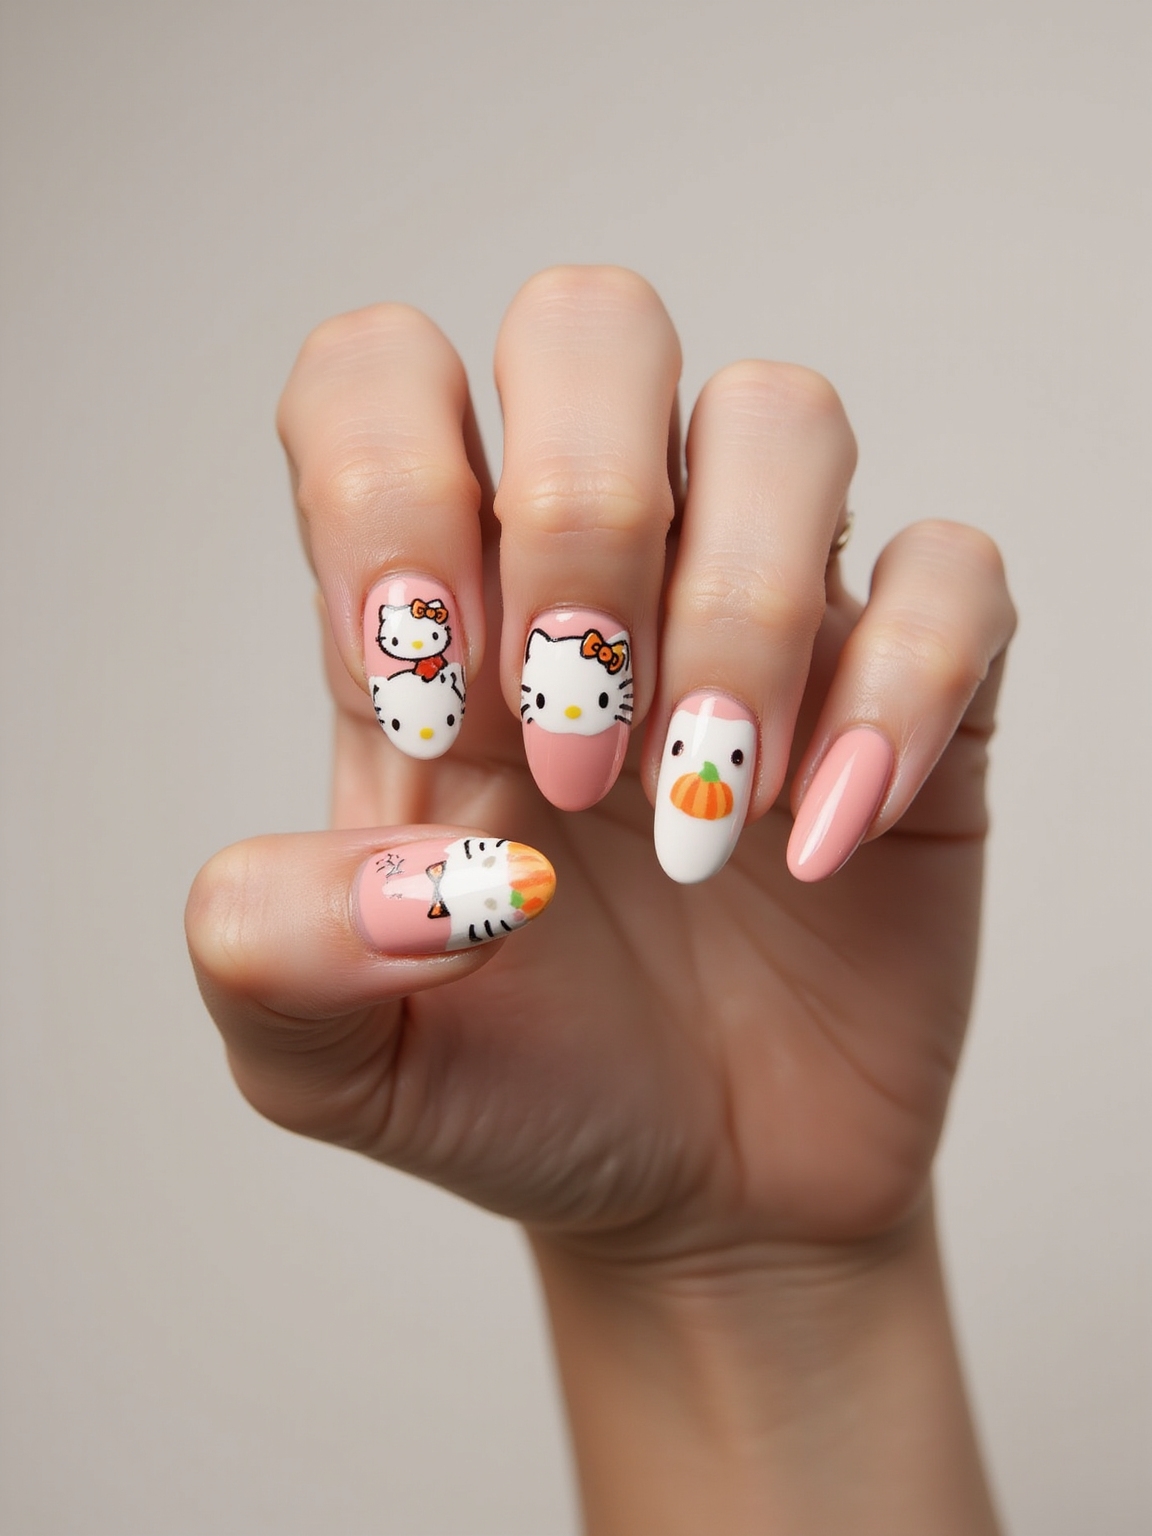
What does spooky-cute actually look like when you shrink it down to ten nails? Every October the same photo lands in my texts: a grinning pumpkin, a small bow, a whisker or two, nothing gruesome. That is the sweet spot these hello kitty halloween nails live in.
I pulled together the designs I reach for most this time of year, from pastel bows on glossy black to milky cobweb tips, plus honest notes on what actually holds up, what a set runs, and which ideas you can paint yourself at home.
Before You Pick a Design
| Look | Best for | Wear time and cost |
|---|---|---|
| Pastel bows on black | DIY-friendly accent nails | Polish about a week, under $15 at home |
| Hand-painted salon art | Statement, photo-ready sets | Gel two to three weeks, $65 to $95 at a salon |
Pastel Hello Kitty Accents on Inky Black

Pastel-on-black is the gentlest way to say Halloween without a single drop of fake blood. I start with a glossy inky base, let it dry fully, then add tiny pink bows, mint stars, and lavender whiskers so the sweetness pops against the dark.
A thin white outline around each shape keeps the details from smudging into the black, and alternating just two accent nails per hand leaves the look wearable to the office. Restraint is the whole game. For more motifs beyond the spooky season, the general Hello Kitty nail set is a good place to browse.
- Paint two coats of glossy black and dry fully between them
- Outline each bow or star in thin white first, then fill with color
- Seal with a glossy top coat so the raised details survive the week
Sunset French Tips With Sweet Bows

One of my favorite fall combos barely looks like Halloween until you glance twice. It is a soft ombré French that fades from baby pink into warm orange right at the smile line, finished with a small painted ribbon at each tip. The gradient does the heavy work, so the bows can stay tiny and sweet.
Sponge the pink and orange on while both are wet so they blend, then clean the edges with a small brush dipped in remover. Micro bows at the smile line and a rhinestone or two are all the detail it needs. Loud glitter would fight the fade, so leave it out here.
This one photographs beautifully and suits shorter nails, which makes it my pick for anyone who wants festive but has to type all day. If the softer end of the palette is your thing, it pairs naturally with a set of baby pink nails the rest of the year.
Spooky-cute works on restraint: one dark base, two sweet accents, and you stop before it turns busy.
Cozy Pumpkin Patch With Little Kitty Faces

A mottled orange base looks like a real pumpkin patch far better than one flat coat ever will. I blend two oranges with a whisper of nutmeg brown on a sponge, dabbing until it looks a little uneven on purpose. That imperfect texture is what sells the harvest feeling.
Keeping the Faces Even
Once the base is dry, I add cat faces on just a couple of nails, usually a ring finger and a thumb, so they pop without crowding. Thin leafy vines traced between the patches tie it together. Keep the faces simple: two dots, a nose, three whiskers, done.
Balance the two accent nails across both hands, and the whole set stays calm even with all that texture underneath. That balance keeps it from getting busy.
Crisp Pink-and-Black Webbed Tips

Webbed tips look intricate but come down to three or four confident lines. Over a sheer pink base, I paint sharp white or black strands radiating from one corner of each tip, then drop a mini satin bow at that corner so the whole thing stays on the cute side. Clean webs against a soft base is the entire look.
Use a striping brush and pull each line in one motion, because hesitating is what makes webs look shaky. Two crossing lines, a couple of connecting arcs, and stop. Precision beats density. Confidence is everything here.
This holds up well as gel and suits medium to long tips where the web has room to breathe. On very short nails I shrink it to a single corner accent. For a tidier relative of this idea, a reverse French tip frames the cuticle and works on any length.
A couple of terms worth knowing before you start:
📖Striping tape
Thin adhesive tape laid down for crisp lines, then peeled off before the top coat.
📖Decal
A pre-printed sticker sealed under a top coat, the quickest way to a clean Kitty face.
Ghostly White Kitty Silhouettes in Negative Space

Negative space keeps a pale ghost-cat looking soft and spectral. Skip it and the white just goes chalky. I like these crisp on an inky base or floated over a milky pink so the silhouette almost glows. A thin brush gives the cleanest edge, though decals are faster and just as sharp under a top coat. The empty room around each shape is the point, so keep bows and whisker hints sparse.
- Choose a sheer or dark base, whichever makes the white pop most on your skin tone
- Float the silhouette with a thin brush or a decal, then let it set before sealing
- Add at most one bow so the negative space stays the star
Sparkly Glitter Gradient With Hello Kitty Decals

Glitter is the most forgiving base for anyone still building confidence, which is exactly why it is what I hand first-timers who want sparkle without perfect lines.
I fade fine glitter from a sheer pink at the cuticle to a twilight purple at the tips, sponging in thin layers so it shimmers like moonlight. Once it is dry, a few small decals sit on top and look cute against the glow, and the uneven sparkle quietly hides any wobble underneath. That is its real gift.
- Sponge glitter in two or three thin passes rather than one thick coat
- Pick two shades that share an undertone so the fade looks smooth
- Seal with a thick top coat, since glitter is gritty and needs it to feel even
Checkerboard Nails in Spooky Pastels

Black-and-white checks shout the season; a foggy pastel grid whispers it. I alternate lavender, mint, dusty peach, and a smoky blue square by square, which keeps the pattern festive but soft. A little striping tape is the shortcut to crisp edges if freehand checks feel like too much.
For the Hello Kitty nod, I layer a small bow or whisker-thin lines over one square per nail, never all of them. One accent nail per hand carries the theme so the rest can stay quiet.
- Pick two to four pastels drawn from the same corner of the color wheel
- Lay striping tape in a grid, paint, then peel before the polish fully sets
- Accent a single nail per hand so the checks do not compete
Galaxy Gradient With Crescent Kitty Moons
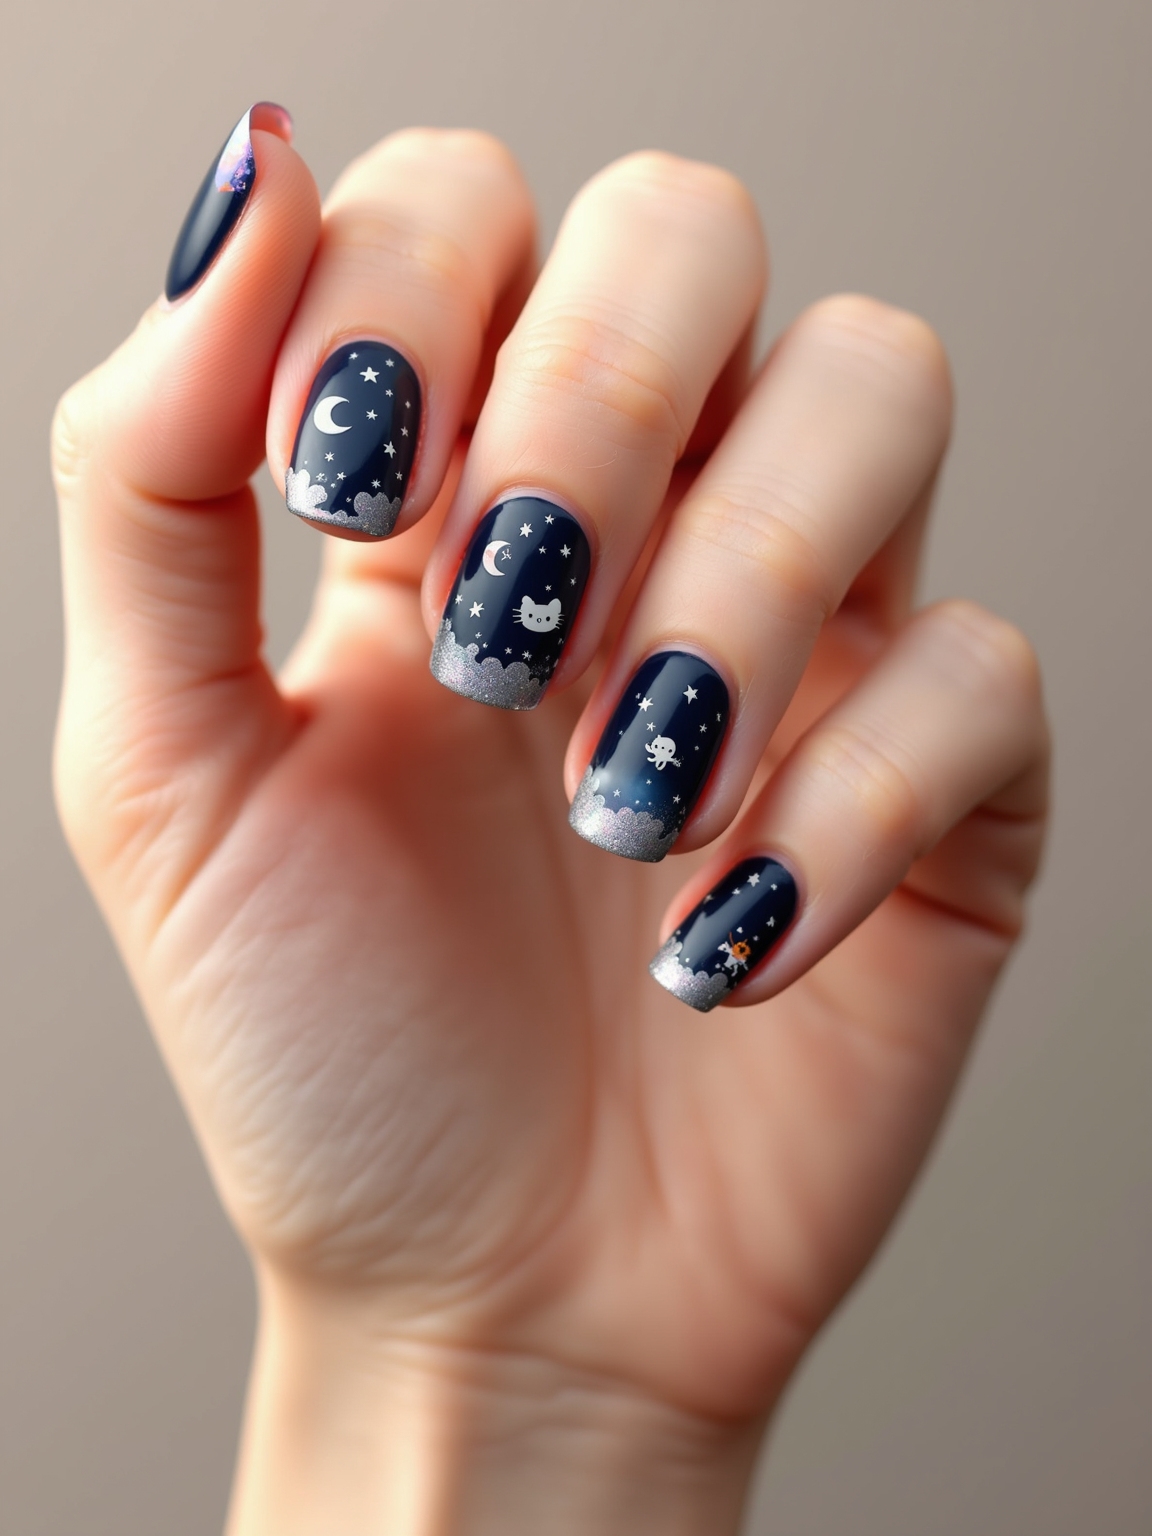
A galaxy gradient lives or dies on depth. One flat navy falls flat. I sponge inky black, plum, and a deep blue together until they blur like real midnight, then mist the finest sparkle over the top for stars. Little crescent-moon cats on two nails become the moons, painted bright white so they stand out against all that dark.
- Layer three dark shades wet-on-wet with a sponge for real depth
- Add micro-glitter sparingly so it looks like stars, not a disco
- Paint the moon cats last in opaque white so they stand out
Playful Pumpkin Grins and Kitty Noses

This is the playful one, and the faces are the payoff. Over whatever base you like, I sketch grinning jack-o’-lantern mouths on the thumbs and sweet whisker dots on the ring fingers so each hand has a little character. Balance matters more than symmetry, and one big grin per hand is plenty.
How Long It Lasts
A fine liner gives the cleanest curved smile; a dotting tool handles the round pumpkin eyes and the kitty nose in one tap. Work while the base is dry but the design polish is still fresh so the colors do not bleed into each other.
The most common fix I make on these is a lopsided grin, so sketch it pencil-light first, check both hands side by side, then commit.
| Base color | Kitty accent | The vibe it gives |
|---|---|---|
| Glossy black | Pastel pink bow | Sweet-goth contrast |
| Milky lavender | White whiskers | Airy and a little eerie |
Misty Pastel Cobweb French Tips

This is the softest design I keep on hand for anyone who thinks the season is too harsh for her taste. The base stays a milky lavender, the tips a sheer blush, and a fine brush sketches just a few web strands from the corners, nothing dense. One small bow near a cuticle is the only real ornament. It feels airy and seasonal without a single spooky note, which is why nervous clients tend to land here.
- Keep the base sheer so the webs stay light and delicate
- Pull only three or four strands per nail, since restraint reads as elegance
- Add one bow, not five, so the manicure stays soft
Quick Hello Kitty Press-On Sets

Press-ons are the fastest route to a themed manicure, box to done in about ten minutes, which makes them my pick for last-minute plans. A good Hello Kitty Halloween set runs $8 to $20 and lasts a day or two on tabs, up to a week or so on glue.
The finish is only as good as the prep, though. Prep decides it. Wipe each nail with alcohol, match every press-on to your natural nail width, and file the free edge before you commit. Tabs are kinder to your nails for a one-night wear, while glue earns you the longer stretch.
- Clean each nail with alcohol so oils do not loosen the bond
- Size every tip to your nail bed before applying any adhesive
- Use tabs for a night out, glue for a week, and never yank them off
Hand-Painted Hello Kitty Statement Art

Some designs are worth booking out. Hand-painted Hello Kitty art, a mischievous face peeking from a moonlit tip, candy-corn stripes, a scatter of tiny bows, is fiddly enough that a skilled tech gets a cleaner result than most of us manage at the kitchen table.
What to Expect to Pay
Bring reference photos, settle on a cohesive palette before you sit down, and talk through wear length so the artist can plan the build. The more specific your inspiration, the closer the result comes to the picture in your head.
It photographs like a dream and, honestly, is the version people stop you to ask about.
How to Get the Look at Home
If you are painting these yourself, the order matters more than the skill. Start with clean, lightly buffed nails and a base coat, build your background color fully before any detail, and let every layer dry so nothing drags. Keep a small brush, a dotting tool, and a bottle of remover for cleanup within reach, because most so-called mistakes are just edges you can tidy before the top coat goes on.
Seal everything with a glossy top coat and re-cap the tips every few days to stretch the wear. And if a design feels beyond your patience on a Tuesday night, that is exactly what press-ons and your local nail desk are for. For a warm-toned alternative when you want the season without the spooky, fall acrylic nails scratch the same itch, and a set of simple fall nails carries you into November.
The Sweet Spot Between Cute and Creepy
The through-line in all of these is restraint: one confident base, a couple of sweet accents, and the discipline to stop before it turns busy. That is what keeps Hello Kitty Halloween nails on the charming side of the line, well clear of costume territory.
Save the two or three designs that fit your length and your patience, and match the effort to your week, press-ons for a quick party and a booked chair for the showstopper. Bookmark this and come back when October rolls around again.