It’s a quiet Sunday, you’ve got a fresh box of plain press-on tips, a buffer, and twenty minutes. That’s really all it takes to turn a blank set into something that looks like it came from a salon, no appointment, no $50 bill, no two-hour sit. Press-ons have come a long way, and a little polish work on top turns them into tiny custom art.
These 12 designs run from a glossy black coffin you can do with two coats to a marble swirl that looks far harder than it is. For each I’ll walk through the technique, the tools you actually need, and the prep that decides whether they pop off in a day or last a solid week. Grab your set and pick where to start.
Press-On Success in Four Lines
| Step | Why it matters | Quick tip |
|---|---|---|
| Size and file first | Tips that fit your nail bed look natural and stay on | Pick the closest size, then file the sides to match |
| Prep the natural nail | Oil-free nails are what makes the bond hold | Buff lightly, then wipe with alcohol before applying |
| Decorate before applying | Easier to paint a tip on a table than on your hand | Do the art, let it cure, then glue |
| Seal the edges | Capped edges resist lifting and chipping | Run topcoat over the free edge and around the sides |
Glossy Black Coffin Set
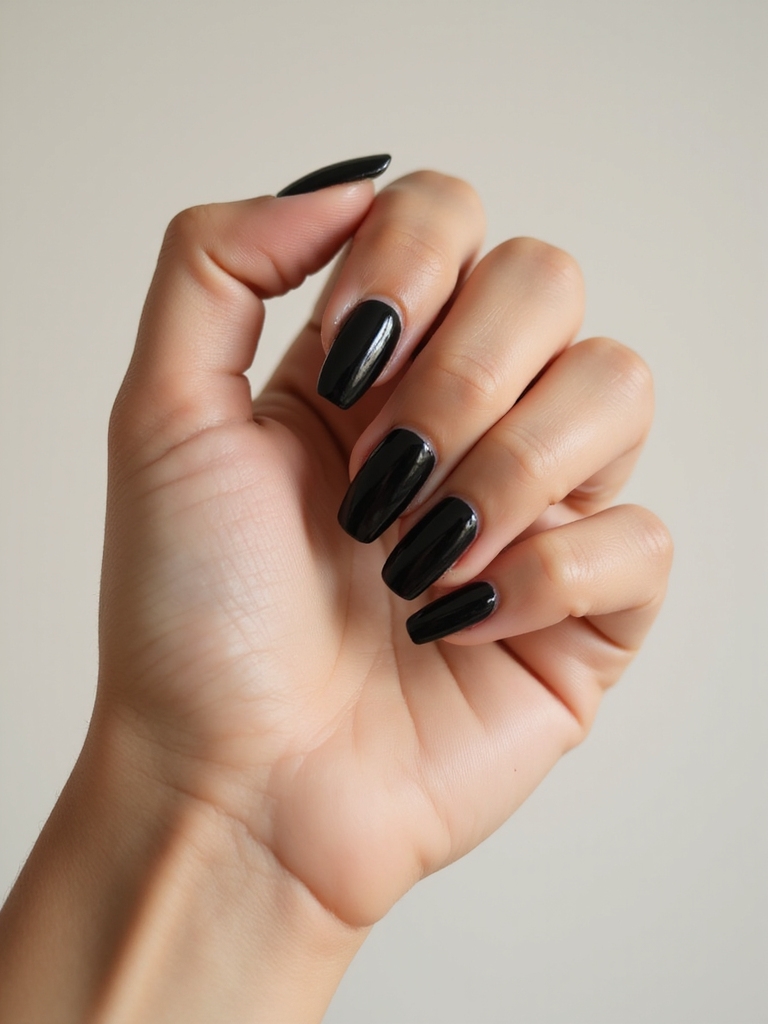
This looks dramatic but it’s one of the easiest sets to pull off, which makes it a perfect first DIY. Size the tips, file the square edges down to that tapered coffin shape, then apply a bond, a base, and two inky coats. A glassy topcoat is what makes the hands look couture instead of craft.
The whole trick is in the shape and the shine: a clean coffin file and a high-gloss seal read expensive on their own, no art required. Pair it with silver rings for instant power. If you love the silhouette, my coffin shape guide covers keeping that length from snapping.
Cotton Candy Pastel Ombre
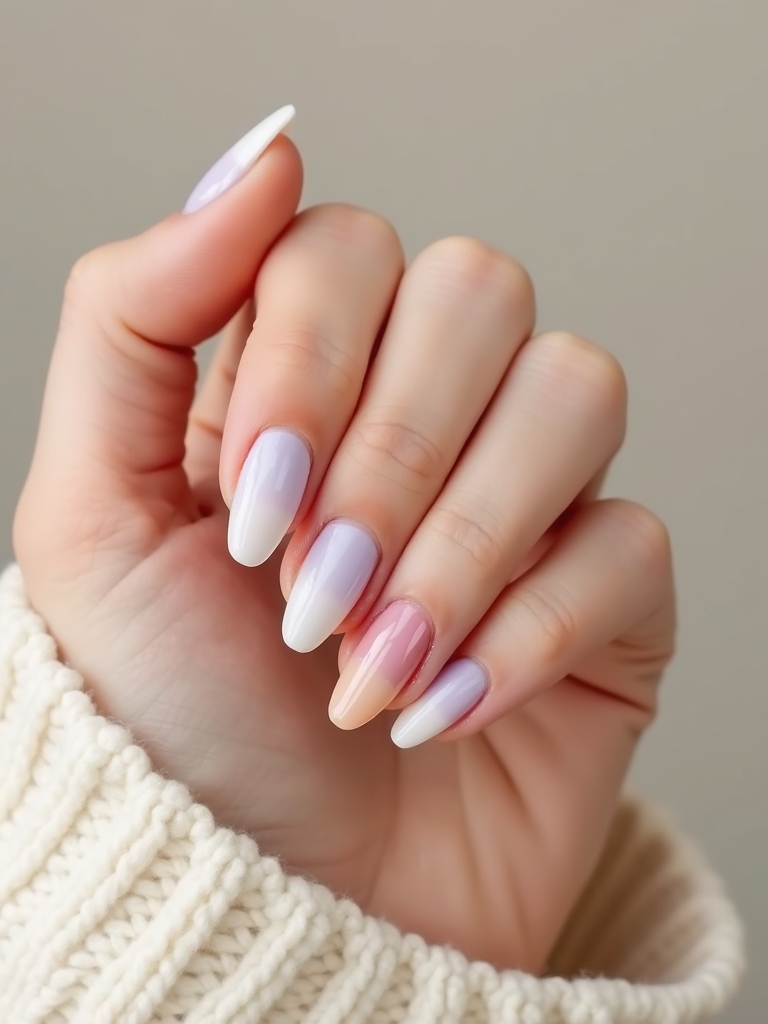
When you want something softer, a pastel ombre looks like cotton candy kissed each fingertip. Buff the tips lightly, then sponge blush pink into lilac, easing the blend with a sheer milky topper so the two colors melt together with no hard line.
A whisper of baby blue on a couple of tips keeps it airy and a little unexpected. Seal with a glossy topcoat and you’ve got a sugary, cloud-soft set. The sponge is the secret to a smooth fade; dab rather than swipe, and build the gradient in thin layers. My ombre nail guide has more on the blending.
Not sure where to start? Pick by your skill and time:
🎯Total beginner
Glossy black coffin or a matte-and-glossy split, just polish and a clean seal.
🎯Want a wow with little effort
Magnetic velvet cat-eye or chrome powder, high impact, low skill.
🎯Up for a project
Water marble or tortoiseshell, messier and more patient but so satisfying.
🎯Love detail, hate painting
Floral decals or a few rhinestones do the art for you.
Mirror-Finish Chrome Powder Press-Ons
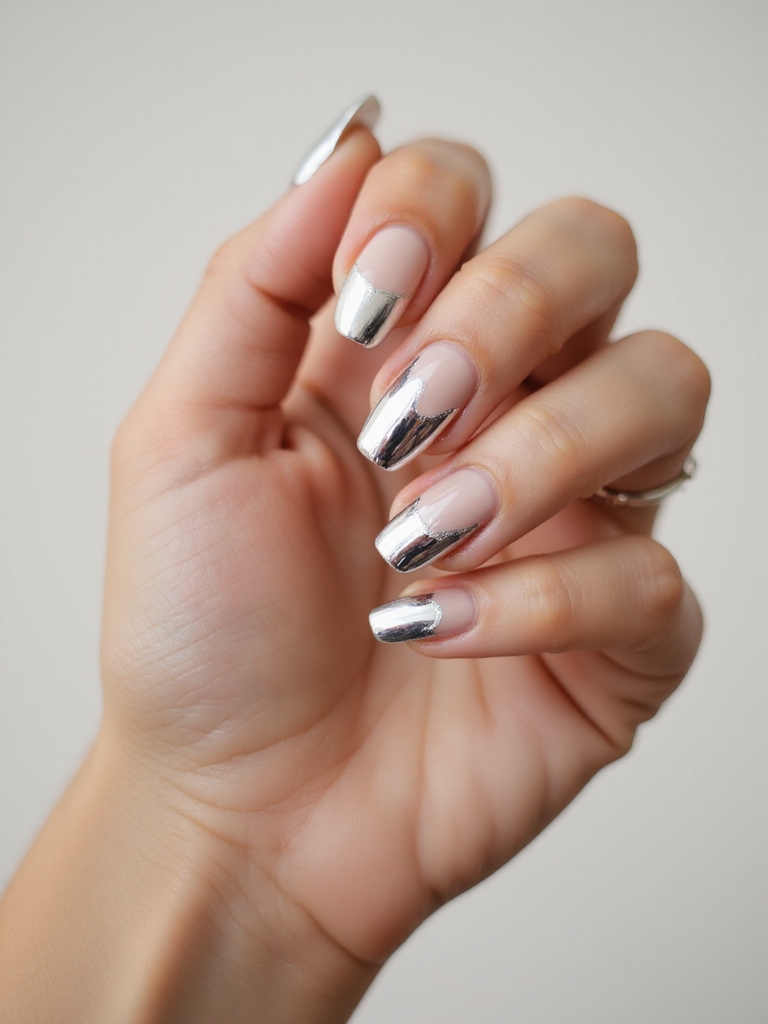
Chrome powder is the fastest way to turn plain tips into tiny mirrors, the kind of finish that catches every bit of daylight. It does need a gel base to grip the powder, but the result is worth the small learning curve:
- Apply a gel base color and cure it to a tacky, no-wipe finish, since chrome only sticks to a cured gel surface.
- Work the chrome on with a soft applicator, pressing in small circles until the tip flashes like a mirror.
- Seal with a glossy gel topcoat and flash-cure, then clean the edges. My chrome nail guide covers the other shades it comes in.
Bold Geometric Negative Space
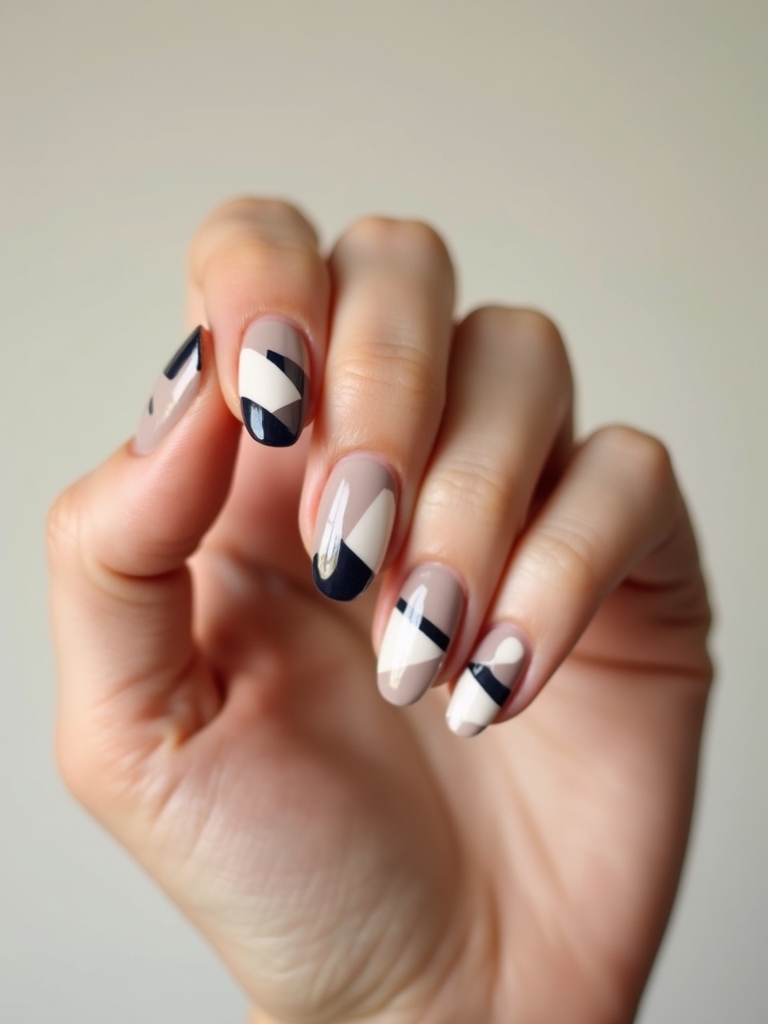
Negative space turns a half-bare nail into full drama, and it’s one of the most budget-friendly designs because you use less product than a full nail. Map crisp triangles, thin chevrons, or peekaboo arches with striping tape, then swipe bold color into the taped-off sections for sharp contrast.
Peel the tape while the polish is still slightly wet for the cleanest edges, then seal. For extra interest, alternate glossy and matte topcoats across the bare and colored sections. It’s modern, quick, and endlessly customizable to your mood or outfit.
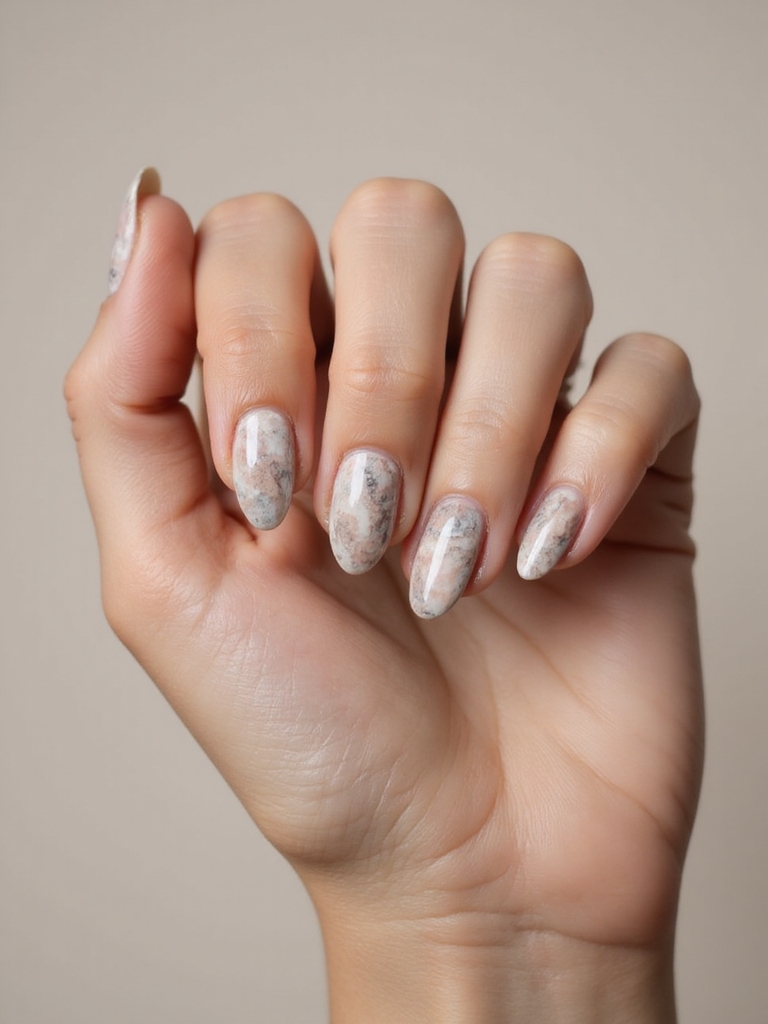
Glossy Tortoiseshell Statement Nails
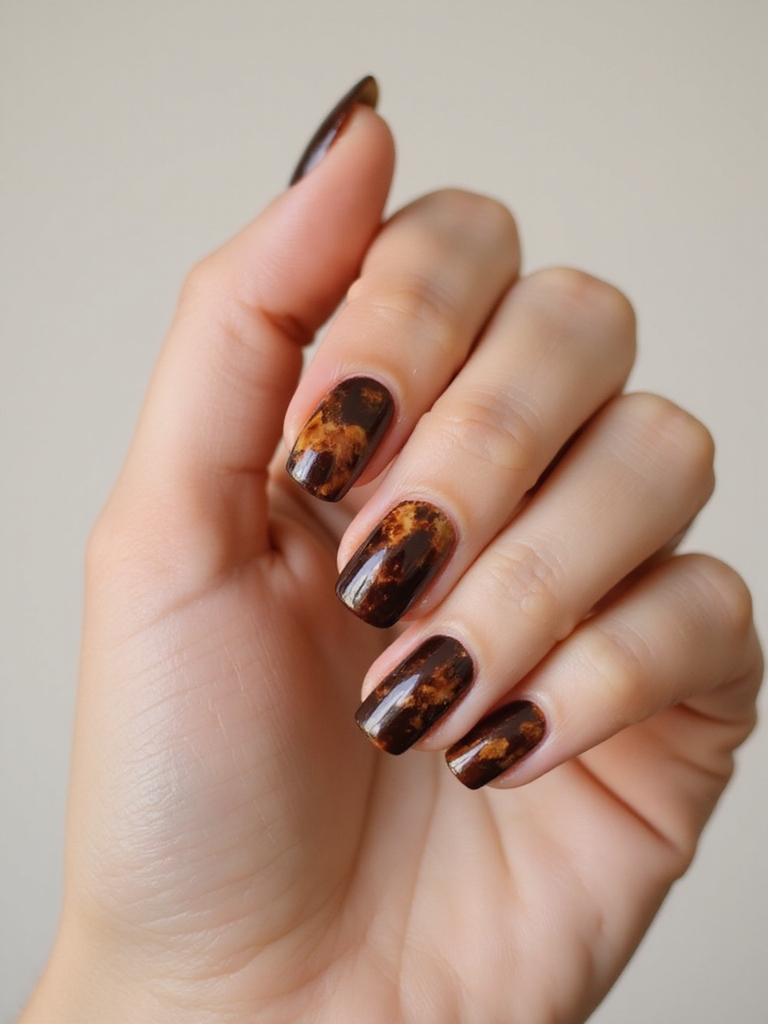
Tortoiseshell looks luxe and costs almost nothing to DIY, which is exactly why I love it on press-ons. Rich amber swirls, inky spots, and honeyed depth come from layering a few sheer browns, no fancy tools needed.
Why the spots should look irregular
The technique is forgiving because the pattern is meant to be irregular. Layer a sheer caramel base, then dab on smoky brown and tiny black flecks while it’s wet.
Soften the blobs by touching them with a brush dipped in alcohol, which bleeds the edges into that organic, glassy tortoiseshell look. Seal twice for real depth, and finish with cuticle oil for shine. The imperfection is the point, so don’t fuss over making the spots match.
Dewy Milky Glazed-Donut Sheen
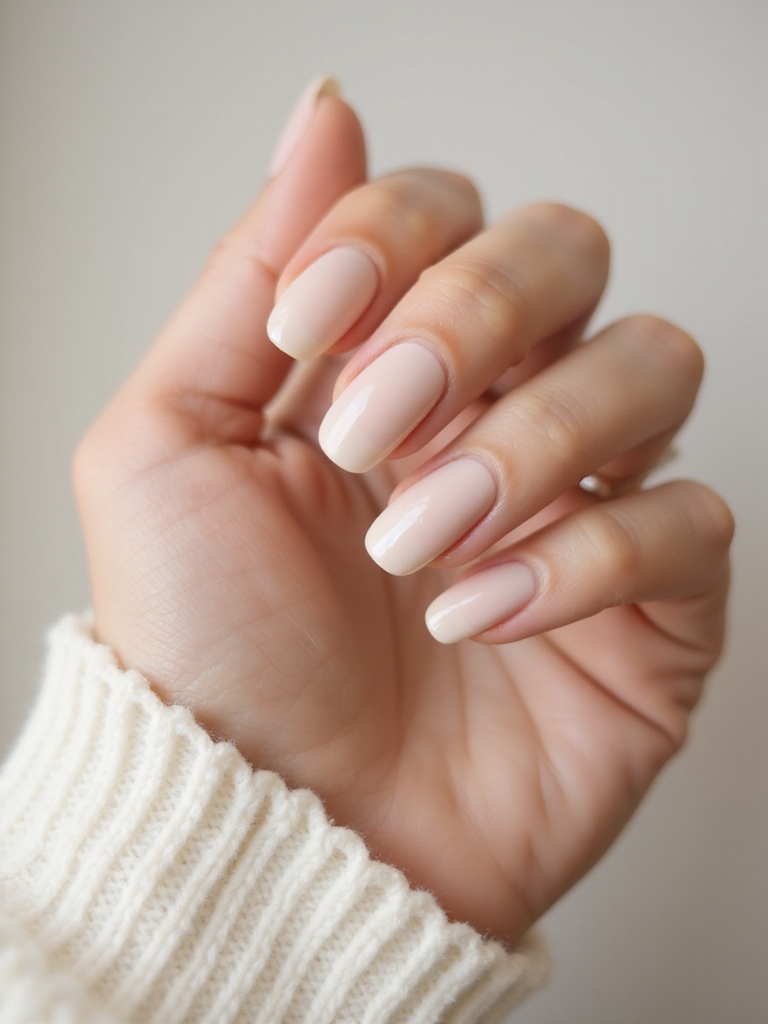
The glazed-donut look is all soft, dewy glow with a whisper of shimmer, and it’s quietly become a year-round favorite. A sheer milky base makes the nails look plush, like frosting that just set, then a dusting of fine chrome over the top gives that sugary, mirror-kissed gleam.
It’s subtle enough for work and pretty enough for anything, the press-on take on an everyday glow.
- Start with a sheer milky white or pink base so the finish looks soft, not opaque.
- Press a fine pearl or white chrome over the milky base for the glaze, keeping the layer barely there.
- Seal with a glossy topcoat. For the base shade on its own, my milky white guide is a soft starting point.
📋Your DIY Press-On Kit
- ✓A full set of plain press-on tips in your sizes, plus nail glue or sticky tabs.
- ✓A gentle file and buffer, alcohol wipes, and a cuticle pusher for prep.
- ✓Your polishes or gels, a fine liner brush, and a glossy and matte topcoat.
- ✓Extras for specific looks: chrome powder, a magnet, decals, rhinestones, or a sponge.
Candy-Box Skittle Manicure

A skittle manicure, a different color on every nail, only works when the colors feel like they belong together. The trick to keeping it fun rather than frantic is choosing shades that share an undertone: raspberry, peach, lemon, mint, and a grounding cocoa, say.
Choosing colors that belong together
I start with a vibe, sunset, sorbet, sea glass, then pull shades that all chat nicely with each other, so every nail feels like part of one set.
Balance the bold pops with one or two soft neutrals, and use your thumb as an anchor shade with the brights alternating across the fingers. That little bit of planning is what makes a Skittle set look polished and intentional, not like a leftover-polish accident.
Velvet Magnetic Cat-Eye Manicure
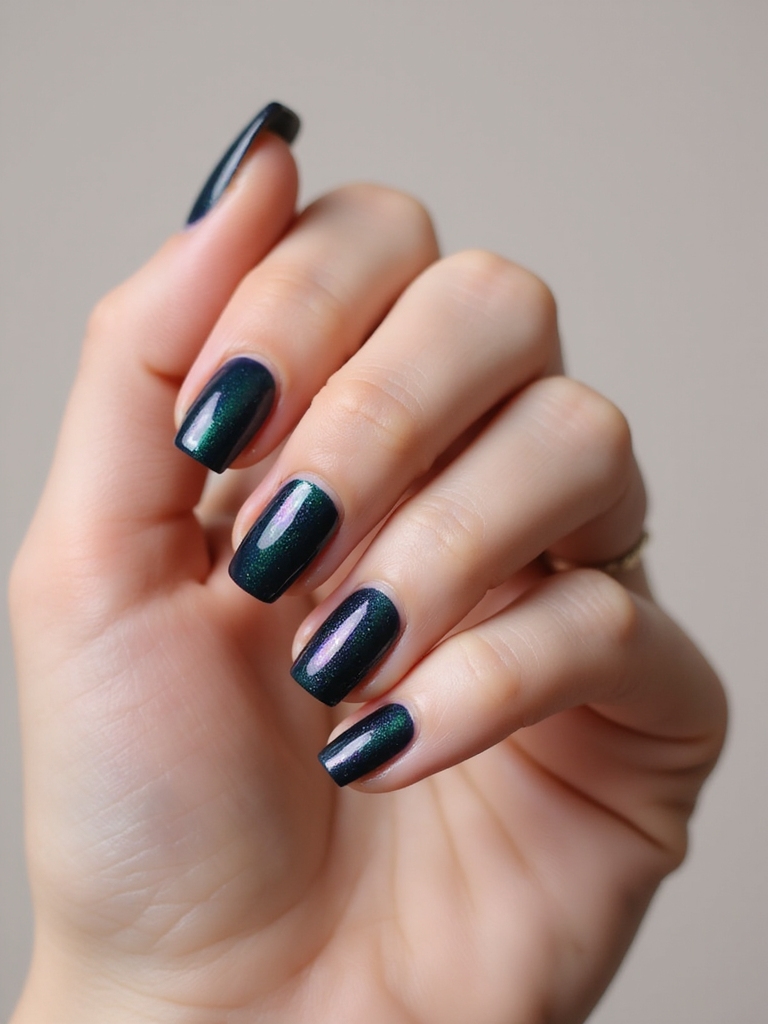
This looks like salon sorcery and takes about a minute per nail. Swipe on a magnetic gel, hover the magnet diagonally over the tip, then nudge it to sculpt a shimmering, velvety arc of light, then lock it with topcoat and cure. The shimmer shifts as your hand moves, like crushed velvet.
Deep jewel tones show the effect best, midnight plum, emerald, or steel, and the shape you choose changes the mood: short ovals stay chic, while almond tips lean dramatic. It’s one of the highest-impact, lowest-effort designs you can do at home.
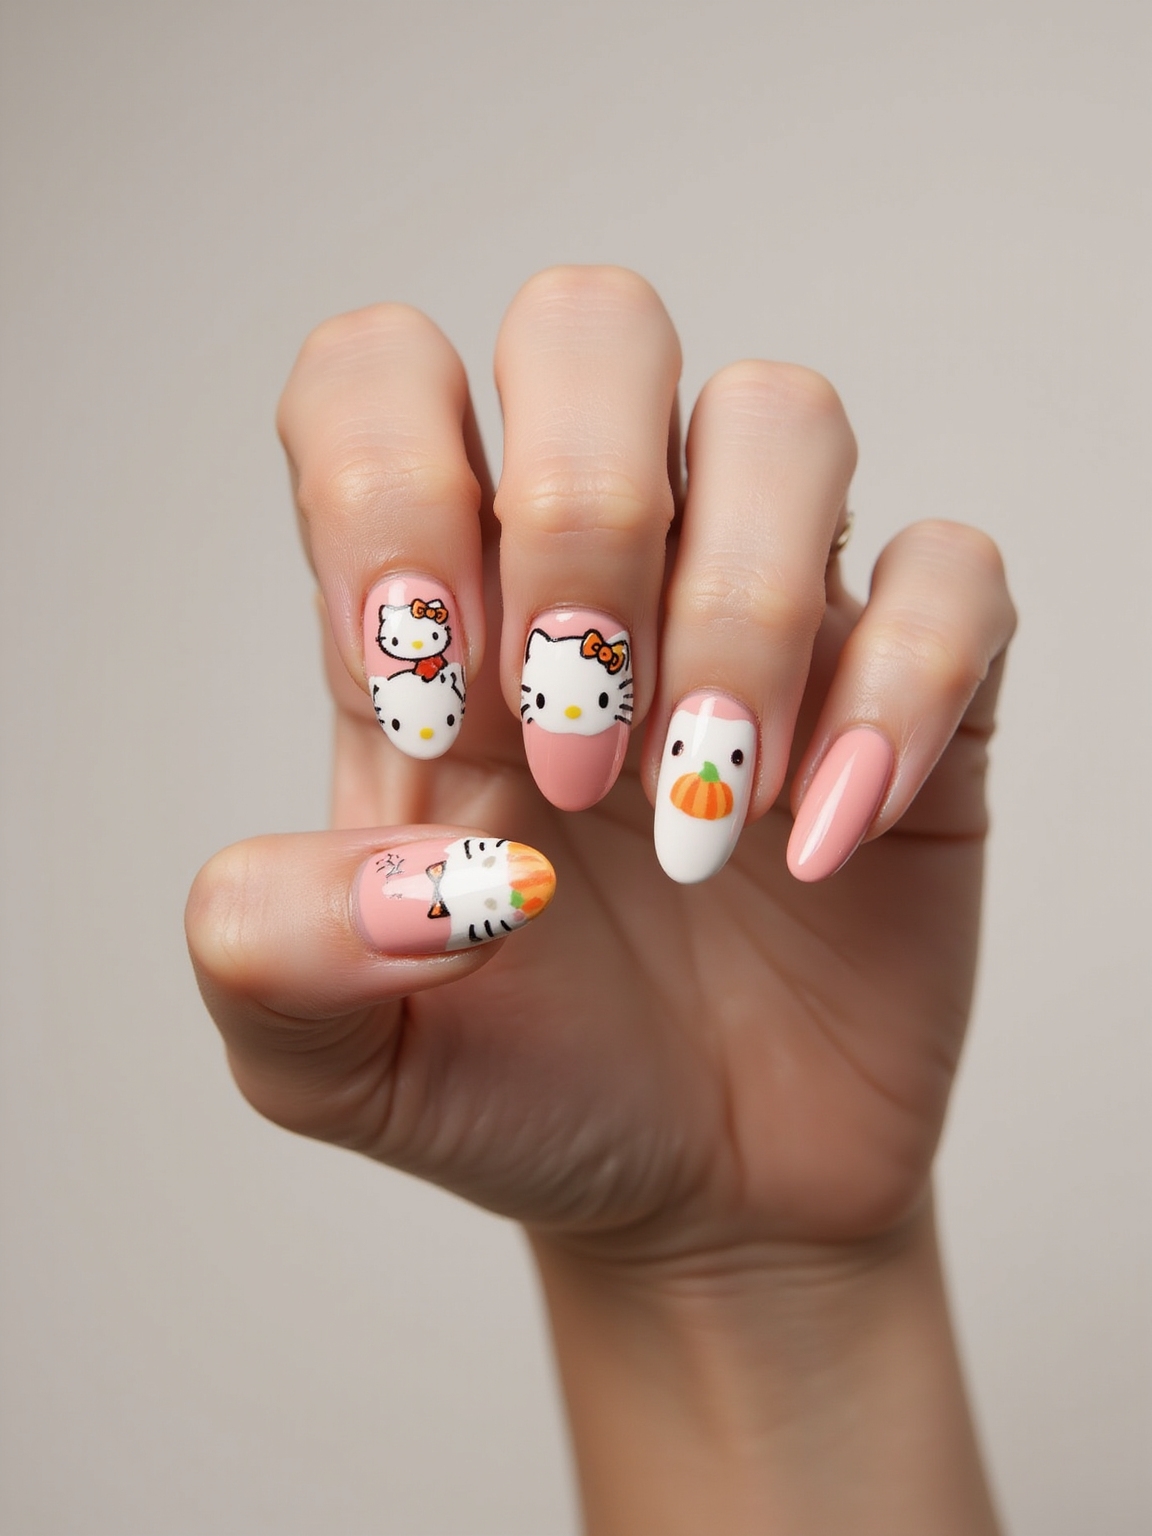
Velvety Cat-Eye With Floral Decals
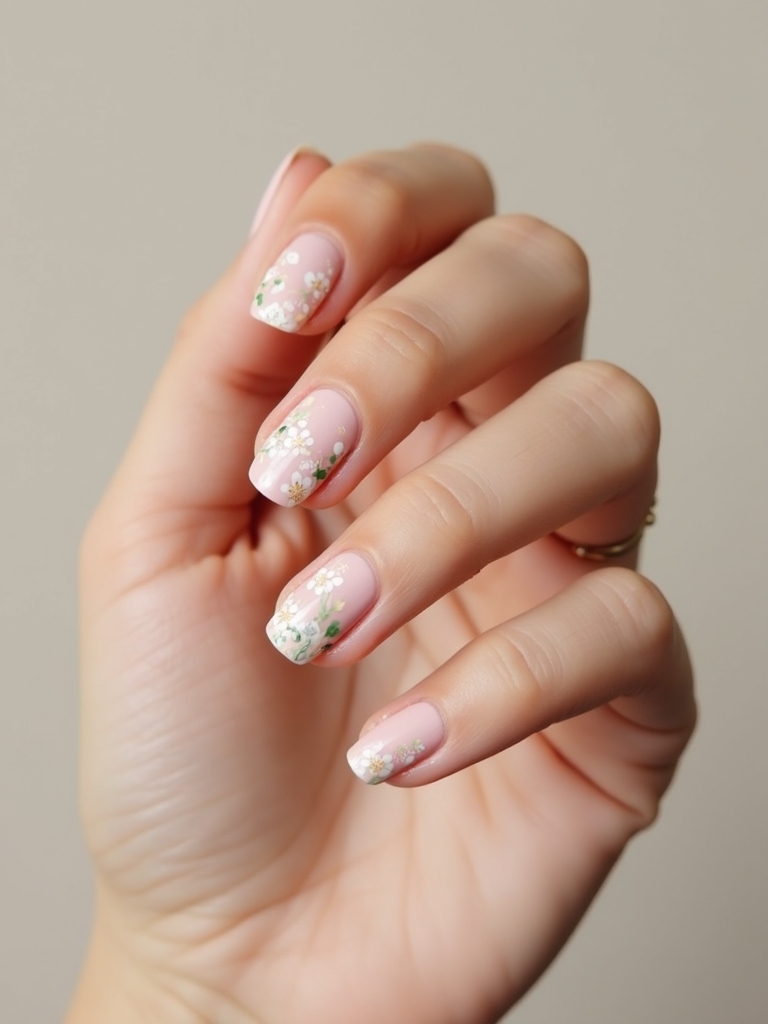
This softens that velvet cat-eye with dainty floral decals, tiny blossoms that look hand-painted without any brush skill. The magnetic shimmer underneath gives the flowers a luxe, dimensional backdrop.
Placing decals without trapping bubbles
Decals are the easiest way to get detailed art on a press-on, since the work is already done for you. The only skill is placement.
Clean and base-coat the tip first, place the decals with tweezers for precision, then smooth out any bubbles and trim the edges flush. Lock everything under two thin topcoats so the petals don’t budge. Keep the flowers to a few nails so the set stays delicate rather than busy.
The order that makes press-ons last a full week:
1Decorate off the hand
Paint and seal your design on the loose tips first, on a table where it’s easy, and let everything fully dry or cure before you go near your hands.
2Prep, then bond
Buff your natural nails lightly, wipe them with alcohol so they’re oil-free, then apply glue and press each tip on with firm pressure for a few seconds. Cap the edges with topcoat.
Marble Swirl Press-On Tutorial
Water marbling looks like wizardry and is mostly patience. You need plain tips, two or three polishes, a fine liner, a toothpick, and a cup of room-temperature water, plus some tape around your work area because it gets messy.
The basic move is dropping polish into the water so it spreads into rings, then dragging a toothpick through to create the swirl before dipping the tip in to pick up the pattern.
Room-temperature water and fresh, fast-spreading polish are what make or break it; cold water or old polish won’t spread into clean rings. Seal with a glossy topcoat once dry. It takes a few tries to get the hang of, so practice on a couple of spare tips first. My marble nail guide covers the no-water version too.
Delicate Rhinestone Accent Set
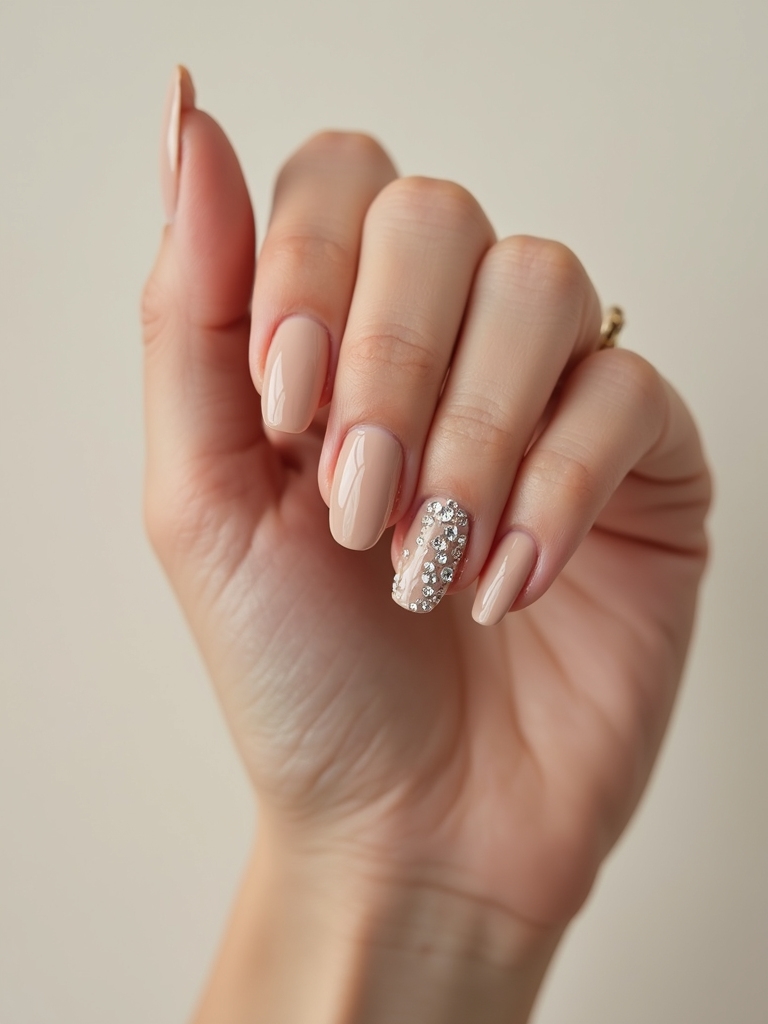
Rhinestones look luxe and cost very little, but the secret to keeping them chic is restraint. Keep the bling to one or two nails, a tiny constellation, a delicate cluster, or a single statement gem, so the look stays light and intentional.
Application is simple but the glue matters. Prep with a buff and a dehydrator, base-coat, then map your design before you start placing stones.
Use a gel glue rather than regular polish to set the stones, since it holds far better, and flash-cure it. Then run topcoat carefully around the edges of each stone to lock it down, which is what stops them popping off in a day.
Matte and Glossy Split Manicure
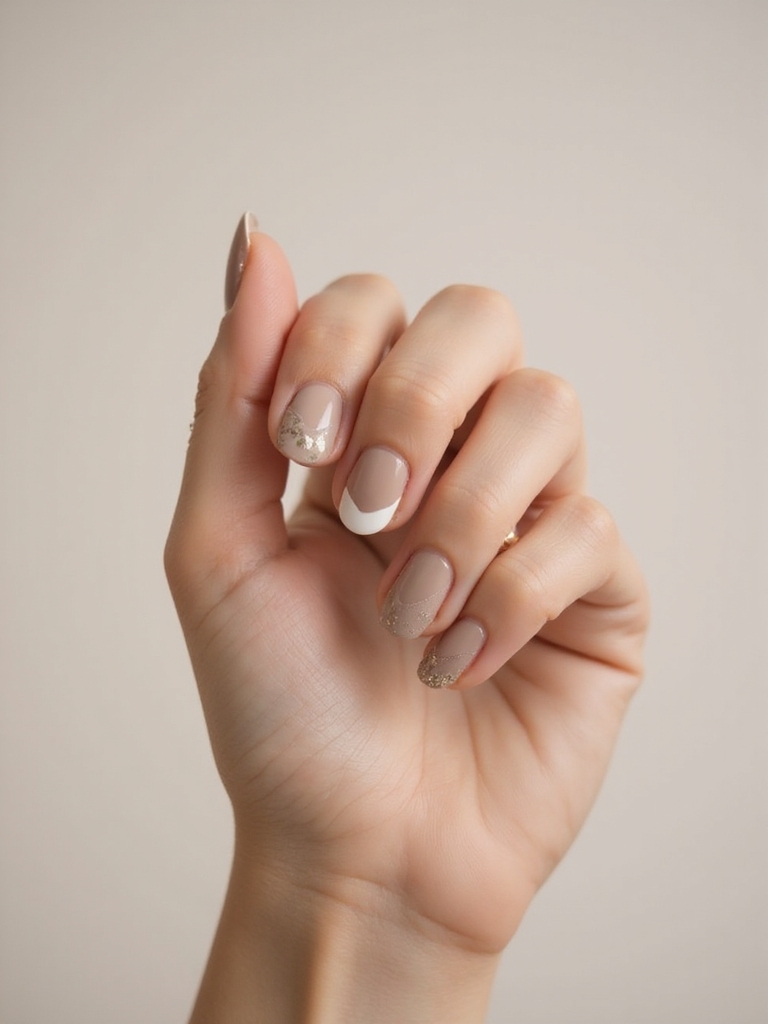
You don’t need any color or glitter to make a set look designed, just two finishes. Pairing matte velvet with glassy shine creates contrast that catches light and looks salon-sleek with almost no effort. Here are the easiest ways to play it:
- Flip a French tip: a matte base with a glossy crescent, or the reverse, for a subtle, modern twist.
- Do glossy dots or a glossy shape over a fully matte backdrop so the shine reads as the design.
- Seal each section carefully so the matte and gloss stay crisp where they meet; a sloppy edge is the only thing that gives it away.
Your Next Set Is a Swipe Away
The real magic of DIY press-ons isn’t any single design, it’s that you can change your whole look in twenty minutes for the price of a coffee, and reuse the tips if you take them off gently. Whether you start with a foolproof glossy coffin or work up to a water marble, the two things that decide your results are the same every time: the prep underneath and the seal on top.
Get those right, buff and de-grease before you bond, cap every edge after, and even your first set will look like it came from a salon and last most of a week. Pick the design that matches the time you’ve got today, keep a few spare tips for practice, and you’ll never wait two hours in a nail chair again unless you want to.