Funky nails get a reputation for being fussy or only for art-school types, but the truth is most of these looks are easier than a perfect classic French. The whole point is play: clashing color, wonky lines, and a little chaos that still looks intentional. Done with a steady base and a good top coat, they look curated rather than messy.
Below are 11 funky manicures worth trying, each with the shade combos that work, the technique behind it, and an honest note on cost and wear. I have painted versions of all of these at the nail desk, so I will also flag the ones that are forgiving for beginners and the ones worth booking a pro for.
Funky Nails, Quick Answers
Are funky nails hard to do at home? Many are not. Squiggles, checkerboard, and sticker looks are beginner-friendly; chrome, aura, and fine line work are where a pro earns their fee.
What do funky nails cost? A gel manicure runs about $35 to $60, with detailed art adding $15 to $40 on top. Press-ons let you wear the look for $5 to $20.
How long will they last? Gel art holds up two to three weeks with a good top coat; regular polish chips within days, so seal it well.
Do bright colors work on deeper skin tones? Beautifully. Neons, chrome, and jewel tones pop especially hard against deep skin, so lean into saturation rather than pastels if you want maximum contrast.
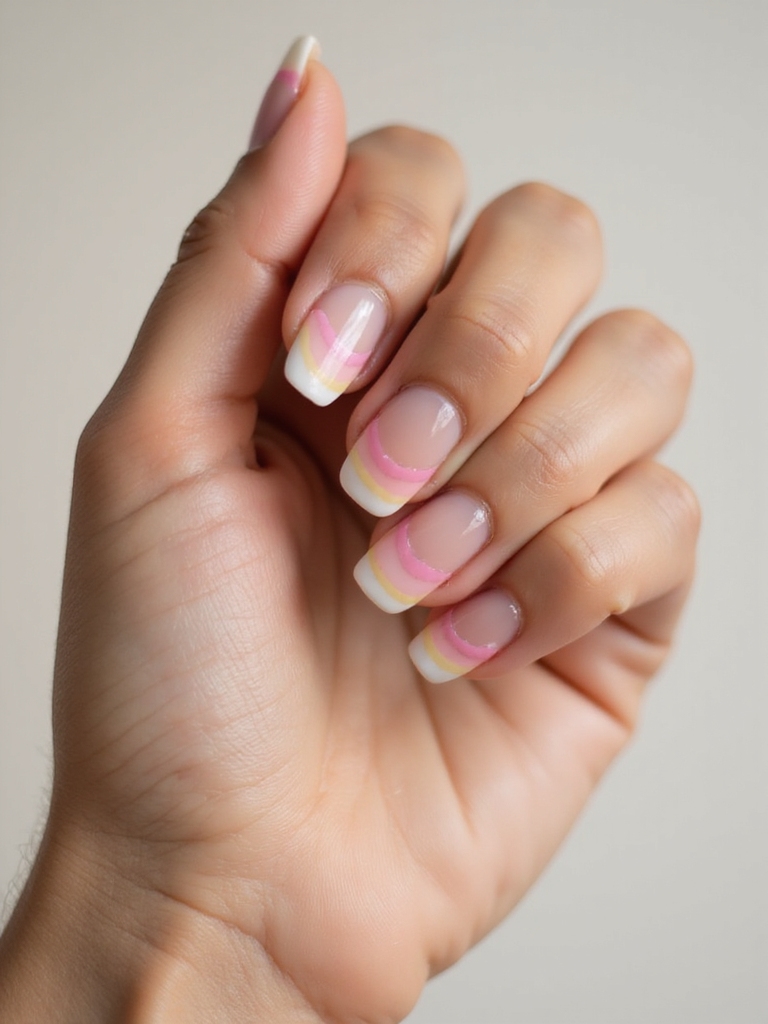
Neon Clash French Tips

The fastest way to make a French manicure funky is to throw the rulebook out on the color. Instead of a soft white edge, paint the tips in two clashing neons, coral against cobalt, lime against lavender, or cherry against tangerine, and keep the base sheer so the line stays crisp. Varying the tip width from nail to nail keeps it from looking like a uniform set.
This one is forgiving for beginners because the tip hides small mistakes, and clean-up around the edge fixes the rest. Neon shows up brightest over a milky base, and it has serious payoff on deep skin, where the brights almost glow. Seal with a glossy top coat, or matte one hand and gloss the other for a little extra attitude. If you like the format, my modern colorful French tips guide has more pairings.
Monochrome Squiggles With Neon Accents
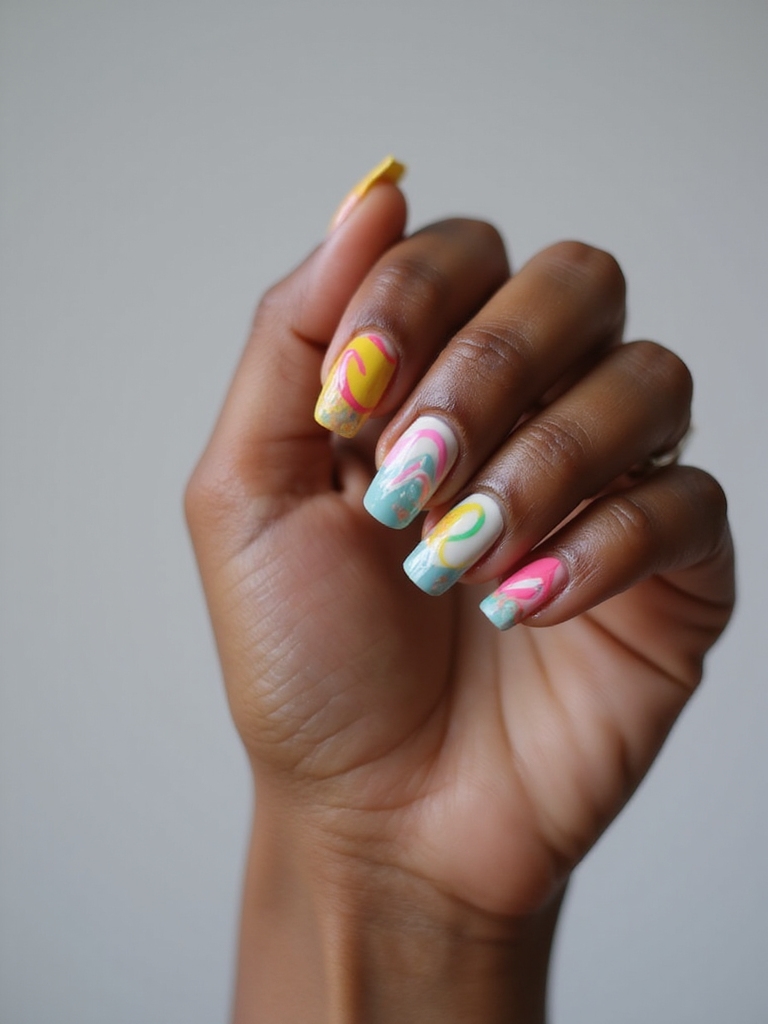
Squiggle nails are the gateway to line art because wobble is the whole aesthetic. There is no such thing as a line that is too imperfect here, which takes the pressure off. The chic version keeps a clean, sheer base with glossy black or creamy white waves hugging the edge of each nail.
Keeping the Lines Loose
To keep it from reading flat, punch up a couple of nails with a single neon wavy line while the rest stay monochrome. That balance of restraint and pop is what makes it feel gallery-cool instead of busy.
Use a thin liner brush and thinned-out polish or gel paint, and rest your painting hand on a flat surface to steady it. This is very doable at home with patience.
Micro and Chunky Checkerboard Mix
Checkerboard had its big moment, and mixing scales is how you keep it fresh. Pair tiny micro checks on some nails with bold chunky squares on others, then rotate the colors so no two nails feel identical. Pastels feel sweet, neons turn loud, and moody earth tones feel grown-up, so the palette sets the whole mood.
A little negative space between the squares gives the eye room to breathe and stops it from looking like a busy grid. Outlining a few squares in a contrast color adds a hand-drawn, curated touch.
- For precision: use striping tape or a small square stamp instead of freehand.
- For balance: keep one or two nails simple so the checks feel intentional.
- For wear: seal with a thick glossy top coat, since pattern edges catch and lift first.
“The single thing that separates funky nails that look curated from ones that look messy is the top coat. A thick, glossy seal pulls clashing colors and wobbly lines together and makes the whole set look intentional, so never skip it and reapply every few days to fight chips.”
Retro Smiley Doodle Nails
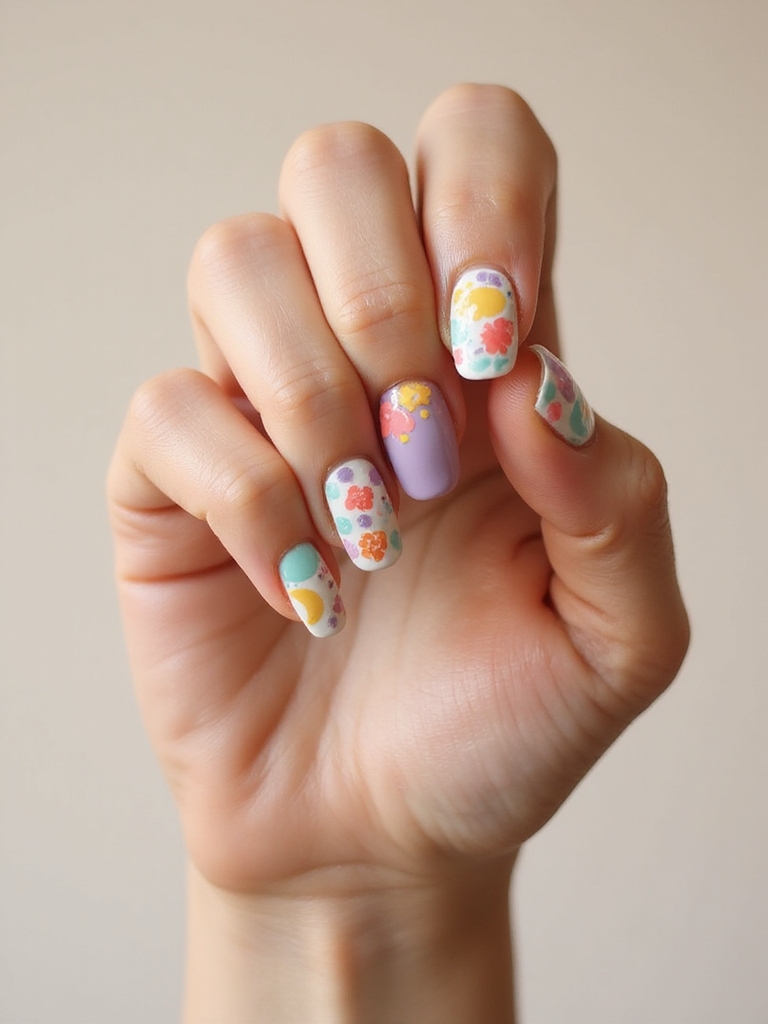
Nothing says playful faster than a retro doodle set: squiggly daisies with smiley centers, tiny stars, and poppy seventies colors scattered across a glossy base. The charm is in the imperfection, so freehand wobble actually helps the look. Mix small doodles with negative space, then let one oversized flower or smiley be the star of the set.
- Start with a base and let it cure fully before any art goes on top.
- Use a dotting tool for smiley eyes and flower centers, or peel-off stickers if freehand feels daunting.
- Seal twice with a glossy top coat so the raised doodles do not snag. My flower nails guide has more floral takes.
Mixed Chrome Skittle Manicure
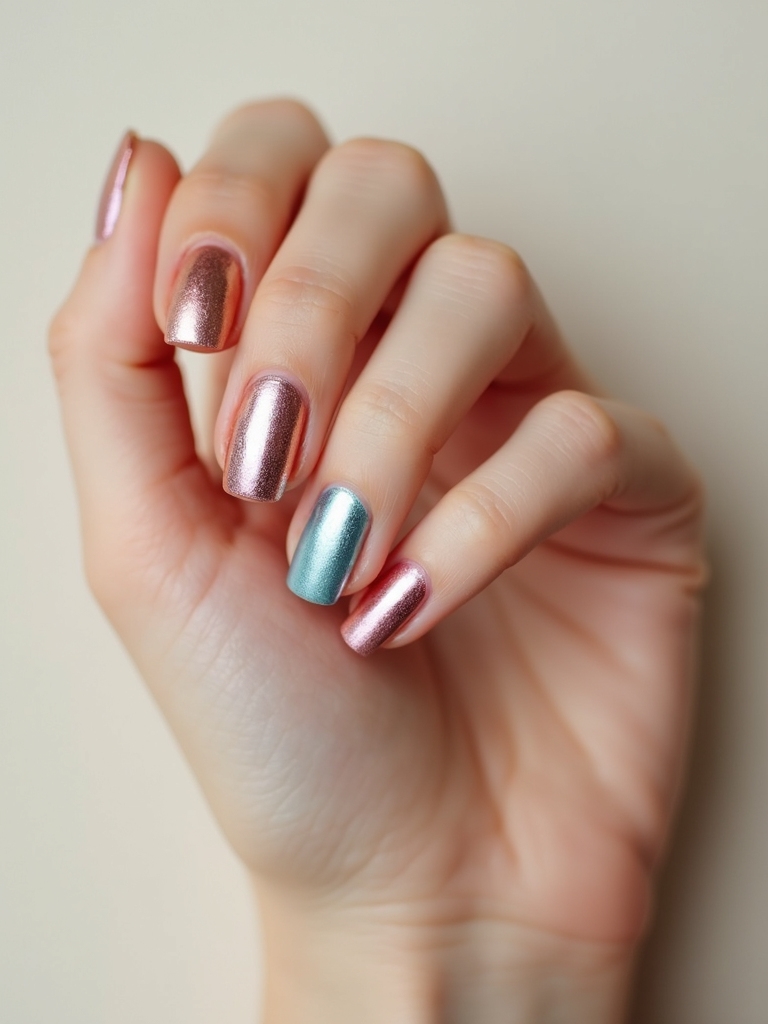
Skittle nails put a separate shade on each finger, and in chrome that turns your hand into a little candy box of mirror finishes. The trick to keeping ten different colors cohesive is to move through them like a gradient, blush rose to electric lime to deep violet, so it scans as a planned rainbow.
Chrome is where I would point you toward a pro or a very patient afternoon, because the powder needs a fully cured no-wipe top coat and a light, even buff to turn truly mirror-like. The reflective finish looks especially striking on deeper skin tones.
- Base matters: chrome over black looks like deep mercury; over white it turns pastel-metallic.
- Burnish lightly: press the powder on with a soft applicator and keep buffing until it turns mirror-bright.
- Seal twice: chrome scratches without a generous top coat, so check my chrome nails notes before you start.
How to keep freehand art from smudging:
1Cure or dry the base fully
Art smears if it goes onto tacky polish, so let the base set completely before you start.
2Thin your paint
Slightly thinned gel paint or polish flows off a liner brush in clean lines instead of blobs.
3Seal in thin layers
Two thin top coats trap the art better than one thick one and keep raised designs from snagging.
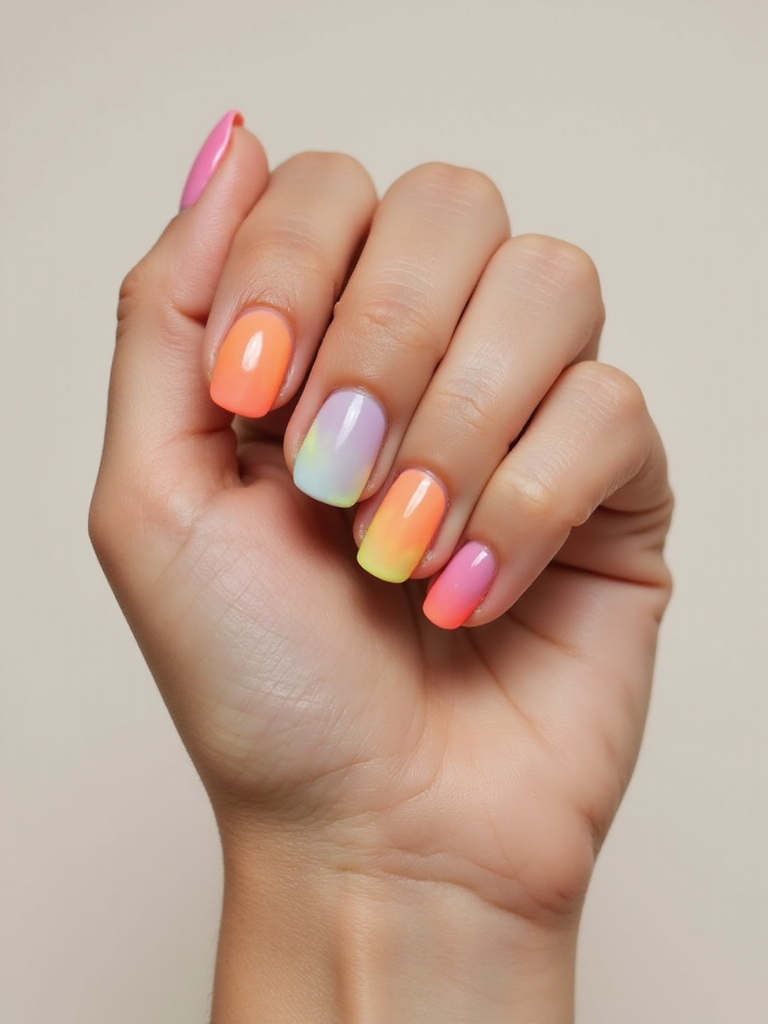
Translucent Layered Jelly Rainbow
Sheer jelly polish is a little bit magic, and layering it builds a juicy, glassy rainbow that looks like stained glass. Start with a milky base for a soft blur, then overlap translucent colors from cuticle to tip so they bleed into each other where they meet. Keeping every coat thin is the secret, because thick jelly goes gluey and loses that see-through glow.
You can give each nail its own hue or stack a full rainbow on every nail for more drama. A thick, syrupy top coat is non-negotiable here, since the shine is the entire point. It is a forgiving look for beginners because there are no hard lines to mess up. See my jelly nails notes for more sheer combos.
Soft, Glowing Neon Halo Nails
Aura nails fake an airbrushed glow with a soft halo of color that seems to come from inside the nail. You build it by sheering out a neon gel, tapping concentrated pigment at the center of each nail, then blurring the edges with a silicone tool so the color fades out toward the sides. Layer a milky jelly over the top to diffuse it further.
Citrus, hot pink, and electric lime make the most convincing glow, and the diffused brights look beautiful against deeper skin. This is a technique worth practicing or booking a pro for, since the blur takes a feel that comes with repetition.
- Work one nail at a time, since the pigment has to be blurred before it sets.
- Less pigment than you think, building up slowly for that lit-from-within fade.
- Glossy top coat only, because matte kills the glow. More ideas in my aura nails guide.
Leopard, Zebra, and Neon Safari
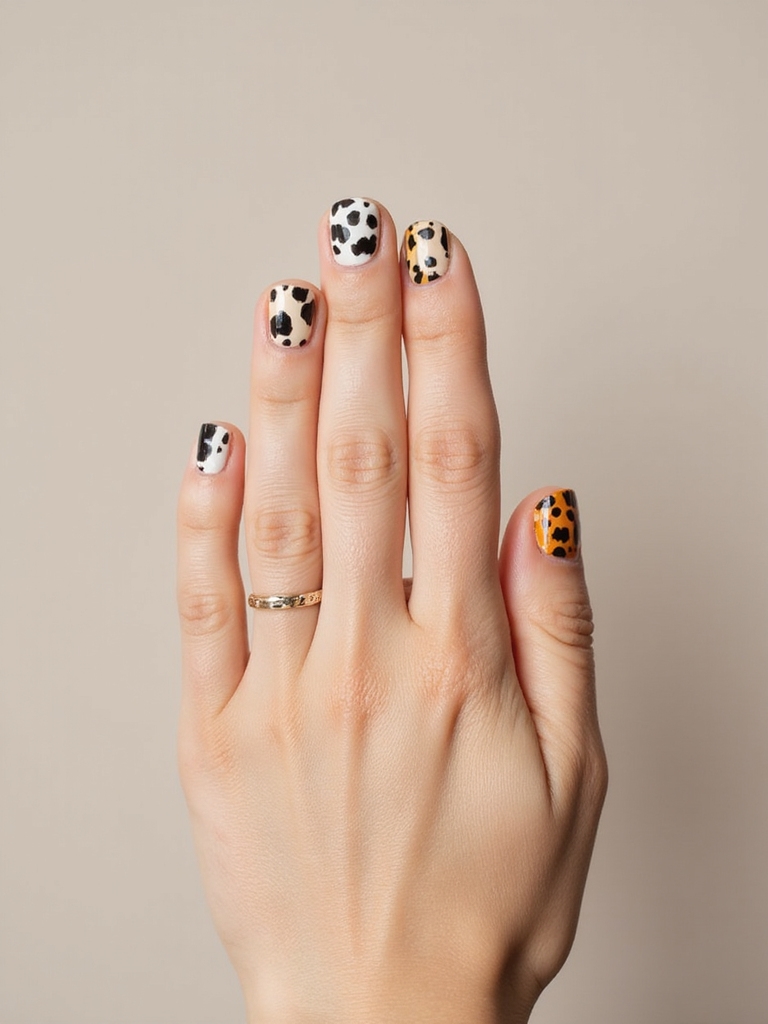
Animal print stops looking like a costume the second you mismatch it on purpose. Pair leopard spots on one hand with crisp zebra stripes on the other, drop a couple of neon cow-spot accent nails in between, and let the thumbs go full safari mash-up. The clash is the look, but it only works if the colors stay in one family.
Keep the palette cohesive, glossy, and tied together with a repeated accent color so the eye sees it as designed. Alternating nails or split-design tips keep each hand interesting without tipping into chaos.
Leopard is the most beginner-friendly print, since real leopard markings are irregular blobs with a darker outline, so precision is not the goal. Zebra takes a steadier liner-brush hand.
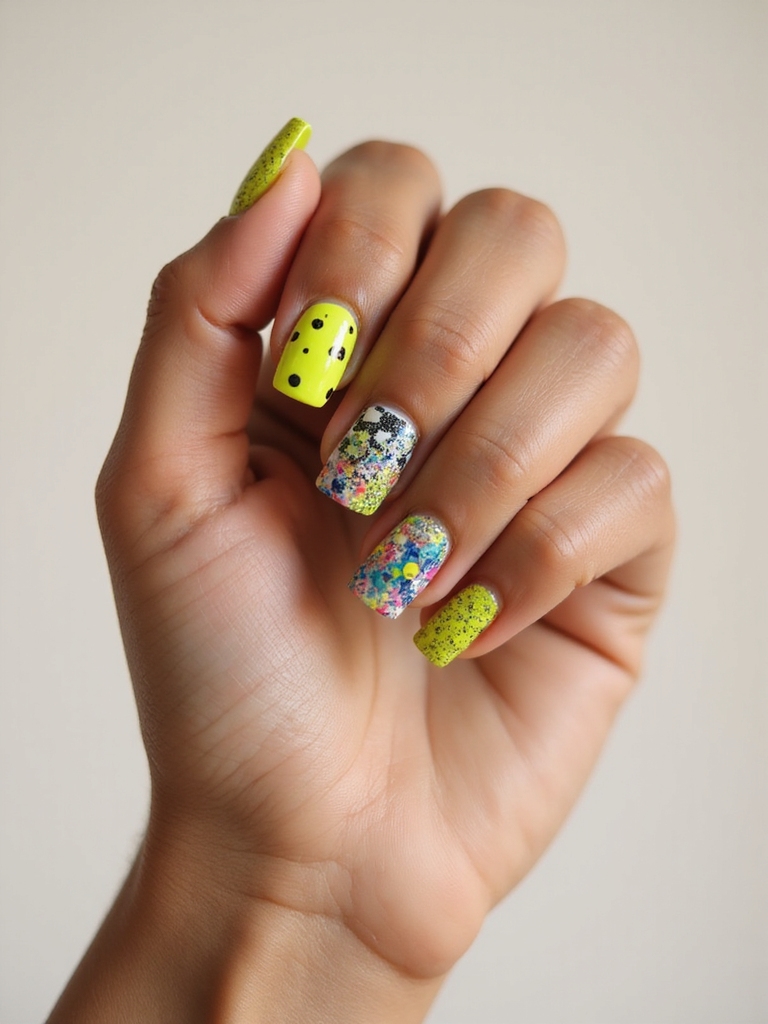
Sheer Cuticle, Glittered Tips
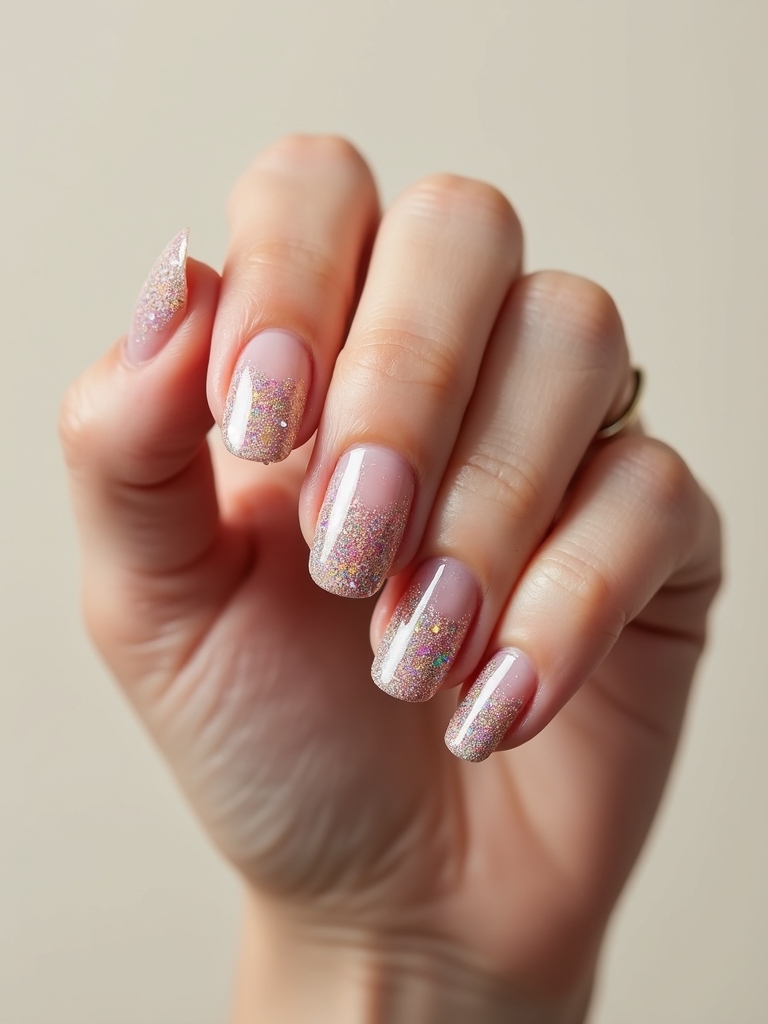
This is the grown-up way to wear glitter: a confetti ombre that fades like a party winding down, sheer and bare at the cuticle, then packed with playful flecks toward the tips. The gradient keeps it from reading like a kid’s craft, and it grows out gracefully because the cuticle area stays clear. It is low effort for surprisingly high impact.
- Pick a base that suits your mood: milky nude, soft blush, or lilac all work.
- Build the glitter from the tip down, dabbing with a sponge so it thins toward the cuticle.
- Seal with a thick glossy topper, since chunky glitter is rough and snags without it.
If you are nervous, start with squiggles or stickers. Imperfection is built into both, so there is no wrong line and no way to truly mess it up.
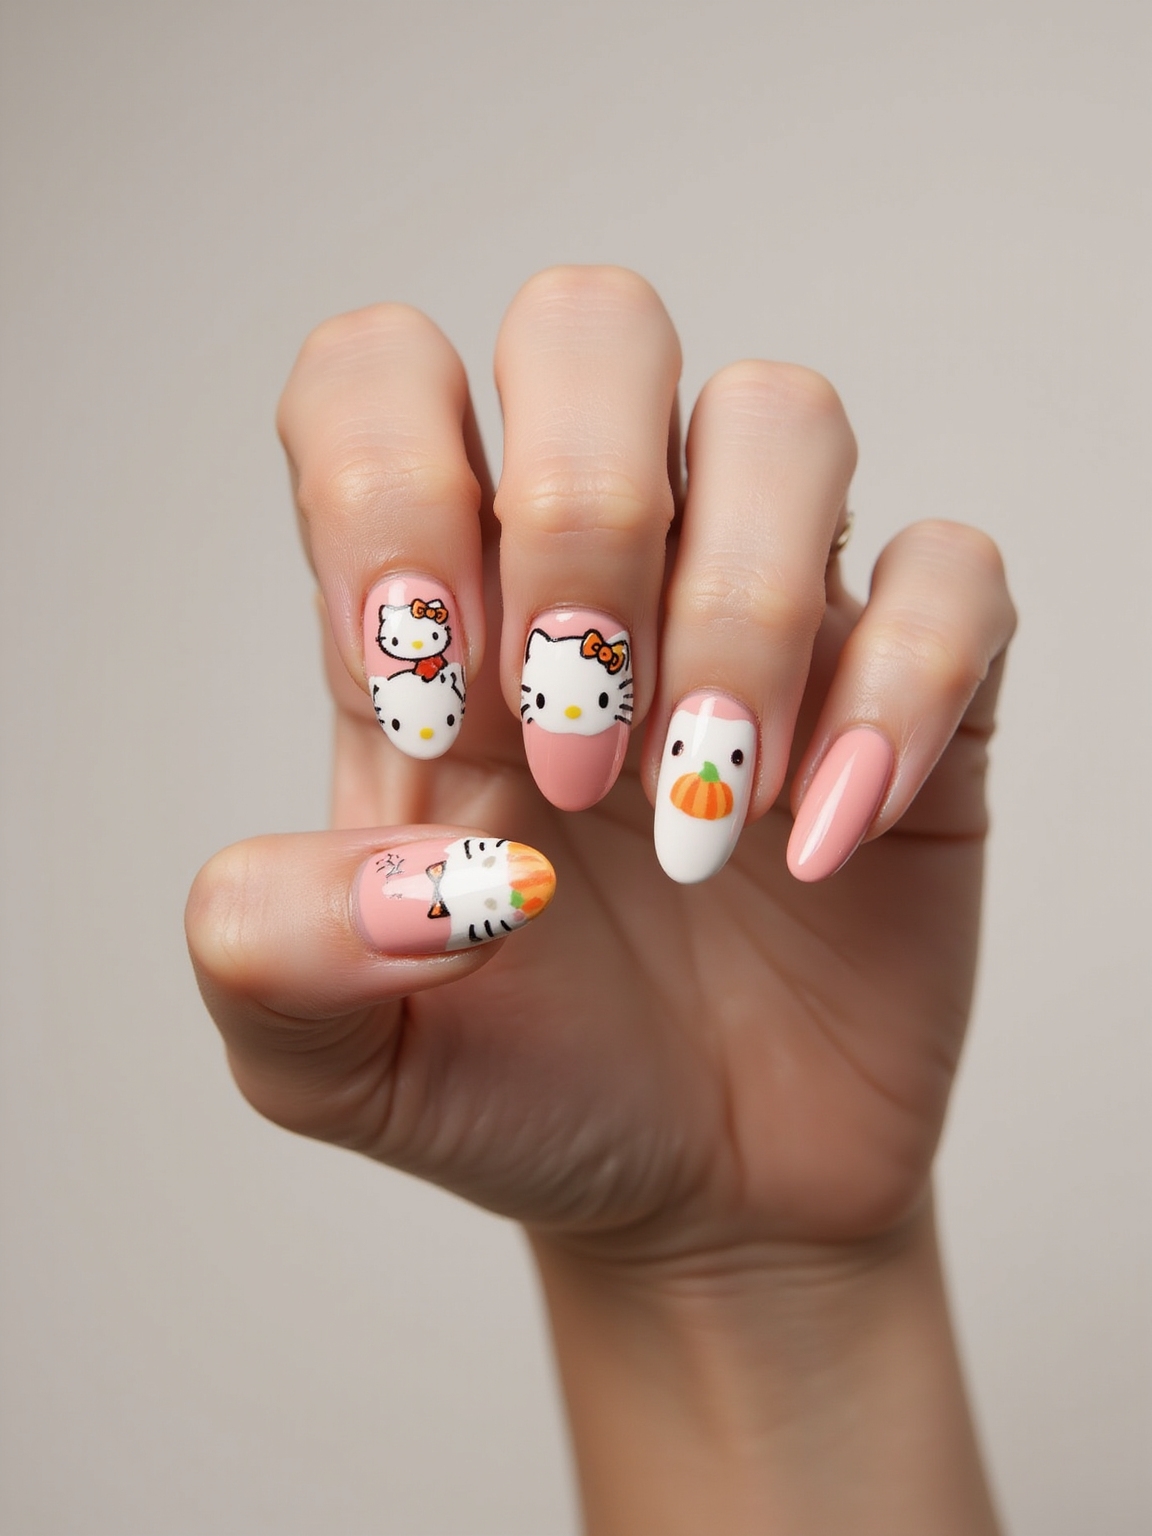
Playful Smiley Sticker Nails

When you want maximum fun with minimum skill, stickers and decals are the answer. A smiley-and-sticker mash-up turns each nail into a tiny mood board of emojis, stars, and cheeky slogans, and you do not need a single steady brushstroke to pull it off. It is the most beginner-friendly look on this list by far.
Making Stickers Last
What keeps it polished rather than cluttered is a tight palette. Pick two main colors plus one metallic accent, place the smileys near the cuticle, and scatter the smaller stickers outward so the design feels balanced.
Mix glossy and matte top coats across the set for texture contrast, and always seal decals under a top coat so they do not peel by lunchtime.
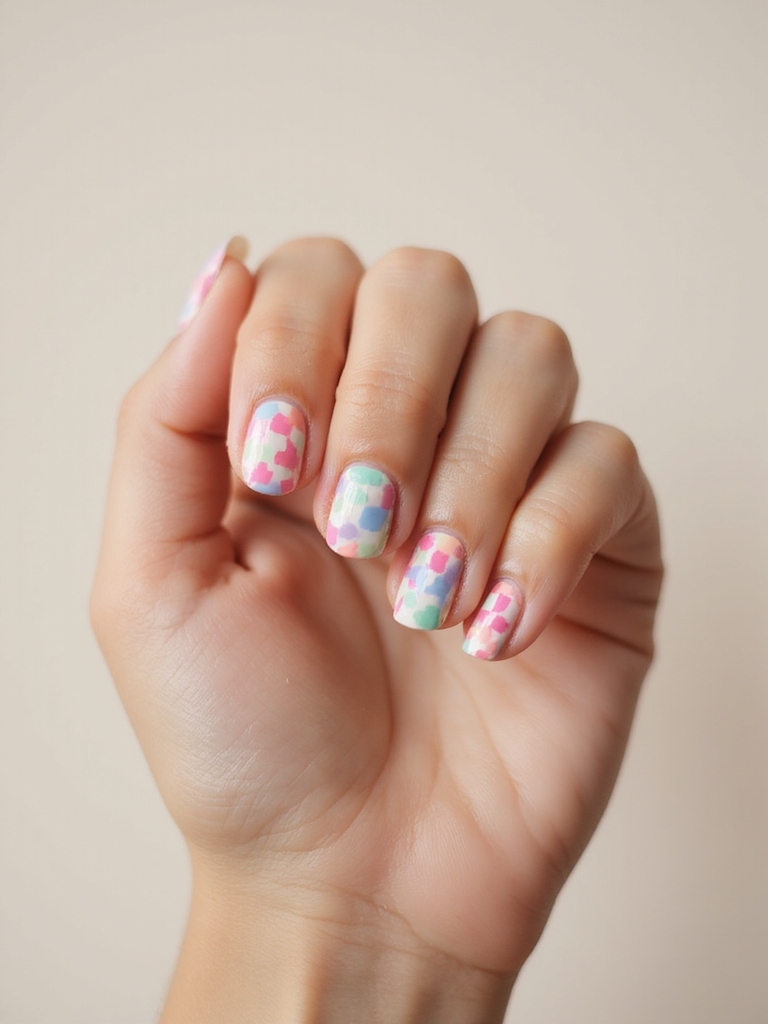
Pastel Pop Art Nails
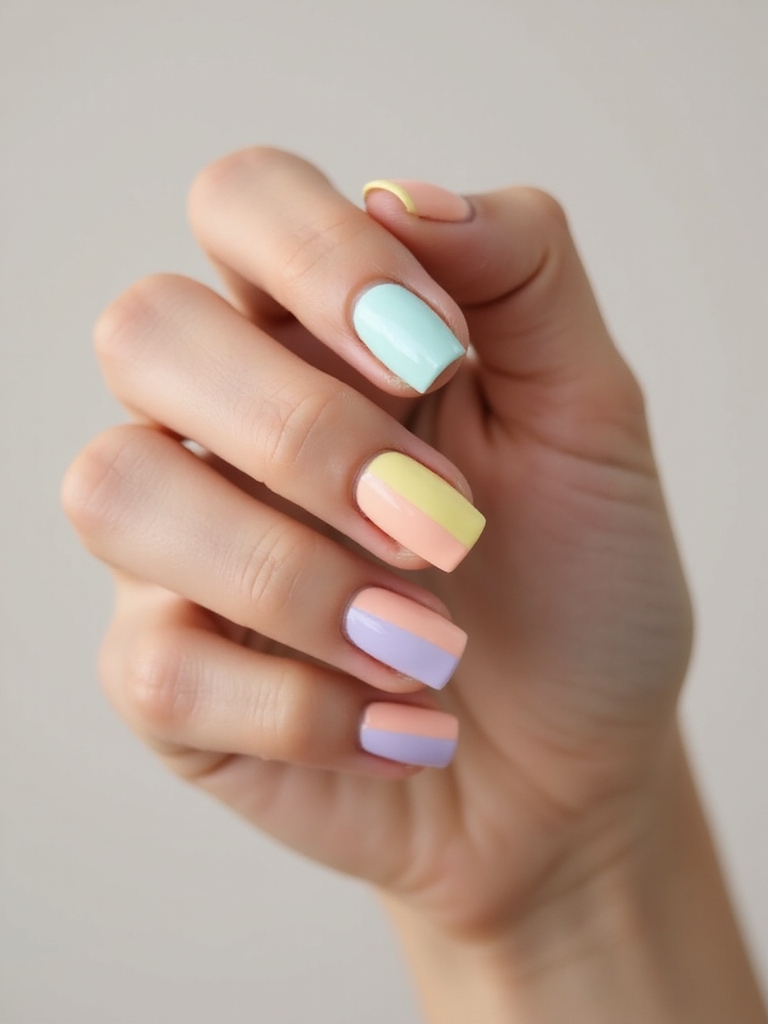
Pop art nails turn each nail into a tiny canvas, and the pastel version keeps the energy playful instead of loud. Map soft blocks of mint, lilac, peach, and butter yellow across the nails, then add crisp white borders so it looks like a comic panel. Squared-off nail shapes suit this best, since the geometry plays into the gallery vibe.
You can flip the orientation of the blocks from nail to nail, mix matte and gloss finishes, or outline the shapes in a single neon for a knowing wink. Keeping the cuticles clean is what makes the whole thing look polished.
It takes patience and a steady hand for the borders, so striping tape is your friend if freehand feels like too much. The payoff is a set that looks like wearable art.
Funky Nails, Answered
?Which funky nail looks are best for beginners?
Squiggles, checkerboard with striping tape, sticker and smiley sets, jelly rainbows, and glitter ombre are the most forgiving, because none of them rely on perfectly straight lines. Save chrome, aura, and fine animal-print work for when you have more practice or a pro’s hands.
?How do I make funky nail art last longer?
Cure or fully dry each layer before the next, cap the free edge with top coat, and reseal with a fresh glossy coat every three to four days. Gel art lasts two to three weeks; regular polish art chips fast unless you are diligent with top coat.
?What do funky nails cost at a salon?
A gel manicure is usually $35 to $60, and detailed custom art adds roughly $15 to $40 depending on how many nails and how intricate. Simple accents cost less than a full set of freehand designs.
?Do funky nails work on short nails?
Absolutely. Squiggles, checkerboard, color blocks, and stickers all work well on short, squared nails, and short lengths are actually easier to paint and live with. Skip the looks that need a long canvas, like dramatic dripping tips.
?What bright shades pop most on deep skin tones?
Saturated neons, mirror chrome, and jewel tones like emerald, cobalt, and magenta create the strongest contrast against deep skin. Go for high-pigment, true-toned colors instead of washed-out pastels if you want the boldest effect.
Pick One and Play
The real secret to funky nails is that they are meant to be imperfect, which makes them far less intimidating than a perfectly even classic set. Whether you freehand wobbly squiggles or stick to stickers and a great top coat, the look rewards play over precision.
Start with one of the beginner-friendly options, give yourself permission to make a wonky line or two, and book a pro for the chrome and aura sets when you want the polished version. Which of these would actually make you smile every time you looked down at your hands?