The first time a client asked me for ‘just a little gold,’ she left with one gilded line on each ring finger, and she texted me a week later saying three people had asked where she got her nails done. That’s the thing about gold. A whisper of it does more than a whole hand of glitter. It’s the fastest way to make a plain manicure look considered.
This is the styling guide to gold, 12 ways to wear it from barely-there to full shine, sorted by how much drama you want and when each one fits. I’ll point you to the deeper how-to for the fiddly ones. Start with the amount of gold you’d actually wear to work, then scale up for the weekend.
Gold Nails, the Short Version
- A little gold goes far: a single gilded line or chrome tip looks more expensive than all-over glitter.
- Match the gold to your undertone; warm yellow-gold, rose-gold, and antique gold each suit different skin.
- Negative-space and French gold designs grow out gracefully, so they last longer between fills.
- Chrome and foil give the brightest shine; sheer gradients and matte-nude combos read quietest.
- Almond and coffin shapes show off gold detail best; short nails suit tips, flakes, and single accents.
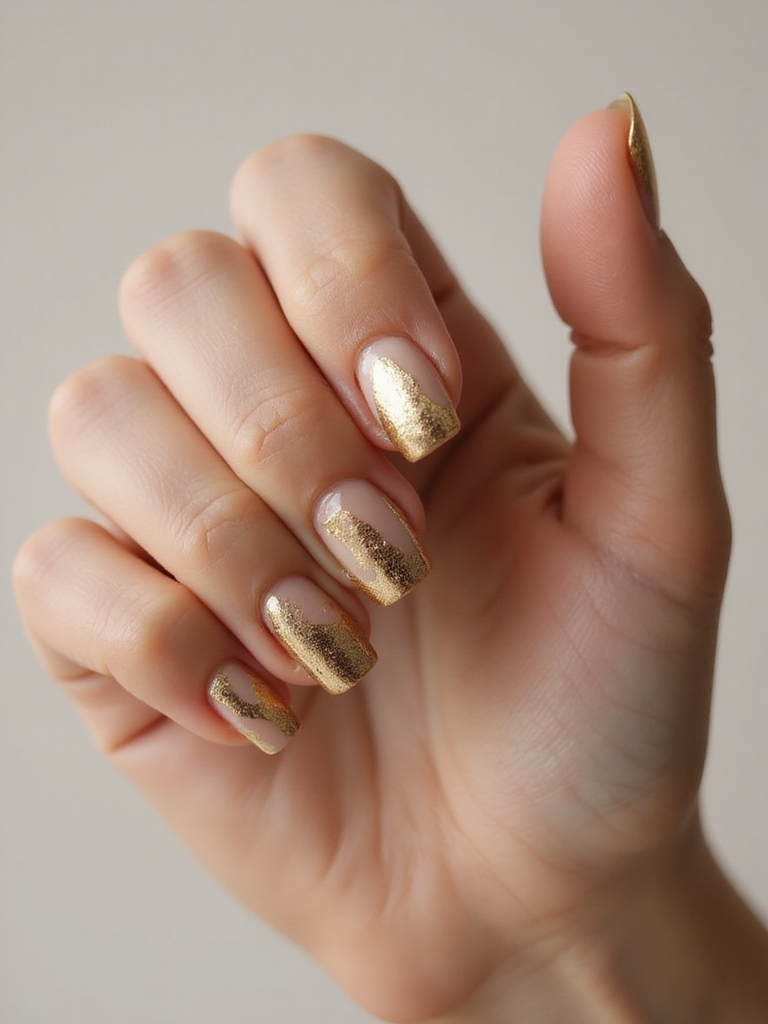
Sleek Gold Chrome Tips

A gold chrome tip is minimal made luxe: a thin, mirror-bright edge that frames the nail like a gold rim on fine china. Worn over a pale nude or milky polish, it stays clean enough for the office and shiny enough to feel special. Keep the tip thin and tapered for the most modern line.
Where to Learn the Technique
It suits almond and squoval shapes especially, where the length shows off the gleam. This is my most-requested gold look, for exactly that reason: it goes with everything you own.
That mirror finish comes from chrome powder buffed over cured gel, which is fussier than it looks. If you want the full run-down on getting it right, see gold chrome nail ideas for the technique.
Minimal Gilded Accents

The most wearable gold of all is a single gilded accent: one thin line, a small dot at the cuticle, or a hairline of gold down the center of one nail. It’s the perfect starting point for anyone nervous about gold, because it adds shine without any commitment. Over a bare or milky base, it looks intentional and quiet, and it grows out without an obvious line.
- Choose one placement, a cuticle line, a center stripe, or a tip, and repeat it.
- Keep the gold thin; a hairline looks more expensive than a thick band.
- Wear it over a sheer nude so the gold stays the single focus.
- Add it to one or two nails for the modern, understated version.
💡Stylist Tip
If you’re gold-shy, start with a gilded line on just your ring fingers. It’s the lowest-commitment way to test whether you like gold before you paint a whole hand.
Molten Foil Overlays
Foil overlays give you bright, broken shards of gold scattered over a base color, and the torn, uneven edges are what make them look organic and rich. A little foil over black, burgundy, or nude turns a plain color into a statement. It’s forgiving, too, since there’s no line to keep straight.
Getting Foil to Stay
It suits any length and any skin tone, and warm gold foil is especially rich on deep skin. Keep the foil to a few nails so it stays special.
Foil is pressed onto a tacky layer and sealed, and the timing of the glue is the whole trick. For the full method and design ideas, see gold foil nail designs.
Glitter Gradient Fade

A gold glitter gradient fades micro-fine sparkle from the tips down toward the cuticle, so the shine looks like it’s melting up the nail. It’s instant glam that photographs like jewelry, and it flatters every length by drawing the eye upward. Sponge the glitter over a sheer nude base and soften it halfway for a smooth fade. For a fuller sparkle, see gold glitter nails.
- Start with a sheer nude so the gradient looks like part of the nail.
- Sponge micro-fine glitter densest at the tip, then fade it down.
- Concentrate extra sparkle right at the edge for a bright tip.
- Lock it under a thick glossy top coat so no glitter snags.
Crisp Gold Negative-Space Bands

Negative-space bands leave stripes of bare nail between clean lines of gold, and that exposed nail is what keeps the look modern and architectural. A single gold band across the base, or a couple of thin parallel lines, is enough. The bare space does as much work as the gold.
This is one of the best gold looks for growing out gracefully, since regrowth hides in the negative space. It elongates the nail, too. For more of this approach, see negative-space nail designs.
- Use striping tape for crisp, even bands.
- Leave more bare nail than gold for the modern balance.
- Keep the design to two or three nails so it stays sharp.
Negative space is the trick I use most for clients who want gold but hate seeing obvious regrowth. The bare nail does the work.
Delicate Gold Leaf Flakes

Gold leaf flakes are irregular scraps of real gold pressed onto a sheer base, catching light at every angle. Scattered thinly over nude or milky polish, they look like flecks of treasure suspended in glass. Keep the flakes tiny near the cuticle and slightly larger at the tip so the eye travels up.
It goes with everything and hides regrowth well, which makes it one of the easiest gold looks to live with. It suits short and long nails alike. It’s the one I recommend to clients who want gold with zero fuss.
- Press the flakes into a tacky top coat with a fingertip.
- Scatter them unevenly; a random spread looks more natural.
- Seal twice if the flakes feel raised so nothing snags.
Marble Veins Laced With Gold

Gold-veined marble threads fine gold through soft, milky swirls for a look that’s luxe but calm enough for daily wear. The gold picks out the darkest lines of the marble like ore in stone. It’s a smart choice for anyone who wants gold that still looks office-appropriate, since the marble softens the shine.
- Feather grey or white swirls into a creamy base first.
- Lay razor-thin gold along the darkest veins only.
- Keep the pattern airy and off-center for a natural look.
- See marble nails for the base technique.
Celestial Stars and Moons in Gold

Tiny gold stars and crescent moons scattered over a sheer or milky base give you a soft, celestial look that feels whimsical without being childish. A single constellation across one accent nail, with the rest kept plain, is the most elegant version. It’s a favorite for the holidays and New Year’s.
Gold stars show up beautifully on deep and dark bases too, like navy or black, if you want more drama. Keep the placement sparse and scattered, the way real stars sit across a dark sky.
This is one you can do with gold nail decals if freehand feels intimidating, which makes it beginner-friendly. Just one or two celestial nails per hand keeps it modern.
A simple way to place a gold constellation on one accent nail.
1Map the stars
Decide on three or four points across the nail before you paint anything.
2Paint or place
Dot gold with a fine liner, or press small gold star decals onto a tacky layer.
3Connect lightly
Trace the thinnest gold line between a couple of the stars, like a constellation.
4Seal
Cap with a glossy top coat so the raised decals don’t lift at the edges.
Geometric Lines in Metallic Gold

Geometric gold uses sharp lines, chevrons, and grids for a modern, almost architectural look. Clean symmetry turns your nails into tiny pieces of design, and gold gives the lines a bright, metallic edge. Two or three accent nails carry it better than a full set.
Keeping Lines Sharp
Vary the line thickness for interest, and pair the geometry with plenty of bare or nude space so it doesn’t get busy. It suits longer shapes where the lines have room to breathe.
Straight metallic lines are hard to freehand, so lean on striping tape until your hand is steady. Lay the tape, brush gold alongside it, and lift it while the polish is still wet.
Matte Nude With a Gold Pop

Setting a bright gold detail against a matte nude base is one of the most sophisticated ways to wear gold, because the flat, soft background makes even a tiny gold accent look like jewelry. A single glossy gold line, or a small foil fleck on an otherwise matte nail, is quietly luxe. Clients ask me for exactly this when they want gold that still reads grown-up and professional.
- Matte the nude base first with a matte top coat.
- Add the gold glossy, so the two finishes contrast.
- Keep the gold to one small accent per nail.
- Deep-skin tip: a warm caramel nude with gold looks especially rich.
3D Molten Gold Drips

Molten gold drips look like liquid metal running down from the cuticle, and they’re the most eye-catching gold look here. Over a pearlescent or milky base, irregular gold droplets pulled down from the base of the nail read like a wet, three-dimensional pour. Let some drips run long and others stop short so it looks liquid.
It photographs incredibly and suits longer nails, where the drips have room to travel. This is a going-out look rather than an everyday one, so bring it out on nights when you want your hands to steal the show.
Rose Gold Ombré Shine

Rose-gold ombré fades a soft, pinkish gold from the cuticle to the tip for a warm, romantic shine that’s gentler than yellow gold. The pink warmth flatters cool undertones especially, where straight gold can look harsh, and it photographs beautifully in soft light. It’s a lovely bridal and date-night option.
- Sponge rose-gold densest at the tips and fade it toward the base.
- Keep the layers thin so the gradient stays smooth.
- Pair it with a soft pink or nude lip for a cohesive look.
- Seal with a glossy top coat for the wet, blended finish.
How to Get the Look
Most of these gold looks share the same basics: a smooth base, a light hand with the gold, and a thick top coat that caps every edge so the metal doesn’t lift. The fiddly finishes, chrome and foil, have their own timing tricks, which is why I’ve linked out to the full guides for those. Start with a single gilded accent or a glitter gradient if you’re new, since they’re the most forgiving.
On cost, a simple gold accent added to a gel manicure runs about $5 to $15 on top of your usual set, while a full gold design like chrome, foil, or drips is closer to $40 to $65 at a salon. A DIY kit of gold striping tape, foil, and a good top coat is roughly $15 to $25 and covers many manicures. Gold detail holds two to three weeks over gel, and a fresh top coat every few days keeps the shine bright.
Choose Your Amount of Gold
Every look here is really the same idea at a different volume: gold as a warm light you place with intention. A single gilded line and a full hand of molten drips both work, because a little gold in the right spot always looks more considered than a lot of it everywhere. The question is simply how much shine you want to carry that day.
If you’re just starting, a gilded accent or a glitter gradient gives you the most payoff for the least effort. Try one this week, and once it feels natural, work up to chrome, foil, or drips for the days you want your hands to do the talking.