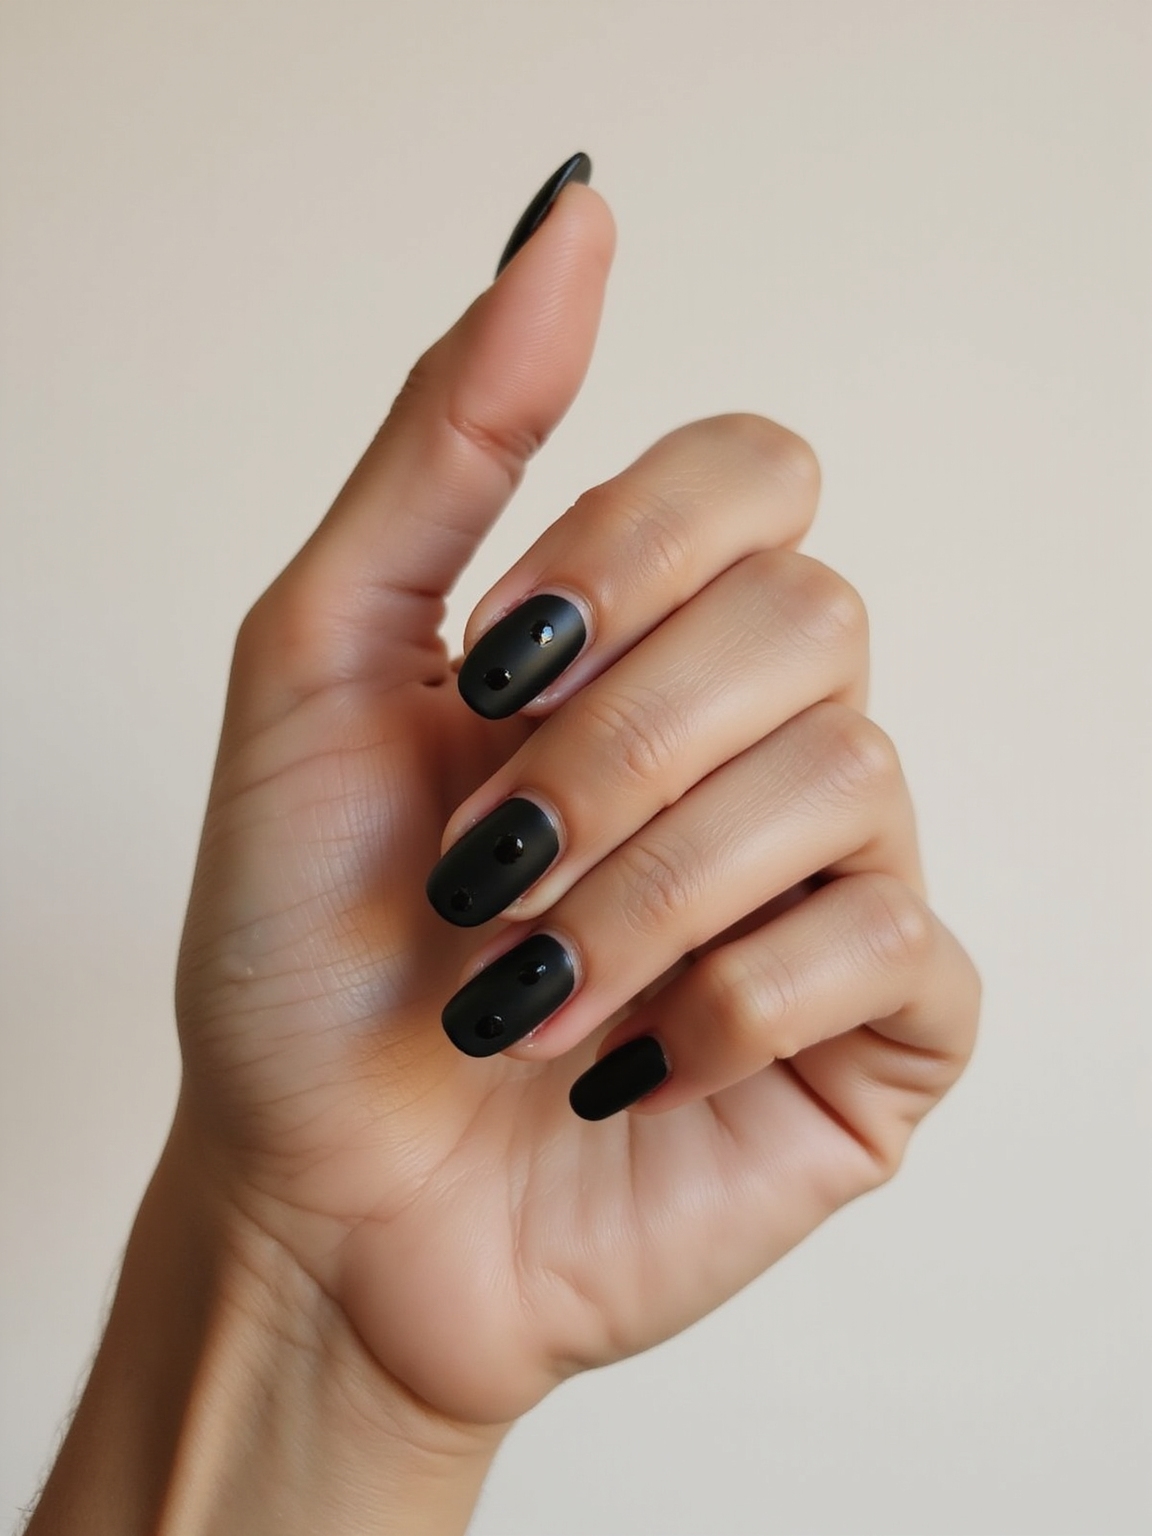
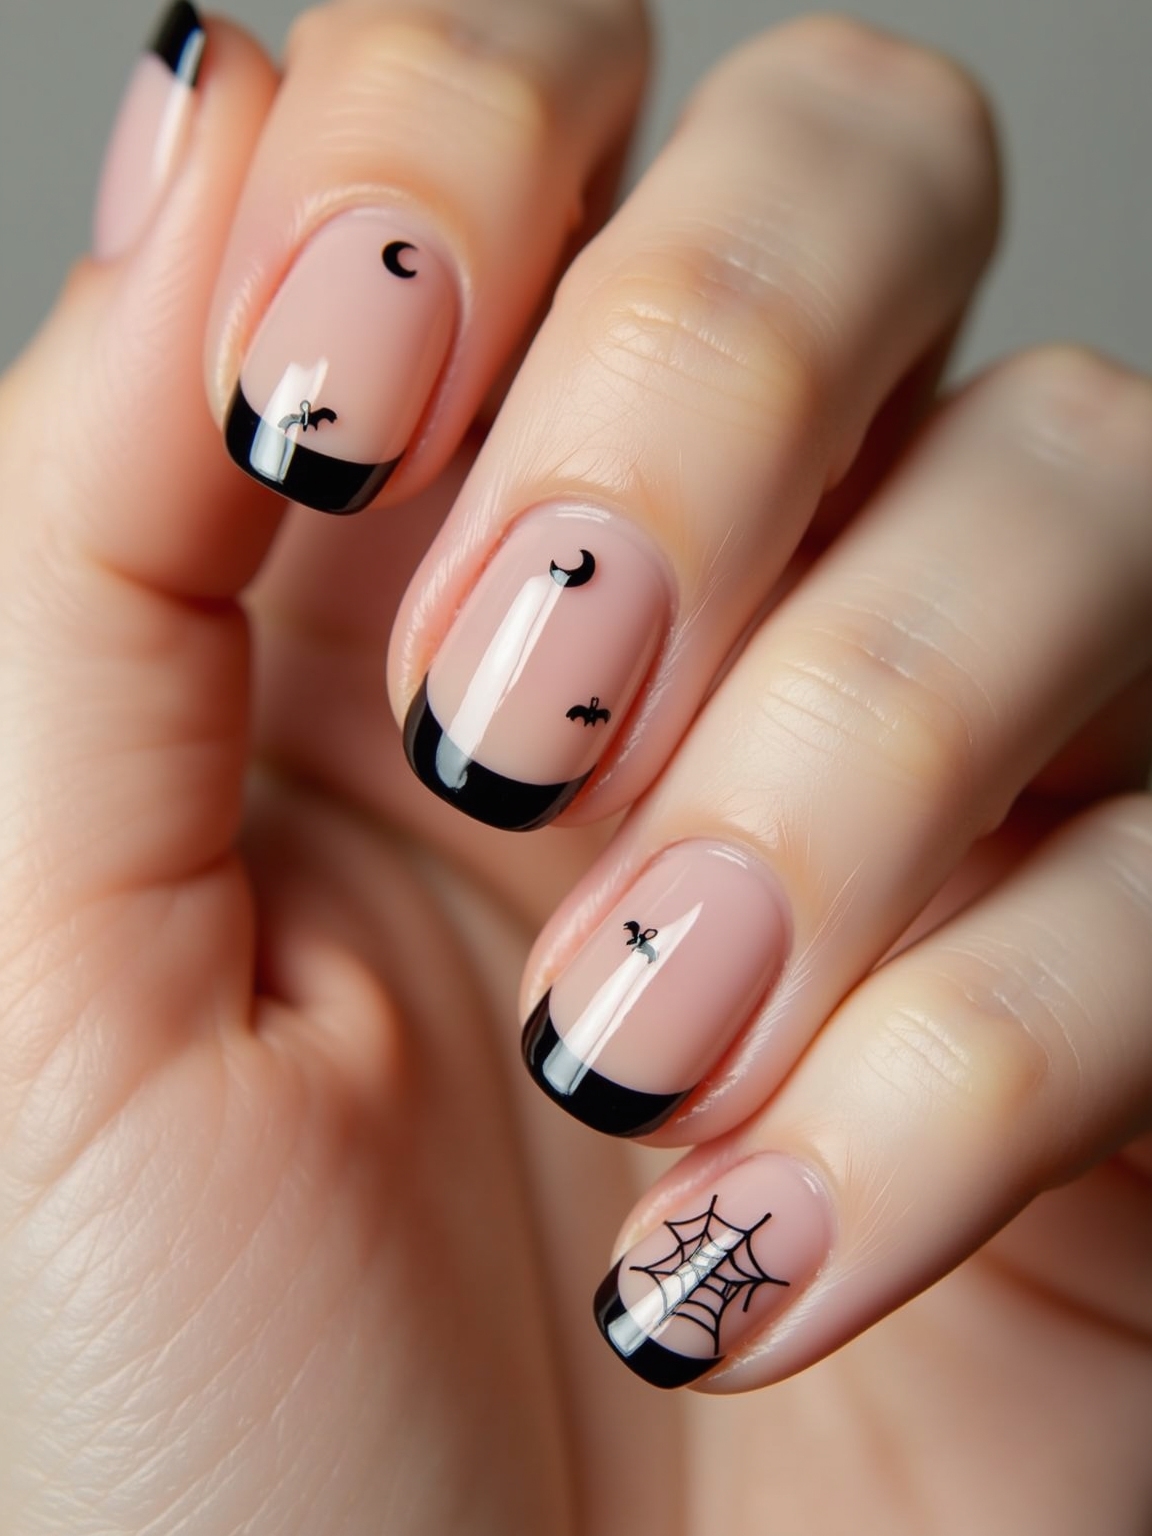
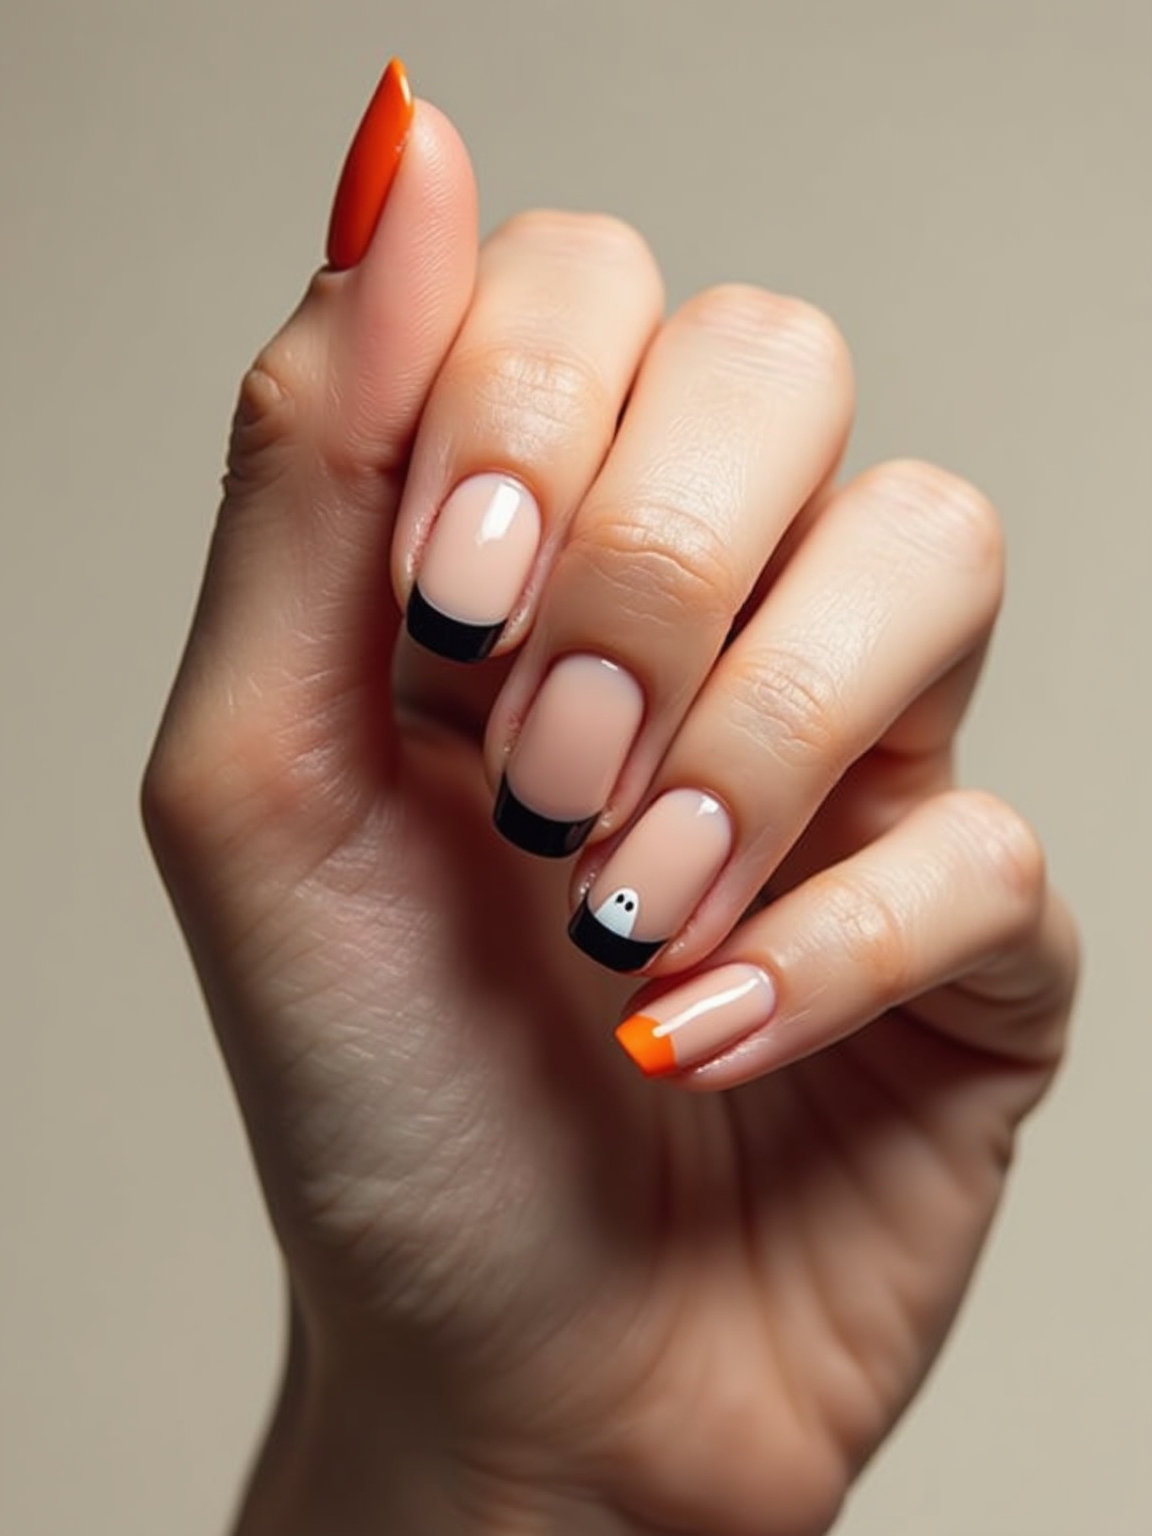
I love keeping Halloween nails chic and wearable, so I’m talking clean nude bases with crisp black tips, a tiny bat or two, and the subtlest pop of pumpkin orange. Think negative-space spiderwebs traced in thin lines and a matte-black nail with glossy dots for quiet drama.
I’ll share simple steps, quick sticker hacks, and how to make them last without bulky layers. If you want festive vibes that still feel polished, you’ll want what’s next.
Minimalist Black Tips

Sometimes, the simplest touch makes the most impact, and minimalist black tips prove it.
I love how a clean nude base with crisp black edges instantly feels seasonal without shouting. They’re quick, chic, and work with any outfit. I use a thin brush or guide stickers for sharp lines, then seal with glossy topcoat. It’s my go-to when I want effortless, modern Halloween polish.
For extra inspiration, try Chic Black French Tip ideas that elevate this look while keeping it timeless.
Tiny Bats Accent Nails

Often, I’ll add a tiny bat or two on just one or two nails to keep things playful without going overboard.
I love the contrast: glossy nude or sheer pink base, then crisp black wings swooping at the cuticle or tip.
Use a dotting tool and a fine brush, seal with top coat, and you’re done.
It’s cute, quick, and totally Halloween without stealing the show.
For more inspiration, browse Spooky Chic ideas that pair minimalist bat accents with subtle seasonal flair.
Chic Pumpkin Orange Pop

I’m craving that perfect pumpkin polish—bright, creamy, and autumn-right without looking neon. To keep it chic, I’d pair the bold orange with a minimalist accent nail, like a single gold stripe or tiny dot.
For balance and contrast, consider pairing your pumpkin hue with sleek black nails for an elegant, season-spanning combo.
Perfect Pumpkin Polish
Though I love a moody mani, nothing says Halloween like a chic pumpkin orange pop—and this “Perfect Pumpkin Polish” is my go-to. The color feels upbeat, flattering, and instantly festive without looking costume-y.
I keep it glossy and clean so it reads polished, not playful. For more October inspiration, browse Spooky October Nail Ideas to pair your pumpkin shade with subtle seasonal accents.
- Choose a creamy, opaque orange.
- Apply ridge-filling base coat.
- Two thin coats; cap edges.
- Seal with ultra-gloss topcoat.
Minimalist Accent Nail
Sometimes the simplest tweak makes the biggest impact, so I anchor my pumpkin-orange mani with one minimalist accent nail for balance.
I pick my ring finger and add a clean white line, a tiny gold dot, or a matte topcoat shift. It’s subtle, chic, and effortless. You still get bold seasonal color, but the accent whispers style. Try it—quick, neat, and instantly polished.
For more cozy seasonal inspiration, explore fall gel nails that pair warm tones with simple, wearable designs.
Negative Space Spiderwebs

Even with all the bold Halloween options out there, I love how negative space spiderwebs feel chic and a little mysterious. I keep the base sheer, then trace delicate lines so the web floats on my nail.
It’s quick, flattering, and easy to tweak for any length.
- Use a milky base coat.
- Draw thin arcs with a striping brush.
- Connect spokes sparingly.
- Seal with glossy topcoat.
Matte Black With Glossy Dots

Swipe on matte black and let glossy dots steal the spotlight—this combo is sleek, modern, and ridiculously easy.
I paint two thin coats, let them dry, then dot on shiny polish with a bobby pin. Big dots feel bold; tiny ones read chic. I cluster a few near the cuticle or trail them diagonally. Quick topcoat on the dots only, and I’m done. Effort, minimal. Impact, major.
Starry Night Skies

When I want nails that feel dreamy but still low-effort, I paint a midnight sky and scatter tiny stars across it.
Deep navy, twinkly silver, and a whisper of shimmer feel festive without fuss.
You can swipe, dot, and be done.
- Two coats navy; let dry.
- Dot stars with silver.
- Add a tiny crescent moon.
- Seal with glossy top coat.
Ghostly French Manicure

Although I love a classic French tip, I’m making it spooky by turning the smile line into soft, floating “ghosts.”
I keep the base sheer and milky, then curve creamy white tips a bit higher for that drifting shape, adding tiny dot eyes so they peek out when I move my hands.
I seal with glossy top coat, keep cuticles hydrated, and pair the look with cozy knits for playful, low-effort Halloween charm.
Subtle Blood-Drip Edges
Ghosts handled, I’m leaning moodier with subtle blood-drip edges that still feel chic. I keep the base sheer or nude, then dot polish at the tips and pull it downward for tiny drips—elegant, not gory.
It’s quick, flirty, and office-friendly while still spooky.
- Sheer nude base coat
- Deep red or burgundy polish
- Dotting tool or toothpick
- Glossy top coat for glassy shine
Cute Candy Corn Stripes

Let’s brighten things up with candy corn stripes that read festive, not fussy. I paint slim diagonal bands of white, orange, and yellow, keeping spacing even and lines crisp.
Use striping tape or a steady brush, then seal with a glossy top coat. Try alternating directions per nail for playful movement. Short nails look especially cute, and the palette pops with cozy sweaters.
Metallic Moon Phases

Candy corn stripes were sweet; now I’m going sleek with metallic moon phases that glow like tiny talismans. I paint an inky base, then pop silver crescents and gold full moons.
It’s chic, quick, and totally wearable beyond October. Try these:
- Matte black base, chrome moons.
- Navy base, rose-gold crescents.
- Accent nail: full moon only.
- Top coat: glossy for shine.
White-on-Black Polka Spooks

Let’s switch gears to a cute-yet-spooky look: I start with a matte black base for that soft, shadowy backdrop you’ll love.
Then I dot on crisp white circles—big and tiny—to make the pattern pop like ghostly confetti.
I seal everything with a quick-dry topcoat so you’re smudge-proof and out the door in minutes.
Matte Black Base
Sometimes the simplest tricks feel the most striking, and a matte black base proves it.
I love how it instantly sets a moody, chic vibe without effort. It smooths imperfections, dries fast, and makes every detail pop.
Here’s how I get that velvety look:
- Start with a ridge-filling base coat.
- Apply two thin matte-black layers.
- Cap the tips.
- Finish with a matte top coat.
Crisp White Dots
Often, the cleanest Halloween detail is just a field of crisp white dots marching over that matte black.
I grab a dotting tool—or a bobby pin—and tap gentle, even spots across each nail. I vary sizes for a playful, ghostly confetti look. Keep spacing consistent, and angle a few dots near cuticles for movement.
It’s quick, graphic, and instantly spooky without feeling heavy.
Quick-Dry Topcoat
Seal the spooky with a slick quick-dry topcoat so those crisp white dots stay sharp and smudge-free. I glide a thin layer over my white-on-black polka spooks and let the shine lock everything in fast.
It’s my shortcut to chip-resistant, party-ready nails without waiting.
- Float the brush—don’t press.
- Cap the free edge.
- Reapply every two days.
- Clean up with a dry Q-tip.
Skeleton Line Art

Bones become brushstrokes with skeleton line art, a chic way to add spooky detail without heavy graphics. I love sketching tiny skulls, finger bones, or ribcage curves with a thin white polish over a black or nude base.
Keep lines delicate and slightly imperfect—they read hand-drawn and cool. Use a detail brush, steady your wrist, then seal it all with a glossy, protective topcoat.
Glittery Midnight Gradient
Sometimes I crave drama, and a glittery midnight gradient nails it without going overboard. I blend deep navy into inky black, then tap on fine silver sparkle at the tips for that starry-night fade.
It’s moody, chic, and totally wearable with costumes or jeans.
- Start with a navy base.
- Sponge on black at tips.
- Add micro-glitter fade.
- Seal with glossy topcoat.
Quick Sticker and Decal Hacks

When I’m short on time but still want a spooky-cute mani, I reach for stickers and decals to do the heavy lifting.
I lay down a quick base color, let it dry, then place tiny bats, spiderwebs, or moons with tweezers.
Seal with a glossy top coat.
Pro tip: trim oversized decals to fit your nail shape, and mix matte and metallic for instant dimension.
Long-Lasting At-Home Gel Tips

From base to top coat, I treat gel like a mini ritual so it actually lasts. I prep well, paint thin, and cure fully, so my Halloween designs survive candy bowls and costume changes. Try these:
- Dehydrate nails, then apply a grippy base.
- Use thin layers; cap the free edge.
- Cure properly—don’t rush.
- Seal nail art with a sturdy, glossy top.
I hope these simple Halloween nail ideas make getting festive feel easy and fun. I’m all about clean lines, tiny accents, and quick wins that look chic in any lighting. If you try a single pumpkin pop, a bat accent, or glossy-on-matte dots, keep layers thin, cap the tips, and seal with a shiny topcoat.
You’ll get wear that lasts and a vibe that whispers spooky-cute. Tag me when you try one—I can’t wait to see your nails!


