
I’m sharing 16 doll-eye makeup ideas that make eyes look lifted, bright, and balanced—without heavy product. I’ll walk you through techniques like tightlining, a soft wing, center-focused shimmer, and smart lower-lash placement.
We’ll also use floating liner, subtle cut-creases, and half-lashes for symmetry. Each tip builds on the last, so you can mix, match, or keep it minimal. Start with a classic doe-eye, then try a puppy liner tweak—here’s how to choose the right one next.
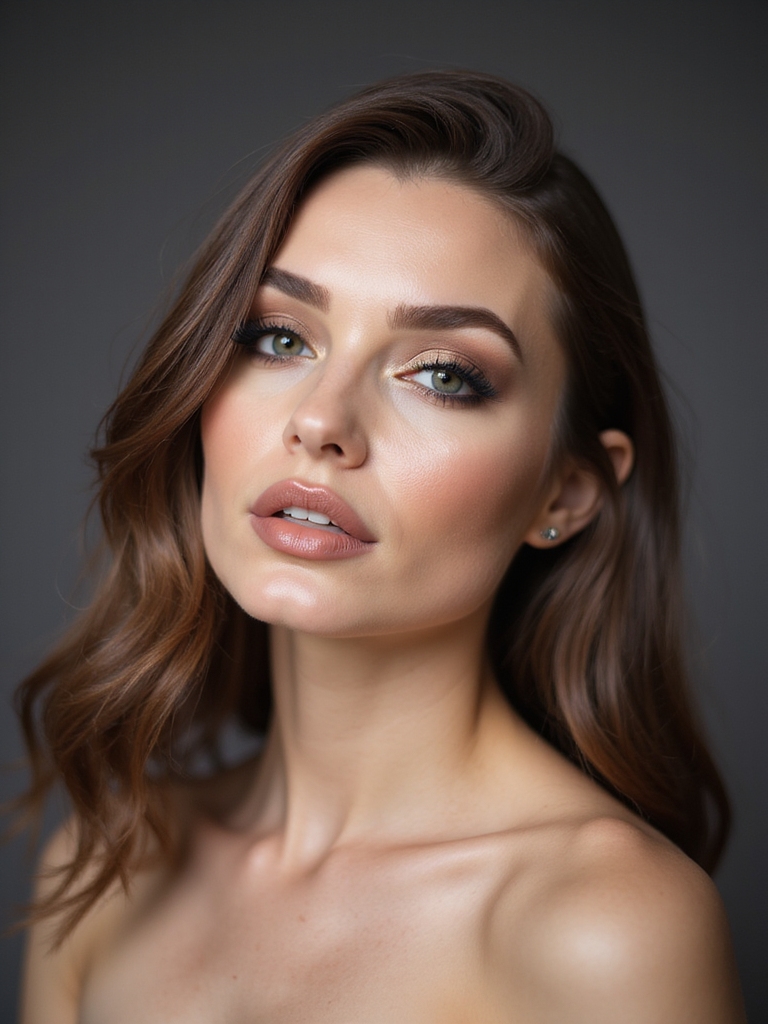
Classic Doe-Eye With Soft Wing

Sweep your gaze wide and bright with a classic doe-eye and a soft wing.
I curl lashes, then sweep a neutral matte shadow over the lid and a lighter shimmer on the inner corner. I tightline the upper lash line.
I draw a thin wing, slightly upward, and soften it. I line the waterline nude.
I finish with lengthening mascara, concentrating center lashes. This technique emphasizes a flawless doe eye by creating a soft, wide-angle effect.
Puppy Liner for Innocent Depth

Start by mapping a gentle, downward-tilted line that follows your lower lash line’s natural angle.
I keep my eyes relaxed and sketch the tail first, ending just below the outer corner.
Then I connect the tail to the upper lashes with a soft, thin stroke.
I tightline, smudge the outer third with brown shadow, curl lashes, and add lengthening mascara, focusing outward for innocent depth.
Many doll makeup looks emphasize the illusion of larger eyes by using doll eye makeup techniques like exaggerated lower liner and fluttery lashes.
Extended Inner Corner Highlight

I start by picking the right shimmer: a fine, light-reflecting pearl or champagne that matches your undertone and doesn’t look sparkly.
Then I tap a tiny amount at the very inner corner, extending slightly along the tear duct and a hair onto the lower lash line for a wide-awake effect.
I finish by softening the edges with a fingertip so the highlight looks seamless but still bright.
For an evening look, you can deepen the outer corner and smoke the crease for a sultry finish that complements the inner highlight and enhances the smokey eye effect.
Choosing the Right Shimmer
Although any sparkle can look pretty, the right shimmer for an extended inner corner highlight makes the doll-eye effect pop without overwhelming your look.
I start by choosing a finely milled, neutral champagne or pearl—no chunky glitter.
Then I check undertone: cool skin likes icy pearl, warm prefers soft gold.
I test opacity; sheer-to-buildable works best.
Finally, I choose long-wearing, non-irritating formulas for comfortable brightness.
Many readers prefer products that enhance a natural look while emphasizing the inner corner to open up the eyes.
Placement for Maximum Brightness
Before picking up my brush, I map the highlight zone so the light lands where it opens the eyes most. I tap shimmer at the tear duct, then extend it slightly along the inner lower lash line and a whisper onto the inner lid.
I blend edges softly to avoid a harsh spot and keep brightness seamless.
- Light guides attention
- Precision prevents glare
- Balance keeps harmony
Hooded eyes benefit from lifting techniques like placing shimmer slightly higher on the lid to counter the droop, which is why I often emphasize lifting placement when working with this eye shape.
Gradient Pastel Lids for Soft Focus

When you want that soft-focus, doll-like gaze, I start with a seamless wash of pastel tones that melt into each other across the lid.
I prime, then choose three shades: palest near the inner corner, mid-tone on the center, and slightly deeper near the outer third.
I blend edges with a fluffy brush, tap a satin highlight on the center, and finish with gentle tightlining.
This look leans on soft, sculpted techniques to keep the eyes appearing wide and naturally lifted.
Lower Lash Emphasis With Individual Flares

For the lower lashes, I first pick flare lengths—short at the inner third, medium in the center, and a touch longer toward the outer third.
I map the placement for balance by spacing each cluster evenly and mirroring both eyes before I commit.
Then I bond each flare under the lashes with a tiny dot of adhesive and blend with a micro-mascara or spoolie so the clusters look seamless.
When working with Asian eye shapes, consider emphasizing the outer third to create a wider, lifted effect that complements a monolid or hooded crease.
Choosing Flare Lengths
Lengths matter most with lower-lash flares, because they set the mood: soft doll-like or wide-eyed dramatic.
I choose lengths first: 4–5 mm for subtle sweetness, 6–7 mm for defined openness, 8–9 mm for bold impact. I test one flare, assess, then build symmetrically. I mix two lengths for dimension and keep tips tapered for a clean finish.
- Short = soft focus
- Medium = balanced clarity
- Long = statement pop
Proper placement and blending with natural lashes enhance the overall look and help maintain effortless application.
Placement for Balance
Now that I’ve picked flare lengths, I place them to balance the eye and keep that doll-like lift.
I map three zones on the lower lash line: inner, center, outer.
I leave the inner third bare.
I set short flares at the center, spaced evenly.
I add slightly longer flares toward the outer third, still spaced.
I mirror placement on the other eye, checking symmetry head-on.
This placement echoes the principles of classic cat eye shaping, emphasizing lash line balance to create a lifted, wide-eyed effect.
Bonding and Blending
Before I anchor anything, I prep the base so the flares grip cleanly and blend seamlessly.
I tightline, curl lightly, then dot clear adhesive beneath lower lashes.
I place short flares first, then medium toward the center, keeping spacing even.
I pinch each bond, let it set, then veil with a whisper of mascara.
- Precision builds harmony
- Patience prevents clumps
- Subtlety amplifies openness
Practice each step slowly to master step-by-step application and achieve consistent results.
White-to-Nude Waterline Switch

For a quick, eye-opening tweak, I switch from a stark white to a soft nude pencil on the waterline to keep the doll-like effect without the harshness. I pick a waterproof nude close to my skin tone.
I gently dry the waterline with a cotton swab. I trace from outer to inner corner. I layer once more. I set with a matching shadow. I clean edges. A natural look often benefits from minimal products and blending for simple natural makeup that enhances features without heavy coverage.
Lifted Outer Half Lash Placement
Although full strips can weigh the eye down, I get a lifted, doll-like tilt by placing a half lash only on the outer third. I trim a wispy half, bend the band, then anchor it just past my iris.
I angle it upward, press, and fuse with mascara. I balance with a light inner corner.
- Choose flexible, lightweight bands
- Angle toward temples
- Keep inner lashes minimal
Fox Eye Makeup creates a lengthened, uplifted appearance by emphasizing the outer lashes and temple area, enhancing that signature lifted outer corner look.
Cut Crease That Follows Your Socket

Even if your crease isn’t strongly defined, I map a cut crease by tracing just above your natural socket so the lid looks bigger and doll-like.
I start with a taupe shadow to sketch the arc, then blend upward, leaving the lid clean.
I sharpen the crease with concealer, set it, and press a light matte on the lid.
Finish with a thin, lifted outer wing.
For a polished finish, I lightly dust a soft highlighter where light naturally hits to enhance the natural glam without overpowering the look.
Glossy Lid With Minimal Liner

Sometimes the simplest route looks the most doll-like, so I keep the lid glossy and the liner minimal. I tap a clear gloss or balm over a sheer nude shadow, avoiding the crease.
Then I tightline the upper lashes with a thin, soft pencil and blend. I curl lashes and add a light, defining coat of mascara.
- Shine suggests youth
- Restraint reads refined
- Texture amplifies dimension
Soft eye makeup is ideal for creating everyday wearable looks that still enhance the eyes, especially when you focus on soft eye makeup techniques.
Half-Lash Winged Cat Eye

Let’s build a half-lash winged cat eye together: I place a trimmed half-lash at the outer third of your lash line to lift the eye without weighing it down.
Then I sketch a thin line from the outer corner, angle it slightly upward toward the tail of your brow, and connect it back to the lash line.
I keep the inner lid minimal so the elongated wing and strategic half-lash create that wide, doll-like lift.
This technique draws on classic eye makeup principles to create a mesmerizing effect.
Strategic Half-Lash Placement
Kick things off by placing a half-lash at the outer third of your lash line to lift and elongate the eye, then anchor the look with a slim wing.
I trim the band to match my eye width, curl my natural lashes, then apply a thin glue line. I press from center to outer corner, blending with mascara and tightlining.
- Precision beats length.
- Balance creates symmetry.
- Small tweaks transform results.
Elongated Wing Technique
While the half-lash lifts the outer eye, the elongated wing shapes the entire silhouette.
I start by mapping a soft guide from the lower lash line toward the temple. I draw a thin line from the inner corner, thickening outward. I extend the wing slightly past the lash, then connect and fill. I soften the inner third, tightline, curl, and finish with outer-focused mascara.
Under-Eye Aegyo Sal Shading

Although it looks subtle, under-eye Aegyo Sal shading can transform your whole eye shape in minutes. I smile to find the natural puff, then trace a soft taupe shadow right beneath it. I blend gently, keeping the center brightest.
I set with a touch of powder, then add a pearly highlight on the bulge.
- Youthful softness
- Balanced dimensions
- Brighter, awake gaze
Floating Liner to Open the Crease

Because floating liner sits above your natural crease, I map the shape before committing.
I look straight ahead, mark tiny dots where the line should float, then connect them with a thin, smooth stroke.
I keep it parallel to my lash line, slightly lifting the tail.
I use a transfer-proof pen, let it dry, then soften edges with a tiny brush for a clean, wide-eyed lift.
Shimmer Pop at the Center of the Lid

For instant doll-like brightness, I tap a tiny shimmer right at the center of my lid to mimic a rounded, wide-eyed dome. I blend matte shadow first, then press a pearl shade with my fingertip. I soften edges with a clean brush, keeping the center brightest. I finish with curled lashes to frame the glow.
- Use fine sparkle, not chunky
- Keep outer corners matte
- Match shimmer undertone to skin
Monochrome Pink Flush for Freshness

With soft pink from lids to lips, I create a seamless flush that reads youthful and doll-like.
I start with a matte petal-pink shadow over the lid and crease, then tap a satin pink at the inner corner.
I curl lashes, add a light coat of mascara, and brighten the waterline.
I sweep cool pink blush high on cheeks and finish with a glossy pink balm.
Tightline Top, Feather Bottom for Balance

Let’s balance the eyes by tightlining the upper lash line so the liner looks invisible but adds depth.
I’ll show you how to press pigment between lashes, then keep the lower lashes soft and airy for a fluttery finish.
Follow me step by step: tightline on top, feather mascara on bottom.
Invisible Upper Liner
Although it looks like you’re wearing nothing at all, invisible upper liner starts by tightlining the top waterline to thicken the lash base without a visible stripe.
I gently lift my lid, press a waterproof pencil between lashes, and wiggle.
Then I feather a whisper of taupe under lower lashes to balance, not frame.
- Choose smudge-proof formulas
- Keep strokes tiny and precise
- Clean the waterline first
Soft, Airy Lashes
Sometimes the prettiest doll-like lashes come from restraint, so I build lift at the roots and keep the ends light.
I start by tightlining the upper waterline with a waterproof pencil to deepen the base.
I curl gently.
I press mascara only at the roots, then comb through once.
For balance, I feather the lower lashes: wipe the wand, tap tips lightly, and separate with a clean spoolie.


