Halloween nails have a reputation for being fiddly, the kind of thing you book a salon chair for two weeks out. They don’t have to be. Most of the designs people stop and ask about are built from a single accent nail, a couple of dots, or a strip of tape, and you can do them at your kitchen table in the time it takes to watch an episode of something spooky.
I pulled together 11 looks that lean easy on purpose: a minimalist web here, a candy-corn tip there, a bloody drip that takes one steady hand. For each one I’ll walk you through the quick method and the tool you probably already own, plus how to make the colors land on deeper skin. Pick the spook level you’re feeling and grab a base coat.
Easy Halloween Nails, Answered Fast
What’s the easiest Halloween nail design for beginners? A single spiderweb or bat on one accent nail over a clean base. One detailed nail passes for a full themed manicure, so you only have to get one right.
What tools do I actually need? A dotting tool or bobby pin, a thin liner brush or striping tape, and polishes you likely own: black, white, orange, and a red. No nail-art kit required.
How do I adapt these for deeper skin tones? Reach for saturated, high-pigment shades, true orange, deep wine, bright neon, and crisp white, which pop against rich complexions far more than muted pastels.
Minimalist Spider Web Accent

The web is the design everyone recognizes, and you only need it on one nail to sell the whole look. Keep the other nails clean and neutral so the single web nail does all the talking:
- Paint all nails a sheer nude or pale gray base and let them dry fully.
- On one nail, use a thin brush to draw a small dot off-center, then pull three or four straight lines out from it like spokes.
- Connect the spokes with little curved lines to form the web, and add a tiny black dot at the end of one strand for a dangling spider.
Negative Space Bat Nails

Negative space keeps a design feeling modern and low-effort because you leave most of the nail bare and let one small shape carry it. A little bat tucked near the tip is graphic, quick, and a step up from a plain manicure.
How to keep the negative space clean
Start with a clear or barely-there base, then paint a small black bat near the free edge of one or two nails. A bat is really just a fat oval body with two scalloped wings, so draw the body first with a dotting tool, then sweep the wings out on each side.
Because the rest of the nail stays clear, smudges and wobbles are easy to clean up with a brush dipped in remover. The bare space is the point: it looks deliberate and a little editorial.
Heads-Up
Glow-in-the-dark and heavily pigmented neon polishes can stain the nail, so a base coat isn’t optional with these, it’s what stands between the color and a yellow nail for a week. Skip lining the very edge of the cuticle with dark polish if your skin stains easily, and always remove glitter or rhinestone looks with an acetone soak; scraping, which damages the nail surface.
Candy Corn Color Blocking
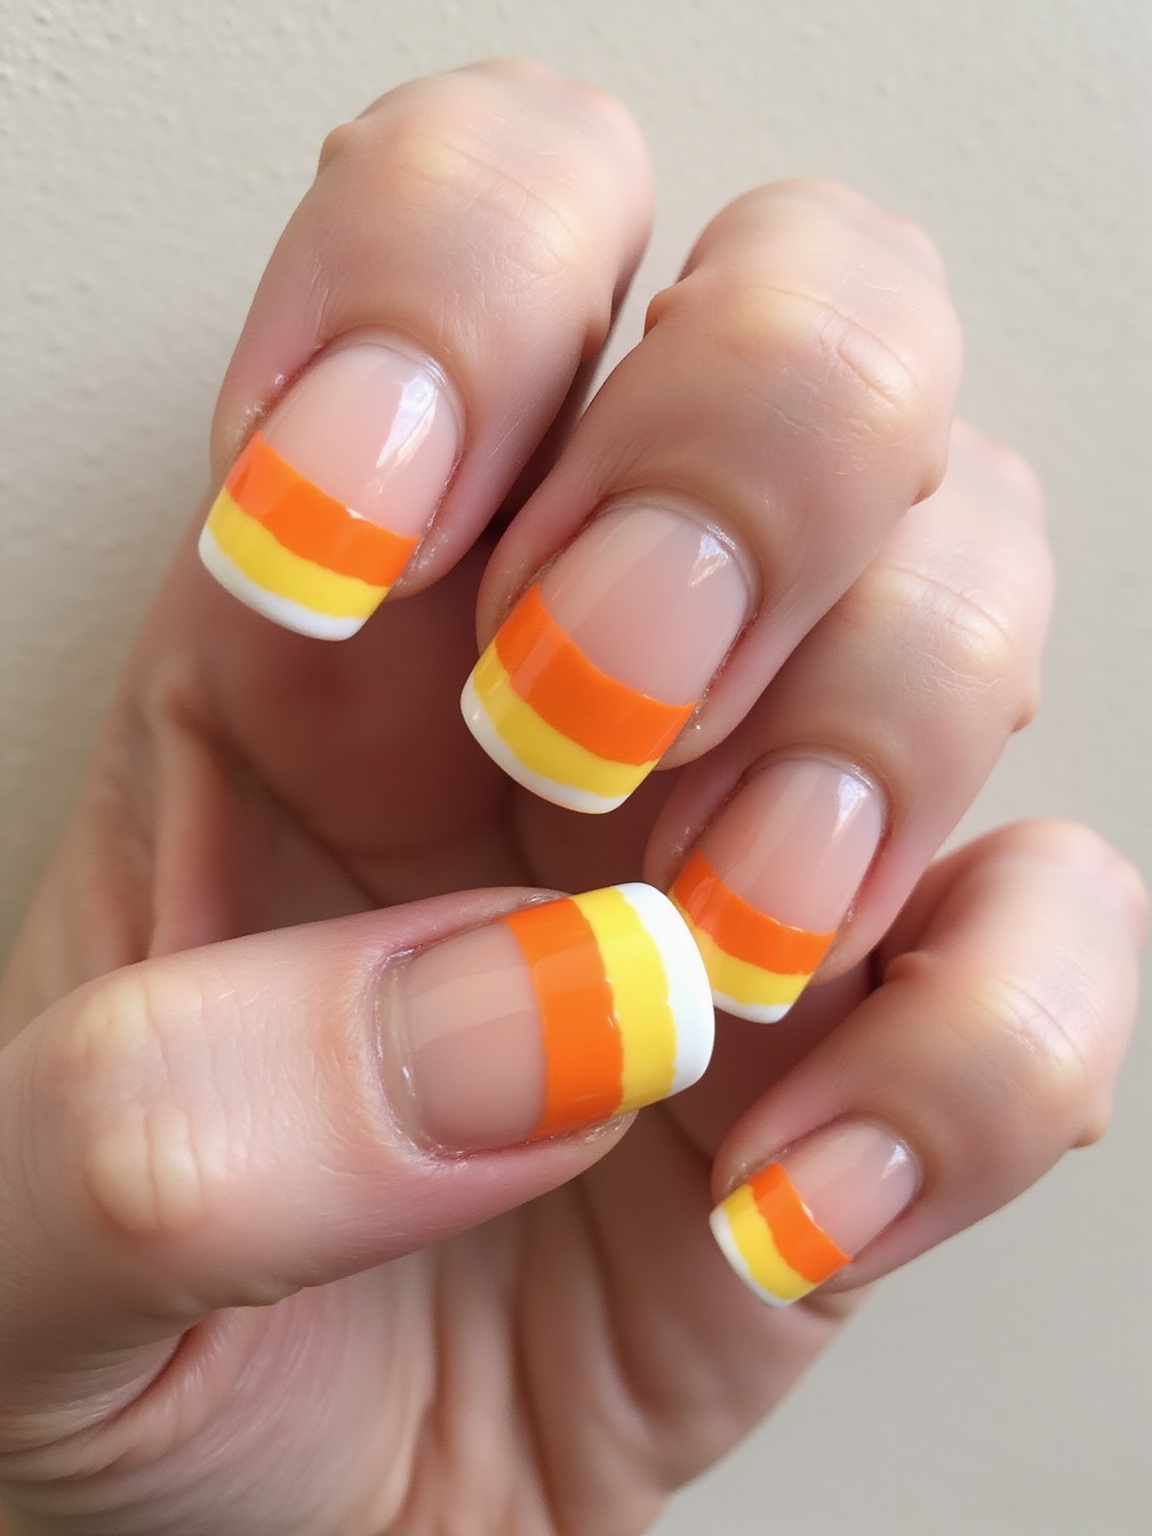
Candy corn is the nostalgic Halloween palette, and you can fake it with three quick bands of color instead of any real painting skill. It’s cheerful, retro, and screams the season at a glance.
Getting three clean bands without tape
Paint the base of the nail white, the middle orange, and the tip yellow, in three horizontal bands. Let each band dry before adding the next so the colors stay crisp and don’t bleed into a muddy stripe. Use the edge of the brush, or lay down striping tape between bands if your hand is shaky.
You can do all ten nails or just a couple of accents. On deeper skin, a true marigold-yellow and a saturated orange show up brighter than the dusty versions, so lean bold with the pigment.
Creepy-Cute Bloody Drip Manicure

The bloody drip is dramatic but surprisingly forgiving, because drips are supposed to look uneven and organic. A glossy red running down over a pale or white base is pure horror-movie, and it takes one color plus a steady-ish hand.
Why uneven drips look the most realistic
Paint a white or nude base, then load a thin brush with a deep, glossy red and pull a few wobbly drips down from the cuticle toward the center of the nail. Vary the length of each drip and let a couple pool into little rounded blobs at the bottom so it looks like real running blood.
Top it with a glossy clear coat to keep that wet, fresh look. If you want a softer version, my dark red nails guide has wearable deep-red ideas you can borrow the base shade from.
Bobby Pin Ghost Dots

If you don’t own a dotting tool, the rounded tip of a bobby pin is the oldest trick there is, and it makes perfect little ghosts in seconds. This is the design I hand to anyone who swears they can’t do nail art.
Over a black or deep-purple base, dip the looped end of a bobby pin in white polish and press a small blob onto the nail, then pull the bottom down slightly into a little tail so it looks like a floating ghost. Add two tiny black dots for eyes with the pointed end once the white dries.
Scatter just one or two ghosts per accent nail, with room to breathe. A handful of friendly ghosts against a dark base is the kind of creepy-cute that still looks pulled together, and it photographs adorably.
Glow Polish Swirl Technique

Glow-in-the-dark polish turns any manicure into a party trick the second the lights drop, and a loose swirl is the easiest way to use it. Here’s the order that keeps the glow bright:
- Paint your base color first, a black, purple, or neon, and let it set.
- Add a coat of glow polish on top; it usually goes on milky and sheer, so build two thin layers for a stronger charge.
- While the top layer is wet, drag a toothpick through it in a loose swirl, then charge the nails under a bright light before you head out.
Which easy Halloween nail matches your patience level?
1I have five minutes and zero skill
Bobby pin ghost dots or a single spiderweb accent. One tool, one nail, done.
2I want something that looks salon-level
Wine nails with rhinestone punctures or neon taped slasher lines, both lean on a tool, tape or a stone, to do the precision for you.
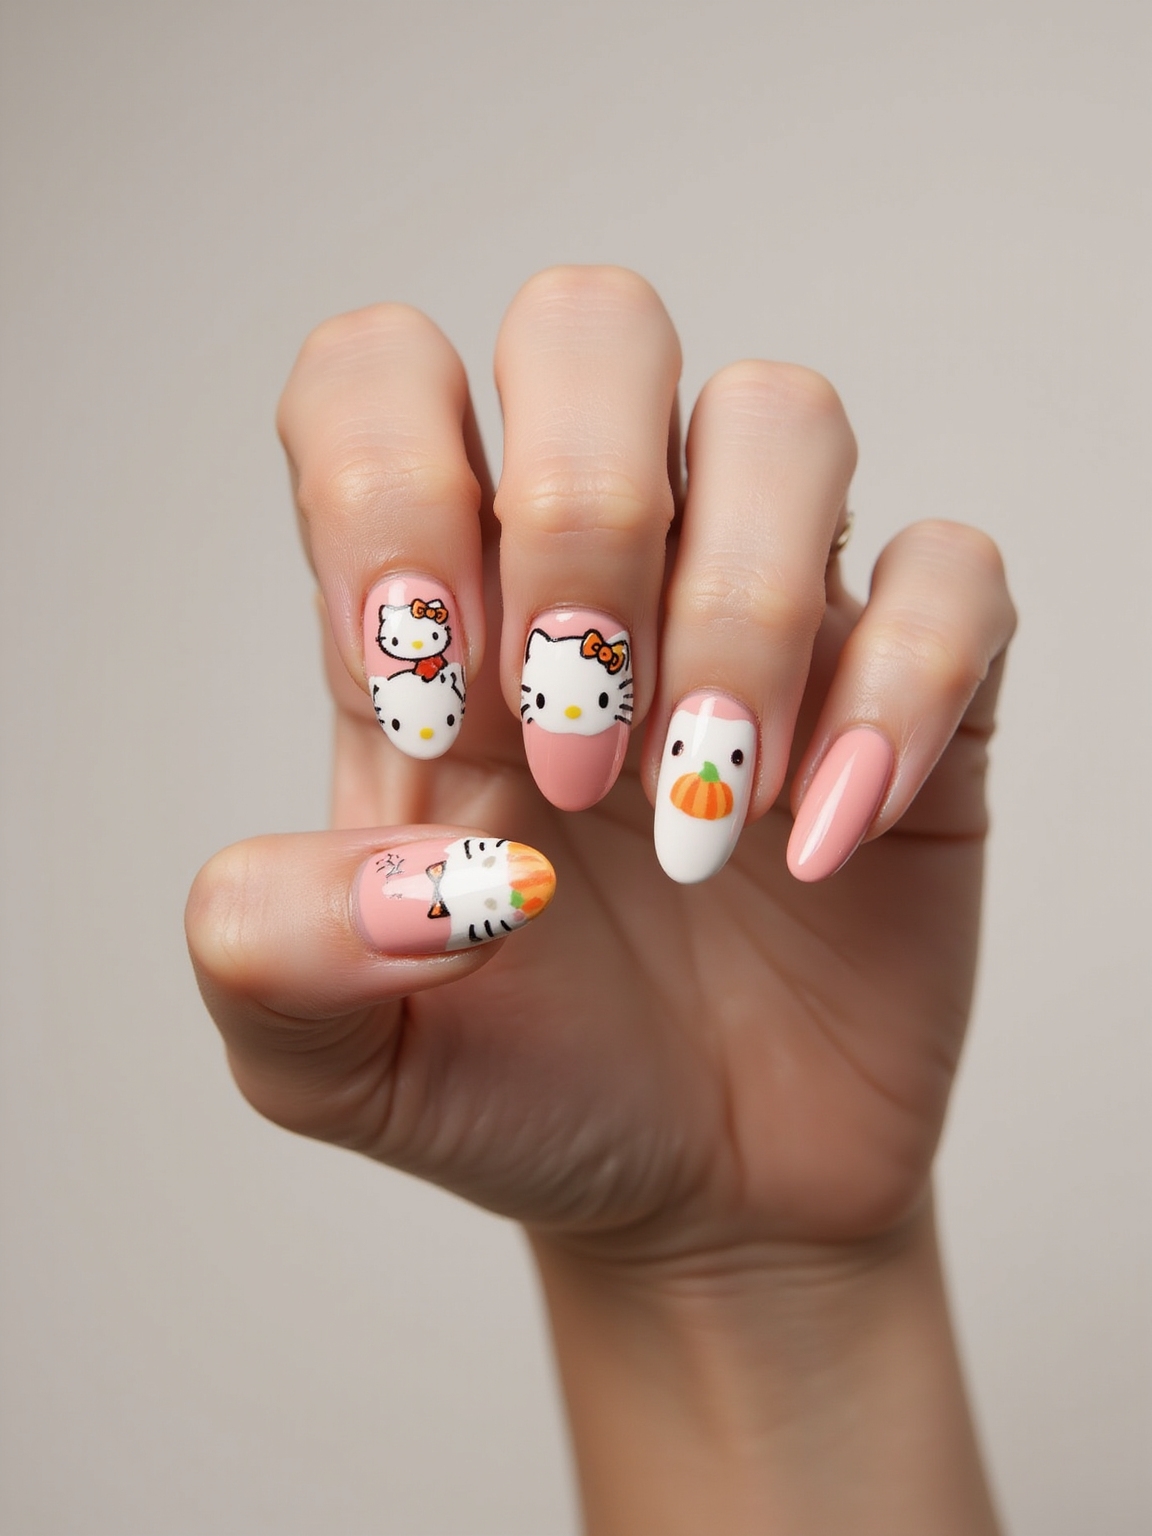
Playful Mismatched Pumpkin Nail Art

Mismatched nails are secretly the easiest roundup look, because nothing has to match and every nail is its own tiny canvas. A pumpkin theme gives you a palette and a few simple motifs to mix.
Think one nail solid orange, one with a little jack-o’-lantern face, one in a green stem-and-vine, one French tip in orange, one with tiny dots. Because they’re all different, a wobble on one just looks intentional next to the others.
- Draw a jack-o’-lantern face with a thin brush: two triangle eyes and a jagged smile in black over orange.
- Use a dotting tool for clusters of tiny pumpkins on an accent nail.
- Keep one nail simple and solid to give the eye a place to rest among the busier designs.
Subtle Black Cat Cuticle Detail
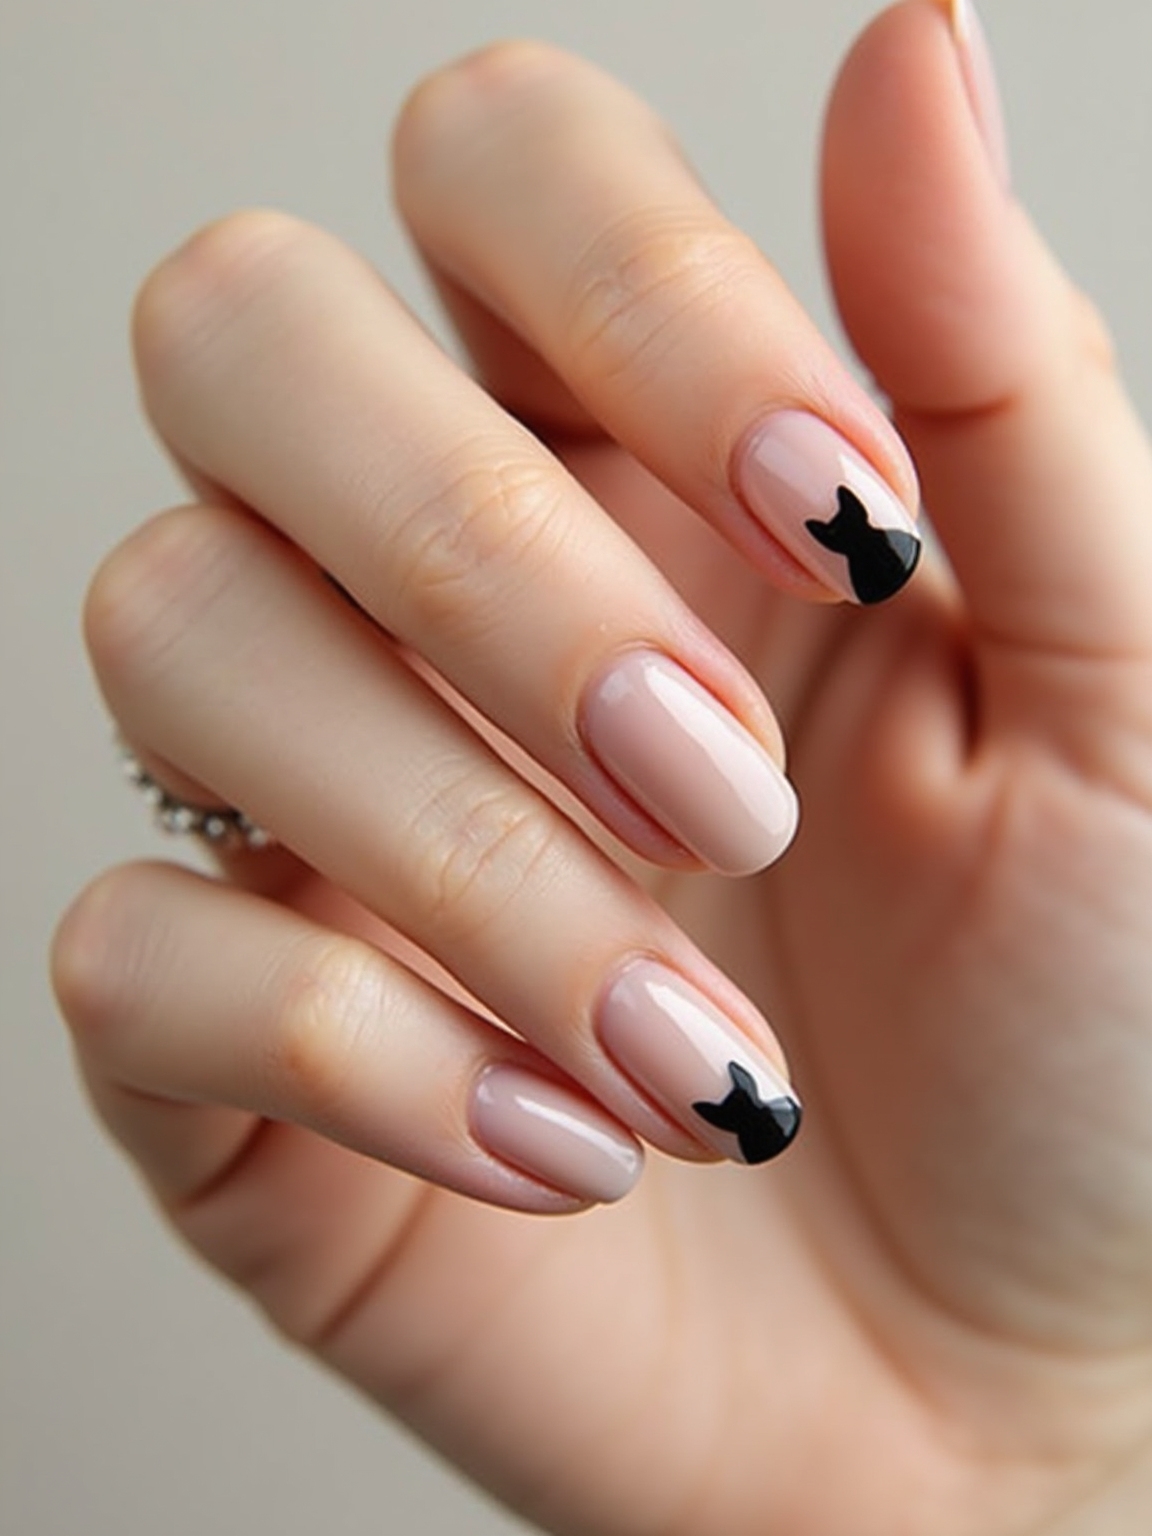
A little black cat peeking up from the cuticle is the understated Halloween nail for anyone who wants a hint of spooky they can wear to work. It’s small, graphic, and sits low on the nail so it feels like jewelry more than costume:
- Over a sheer nude or soft pink base, paint a small black cat silhouette near the cuticle of one accent nail.
- A cat is just a rounded body, two pointed ears, and a curled tail, so build it with a few strokes of a thin brush.
- Keep it tiny and tucked at the base; the smaller and neater it is, the more refined the whole hand reads.
Moody Striped Skeleton Nails

Skeleton nails sound advanced, but a striped, suggestion-of-bones version is mostly straight lines you can lay down with tape. The moody, muted palette keeps it chic and grown-up:
- Paint a grayish-taupe or bone base across all nails for that weathered, skeletal tone.
- Use thin striping tape to mask off, then paint simple white bone-segment lines down each nail, peeling the tape while the polish is still wet.
- Smudge the edges of the white slightly with a clean brush so the bones look aged and worn.
Wine Nails With Rhinestone Punctures
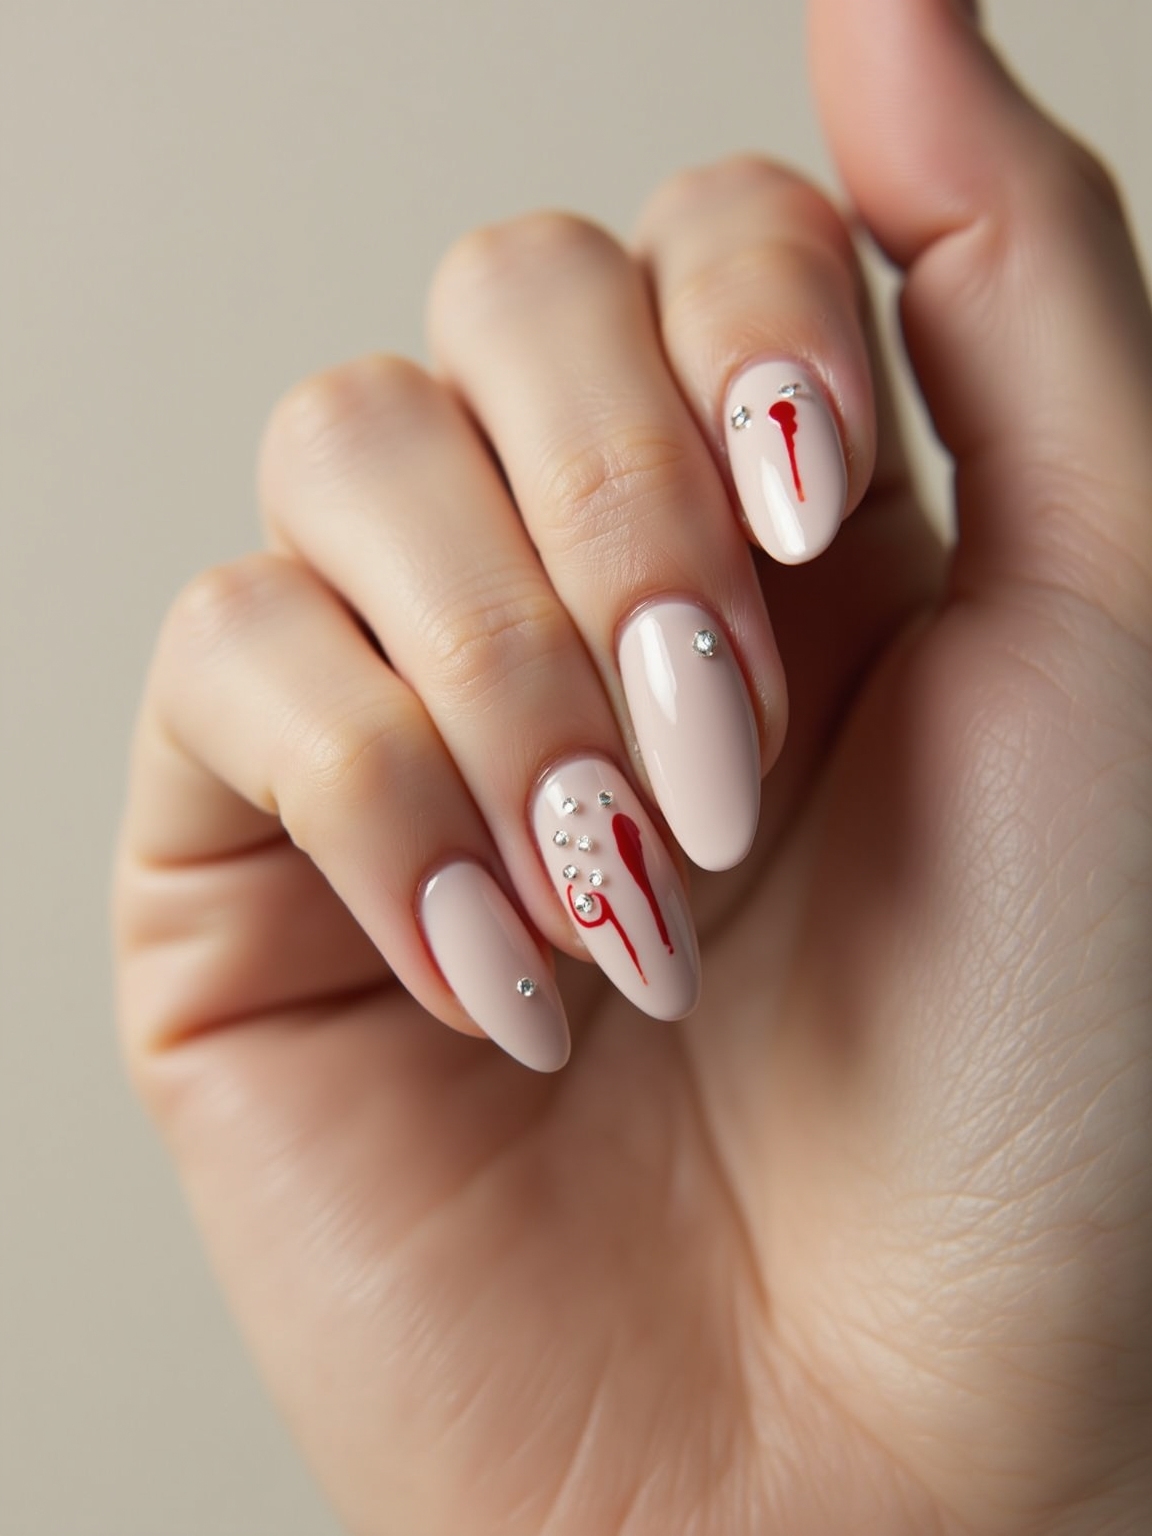
This is the grown-up vampire nail: a deep, glossy wine with two small rhinestones placed like fang punctures. It’s barely Halloween from across the room and unmistakable up close, which is exactly the elegant level of spooky a lot of people want.
Paint two coats of a rich oxblood or wine, then on one accent nail place two tiny rhinestones close together with a dot of clear gel or top coat to hold them. The two-stone placement is what makes it read as a bite, not stray bling.
- Use a dab of clear builder gel or thick top coat as glue, and press the stone in with a tweezer or the tip of a pin.
- Seal around each stone with another layer of top coat so it doesn’t catch and pop off.
- Keep the rest of the nails plain wine so the two little punctures are the whole story.
🅰️Accent Nail Only
Paint one detailed nail and keep the other nine clean. Fastest route, very hard to mess up, reads as a full themed set.
🅱️Full Themed Set
Carry the theme across all ten with mismatched motifs. More time and a steadier hand, but maximum payoff in photos.
Neon Taped Slasher Lines

Sharp neon slashes across a black base look like a horror poster, and the secret is tape, which gives you crisp edges no freehand line can match. It’s the most graphic design here and one of the easiest once the tape is down.
Why tape beats a freehand line every time
Paint a black base and let it cure hard, then lay strips of striping tape diagonally across each nail in a loose, slashing pattern. Brush bright neon, green, orange, or pink, over the gaps and peel the tape off immediately while wet for clean edges.
Neon needs a dark base to glow its hardest, so don’t skip the black. On deeper skin, the brightest, most saturated neons read electric, so go bolder than you think you need to.
Maintenance & Care
A DIY Halloween manicure only earns its keep if it survives the night, so a little prep goes a long way. Start every look with a clean, buffed nail and a proper base coat, which stops dark and neon pigments from staining and gives the color something to grip.
Work in thin layers, never one thick coat, because a fat coat of polish stays soft underneath and dents the second you reach into a candy bowl. Once your design is dry, seal the whole thing, art and all, with a good top coat, and run a swipe of it along the free edge to cap the tips, which is the single best thing you can do to stop early chipping.
For the looks with rhinestones or heavy detail, give them extra dry time before bed and reapply top coat every couple of days to keep stones anchored and colors glossy. If you used glow or neon polish, a clear glossy top coat keeps the finish bright. And when the season’s over, take everything off gently with an acetone soak; peeling, which pulls up layers of your natural nail.
For more on building a manicure that lasts, my press-on nail ideas cover a no-dry-time route, and my double french tip designs show how clean lines hold up.
Easy Halloween Nails FAQ
?What are the easiest Halloween nail designs to do at home?
Single-accent looks are easiest: a spiderweb on one nail, bobby-pin ghost dots, or two rhinestone fang studs over wine polish. You only have to get one nail right, and the clean nails around it make the whole hand look intentional.
?What can I use if I don’t have a dotting tool?
The rounded end of a bobby pin or the tip of a toothpick both work. A bobby pin makes clean round dots for ghosts and pumpkins, and a toothpick handles finer detail like spider legs or thin lines.
?How do I keep DIY Halloween nails from chipping?
Use a base coat, work in thin layers, cap the free edge with top coat, and reseal every couple of days. Thin coats cure harder than thick ones, and capping the tip is the biggest defense against early chips.
?Which Halloween nail colors work best on deeper skin tones?
Saturated, high-pigment shades, true orange, deep wine, bright neon green or pink, and crisp white. Rich, bold pigments read vivid against deeper complexions, while dusty pastels tend to disappear.
Spooky Nails Without the Salon
None of these ask for a nail-art kit or a booked appointment, just polishes you mostly own and a bobby pin, a bit of tape, or a thin brush standing in for fancy tools. Whether you want a barely-there bat for the office or a full bloody-drip moment for the party, the design is built from one accent nail and a little patience.
Start with the look that matches how steady your hand feels tonight, lay your lines with tape if you’re nervous, and seal it all with a top coat so it lasts through the candy and the cold. You’ve got everything you need in the drawer already, so pick your spook level and get painting.