
Most eye-makeup idea lists hand you the same five looks with fresh photos and call it inspiration. I wanted this one to earn its place, so I have tied each idea to a real occasion: the eye I would do for a slow Sunday versus a night out, a strict office versus a party.
Match the look to your day and the choice gets easy. These 15 ideas run from a two-minute glossy lid to a full metallic, and each note tells you when it shines and what to pair it with, so you spend less time scrolling and more time actually trying things.
How to Use This List
- These ideas are sorted by vibe and occasion, so you can match the eye to your day at a glance.
- Most take two to ten minutes and reuse the same small handful of products in different ways.
- Each idea adapts by skin tone, warmer and brighter pigments like gold, copper, and emerald show up best on deep skin.
A Glossy One-Shade Lid for Off-Duty Days

When you want to look pulled together with zero fuss, one cream shade swiped across the lid and left a little glossy is the idea to reach for. It is the laziest look here and the one I wear most on weekends.
Why it earns a spot in the rotation:
- Under a minute with a single cream eyeshadow and your finger.
- Pairs with everything, from a bare face to a bold lip.
- Best on running-around days when you want effort-free polish.
A Soft Brown Wing for the Office

A brown wing is the idea I hand anyone who wants definition that passes at a conservative job. The softer color and blurred edge keep it professional while still opening the eye, so it stays firmly in daytime territory.
When and how to wear it:
- Great for meetings and interviews, where black liner can feel like too much.
- Smudge the edge slightly so it stays soft and daytime-appropriate.
- Top with one coat of brown mascara to keep the whole eye in the same gentle key.
A Neon Inner Corner for a Night Out

When the plan is dinner and drinks and you want one unexpected detail, a neon inner corner does it without a full color commitment. It is a tiny hit of brightness that photographs alive under bar lighting.
- Pick a brightening shade like electric blue, lime, or hot coral.
- Leave the lid bare so the corner does all the talking.
- Layer a dab over a white base so the neon stays true once the lights drop.
📋Quick eye-look kit
- ✓A warm neutral and a deeper brown shadow
- ✓One shimmer (champagne or gold)
- ✓A pencil liner and a brown mascara
- ✓A small detail brush and a fluffy blending brush
A Precise Flick for Date Night

Some nights call for a sharp, deliberate flick, the kind that makes you feel a little more confident walking in. This is the date-night idea: clean, classic, and a touch dramatic without being a whole production.
- Steady your elbow on a table so your hand stays calm for the line.
- Work in two or three short strokes, joining them into one clean flick.
- Set it with a matching shadow pressed over the liner so it lasts all evening.
A Tapped-and-Blended Soft Eye

If sharp lines stress you out, this idea skips them entirely. You tap, blend, and press color with your fingers until it looks soft and diffused, which is forgiving enough to do half-asleep and still look intentional.
What makes it foolproof:
- Fingers do the work, so there is no brush technique to master.
- Build slowly in light taps and stop when it feels right.
- Great for beginners and anyone who finds blending brushes fiddly.
An Easy Smudged Kajal for Errand Days

On days that are all errands and no plans, a quick smudge of kajal gives your eyes some life in about sixty seconds. It is the idea I lean on when I want to look awake without thinking about it:
- One minute, one pencil, smudged with a fingertip while you walk out.
- Reads cool and undone, which suits low-key casual days.
- Smoke it darker later if errands turn into dinner.
A Pastel Waterline for a Playful Twist
Swapping black liner on the waterline for a soft pastel is the easiest way to feel playful without committing to a full colorful eye. It is a small idea with a big payoff, and unexpected enough to feel fresh:
- Try baby blue, lilac, or mint on the lower waterline.
- Keep everything else bare so the pastel pops on its own.
- Lovely for spring and warmer months when you want something light.
Stuck on which idea to try? Pick by your day:
🎯Three minutes, busy morning
Go quick taupe or a glossy one-shade lid, both are nearly foolproof.
🎯Night out, want a moment
Try a neon inner corner, a metallic foil, or a precise flick.
A Champagne Halo for Brunch

For daytime events where you want a soft glow, a champagne halo is the easy win. It catches the light prettily over brunch or in photos without looking like full glam at noon.
- Glow concentrated at the center so the eye looks lifted and bright.
- A daytime-soft choice that still photographs beautifully.
- Use a warm champagne on deep skin so the glow registers clearly.
A Crisp Floating Crease for a Statement

When you want people to notice your eyes, a crisp floating crease delivers. The lifted line above your natural crease reads modern and a little editorial, so it is the idea for an event where a regular eye would feel too safe.
It takes patience and a steady detail brush, so save it for when you have ten unhurried minutes. Map the arc with your eyes open first, since the line needs to sit where it actually shows, then build it in short strokes and fill below it with a soft shade. The payoff is a graphic, eye-opening shape that looks especially striking on hooded and monolid eyes.
A Metallic Foil for Parties

Nothing says celebration like a foiled metallic lid that throws light across the room. This is the party idea, the one to pull out for New Year, a birthday, or any night you want your eyes to be the outfit.
How to make it a full-shine moment:
- Dampen the brush so the metal turns mirror-bright.
- Gold, bronze, and copper glow on deep skin, so reach for warm metals there.
- Keep the lip nude so the eyes stay the headline.
| Idea | Best for | Time |
|---|---|---|
| Glossy one-shade lid | Off-duty, weekends | Under 1 min |
| Soft brown wing | Office, interviews | 3 to 5 min |
| Metallic foil | Parties, events | 8 to 10 min |
A Quick Taupe Eye for Busy Mornings

Taupe is the idea for mornings when you have three minutes and no brainpower. A neutral that adds quiet shape and goes with anything, it is the closest thing to a default eye that still looks considered.
- One neutral shade through the socket for instant, no-think depth.
- Goes with every outfit and lip, so it is the safe weekday pick.
- Three minutes flat, which is why it is on heavy rotation.
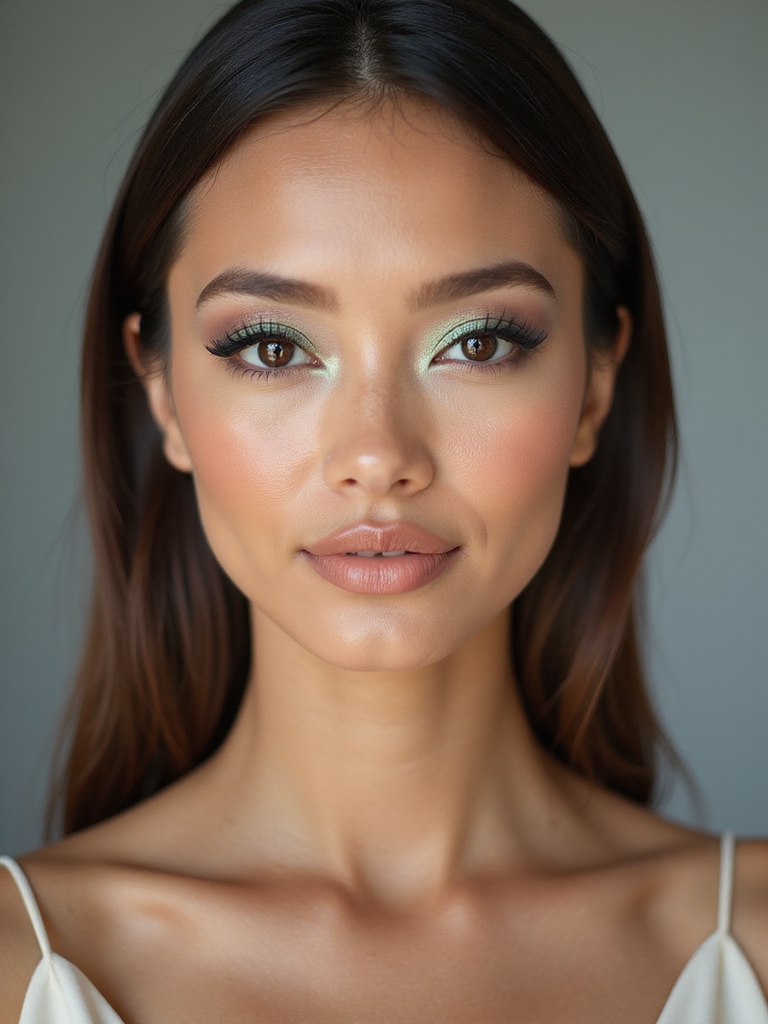
A Sunset Shimmer for Golden Hour

A sunset eye blends warm shimmers, peach, amber, terracotta, so they melt together like the sky at dusk. It is the idea for golden-hour weddings, festivals, and warm-weather evenings where soft warmth suits the mood.
Blend Light to Deep Across the Lid
Build it by layering the lightest peach on the inner lid and deepening toward amber and terracotta at the outer corner, blending where they meet. The gradient is what gives it that glowing, sunset feel.
It is truly flattering across skin tones, and on deep skin the warm coppery end of the gradient looks especially rich.
Mirrored Graphic Wings for the Bold

For the days you feel like making art on your face, mirrored graphic wings, matching geometric shapes on both eyes, are the most expressive idea here. It is the look for a concert, a creative event, or simply a confident mood.
To pull off the symmetry:
- Map both shapes with a light pencil before you commit to liquid.
- Do one stroke on each eye in turn so they stay even.
- Photograph it since this is the idea you will want to remember.
The best eye look is the one that fits your day, not the most complicated one you can manage.
An Emerald Lower-Lash Accent

Putting a jewel tone along the lower lashes is an idea that feels fresh because so few people do it. Emerald is the standout: rich, a little unexpected, and flattering against most eye colors.
- Run emerald along the bottom lashes with bare lids up top.
- A modern, low-effort way to wear color without a full colorful lid.
- Brightens brown and hazel eyes especially, making them pop.
A Soft Sculpted Crease for Everyday Polish

If you want one idea that quietly lifts any day, a soft sculpted crease is it. A little diffused depth placed in the crease gives the eye natural dimension, so you look polished without anyone clocking that you did much.
It is the everyday-upgrade idea, somewhere between bare and done. A single mid-tone blended through the crease is all it takes, which makes it a realistic habit rather than a special occasion.
Styling Tips
A couple of small habits make any of these ideas land better. Always prime the lid first, even a thin layer of concealer, so color grips and lasts, and tap excess off your brush before it touches your eye so you build up rather than over-apply. If you only own a few shadows, a warm neutral, a deeper brown, and one shimmer will cover most of this list.
Think about balance, too. When the eye is the statement, keep the lip soft, and when you go bold on color, anchor it with groomed brows and a little mascara so the look feels finished rather than half-done. Pair any of these with a polished base like a glowy makeup look and the whole face comes together.
Eye Makeup Idea Questions, Answered
?What is the easiest eye makeup idea for beginners?
A glossy one-shade lid or a quick taupe eye. Both use a single shade applied with your finger, take under three minutes, and are almost impossible to mess up, which makes them the best starting points before you try liner or crease work.
?How do I pick an eye look for an occasion?
Match the drama to the setting: soft brown or taupe for work, a neon corner or metallic for a night out, and a champagne halo for daytime events. When the eye is the statement, keep the lip soft so the look stays balanced.
?Which eye makeup ideas work best on deep skin tones?
All of them, with the right pigments. Reach for warm metals like gold and copper, true-neon and jewel tones such as emerald, and richer shimmer shades so the color shows up clearly rather than fading against the skin.
Pick One and Try It Today
The reason to sort eye looks by occasion is simple: you are far more likely to actually wear the glossy lid you can do in a minute than the floating crease you keep meaning to attempt. Start with the idea that fits the day in front of you, and build from there as you get comfortable.
Bookmark this and treat it like a menu. On a slow morning, grab the taupe; for a party, the metallic; for a confident night, the flick. The more you try, the faster each one gets, and soon you will have your own short list of go-to looks. Pair them with a fresh eye makeup technique or two and your rotation only grows.


