I’ve always believed that a braided updo isn’t just a hairstyle – it’s your crown, your statement, and your moment to shine. Whether you’re walking down the aisle or strutting through your everyday life, these intricate woven designs have the power to transform any look from basic to breathtaking.
Let me show you nine stunning ways to twist, wrap, and braid your way to head-turning elegance that’ll make every snapshot count.
Crown Braid Elegance: A Royal Touch for Special Events
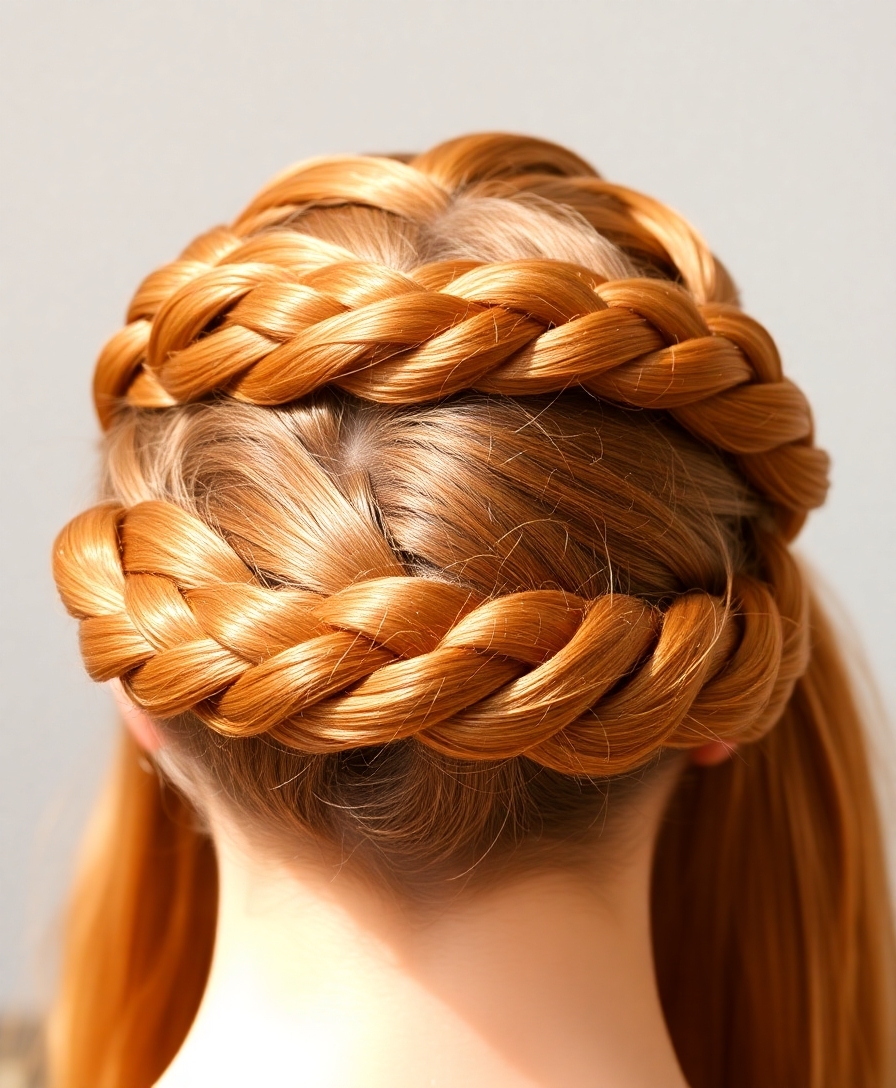
When you want to feel like absolute royalty, nothing makes a statement quite like a crown braid updo.
I’m telling you, this elegant style wraps around your head like nature’s tiara, creating that ethereal vibe you’ve been dreaming of.
Trust me – with some bobby pins and a bit of practice, you’ll master this look that’s perfect for weddings, galas, or any moment you’re ready to rule. Additionally, incorporating Mohawk braided hairstyles can elevate your crown braid and give it a unique twist.
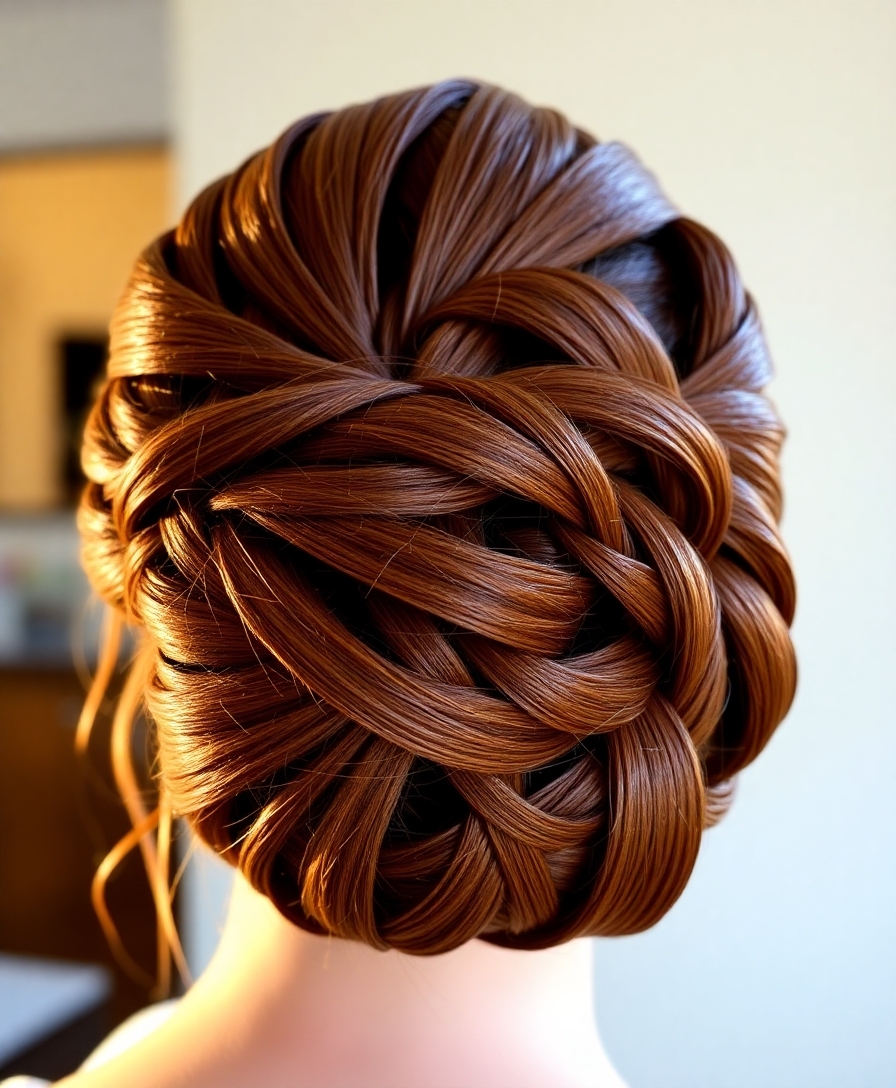
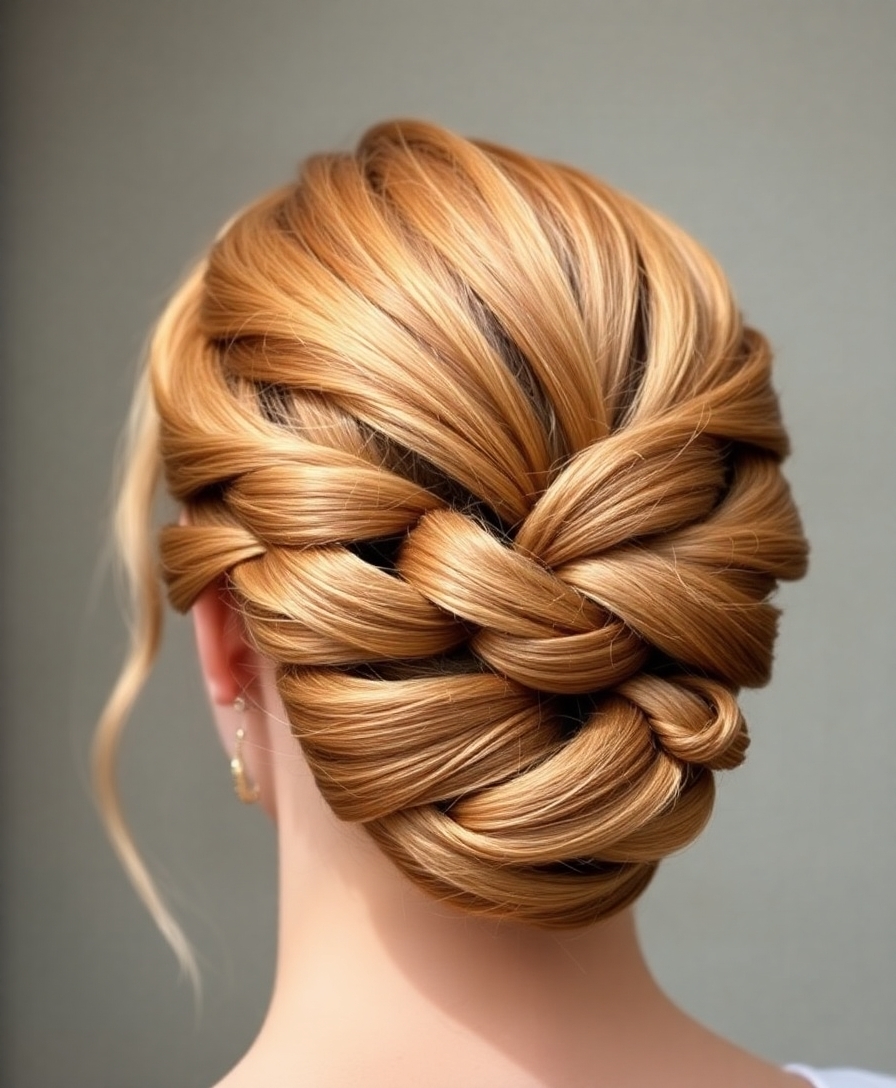
Twisted Dutch Braid Bun for Modern Sophistication

I’ll let you in on my favorite secret for a flawless Dutch braid bun – it’s all about creating that perfectly sleek base before you start braiding.
To achieve the smoothest foundation, I always recommend using a fine-toothed comb and a stronghold gel, working section by section from the nape of your neck upward.
Once you’ve got your base prepped, you’ll want to position your crown braid exactly where it’ll sit best on your head – I find that slightly off-center placement adds an unexpected modern twist to this sophisticated style.
Additionally, incorporating elegant braided updos can elevate your look even further for any occasion.
Sleek Base Braiding Tips
To achieve that ultra-sleek, modern Dutch braid bun, you’ll want to start with the perfect foundation.
I always prep my clients’ hair with a smoothing serum and flat iron the roots. Trust me, section your hair cleanly using a tail comb – those precise parts make all the difference.
For that super-sleek finish, brush each section taut before braiding. Incorporating effortless messy buns into your hairstyle repertoire can provide a contrast to your sleek braid updo, adding a touch of effortless elegance to your overall look.
Securing Your Crown Position
Now that you’ve mastered those sleek sections, let’s talk crown positioning – it’s where the magic happens!
I’ll show you how to secure your Dutch braid right at the crown sweet spot. Position your twist about two inches back from your hairline, anchoring it with U-shaped pins crossed in an X.
Trust me, this placement creates that coveted height while keeping everything locked in place. Additionally, for a touch of elegance, consider incorporating updo hairstyles for prom that enhance the overall look of your braided bun.
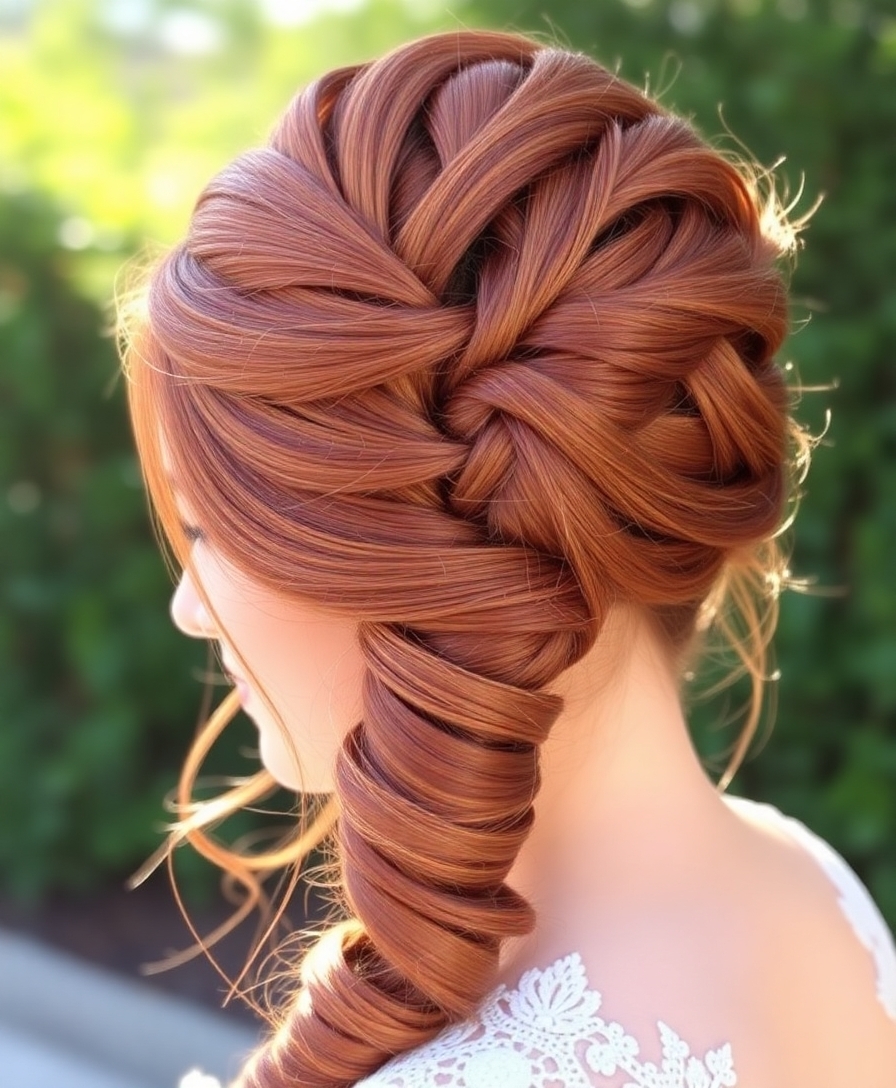
French Braid Wrap With Side-Swept Romance

I’m excited to show you how to create this show-stopping French braid wrap that’ll make you feel like you’ve just stepped off a romance novel cover. The key lies in starting your French braid high on one side of your head, gradually incorporating loose sections while working your way down and around to create that coveted sweeping effect.
You’ll need a strong-hold hairspray and some strategically placed bobby pins to keep your masterpiece secure, but trust me – this ethereal style is worth every minute of effort.
Plus, this chic updo pairs beautifully with short hairstyles for teen girls, so you can switch up your look effortlessly.
Braiding Pattern and Technique
Creating this French braid wrap begins with a deep side part that sweeps dramatically toward your preferred side.
I’ll guide you to section off a 2-inch strip of hair along your hairline, then start French braiding from behind your ear.
As you work upward, incorporate loose strands while following your part line’s curve, keeping tension firm but not tight.
Securing Your Side Sweep
After you’ve completed your French braid wrap, securing that gorgeous side sweep is where the magic happens.
I’ll show you how to lock it in place with mini clear elastics and strategically placed bobby pins. Tuck them in at a 45-degree angle, crossing two pins in an X pattern. To achieve the perfect look, consider using easy braided hairstyles that complement your face shape and outfit perfectly. Don’t forget my secret weapon: a light mist of flexible-hold hairspray.
Essential Styling Products
Three must-have products will take your French braid wrap from pretty to absolutely stunning.
First, I swear by a texturizing spray to give your braids that perfect grip and volume.
Next, grab a strong-hold hairspray – trust me, those flyaways don’t stand a chance.
Finally, I’m obsessed with shine serum for that red-carpet worthy gleam.
To elevate your look, consider incorporating effortless messy bun hairstyles for an added touch of flair.
Let’s make your updo unforgettable!
Bohemian Fishtail Updo With Loose Tendrils

While fishtail braids are stunning on their own, I’ve discovered that weaving them into a bohemian updo creates pure magic.
Let me show you how to nail this dreamy, ethereal look that’s perfect for any special occasion.
- Start with day-old hair for better grip
- Create two fishtail braids along the sides
- Pin braids into a loose crown formation
- Pull out face-framing tendrils for that effortless vibe.
Additionally, a chic messy ponytail can complement your overall bridal look perfectly, offering a relaxed but elegant touch to the hairstyle.
Braided Rose Bun: Floral-Inspired Glamour
I’ll show you how to transform your braids into a stunning rose-shaped bun that’ll make everyone wonder if you’ve got actual flowers in your hair.
To create this romantic updo, you’ll need to master the spiral braiding technique where we’ll wind the braid around itself to form delicate petals. Chin length updo hairstyles provide the perfect canvas for this floral-inspired look, ensuring that even shorter hair can capture this elegant style.
Let’s add some strategic teasing and light backcombing to give your rose bun that coveted garden-fresh volume and dreamy texture that makes this style truly bloom.
Braiding Your Rose Pattern
Creating a gorgeous rose pattern in your hair isn’t as complicated as you might think!
Let me show you how to transform your braids into a stunning floral masterpiece.
- Start by Dutch braiding a spiral from your crown, gradually adding hair as you work outward.
- Keep the braid close to your scalp, maintaining even tension.
- When you reach the end, twist remaining hair into a coil.
- Pin strategically to create petal-like layers that form your rose.
Adding Texture and Volume
Now that you’ve mastered the rose braid pattern, let’s amp up your style with some serious volume and texture!
I’ll show you how to tease specific sections strategically – focus on the crown and sides.
Spritz texturizing spray at the roots, then use your fingers to gently massage and lift.
Don’t forget my favorite trick: Pull your braids apart slightly for that effortlessly lived-in look. Additionally, consider incorporating a messy bun for short hair for an urban chic vibe that embraces your natural beauty.
Double Waterfall Braid With High Twisted Knot

While this elegant updo may look complex, you’ll be amazed at how achievable the double waterfall braid with high twisted knot really is.
I’ll show you my favorite way to create this show-stopping style that’s perfect for special occasions.
- Start by parting your hair down the middle and creating two waterfall braids.
- Let loose strands cascade naturally as you braid.
- Gather remaining hair into a high ponytail.
- Twist and pin into an elegant knot, securing with bobby pins.
Spiral Lace Braid for Wedding-Ready Style
I’ll show you how to create the perfect spiral lace braid that elegantly crowns your head like a romantic bridal halo.
When you’re placing the crown braid, make sure to secure it firmly at your nape first, then work the spiral pattern upward while keeping consistent tension throughout.
You’ll want to anchor those gorgeous braided sections with precisely placed bobby pins in a crisscross pattern, ensuring your wedding-ready style stays flawless from “I do” to the last dance.
Elegant Crown Placement Tips
Creating a stunning spiral lace braid crown requires three key placement techniques that’ll transform your updo from basic to breathtaking.
I’m sharing my go-to tips for nailing that perfect crown position every time:
- Position your spiral braid slightly off-center for a modern twist.
- Secure anchor points every 2 inches with clear elastics.
- Tuck ends beneath the crown’s thickest section.
- Cross-pin in an X pattern for all-day hold.
Essential Braid Securing Techniques
To master a wedding-worthy spiral lace braid that stays flawless from “I do” to last dance, you’ll need rock-solid securing techniques that go beyond basic bobby pins.
I’ll show you my go-to method: First, I anchor each crossover with mini elastic bands.
Then, I weave invisible pins in a crisscross pattern and mist with flexible hairspray.
Trust me, this braid isn’t going anywhere.
Messy Box Braid Updo With Textured Volume

With its effortlessly cool vibe, the messy box braid updo lets you rock that perfectly imperfect look while keeping your braids stylishly contained.
- Loosely gather your box braids at the crown, letting a few strands escape for that carefree texture.
- Pin braids randomly in a circular pattern, creating height and dimension.
- Pull select pieces gently to add volume and lived-in appeal.
- Secure flyaways with light hairspray, maintaining that intentionally undone finish.
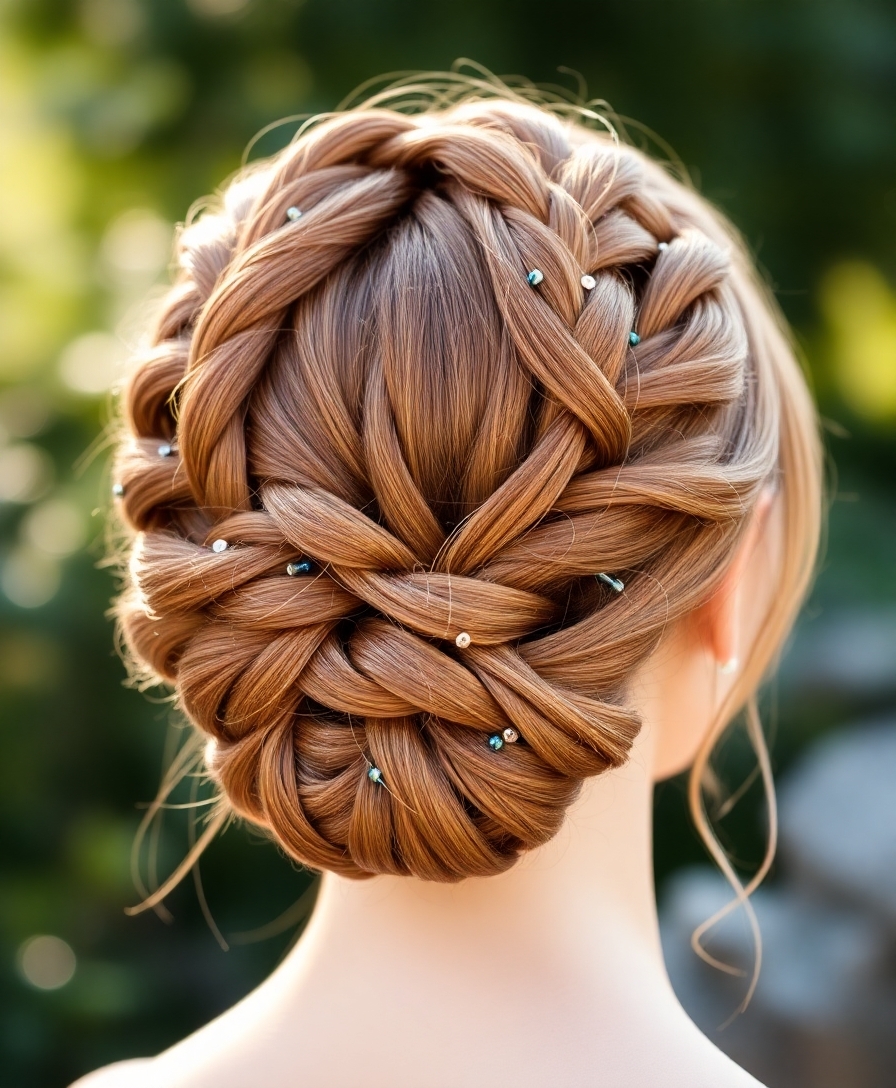
Rope Braid Crown With Pearled Accents
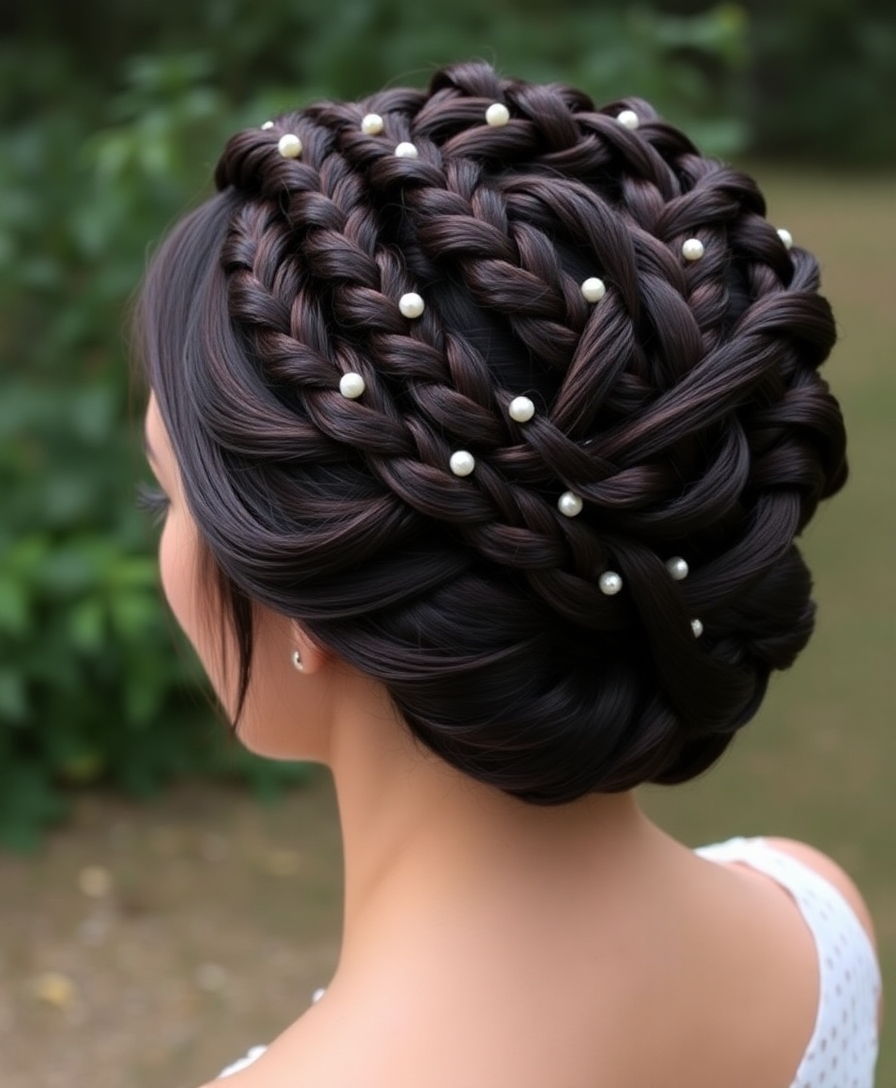
Three elegant rope braids intertwined into a crown create the perfect canvas for delicate pearl accents in this romantic updo.
I’ll show you how to weave these twisted strands into a stunning halo, strategically placing luminous pearls that catch the light.
Trust me – this look’s perfect for brides and special events, adding that extra touch of sophistication without feeling stuffy or overdone.
Grecian-Inspired Triple Braid Weave
Drawing inspiration from ancient Greek goddesses, this intricate triple-braid weave turns your hair into a masterpiece of cascading plaits that’ll make you feel like royalty.
I’ll help you channel your inner goddess with this stunning style.
- Start with three distinct sections, weaving each into a loose Dutch braid
- Cross-weave your braids to create an illusion of endless intertwining
- Pin strategically at the nape for that effortless drape
- Leave wisps around your face for that divine, ethereal touch
Side-Swept Mermaid Braid Chignon

The mermaid braid chignon brings oceanside romance to your updo game, taking that Greek goddess energy and giving it a beachy twist.
I’ll show you how to sweep your hair to one side, create a thick fishtail braid, then coil it into a dreamy chignon.
Add some strategic pulling to create that coveted undone texture, and you’ll be turning heads with this ethereal style.
Celtic Knot Braid With Intricate Details

Inspired by ancient Celtic artistry, this intricately woven updo transforms your everyday braids into a showstopping masterpiece.
I’ll show you how to create this stunning look that’s perfect for special occasions or when you’re feeling extra fancy.
- Start with three thin braids on each side
- Weave them in a figure-eight pattern
- Secure crossing points with clear elastics
- Pin the pattern to create an eternal knot effect
Braided Mohawk Updo for Edgy Elegance
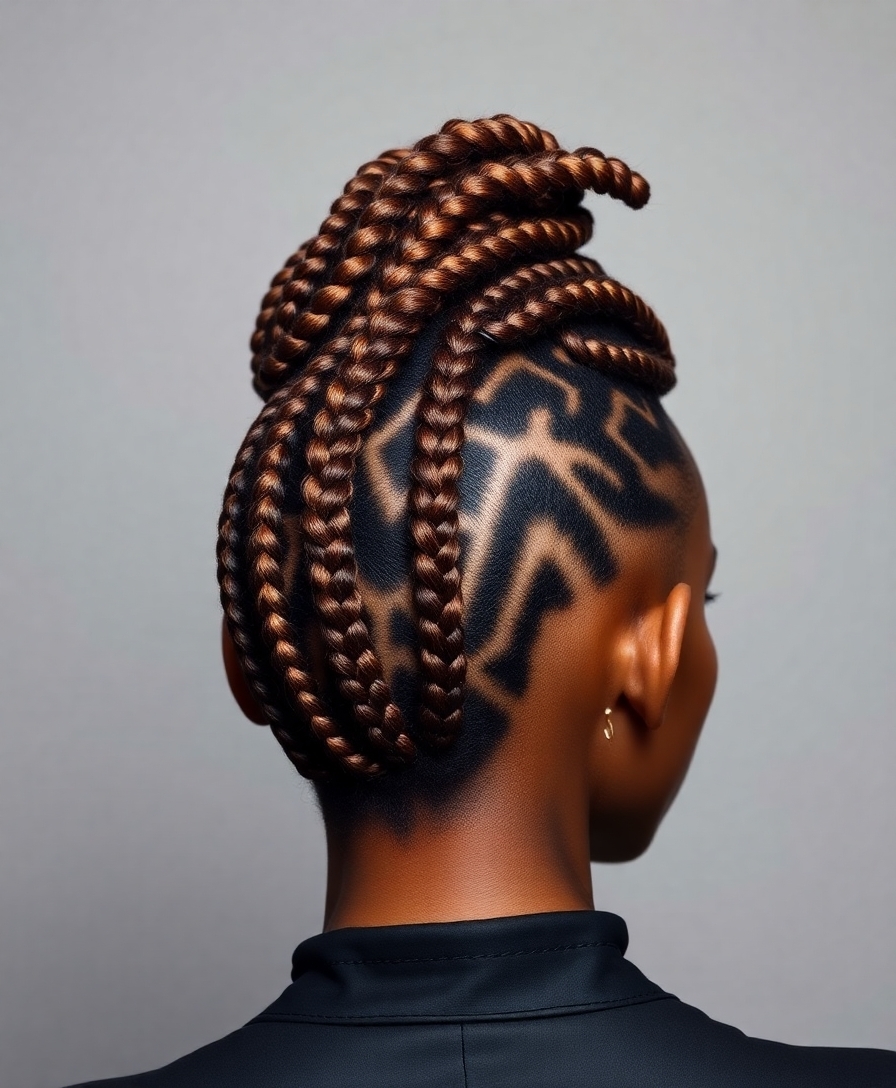
Blending fierce attitude with polished sophistication, this braided mohawk updo breaks all the rules in the best possible way.
I’ll show you how to create a striking center braid that rises like a mohawk, flanked by tight cornrows on each side.
Trust me, it’s the perfect style when you want to command attention while keeping your elegant edge at any formal event.
Butterfly Braid Bundle With Romantic Twists
From edgy elegance to ethereal romance, I’m excited to share my favorite updo that’ll make you feel like a butterfly goddess!
- Create loose Dutch braids curving up both sides, letting wisps frame your face.
- Pin braids into a messy bun, crossing them to form “butterfly wings.”
- Add delicate twists between the braids for an enchanted garden vibe.
- Secure with decorative pins and mist with hairspray for all-day whimsy.
Halo Braid Fusion With Hidden Pins
Every goddess deserves a crown, and I’ll show you how to create yours with this stunning halo braid fusion!
By weaving your hair into a circular braid that wraps around your head like a celestial ring, you’ll achieve pure magic.
I’ve mastered the art of concealing pins strategically, so your halo stays perfectly in place while looking effortlessly ethereal.
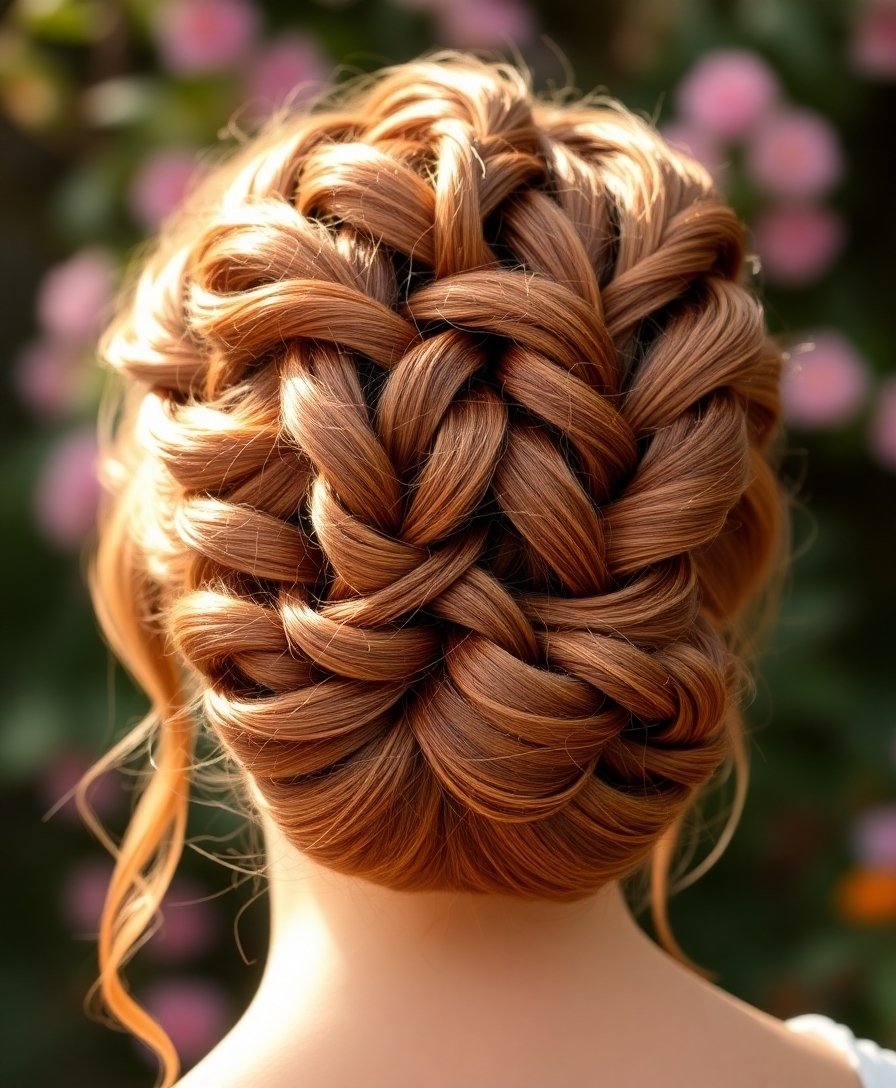
Lattice Braid Architecture for Evening Glam

The stunning lattice braid architecture I’m about to show you takes evening glamour to jaw-dropping heights.
Trust me, this intricate weave will turn heads at any formal event.
- Start with three diagonal Dutch braids crossing at precise angles
- Lock each intersection with clear elastic bands
- Secure loose ends underneath with bobby pins
- Mist with flexible-hold hairspray for that red-carpet shine
I’ve shown you nine stunning braided updos that’ll transform your look from basic to breathtaking. Whether you’re walking down the aisle or strutting through downtown, these styles pack serious wow-factor.
Trust me, I know these braids take practice, but they’re worth every minute. So grab your hairpins, embrace your inner artist, and get ready to turn heads. Your perfect braided updo awaits!