
I’m about to show you 15 zombie makeup ideas that turn a quiet face into a full-on haunting spectacle. Think freezer-burned pallor, bruised sockets, glossy ooze, and jaw-ripping prosthetics—all doable with drugstore staples or pro kits.
I’ll mix fast looks with sculpted rot, glam-gore sparkle, UV veins, and cracked desert skin so you can pick your poison. Ready to look freshly risen—or centuries gone? Let’s start with the classics, then things get…messier.
Classic Night-of-the-Undead Look

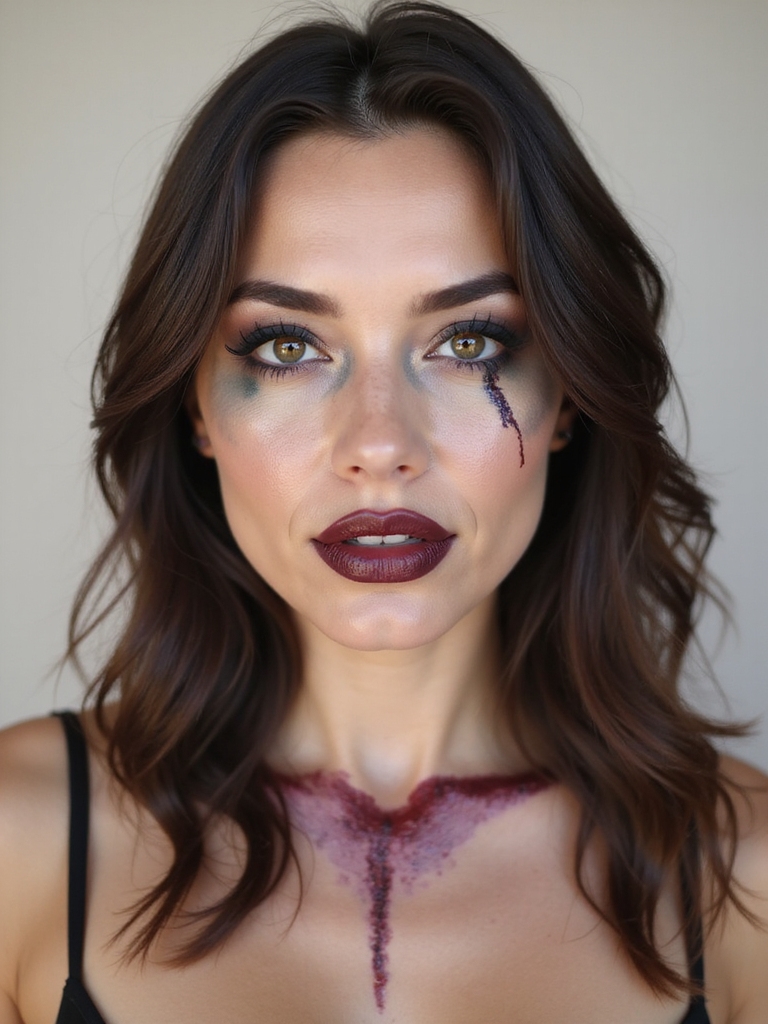
Even before I reach for the fake blood, I anchor the Classic Night-of-the-Undead look with a deathly base: think ashy, cool-toned foundation a shade or two lighter than your skin.
Then I hollow temples, eyes, and cheeks with taupe shadows, tapping in bruised purples. I veiny-up with fine blue lines, blur edges, add cracked lips, and finish with glossy, sickly tears. Unsettling perfection. Beetlejuice-inspired color palettes can add a theatrical pop of contrast to the finished look.
Fast Drugstore Zombie in 10 Minutes
You want a zombified face in record time? I’ll show you a quick base and contour with drugstore staples, then we’ll smudge the shadows, splatter a little “gore,” and set it so it lasts past midnight.
Grab your basket—no fancy brands, just fast, filthy, and freakishly effective. Learn basic color-blocking with cosplay makeup to speed the process.
Quick Base and Contour
While the clock’s ticking, I grab my drugstore staples and slam down a fast, creepy base that reads undead on sight. I sheer out pale foundation, press in grey at temples, and sink the cheeks with taupe.
Hollow eyes, sharpen jaw, done. You’ll look freshly risen, not overworked—perfect for last-minute fright.
- Grey smudges = instant gaunt
- Taupe contour, light hand
- Purple under-eyes
- Tap, don’t drag
Goth-inspired touches like softened edges and romantic dark accents can deepen the look for a moodier finish, especially when you blend in romantic goth elements.
Drugstore Products Only
Raid the corner aisle and I’ll prove a snarling corpse face doesn’t need prestige prices or pro kits. I grab pale foundation, gray shadow, and a cheap brow pencil to sketch sunken sockets and gaunt lines.
Lipstick doubles as dried blood; black liner carves cracked veins. A gel blush adds rotten flush. Petroleum jelly slicks lids and cheekbones for grimy, undead gleam—done in ten. Concert makeup can be adapted for stage lighting and long wear with a few basic setting tricks.
Smudge, Splatter, Set
Corner-aisle haul in hand, I kick into speed mode: smudge, splatter, set. I blur gray cream along hollows, streak liner under eyes, then tap lipstick for fresh “undead.” I flick watered-down shadow for messy stains, dab gloss on cheekbones, and lock everything with hairspray. Experiment with bold and playful color placements to make the look pop.
You’ll look convincingly cursed in minutes—no prosthetics, all attitude.
- Smudge shadows
- Splatter diluted pigment
- Tap lip “blood”
- Set with spray
Sunken Eyes and Hollowed Cheeks

Because the undead look is all about stark contrasts, I start by mapping shadows to fake sunken eyes and hollowed cheeks. I sweep cool-toned browns into the crease, dragging them toward the inner corners for that sleepless cavern vibe.
Then I contour beneath cheekbones with ashy shades, tapering toward the mouth. A touch of muted purple near temples and lower lash line seals the deliciously gaunt illusion. Inspired by Sukuna’s dramatic facial markings, add precise dark lines or accents to sharpen the overall look and heighten the intensity of the makeup, referencing Sukuna-inspired makeup techniques.
Rotting Flesh With Tissue and Latex
- Tear, stick, tint, gloss
- Coffee grounds texture
- Fake blood drip control
- Spirit gum safety tips
Scarecrows often use simple materials and sun-faded fabrics to achieve a weathered look, so consider incorporating straw and burlap into your makeup props and costume.
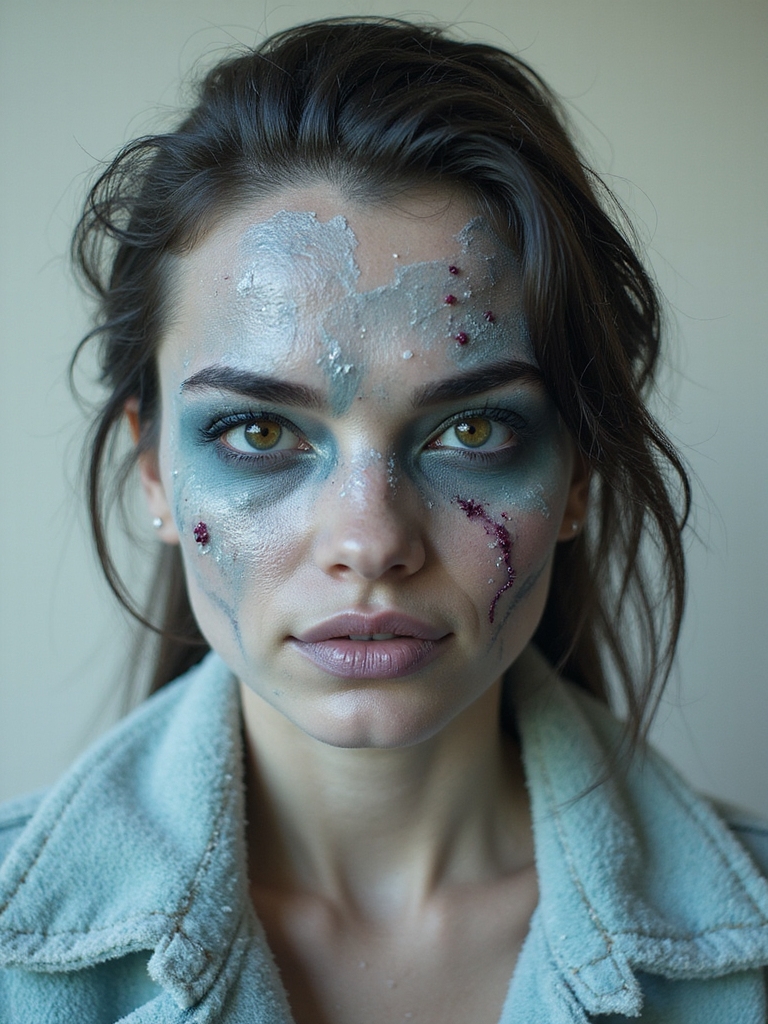
Freshly Turned With Subtle Decay
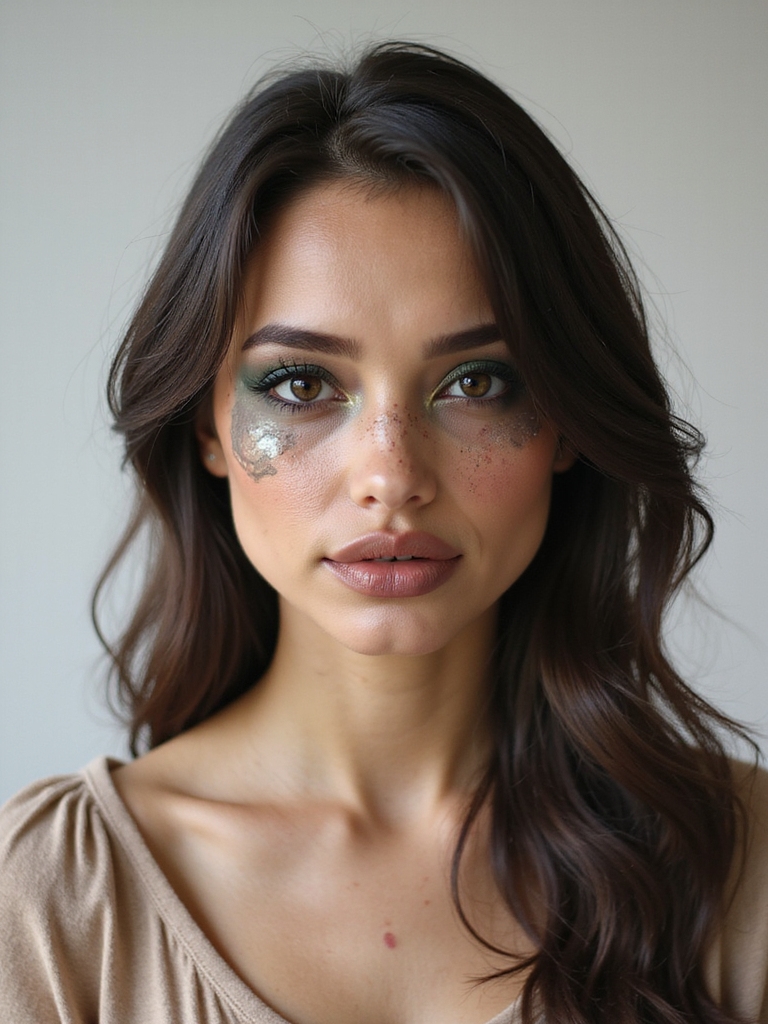
Although the bite’s barely set in, I love leaning into that “just-turned” look: dewy skin gone a touch too pale, faint blue-green veining at the temples, and a whisper of ashiness around the mouth and eyes.
I blur a cool-toned contour under cheekbones, tap lavender highlighter on high points, then mist glycerin for clammy sheen. Add soft under-eye shadows, feathered brows, and a muted, desaturated lip. Subtle, chilling, irresistible.
Glam Party Makeup Looks to Shine All Night party makeup remains a great reference for creating long-lasting, camera-ready finishes.
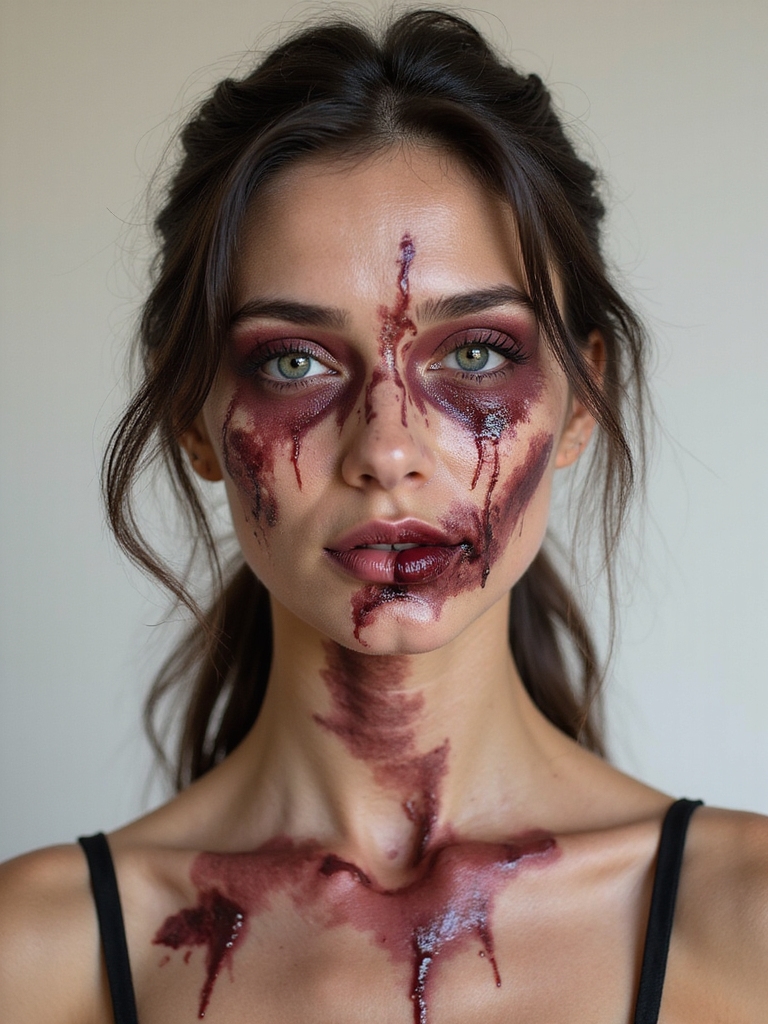
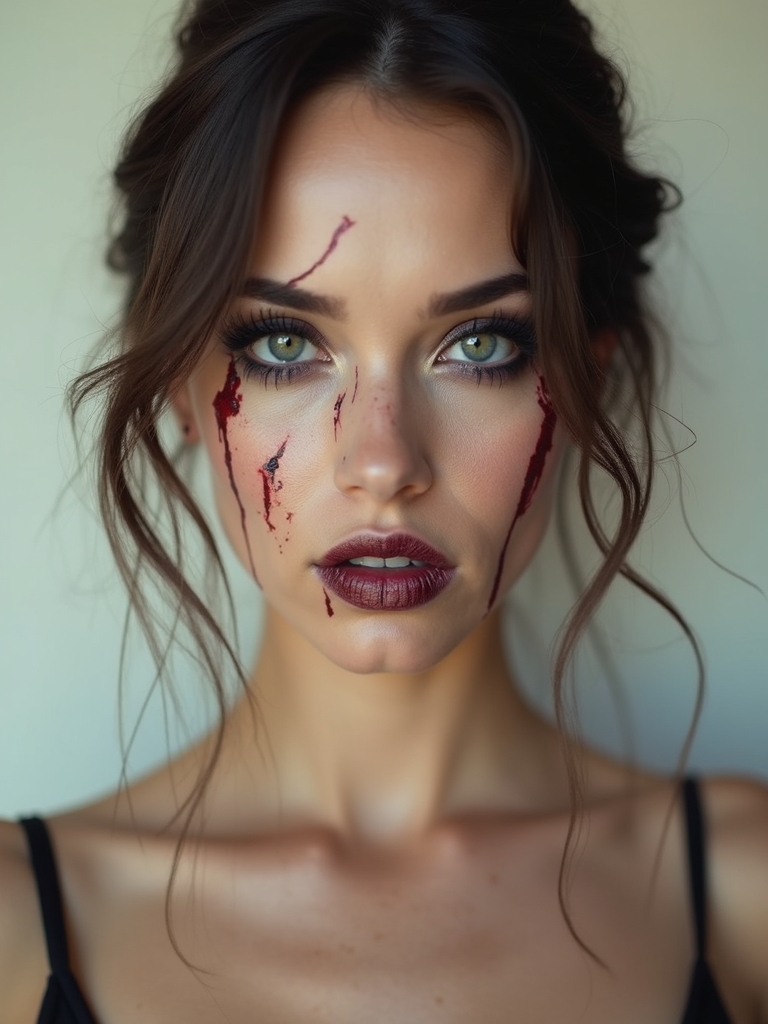
Blood-Slick Bite Marks and Gouges
Sink your teeth into the messy fun: I craft bite marks and gouges that look wet, raw, and freshly fed. I layer scar wax, tear it open, then flood edges with cherry syrup blood and a slick petroleum sheen. Splatter, smear, and let gravity streak. You’ll look dangerously delicious—no nibble required.
- Glossy drip trails seal the “fresh” illusion
- Jagged edges sell trauma
- Dark cores add depth
- Clotted bits suggest time passing
Glittering accents can be added sparingly to catch light and enhance texture, especially when applied over drier areas with glitter makeup.
Veiny, Desiccated Corpse Aesthetic

Lean into the dry-and-dreaded: I map out spidery veins and parched texture that make skin look starved of life.
I thin cool-toned cream paints with setting spray, sketch faint branching lines, then tap translucent powder to blur them into the dermis.
I mottled bruises with stippled greys, taupes, and sickly blues.
Matte lips, cracked highlight, and flaking latex seals that brittle, thirsted-through corpse vibe.
Artistry techniques help refine realism by focusing on texture, layering, and contrast with precision application.
Radioactive Neon Zombie Glow
Ready to glow like you crawled out of a reactor? I’ll map sharp toxic green contouring, then punch it up with UV-reactive face paints that blaze under blacklight.
For the finale, I’ll flick on a blacklight splatter effect so you look wickedly radioactive from cheekbone to collarbone.
Uv-Reactive Face Paints
Ever wonder why some zombies look like they’ve crawled out of a toxic rave? I swipe on UV-reactive face paints to make my undead glow snap under blacklight.
Think high-voltage highlights, pulsating cheek splashes, and a lurid lip that beams in the dark. You’ll slay the graveyard shift with:
- Neon veins
- Electric eye rings
- Radioactive bite marks
- Dripping ultraviolet tears
Toxic Green Contouring
Dial up the decay and carve your face with toxic green like it’s radioactive contour. I sweep neon pigment under cheekbones, temples, and jaw, then blend it sharp for skeletal drama.
A thin stripe along the nose bridge pulls it hollow and eerie. Tap brighter lime on high points, keep hollows deeper. Pair with ashy lips and cracked veins for instant undead chic.
Blacklight Splatter Effect
Flip the switch and let neon chaos take over—this blacklight splatter effect turns me into a radioactive glowstick zombie. I mist on UV-safe body paint, then flick neon pigments with a stiff brush for cosmic gore.
Under blacklight, every drip screams apocalypse chic. Seal it, strut, and let the glow do the haunting.
- UV-safe paints only
- Flick, don’t smear
- Contrast colors boldly
- Seal for sweat nights
Moldy Grave-Dirt Texture Finish

From the damp edge of the grave itself, I build a moldy grave-dirt texture that looks freshly clawed from the earth.
I stipple olive and ashy browns, then press crumbled coffee grounds into tacky latex for gritty clumps.
A mist of matte setting spray locks it.
I smudge green-gray along cheek hollows, dab darker pockets near nostrils and temples, then finish with dusty, cracked highlights.
Freezer-Burned Frostbitten Zombie
Ready to chill the room? I’ll show you how to build an icy blue complexion, lace in sharp frostbitten veins, and finish with cracked ice lips that look freshly thawed—barely.
Stick with me, and we’ll freeze them in their tracks.
Icy Blue Complexion
While the living cling to warmth, I’m chasing chill: let’s build an icy blue complexion that screams freezer-burned and frostbitten.
I start with pallid primer, then layer sheer sky-blue cream, cooling the high points while leaving hollows ghostly.
I tap in slate shadows for sunken cold and blur edges so the chill feels real.
- Frost-bitten cheeks
- Glacier-cast forehead
- Ice-dusted nose
- Polar-lit jawline
Frostbitten Veins Detail
As the chill sets in, I map frostbitten veins that look like they’ve been flash-frozen under the skin. I sketch thin, branching lines with slate blue, then vein-shadow with dusty purple.
I tap icy white along edges, letting highlights shimmer like hoarfrost. A touch of mottled grey around joints sells the freezer-burn. Blend lightly, keep paths irregular, and let the cold creep outward.
Cracked Ice Lips
A jagged, frostbitten pout makes the whole undead look snap with chill. I paint a slate-blue base, tap on white cracks, then gloss with icy shimmer so my lips look freezer-burned and deadly.
You’ll feel the chill bite back—perfect for a fresh-from-the-tundra zombie kiss.
- Dab petroleum jelly for cracked texture
- Tap iridescent blue highlight
- Vein edges with gray liner
- Seal with cooling mint gloss
Blackout Contacts and Clouded Eyes
Sometimes the fastest way to look undead is through the eyes—blackout contacts and clouded lenses instantly turn a fresh face into a chilling corpse. I love pairing glossy lids with matte, bruised sockets so those inky pupils pop.
For milky cataracts, I mist white cream pigment over the iris area and feather gray at the edges. Add a tight waterline, veiny detail, and you’re headline-ghastly.
Split-Skin Prosthetic Jaw Tear
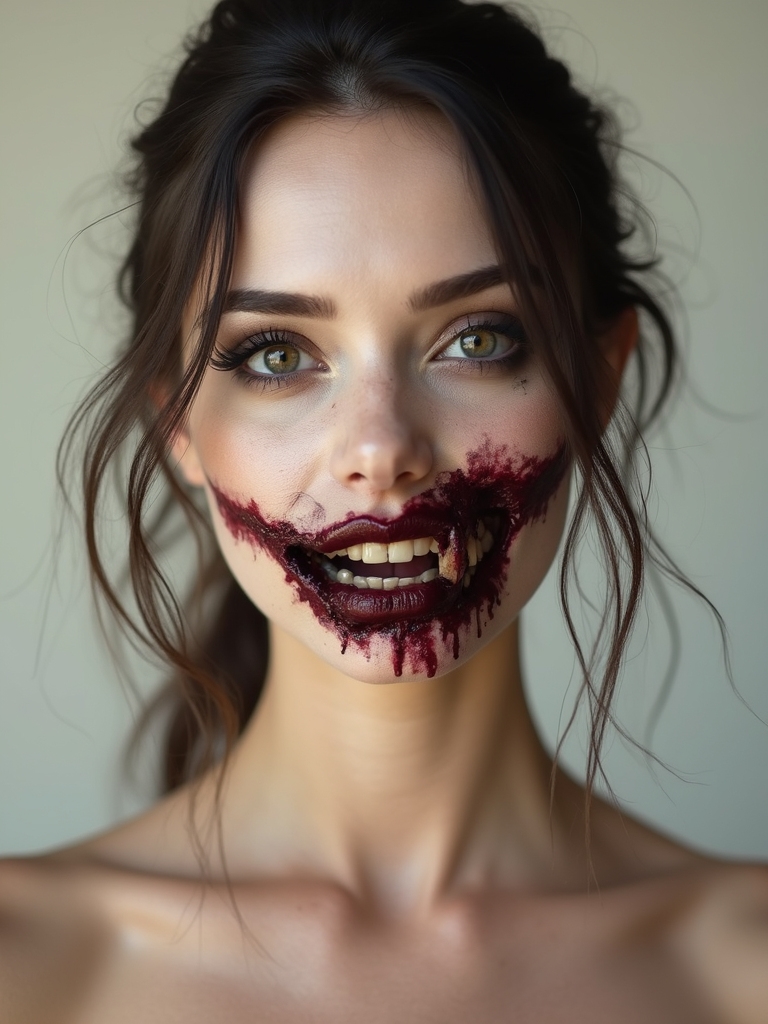
Ready to shred some faces? I’ll show you the exact materials and tools I grab, walk you step-by-step through placing a split-skin prosthetic jaw tear, and keep it snug with smart adhesives.
Then we’ll blend the edges and punch up the coloring so your ripped mandible looks wickedly real.
Materials and Tools
Though the finished look screams chaos, the Split-Skin Prosthetic Jaw Tear starts with a tight kit of smart materials.
I gather durable pieces, clean adhesives, and pigments that bite on camera. No spoilers on steps—just the essentials I trust when jaws drop.
- Silicone or latex prosthetic with split-skin edges
- Pros-Aide or medical adhesive
- Alcohol-activated palette and brushes
- 99% isopropyl, cotton swabs, powder
Application Step-By-Step
While the look is gnarly, the workflow stays clean: I map the tear line on my jaw with a white pencil, degrease the skin with 99% isopropyl, then dry it completely.
I brush a thin layer of adhesive along the line, wait tacky, and press the split-skin prosthetic from center outward.
I secure edges with more adhesive, smooth seams, reinforce with stippled latex, then freeze movement till set.
Blending and Coloring
Because the prosthetic’s edges sell the illusion, I start by melting them into skin with cream makeup that matches your base tone, feathered outward with a damp sponge.
I stipple purples, sickly greens, and nicotine yellows around the tear, then flick in capillary reds near the deepest split.
I set everything with powder, then gloss the “wet” interior.
- Bruise wheel magic
- Translucent powder lock
- Sheer blood gel
- Tiny vein brush
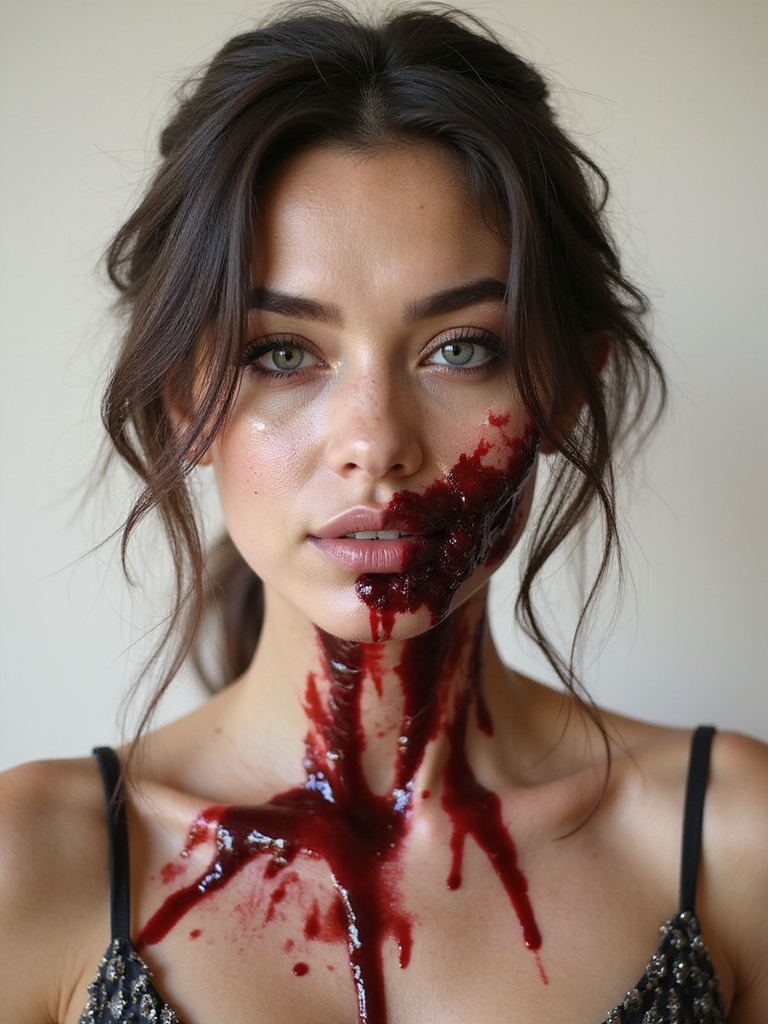
Dried Blood Cracks and Scab Build

If you want your undead look to scream “freshly clawed from the grave,” nail the dried blood cracks and scab build first.
I stipple liquid latex in jagged paths, dust with translucent powder, then tap in a deep oxblood cream. I press coffee grounds and tissue for chunky texture, seal, and highlight edges with a thin rust line. Add glossy dabs for tacky, wickedly real ooze.
Water-Activated Paint Greyscale Ghoul
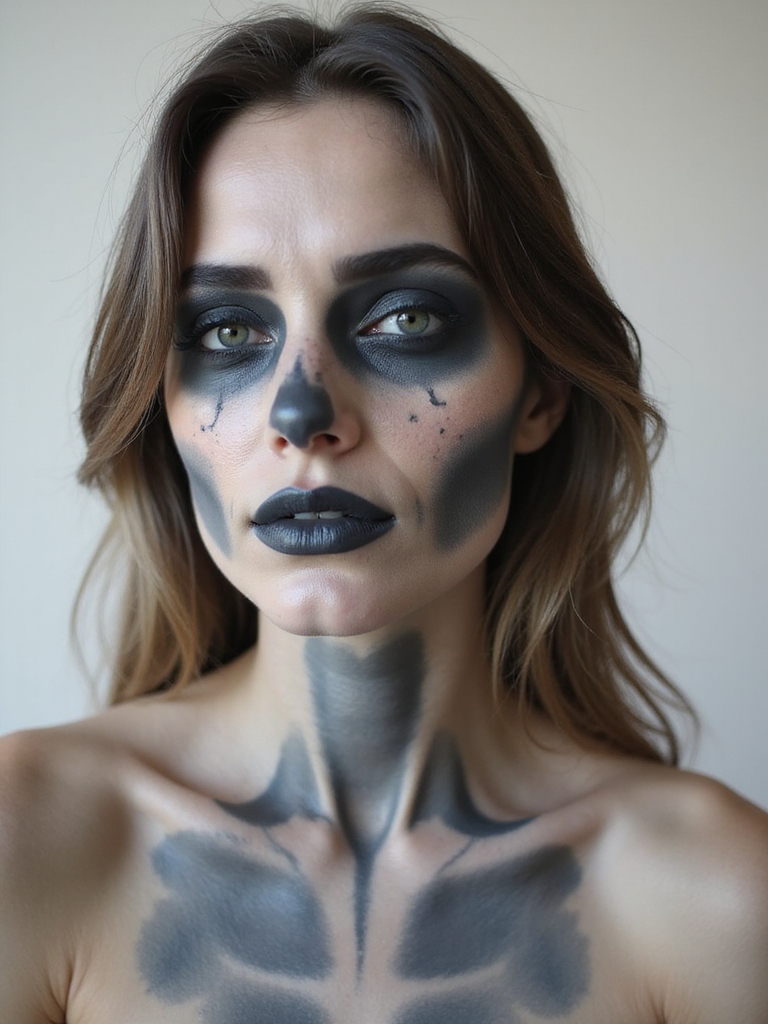
Grave-grit set, I switch gears to a stark, comic-book corpse with water-activated paints. I block in pale gray, carve shadows with slate, then snap highlights in icy white for a punchy, greyscale ghoul. You’ll read as vintage horror reel—graphic, high-contrast, deliciously dead.
- Prime lightly; matte holds magic.
- Map hollows: temples, cheeks, sockets.
- Crisp lines beat muddy blends.
- Seal misty; avoid shine.
Glam Gore Zombie With Glitter Rot
Sometimes I crave a zombie look that slays and sparkles, so I mash brutal texture with disco shine for a glam-gore payoff.
I stipple bruised purples, sickly greens, then sculpt latex “rot” along cheekbones.
While it’s tacky, I press black glitter and holographic flakes.
Sharp wing, smeared crimson lip, and dew-highlight temples.
Under flash, I’m decomposed couture—glimmering decay that stalks the dance floor.


