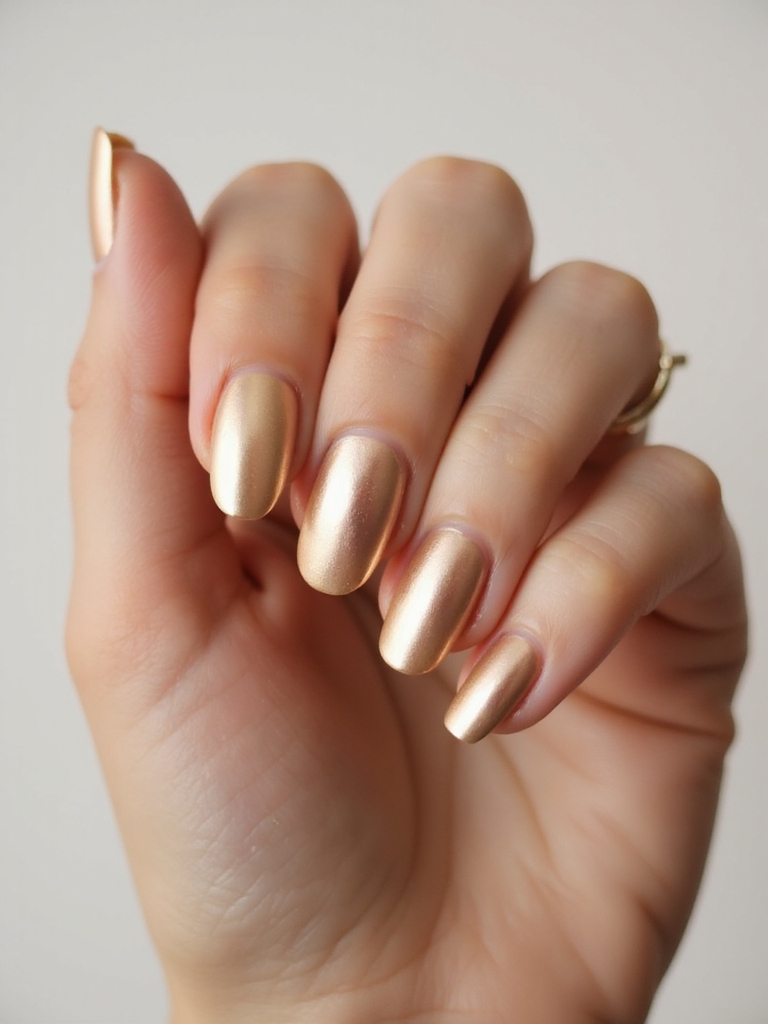
There’s a real difference between gold nails and gold chrome nails, and it’s worth knowing before you book. Regular gold polish sits flat and glittery. Chrome is a mirror, a true reflective metal finish buffed on as a fine powder over cured gel. One looks like paint; the other looks like liquid metal.
That mirror is also the fussiest finish in the nail world, which is why so many home attempts go cloudy or peel by day two. Below are 13 gold chrome looks, from a whisper-thin crescent to a full molten mirror, plus the application details that actually make the shine last. I’ll flag which ones are beginner-friendly as we go.
Gold Chrome at a Glance
| Chrome look | Coverage | Best for |
|---|---|---|
| Minimalist tip crescent | Light | Beginners, office, short nails |
| Full-mirror mani | Full | Events, confident chrome fans |
| Negative-space or French | Partial | Low-maintenance, grow-out friendly |
Minimalist Gold Chrome Tips
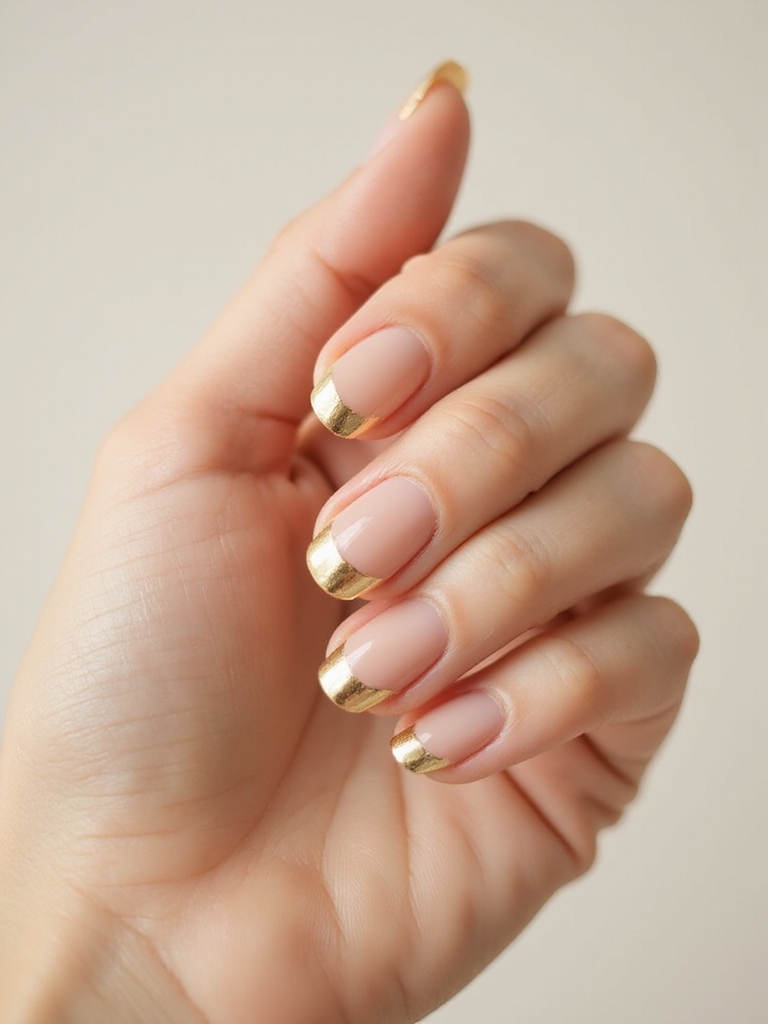
The easiest way into chrome is the smallest one: a slim crescent of gold mirror traced along each tip, like light skimming the edge of a wave. Over a sheer nude or milky-pink base, that thin line of shine looks modern and goes with everything, and because there’s so little chrome, a slip barely shows. This is the one I hand beginners first.
Keep the crescent narrow and the line crisp, then seal it well so the metallic edge doesn’t catch. It suits short nails especially, where a full mirror can swamp a small plate. Pair it with your everyday gold nails when you want a little more warmth.
- Apply chrome only to the cured top-coat layer; it won’t grab on wet polish.
- Use a sheer, pale base so the thin gold line stays the focus.
- Run your final top coat over the very edge so the crescent stays put.
Full-Mirror Gold Chrome Mani
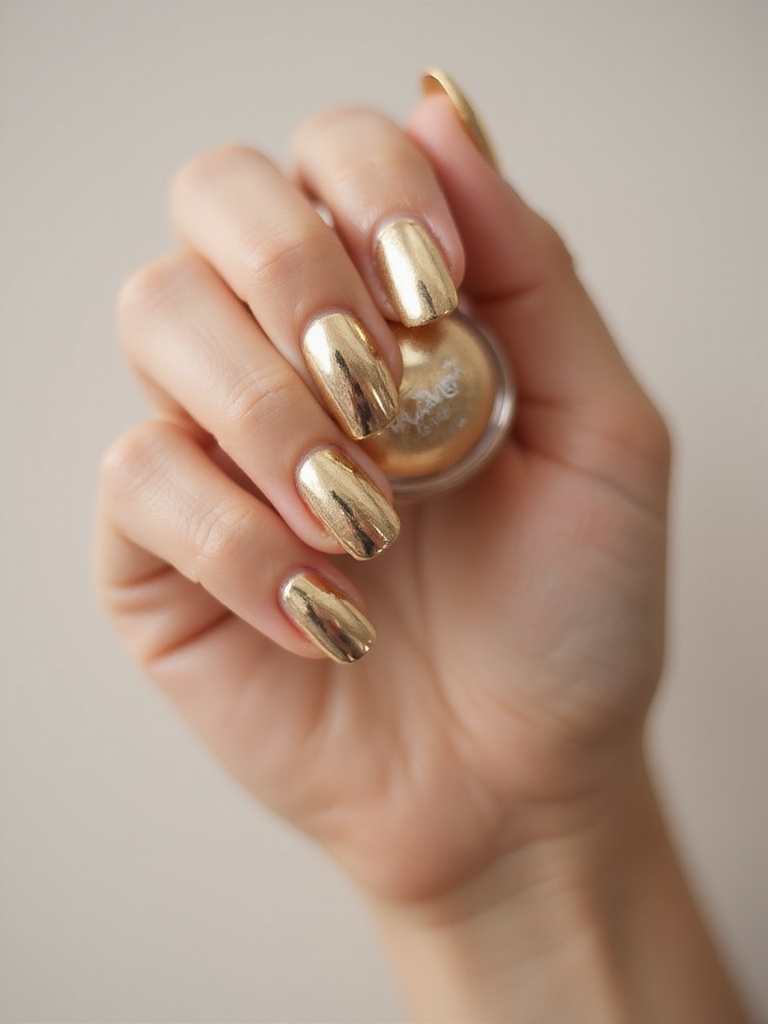
A full-mirror gold chrome mani floods every nail with reflective metal. Done right, it really does look like your fingertips were dipped in liquid gold. The finish is at its cleanest over a dark or black base, which deepens the reflection. Buff the chrome powder on in tight circles over cured, tack-free gel until the surface flips from dusty to mirror.
Why Chrome Turns Cloudy
This is a commitment look. It pairs with sleek rings and a plain outfit, since the nails are the whole statement, and it shows every smudge, so precision matters. Expect a salon full-chrome set to run about $40 to $65, and you’ll get two or three weeks of wear from it.
The number-one reason a full mirror goes cloudy is skipping the wipe. Your gel top coat has to be fully cured with no sticky layer before the powder touches it. Rub the powder in longer than feels necessary, then lock it under a non-wipe top coat straight away.
Negative-Space Gold Chrome Accents
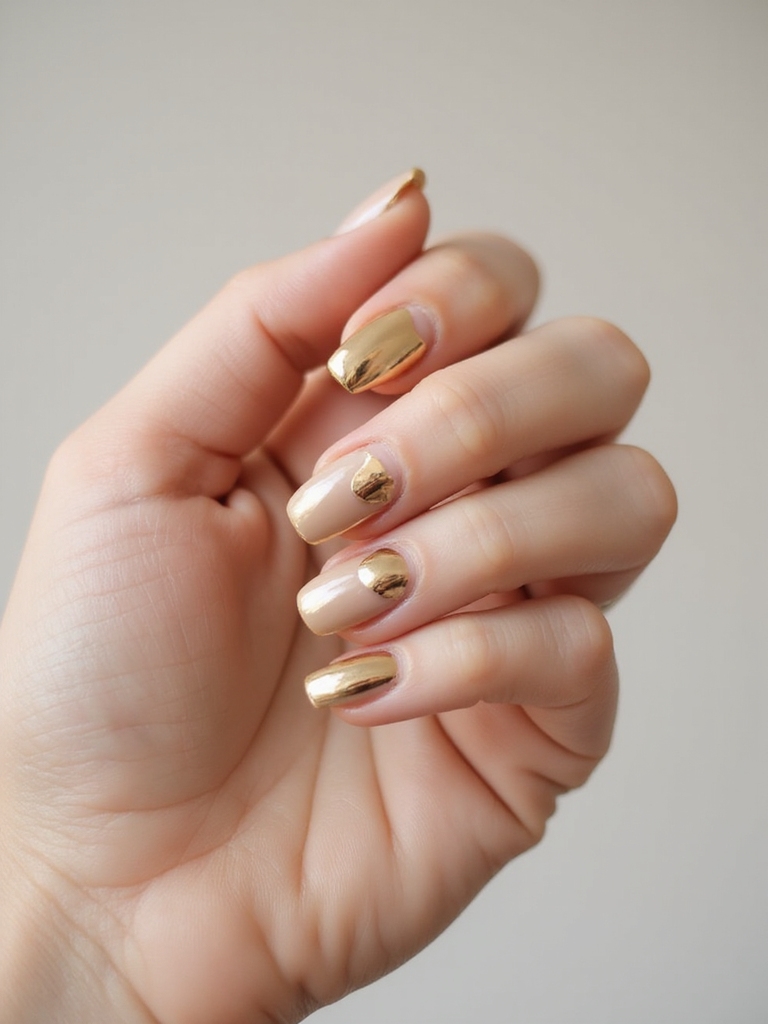
Once you’ve tried full mirror, negative space is the grown-up next step: gleaming half-moons, thin cuticle cuffs, or an off-center slash of gold that looks like metal sliding across bare nail. The exposed nail keeps the whole thing sleek, and it wears far longer than a full set. It grows out kindly, too.
Map the shapes with striping tape, apply chrome only inside the lines, and seal with a thin top coat so the metallic edge sits flush. The precision is what makes it look intentional, so take your time lifting the tape.
This is one of the smartest picks right now if you’re stretching time between appointments, because the bare space grows out without an obvious line. For the technique across full designs, see negative-space nail designs.
Gold Chrome French With Micro Smiles
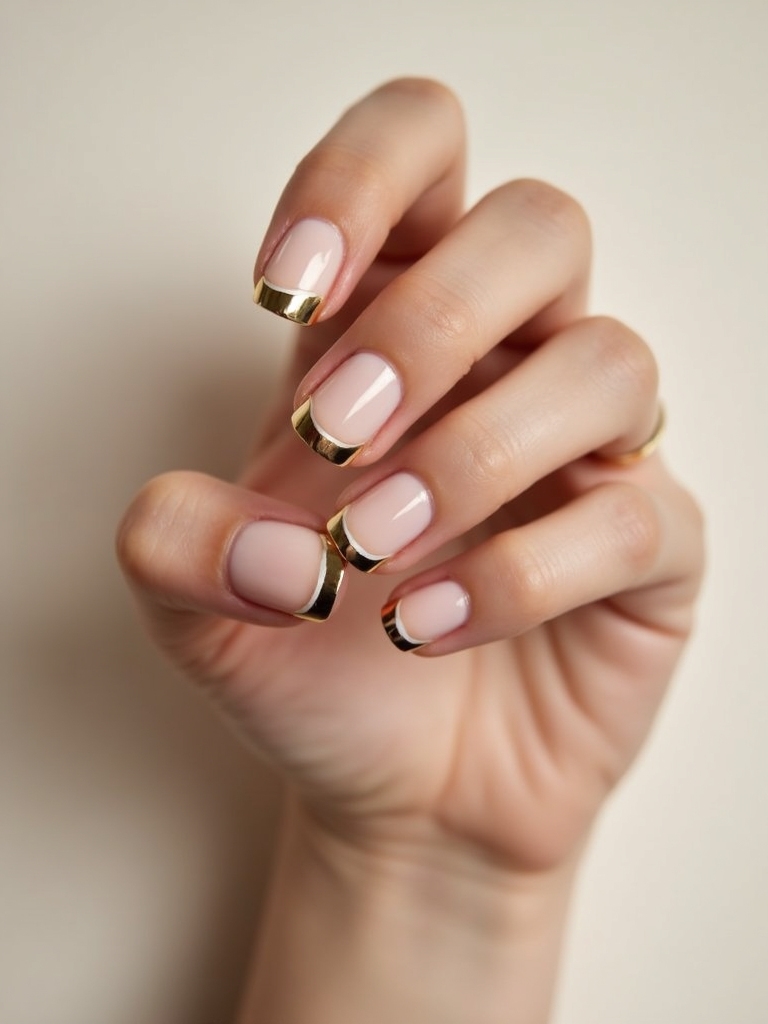
A gold chrome French swaps the classic white tip for a fine, mirror-gold smile line, and shrinking that smile to a micro-curve is what makes it look expensive rather than retro. The thin gold arc lifts the fingertip and flatters shorter nails especially well.
Getting the Curve Even
Precision is everything with a micro-smile: the two sides have to match, or the eye catches the wobble immediately. The wobble is the first thing I fix when someone brings me a home chrome French. Use a smile-line guide sticker or a steady liner brush, and keep the gold arc ultra-thin.
Balance the shine against a clean nude base so the gold leads. If freehand smiles feel out of reach, French-tip guides give you the curve and you just chrome inside them. It’s a close cousin of classic french tip nails with a metallic twist.
📋Crisp Micro-Smile Checklist
- ✓Start with a fully cured, wiped top coat so the chrome adheres.
- ✓Use a smile-line sticker or guide so both curves match.
- ✓Keep the gold arc thin; a thick smile looks dated.
- ✓Seal with a non-wipe top coat to lock the mirror.
Marble and Gold Chrome Veining
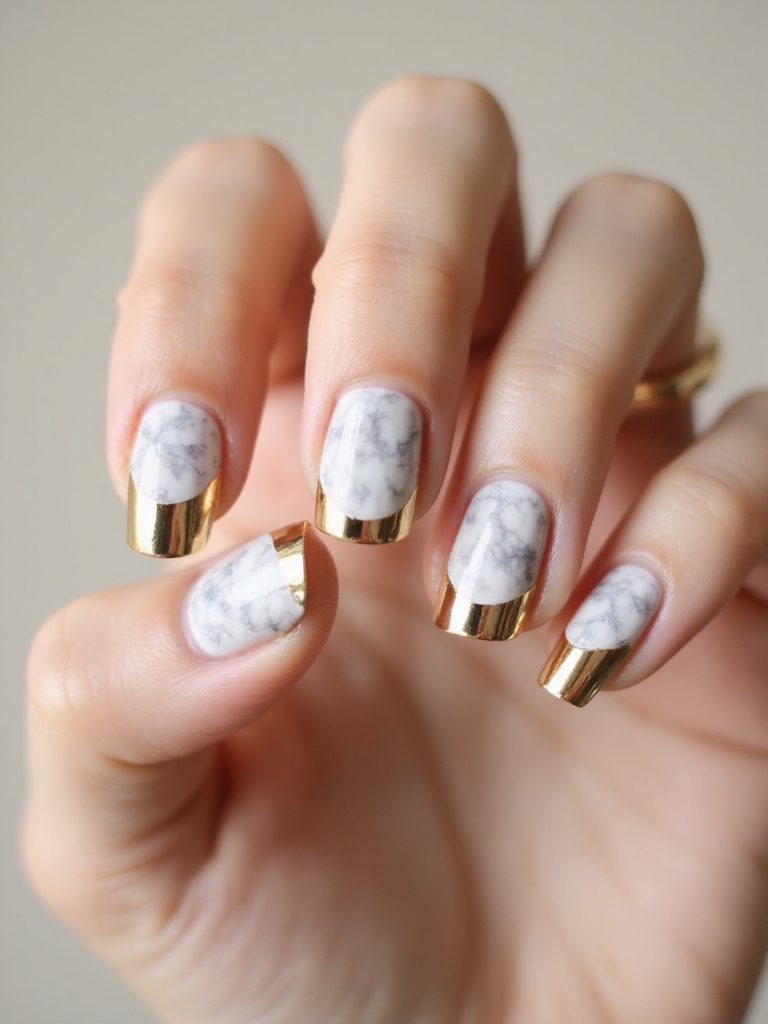
For something softer than a hard mirror, marble veining threads gold chrome through milky stone like metal running through rock. Anchor a translucent or milky base, feather fine white ink into loose, asymmetrical swirls, then trace thin gold veins along them. The metallic threads catch light while the marble keeps everything calm.
Keep the veins airy and off-center, because a symmetrical pattern kills the natural-stone illusion. It looks luxe on longer almond and coffin shapes. To compare it with the classic stone effect, see marble nails.
- Feather the white ink while the base is still slightly wet for soft edges.
- Trace gold veins with a fine liner, then seal before they smudge.
- Match warm or cool gold to your rings so nothing clashes.
Molten Gold Chrome Ombré Fade
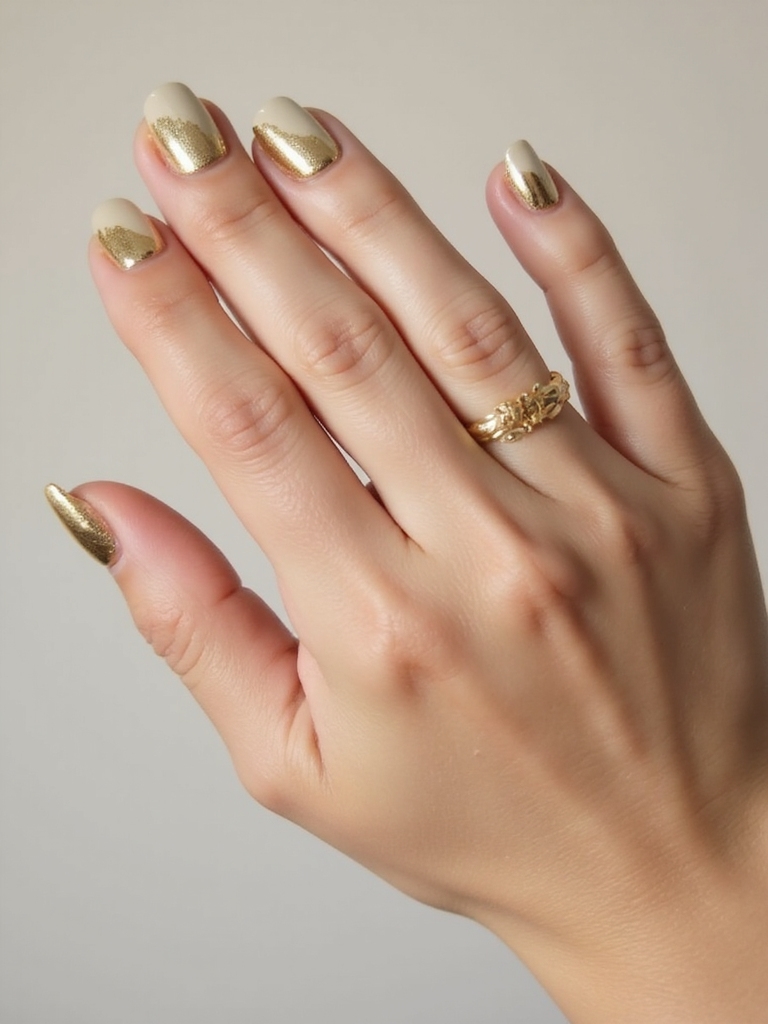
An ombré fade carries the gold chrome from a solid cuticle down to glassy, clear tips, so the nails look lit from the base like a slow sunrise. Buff the chrome heaviest near the cuticle and feather it out toward the tip, letting the gold thin into transparency. The gradient elongates the finger and softens the whole look.
This works on any length, though longer nails give the fade more room to travel. Choose your gold temperature to suit your undertone: warm for a candlelit glow, or a cooler champagne for something icier.
- Build the chrome densest at the base, then buff outward to nothing.
- Work over a cured, tack-free layer so the powder grabs evenly.
- Seal with a non-wipe top coat so the clear tips stay glassy.
Pick the gold that suits your undertone and the mood you want.
🎯Warm molten gold
Yellow-rich and sunny; flatters warm, olive, and deep skin.
🎯Champagne chrome
Pale and cool; a softer, icier fade for fair or cool undertones.
🎯Rose gold chrome
Pink-tinged and romantic; pretty on medium and cool skin.
Matte Base With Gold Chrome Details
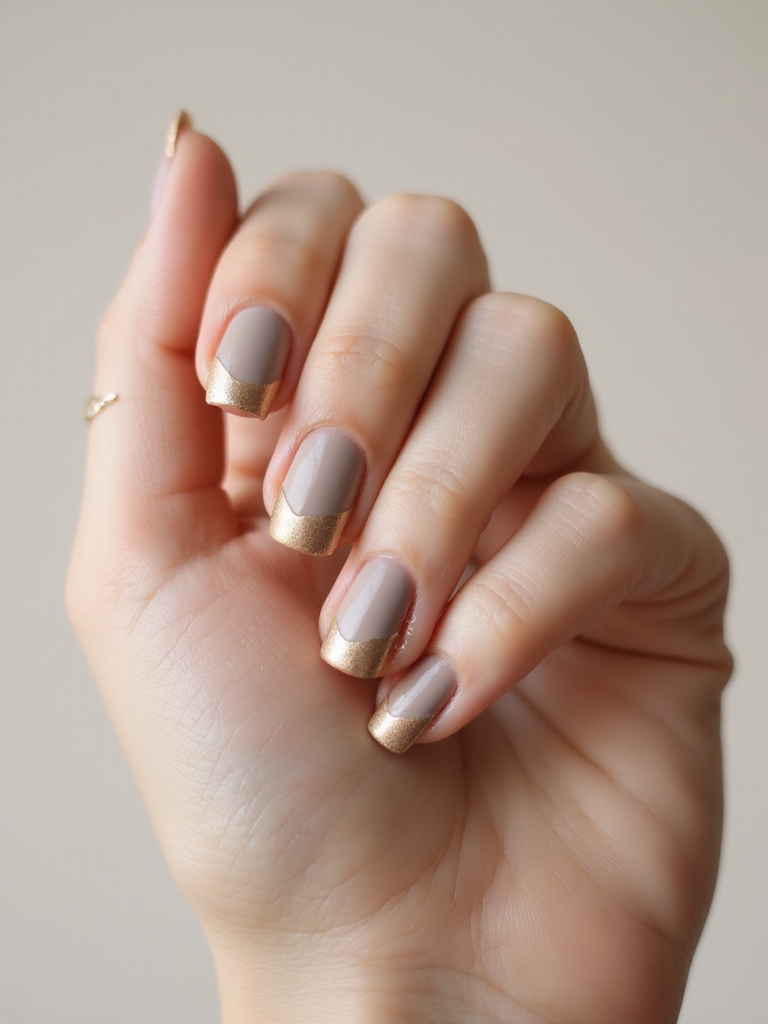
Setting bright gold chrome against a matte base is the contrast trick that makes both finishes look more expensive, because the flat, velvety background makes the mirror detail pop like jewelry laid on suede. Chrome a few accent lines, a half-moon, or a single tip, then matte everything else. The clash of textures does all the work. I use this one constantly for clients who want chrome that still suits the office.
- Chrome and seal your metallic detail first, while the top coat is glossy.
- Apply a matte top coat only to the non-chrome areas to keep the mirror shiny.
- Deep bases like black, plum, or forest green set off gold chrome best.
- Keep the chrome minimal; against matte, a little metal looks like a lot.
Gold Chrome Cuticle Halos
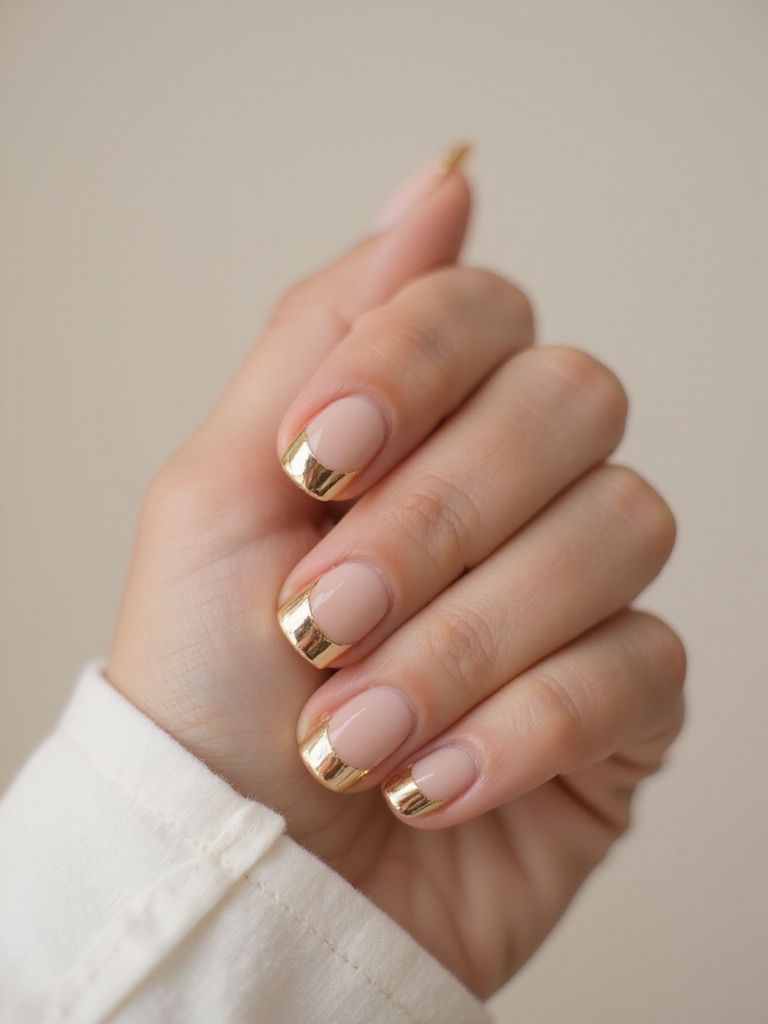
Cuticle halos flip the French idea on its head: instead of gold at the tip, a thin arc of mirror gold hugs the base of the nail like a rising sun. It’s subtle, a little unexpected, and grows out gracefully because the gold sits where regrowth is least obvious. The effect is quiet. Keep the halo thin and the rest of the nail sheer.
- Outline the halo with striping tape for a clean arc.
- Chrome inside the curve, then peel the tape while the layer is fresh.
- Wear it over a milky or sheer base so the halo stays the focus.
Black and Gold Chrome Contrast
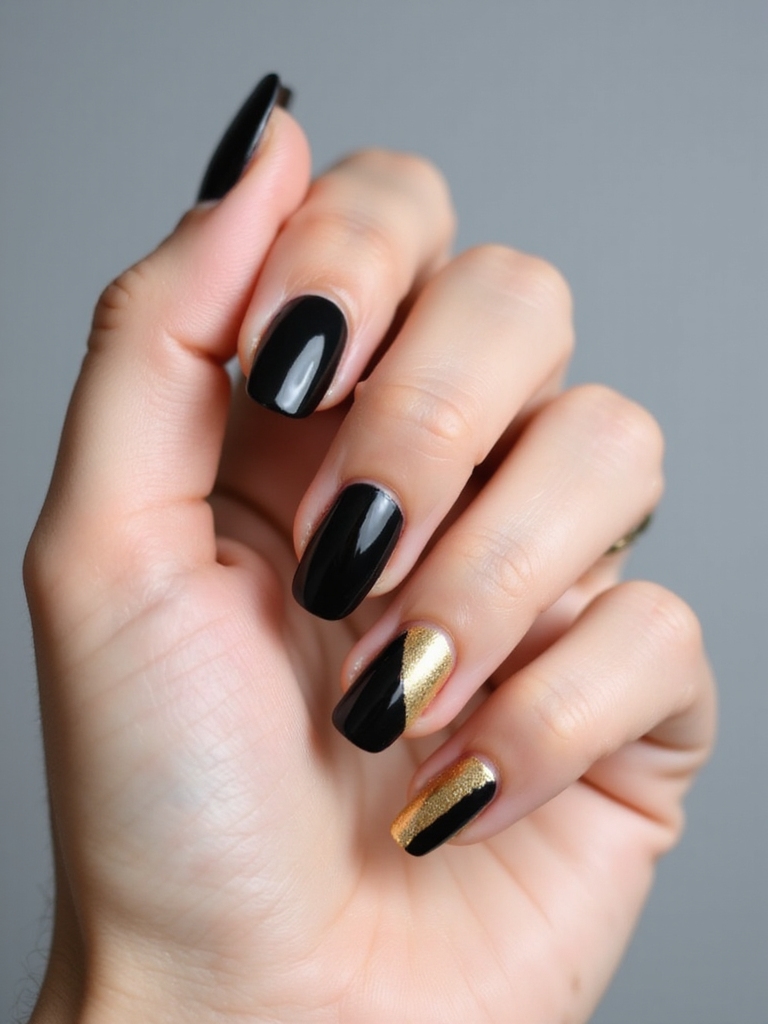
Black and gold is the most dramatic chrome pairing there is, all high-gloss noir with liquid-gold accents cutting across it. A glossy black base makes the gold mirror look even brighter. The combination photographs like couture. Keep the gold to slashes, tips, or a single statement nail so the black still grounds the look.
This is an evening look, and it suits longer shapes that give the contrast room. On deep and rich skin tones, warm yellow-gold against black is especially striking, and it’s the pairing I love on an evening client. Seal the whole thing glossy so the black and the mirror share the same wet shine.
Pearl Embellishments With Gold Chrome
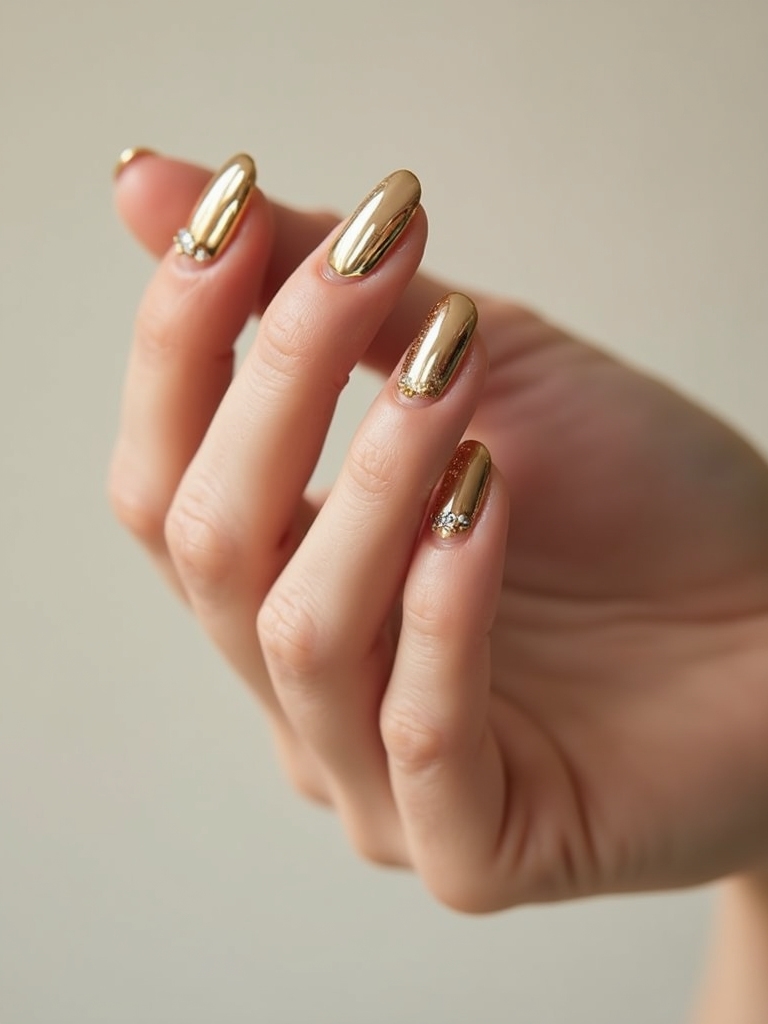
Tiny pearls scattered near the cuticle add a soft, couture touch that balances the hard shine of gold chrome. Place a few micro-pearls at the base of one or two accent nails, set them in a bead of gel, and cure so they hold. The round, matte pearls play beautifully against the flat mirror of the chrome.
Keep the placement asymmetrical and sparse, since a cluster of three graduated pearls looks more expensive than a full row. It’s a favorite for weddings and events, where the mix of textures feels dressy. Pair it with a soft gold foil nail designs accent for extra dimension.
- Set pearls in builder gel, not just top coat, or they pop off.
- Cluster three graduated sizes for a richer look than a straight row.
- Limit pearls to a couple of accent nails so they stay a highlight.
ℹ️Good to Know
Pearls and chrome both need a non-wipe top coat and a fully capped edge to last. Pearls pop off if they only sit in top coat, so set them in a bead of builder gel and cure, then seal over the top.
Abstract Gold Chrome Brushstrokes
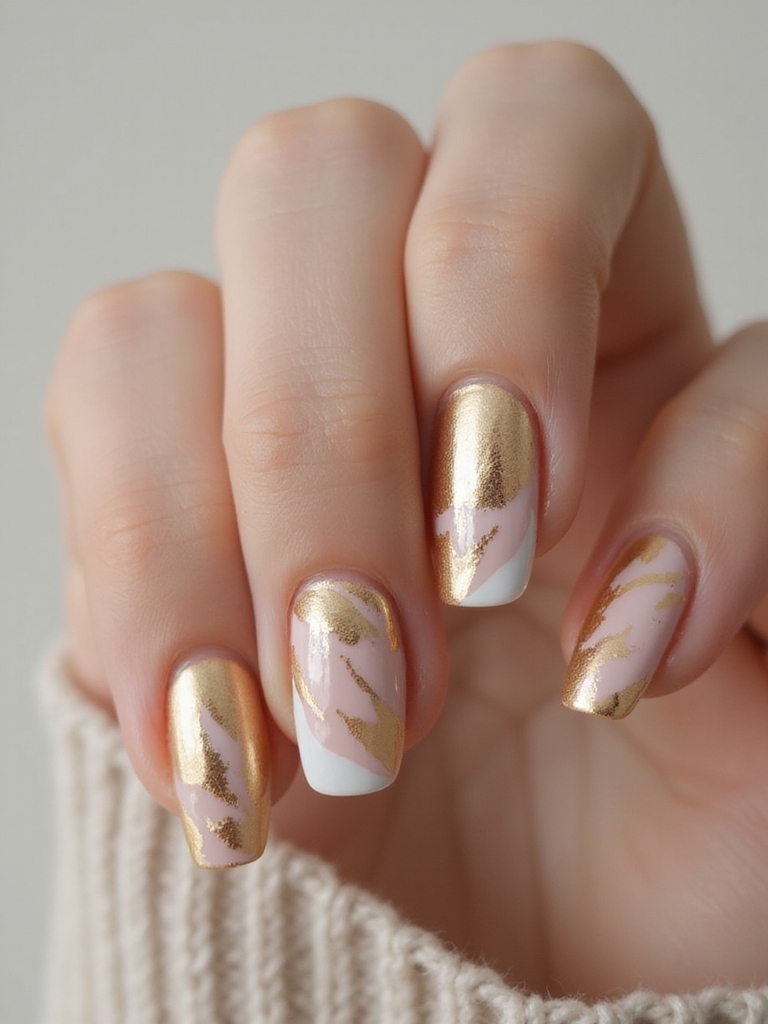
Abstract brushstrokes are the most freeing chrome look, since there’s no line to match and no shape to perfect. Drag loose, gestural strokes of gold across a neutral base and let them fall where they will, like liquid metal flicked from a brush. The imperfection is the point.
An Easy Starting Point
The easiest way to fake the effect is to chrome a whole nail, then paint your base color back over parts of it, leaving abstract gold shapes peeking through. Cured chrome under gel stays put while you work on top.
Because it’s forgiving, this is a great first freehand chrome project. Keep two or three nails plain so the abstract ones stand out, and vary the density of gold from nail to nail.
How to Get the Look
Every gold chrome look here rests on the same foundation, so nail this and the designs get easy. Apply and cure your gel color, then a gel top coat, and wipe away the sticky layer completely, because chrome only grabs on a fully cured, tack-free surface. Rub the chrome powder in with a soft applicator in firm little circles until the dust turns to mirror, then lock it under a non-wipe top coat right away.
On cost, a full gold chrome set at a salon runs about $40 to $65, while a starter kit of powder, gel, and a lamp for DIY is roughly $30 to $50 and lasts many manicures. Chrome keeps its shine two to three weeks with a capped edge and a fresh top coat if it dulls. When you take it off, soak in acetone; scraping chrome drags your top layer with it. So which is more your speed, a quiet crescent or a full molten mirror?
Find Your Level of Shine
Gold chrome runs the whole range from barely-there to full mirror, and the good news is they all lean on the same handful of skills: a cured base, a proper wipe, firm buffing, and a capped edge. Get those right and every look here is within reach, whether you want a thread of gold or two hands of liquid metal.
If you’re new to it, start small with a crescent or a micro-smile and work up to the full mirror once the powder feels familiar. When you picture your ideal version, are you drawn to the quiet, wearable gold or the kind that turns every handshake into a moment?