The biggest myth about a curly mohawk is that you have to shave half your head to earn one. You don’t. Some of the boldest versions keep every strand and simply borrow the shape, gathering the sides back so a strip of curls runs high down the middle.
What you actually choose comes down to how much commitment you want. The thirteen looks here span full shaved undercuts to pin-and-go faux hawks. For each one, I will flag the real price, the upkeep, and the edge-care step most tutorials breeze right past.
Curly Mohawk Basics, Answered
Do I have to shave my sides? No. A faux hawk pins the sides back for the same silhouette with zero clippers, so you can test the look before committing to anything permanent.
How long does it last? A shaved undercut needs a line-up every two to three weeks, while a pinned faux hawk is a daily, fully reversible style you wash out at night.
What does it cost? A salon mohawk appointment usually runs 1 to 3 hours, and a maintenance undercut trim sits around $15 to $25 at most barbershops.
The Classic Curly Mohawk, Bold and Unmistakable
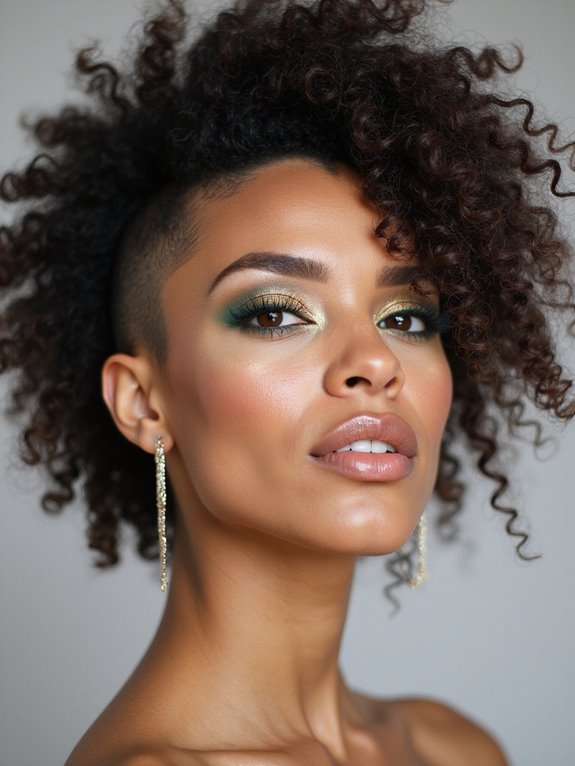
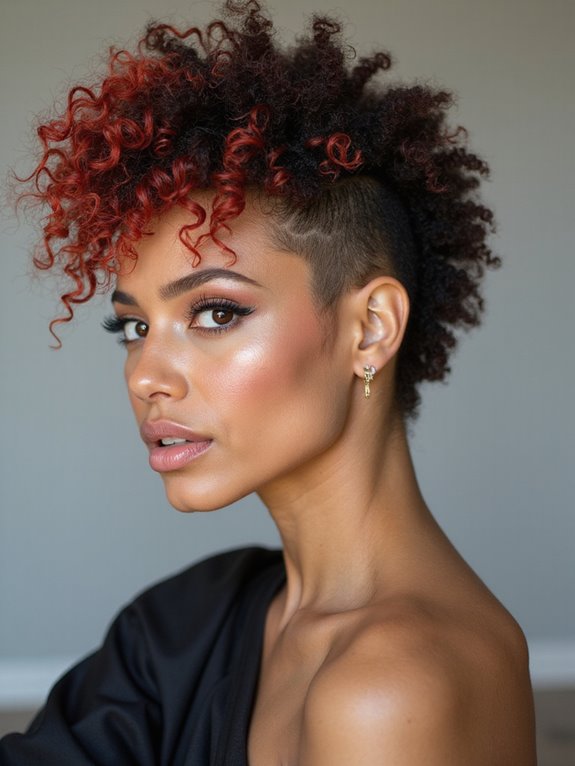
The classic curly mohawk is the one most people picture first: short or tightly faded sides with a tall ribbon of curls running from your crown to your nape. It reads bold because the contrast does the work, all that volume up top against clean, close sides.
The first thing I tell anyone nervous in my chair is that you set the height, not the clippers, so you can go fully dramatic or keep it modest and still own the shape. Most women who sit down asking for one are braver than they give themselves credit for. The shape just makes it official.
To hold that center strip upright, you need real grip. A strong-hold curl gel or sculpting cream worked into damp hair locks the shape without flattening your pattern, and scrunching as it dries keeps the curls springy instead of stiff.
This version rewards definition, so it suits tighter curls and coils that already stack with their own height. If you love the drama but want a softer entry, curly hairstyles for Black women show plenty of crown-forward shapes that flatter natural texture.
- Best for type 3 to 4 textures that hold volume on their own
- Pair with a matte pomade on the sides for a crisp, non-greasy finish
- Refresh the height each morning by scrunching in a little water and re-gelling the roots
Bold Volume Over Shaved Sides

When the sides go all the way down to a shave or a tight fade, every bit of attention lands on the volume up top, and that is the whole point. This is the most graphic take on the trend, the one that turns heads in a meeting or on a dance floor. It works beautifully on coily hair because shrinkage actually helps, building a dense, sculptural crown without much product.
Keeping the Crown Full
The trade-off is upkeep. I have watched a sharp undercut blur into shapeless fuzz within three weeks, which is why I push a steady schedule: a line-up every two to three weeks runs about $15 to $25. Skip it and the crisp contrast that makes the style read bold quietly disappears. If you want that same graphic energy with a little more edge, edgy curly scene looks play with the same high-contrast idea.
Prefer the drama without a near-weekly barber habit? Ask for a longer guard on the sides. You still get the lift and separation, just with a softer grow-out that forgives a missed appointment by a week or two.
A few things people get wrong before their first mohawk.
❌ Myth: A mohawk means shaving your head
✅ Reality: Only the sides shorten, and even that is optional once you know the faux hawk exists.
❌ Myth: Curly mohawks are high-maintenance
✅ Reality: A wash-and-refresh routine keeps most versions looking sharp for days between full styling sessions.
Long Curly Mohawks That Read Elegant

Not every mohawk is about shock value. Keep the length in the center and let it cascade, and the same shape suddenly turns romantic, even formal. Long curly mohawks give you the most styling range of any version here, because that extra hair can be braided down the sides, swept to one shoulder, or piled into a loose crest for an event.
It is the one that earns the most second looks at weddings and parties, where you want bold without harsh. The catch is weight: a long center strip pulls down as it grows, so the height you loved on day one needs a little coaxing with root-lift product by week three. If your curls are fine, ask your stylist to keep the strip narrow so it stands instead of slumping.
- Braid or cornrow the sides to keep the silhouette clean while the center stays long and full (protective braided curly styles tuck the sides beautifully)
- Sweep the length to one side for an asymmetrical, red-carpet finish
- For events, mist with a flexible-hold spray so the crest moves instead of freezing solid, and see curly prom hairstyles for more dressed-up takes
The Edgy Curly Faux Hawk, No Shaving Required

If you love the shape but not the commitment, the faux hawk is your answer, and honestly it is where I send most first-timers. You gather the sides, pin them underneath, and let the center curls pouf up into a crest. No clippers, no regret, and you can wash it out tonight. It hands you a dramatic silhouette for a night out with none of the grow-out awkwardness. Want something cropped instead? A curly pixie gives edge with even less daily fuss.
One caution, because it really matters: the mistake I fix most often is pinning so tight it drags on the hairline. The fine curls at your temples are fragile, and constant tension is how edges thin over time. Pin to the scalp, not into it, anchor with bobby pins angled against the direction of pull, and give your hairline a rest between styling days. A tucked-not-yanked faux hawk can look just as sharp without putting a single strand under strain.
- Backcomb lightly at the roots of the center section for instant height
- Smooth the tucked sides with a boar-bristle brush without flattening the crest
- Tie the crest down loosely at night so you wake to height, not a flattened side
🅰️Shaved Sides
Maximum contrast and the lowest daily effort, but a standing barber appointment every few weeks to keep the line crisp.
🅱️Braided Sides
No clippers, protective for your edges, and easy to take down, though the braids themselves need redoing every week or two.
Defined Texture and Intricate Coils Down the Center
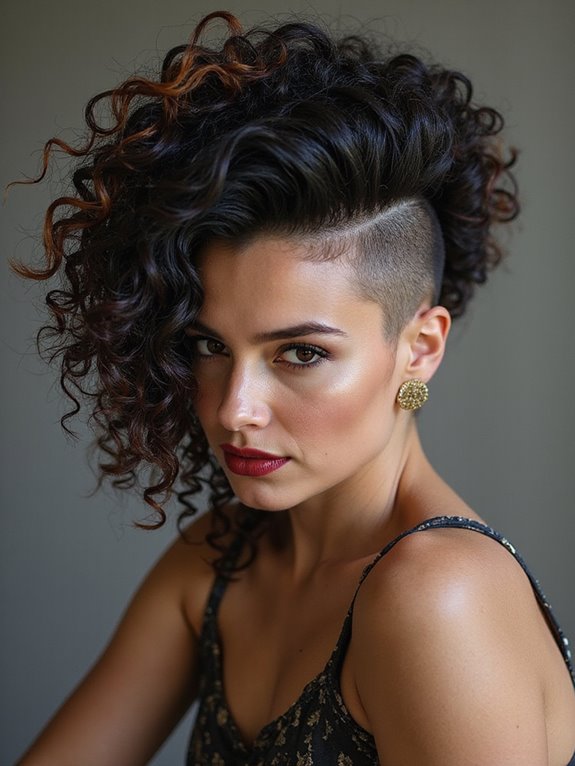
When the center strip is all about crisp, defined coils rather than soft volume, the mohawk takes on a sculptural, almost architectural quality. This is where your curl pattern becomes the design.
Twisting or coiling individual sections gives you that intricate, stacked look, and it photographs well because every coil catches the light. What finally made my coils hold all day was styling on soaking-wet hair, not damp, so the product spreads evenly before the pattern sets.
The other thing nobody mentions: section size controls everything. Smaller sections read as tight, defined twists; larger ones give a looser, chunkier coil. Decide that before you start, because once the gel is in you are committed to the size you chose. Working with your natural curl pattern beats fighting it every time.
- Work a curl definer through dripping-wet hair in small sections for the tightest clumps
- Coil each piece around your finger or a Denman brush, then leave it completely alone to dry
- Diffuse on low or air-dry fully before touching, since early handling is what turns definition into frizz
Products and Day-Two Care That Keep a Mohawk Sharp
A curly mohawk stands or falls on its product lineup. The good news is you only need a few. A curl definer clumps and shapes the top, a strong-hold gel locks the height, and an anti-humidity spray keeps frizz from swallowing your edges by midday.
Layer them light to heavy: cream first on wet hair, gel to set, spray last once everything is fully dry. A solid trio of drugstore products runs about $30 to $45 total and lasts months, so this is not the look that drains your budget.
Day two is where most people quit. They really shouldn’t. I keep mine going with a quick mist and a scrunch, nothing more. Instead of restyling from scratch, spritz the top with a water and leave-in conditioner mix, scrunch to wake the curls back up, and re-gel only the roots for height.
Finger-detangle gently and never drag a brush through a dry mohawk, because that is how a clean look turns into a frizz halo. Done right, a single wash can carry you three or four days.
- Curl definer for clump and shape on wet hair
- Strong-hold gel to set the upright center
- Leave-in spray plus a satin bonnet to stretch the style across several days
Common Mistakes to Avoid
The fastest way to flatten a curly mohawk is too much product. Pile on heavy gel and the center strip turns crunchy and stiff, which kills the bounce that makes the look work in the first place. Start with less than you think, scrunch to break the cast once it dries, and add more only where you actually need hold. The second classic slip is ignoring the sides; even a faux hawk looks unfinished when the tucked hair is frizzy and loose.
One more quiet mistake costs the most: chasing someone else’s mohawk instead of your own texture. A look built for loose 3a waves will not behave like one built for tight 4c coils. Force it, and you just end up frustrated. Match the style to what your hair actually does, lean into your real curl pattern, and the bold version of you shows up on its own. Treat your curls as the star, and the shape follows.
Curly Mohawk Questions, Answered
?Does a curly mohawk suit my face shape?
It is one of the more forgiving bold cuts, because the height adds length that balances rounder and heart-shaped faces, while the soft curls frame sharper jawlines. If you are unsure, a faux hawk lets you test the proportions before any cutting happens.
?How long does a salon mohawk appointment take?
Plan on 1 to 3 hours depending on length, texture, and whether you are adding braids or color. A simple undercut and shape is quick; intricate coiled or braided sides take the most chair time.
?Can I get the look without cutting anything?
Yes. A faux hawk pins the sides back and a braided version cornrows them flat, both giving you the mohawk silhouette with zero clippers and full reversibility. It is the smartest way to road-test the shape before you decide whether a real undercut is worth the upkeep.
?How do I protect my edges with shaved or pinned sides?
Keep tension gentle, avoid daily gel directly on the hairline, and never pin so tight it tugs. Cleanse buildup along the edges, alternate your part or pin placement, and sleep on silk or satin to limit friction while your hairline rests.
?How do I grow out the shaved sides later?
Expect an awkward few months while the sides catch up. A longer guard at each trim softens the line, and braiding the growing sides keeps everything tidy until the lengths even out.
Pick Your Level of Bold
A curly mohawk is really a spectrum, not a single haircut. You can shave the sides for maximum drama, braid them to protect your edges, or pin a faux hawk you rinse out before bed, and every one of those still counts as fully bold.
If you are on the fence, start with the faux hawk this season. Live with the silhouette for a few wash days, see how it feels in real light and real photos, and let that tell you whether the clippers are worth it. Save a photo you love and talk the grow-out through with your stylist before you commit.
More Hair Inspiration