A good braid does more than pull your hair back. The right one adds structure and a finished look in about the time it takes to wait for your coffee. The trick is matching the braid to your hair length and the morning you actually have. These fifteen simple braided hairstyles run from a two-minute side braid to a pull-through that looks far harder than it is, and each one comes with the steps to get it right.
Key Takeaways
- The classic three-strand braid is the foundation; once your tension is even, every other braid looks neater.
- French and Dutch braids differ by a single move, crossing strands over versus under, which is why a Dutch braid sits raised and visible.
- Second-day hair grips better than freshly washed hair, so most of these styles hold longer with a little texture or dry shampoo.
- Pull-through and bubble braids rely on elastics, not weaving, so they work even if you have never truly braided.
- Finish by gently pulling the edges of each braid to add width and a soft, intentional shape.
Master the Classic Three-Strand Braid
Everything starts here. Split a section into three equal strands, cross the right over the middle, then the left over the middle, and keep alternating to the ends.
The only thing separating a sloppy braid from a clean one is even tension. Keep the strands taut and close to your head, and keep all three pieces the same thickness the whole way down.
Tie it off, then pinch and tug the outer edges to loosen it slightly. That one step adds width and keeps the braid from looking thin or schoolgirl-tight. Once this feels automatic, the rest of this list gets easy. The braid itself goes back thousands of years across cultures, so you are in good company.
The Sleek French Braid, Step by Step

A French braid is just a three-strand braid that gathers more hair as it travels down your head, which is what gives it that smooth, attached-to-the-scalp finish.
- Take a section at your crown and split it into three.
- Cross the outer strands over the middle once, the normal way.
- Before each new cross, fold a small amount of loose hair into the strand you are about to move.
- Keep adding and crossing until you run out of loose hair, then finish as a regular braid.
Smooth a little water or styling cream over the top first if flyaways fight you. Braiding over one shoulder with your chin slightly down helps until your hands learn the rhythm.
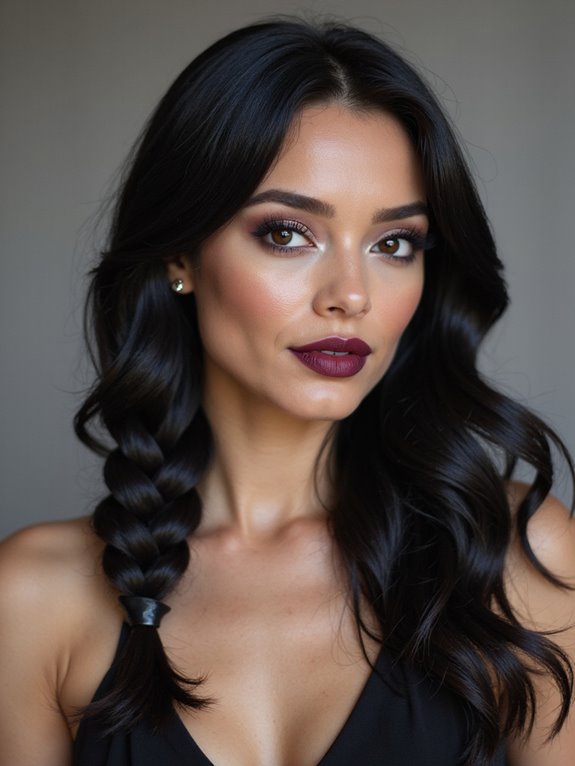
Chic Side Braid for Any Hair Length

When you want something fast that still looks done, sweep everything over one shoulder and braid loosely to the side. It works on a lob or waist-length hair, and it quietly hides second-day roots.
Keep this one soft, not tight. A relaxed side braid with a few face-framing pieces left out reads current; a severe one can harden the whole look. Pull the edges wide once it is tied off, and you are done in under three minutes. For more low-effort takes, these quick braided hairstyles follow the same idea.
Braided Bangs for a Quick Change

Grown-out bangs or face-framing pieces are the perfect length to braid back off your face. Start a tiny braid at your part, angle it along your hairline toward your ear, and pin it behind your ear.
Add a small amount of hair as you go, the same way you would with a French braid, so it sits flat like a built-in headband. This is the move that buys you another week between bang trims, and it keeps your hair out of your eyes without a single clip showing.
A Simple Braided Headband in Minutes

Take a section above one ear, braid it as a basic three-strand, then sweep it across the top of your head and pin it behind the opposite ear. The braid lands like a headband and instantly dresses up loose hair.
Leave the rest of your hair down and undone on purpose; the contrast between the neat braid and soft lengths is what makes it look intentional. Use bobby pins that match your color so the finish stays seamless.
The Speedy Fishtail Braid
A fishtail looks intricate but uses only two strands. Split your hair in half, then cross a thin piece from the outside of one section over to the inside of the other, and repeat, alternating sides.
The secret is thin pieces. The smaller the strands you cross over, the tighter and more woven the pattern reads. It is slower than a regular braid, so save it for second-day hair, which holds the texture better and grips without slipping.
The Half-Up Braided Crown
Take a section from each side of your head, braid each one, then bring both braids to the back and pin them together so they meet like a crown over loose hair.
This keeps hair off your face while leaving length down, which makes it a quiet workhorse for work, weddings, and everything between. Pull the braids wide before pinning so the crown looks full rather than stringy. A half-up half-down braided look is the natural next step if you want more variations.
The Boho Waterfall Braid
A waterfall braid is a French braid where you drop one strand each time instead of carrying it down, letting pieces fall like a cascade.
Braid horizontally across the back of your head. Each time you cross the top strand down, release it, pick up a fresh piece from above, and keep moving sideways. It looks romantic with loose waves underneath and photographs beautifully on second-day texture.
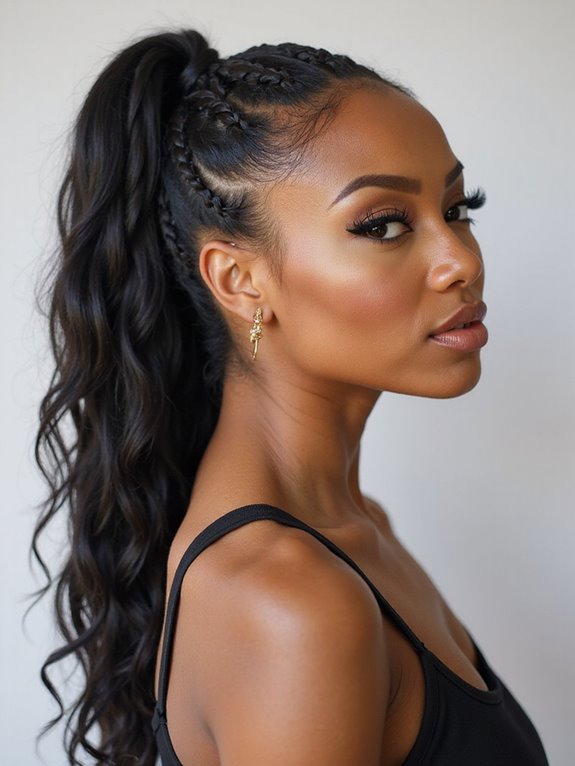
Add a Braid to Your High Ponytail
Tie a high ponytail, then braid the tail into a simple three-strand and tie the end. One extra minute turns a gym ponytail into something deliberate.
For a cleaner finish, wrap a small piece of hair around the base to hide the elastic. If you want the braided tail to look thicker, gently pull its edges apart. See more ways to dress one up in these braided ponytail hairstyles.
The Bubble Braid Upgrade
No real braiding required here. Tie a ponytail, then add small elastics down its length at even intervals, and gently puff out the hair between each one to create rounded bubbles.
Use clear or matching elastics, and tug each bubble wider so they look plump and even. It is one of the easiest ways to make a plain ponytail look styled, and it holds all day without falling apart.
A Braided Low Ponytail
Gather your hair into a low ponytail at the nape, then braid the length and finish with a small elastic. It reads more polished than a high version and works under hats or against a coat collar without snagging.
Leave a few pieces out at the front to soften it, and wrap a strand around the elastic for a tidy, professional look that suits the office.
The Messy Low Braided Bun
Braid a loose low ponytail, then coil that braid into a bun at your nape and pin it in place. Because the bun is made from a braid, it holds its shape far better than a twisted one.
Pull a few pieces loose around your face and let the bun look slightly undone on purpose. This is the five-minute style for days you want to look gathered without trying. For a tidier version, these braided bun hairstyles show the range.
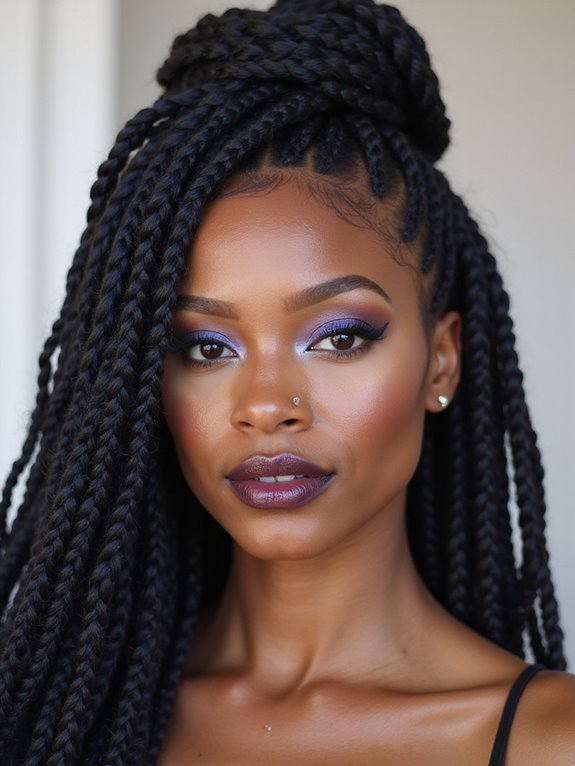
Braided Space Buns
Split your hair down the middle, braid each side, then wind each braid into a small bun high on your head and pin it. The braids give the buns texture and stop them from slipping out.
Keep them even by parting carefully and starting both braids at the same height. It is playful for festivals and weekends, and it keeps every strand off your neck on hot days.
The Polished Pull-Through Braid
This one looks like an elaborate rope braid but uses only ponytails. Tie a small ponytail, split it in two, tie a second ponytail just below, then pull the first one up and through the gap. Repeat down the length.
- Tie a small section at your crown.
- Split it, add the next small ponytail below, and pull the top split through the middle.
- Keep stacking and pulling, then gently widen each segment for that full, woven effect.
It is the highest-impact, lowest-skill braid on this list, and pancaking the segments at the end is what makes it look salon-made.
The Dutch Braid for Built-In Volume
A Dutch braid is the French braid in reverse: you cross the strands under the middle instead of over. That single change makes the braid sit on top of your hair, raised and bold, instead of sinking in.
Add hair before each under-cross, the same way you would for a French braid. Dutch braids are the base for everything from a single statement plait to two sporty rows, and they grip well enough to survive a workout.
Styling Tips to Keep Any Braid Looking Fresh
Two habits do most of the work. First, braid on second-day hair or mist a little texture spray through clean hair, because a touch of grip stops strands from sliding loose. Second, pull the edges wide once the braid is tied, which adds fullness and a softer line.
Set the finished style with a flexible-hold hairspray rather than a stiff one, and tuck any ends under with a bobby pin. If you sleep in a loose braid, you wake up with soft waves and a head start on tomorrow.
Frequently Asked Questions
Which braid is easiest for a complete beginner?
The pull-through and bubble braids, because neither one requires actual weaving. You only tie small ponytails and pull or puff them, so they look intricate while staying genuinely simple.
How do I stop my braid from falling apart?
Start with grip. Second-day hair or a light texture spray helps the strands hold, keep your tension even as you braid, secure the end with a small elastic, and finish with a flexible hairspray.
Do these braids work on short hair?
Yes. A side braid, braided bangs, a braided headband, and a small French braid all work on a bob or lob. Shorter pieces may slip out, so use a little product and a few extra pins.
How do I make a thin braid look fuller?
Gently pull the outer edges of each section apart after you tie it off, a move stylists call pancaking. For very fine hair, lightly tease the section before braiding to build a base.
How long do these styles last?
Most hold comfortably through a day and into the evening. Sleep in a loose version and you can refresh it the next morning, or take it down for ready-made waves.
Conclusion
If you only practice one thing, make it the basic three-strand braid with even tension, because every style here builds on it. After that, the two moves that separate a styled braid from a tired one are simple: work with second-day texture, and pull the edges wide before you walk out the door.