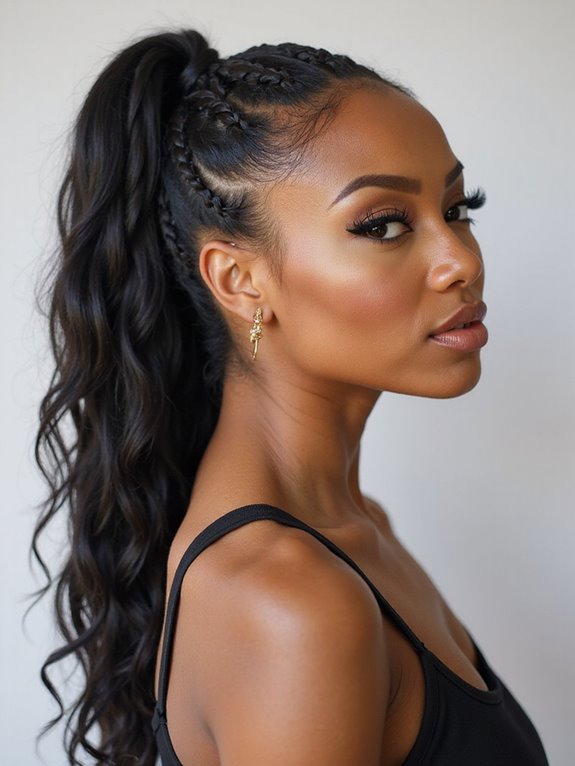
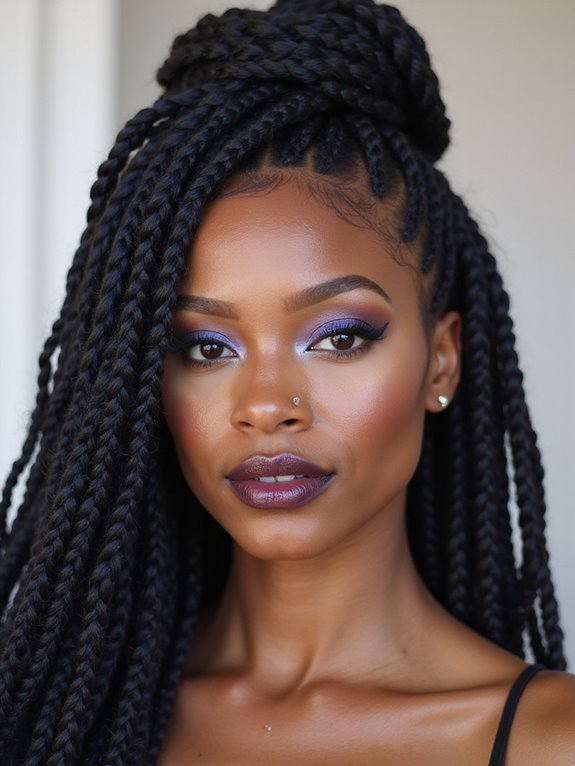
The best braided buns share a quiet secret: they look like you fussed, when really you spent five minutes and a handful of pins. That gap between effort and effect is exactly what makes them feel so polished, and it is why a braided bun rescues a bad-hair morning and dresses up an evening with equal ease.
Here are fifteen braided bun hairstyles that read classy without the work, sorted from the simplest everyday options to the dressier ones. Each one is paired with the face it flatters and a quick styling note, so you can land on the version that suits your hair and the look you want.
Braided Buns, Quick Answers
What makes a braided bun look polished with little effort? A secure base and a few deliberately loosened pieces. The structure holds while the softness around it stays relaxed rather than fussy.
Do I need long hair? No. Short and medium lengths manage smaller buns and half-up versions beautifully, often with just a couple of extra pins.
How long do they take? Most take five to ten minutes once you know the braid. The dressier woven styles take a little longer but still look harder than they are.
A Timeless Braided Crown Bun

The braided crown bun wraps a braid around the head before gathering it into a bun, and it is the look that reads most polished for the least skill. The braid does the decorative work while the bun keeps everything tidy at the back.
Why it always looks done
It suits weddings, work, and anything in between, and it flatters almost every face because the height of the braid can sit wherever balances your features. The circular braid also keeps every strand off your face, which is a relief on a busy day.
Leave a few soft pieces down at the temples and the whole thing turns romantic. For more woven shapes, see braided crown hairstyles.
Simple Low Braided Chignon

A low braided chignon sits at the nape, soft and refined, and it is my default whenever I want to look pulled together with almost no effort. Braid loosely, coil at the neck, and pin, the looseness is what keeps it from looking stiff.
It is endlessly flattering and comfortable for hours since the weight rests low. Dressed with a pin or worn plain, it works for the office, a dinner, or a wedding without changing a thing. Leave a few face-framing pieces down to soften the line.
A couple of myths that keep people from trying a braided bun:
❌ Myth: Braided buns are complicated
✅ Reality: Most start with a basic three-strand braid coiled and pinned. If you can braid a simple plait, you can build nearly every look on this list.
❌ Myth: You need long hair for a bun
✅ Reality: Short and medium lengths manage smaller buns, half-up versions, and mini buns easily, sometimes with a couple of extra pins to gather shorter pieces.
The Twisted Rope Braid Bun

A rope braid bun swaps a traditional plait for a two-strand twist, giving the finished bun a sculptural, light-catching texture. It is faster than a full braid and looks more intricate than it is, which is the whole appeal. Here is the quick method:
- Split a ponytail in two and twist each section in the same direction
- Wrap the two twists around each other to form the rope
- Coil and pin the rope into a bun, twisting the same way so it stays clean
Quick Mini Braided Buns

Two or three small braided buns are the playful, youthful end of this list, perfect for a casual day or a festival. Splitting the hair and coiling each braided section into its own little bun takes minutes and reads fun rather than fussy.
They suit most lengths and textures, and the smaller scale means they hold easily. A few ways to wear them:
- Two high space buns for a bold, playful look
- A row of mini buns along the crown for something more intricate
- A pair at the nape when you want it subtle and grown-up
The rope braid bun, step by step:
1Tie and split
Gather a ponytail where you want the bun, then divide it into two equal sections.
2Twist and wrap
Twist each section tightly in the same direction, then wrap the two around each other into a rope.
3Coil and pin
Wind the rope into a bun, coiling in the same direction you twisted, and secure with pins.
A Half-Up Braided Bun

The half-up braided bun gathers the top section into a braided bun while the rest falls free, the best of both worlds when you want your length on show but your face clear. It is also the easiest braided bun for shorter hair, since only the top needs to reach. A few notes:
- Braid and coil just the top third into a small bun at the crown
- Leave the rest down, straight, waved, or curly as you like
- Hide the band by wrapping a small braid around the base
The Fishtail Braided Bun
A fishtail braid coiled into a bun looks intricate and special, all that fine woven texture gathered into one polished shape. The method is simple even though the result looks advanced: cross small pieces from each side over to the opposite section, then coil the finished braid up and pin.
It is a favorite for weddings and photos because the detailed surface looks expensive up close. Gently pull the fishtail wider before coiling to make the bun look fuller and softer, and it turns romantic without any extra tools.
A Dutch Braid Bun
Working a Dutch braid into the base before coiling gives the bun raised, three-dimensional rows that pop against the scalp. Because the strands cross under rather than over, the braid sits proud of the head for a bolder, more visible detail than a French braid.
It is a great choice when you want the braid itself to be the statement, traveling from your hairline back into the bun. A Dutch braid bun keeps hair fully off the face and looks especially sharp with a sleek, smoothed base.
Keep the rows neat by adding small, even pieces as you braid, and smooth the base with a little gel for the sharpest version. It is a confident, modern way to wear a bun with the braid on full display.
A Soft French Braid Bun
The French braid bun lays a braid flat and soft against the head before feeding it into a bun, for a gentle, romantic finish. Where a Dutch braid pops up, a French braid melts into the hair, which makes it the softer, more understated of the two.
It is lovely for everyday wear and dressier days alike, and it flatters looser textures beautifully. A light mist of hairspray keeps the French section smooth as it settles, and a few loosened pieces at the front soften the whole look.
- Braid loosely so the French section stays soft against the head
- Feed it straight into the bun for a smooth, all-in-one look
- Loosen a few pieces at the front to keep it romantic
The Undone Messy Braided Bun
The messy braided bun is the five-minute hero of any busy morning, and the looseness is the point. As long as the base is secure, a little undone texture stays relaxed and modern, not careless. Braid loosely, pull the plait wider, coil casually, and pin.
It suits second-day hair perfectly, since a bit of natural texture helps it grip. Pull a few pieces loose around the face once it is pinned, and you have a look that seems thrown together but quietly flatters. For more, see messy braided hairstyles.
A Full Double Braided Bun
Using two braids instead of one builds a fuller, more dimensional bun, with the plaits wrapping around each other for a woven, intricate effect. It looks far more elaborate than it is, which is exactly why it works for events.
The double approach also adds volume for finer hair, since two braids fill out a bun that a single plait might leave looking sparse. Braid two sections, then coil them together or stack one over the other and pin into one generous bun.
Keep the two braids the same size for balance, and pin where they meet so nothing shifts. It is a quietly impressive look that suits a wedding guest or a special evening out.
The Romantic Milkmaid Braid Bun
The milkmaid braid carries two braids over the top of the head in a halo shape, and tucking the ends into a small bun at the back keeps the whole thing secure and tidy. It is dreamy, vintage, and far easier than it looks.
This one flatters longer hair best, since the braids need length to reach across the head, though added hair can help shorter lengths get there. It is a beautiful choice for a garden wedding or any time you want something soft and a little nostalgic.
- Best on longer hair, since the braids must reach across the crown
- Pin securely where the braids meet at the back
- Add a few flowers or a ribbon for a garden-wedding feel
A Sleek Braided Top Knot
The braided top knot takes the bun high on the crown for a bold, modern look that lifts the whole face. A braid wrapped into a high knot looks confident and a little fashion-forward, especially with a smooth, gelled base.
It is a strong choice for showing off earrings and a clean neckline, and it keeps every strand off your face on a hot or hectic day. Smooth the base with a touch of gel for the sharpest finish, or leave it softer for an easier daytime version.
- Set the height first by gathering high and tipping your head back
- Smooth with gel for a sharp finish, or leave it soft for daytime
- Wrap a braid around the base to hide the band
A Side-Swept Braided Bun
Sweeping a braided bun low and to one side adds soft asymmetry and a romantic, off-duty elegance. Gathering everything over one shoulder before coiling the bun at the side of the nape gives the look movement and a flattering diagonal line.
It is a lovely choice for a wedding or a date, and it pairs beautifully with a deep side part. A few face-framing pieces left loose on the fuller side finish it, and the whole thing takes only a minute more than a center bun.
Anchor the bun well at the side of the nape so the weight does not drag it down over the night, and you have a soft, photo-ready look that took barely any time.
A Playful Bubble Braid Bun
The bubble braid bun skips braiding altogether, segmenting a ponytail with small elastics and puffing each section before coiling it into a bun. It is the most beginner-friendly look here, since there is no actual braiding involved.
- Tie a ponytail and add small elastics down its length at even spacing
- Puff each section by gently pulling the sides wider into bubbles
- Coil and pin the bubbled length into a soft, textured bun
Styling Tips for a Polished Finish
A few small habits separate a braided bun that looks polished from one that looks rushed, and none of them take extra time. Start on second-day hair, which grips pins and holds a braid far better than freshly washed strands. Pancake your braid, gently tugging its edges wider, before coiling so the bun looks fuller and softer.
Keep the base comfortable rather than tight, since tension at the hairline strains your edges over time and a relaxed base actually looks more natural anyway. Finish with a light mist of hairspray and a few deliberately loosened pieces around the face, that touch of softness is what makes the whole thing read classy without looking like you tried. For the full how-to, see braided bun.
Braided Bun Hairstyles, Answered
?Which braided bun is easiest for beginners?
A low three-strand braided chignon or a bubble braid bun. Both are forgiving of uneven work and look polished on a first try, since a low placement and a little softness hide small imperfections.
?How do I make a braided bun look fuller?
Pancake the braid before coiling by gently pulling its edges wider, and use two braids instead of one for finer hair. Both tricks add volume and make the bun look more generous without extra length.
?Can I wear a braided bun on short hair?
Yes. Half-up braided buns, mini buns, and small crown buns all work on shorter lengths. Use a few extra pins to gather the shorter pieces, and twist any too-short strands back around the bun.
Classy, With Almost No Effort
The magic of the braided bun is that the effort never shows. A low chignon, a rope twist, a milkmaid halo, each one looks like you spent real time when you spent five minutes, and that is exactly the kind of polish worth keeping in your back pocket.
Pick the one that fits your hair and your morning, master a basic braid to open up the rest, and keep the base gentle so your edges stay happy. Save this list for the next time you need to look put-together in a hurry.
Worth a Look