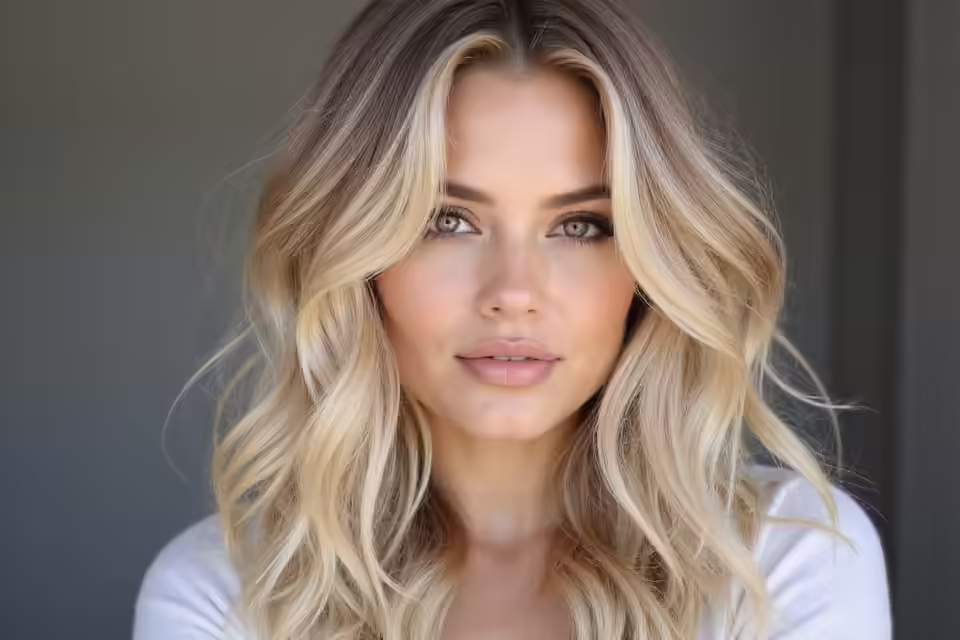
People call the bun the lazy option, the thing you grab when you’ve given up on your hair. I see it the other way around. Bun hairstyles are the most flexible shape in styling: the same gathered knot can look sporty at the gym, polished in a boardroom, or soft and romantic under a veil, depending on where you place it and how tightly you pin it.
I’ve gathered 24 buns here that I use on clients and on myself, sorted loosely from the no-fuss everyday knot to the braided and vintage updos that take a little patience. For each one you’ll get the real steps, who it tends to flatter, and an honest word on the time or upkeep it costs.
Quick Read Before You Pin
Bun placement does most of the work: high feels youthful and lively, low looks refined, and a knot at the nape is the safest bet for formal events. Texture matters too, so a day-old or lightly product-prepped head holds far better than freshly washed, slippery hair.
Match the bun to your hair type and your time budget. A messy knot takes two minutes and forgives flyaways, while braided crowns and fishtail buns want ten to twenty minutes and a steady hand. None of these need a salon, but a few are worth booking out for a big day.
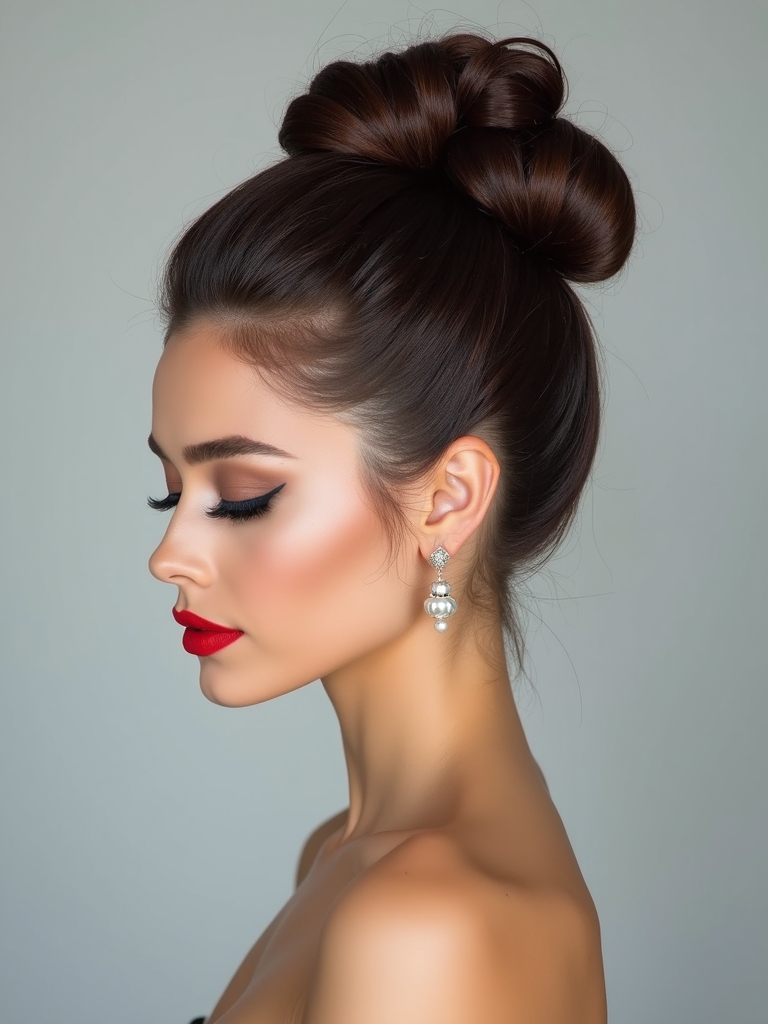
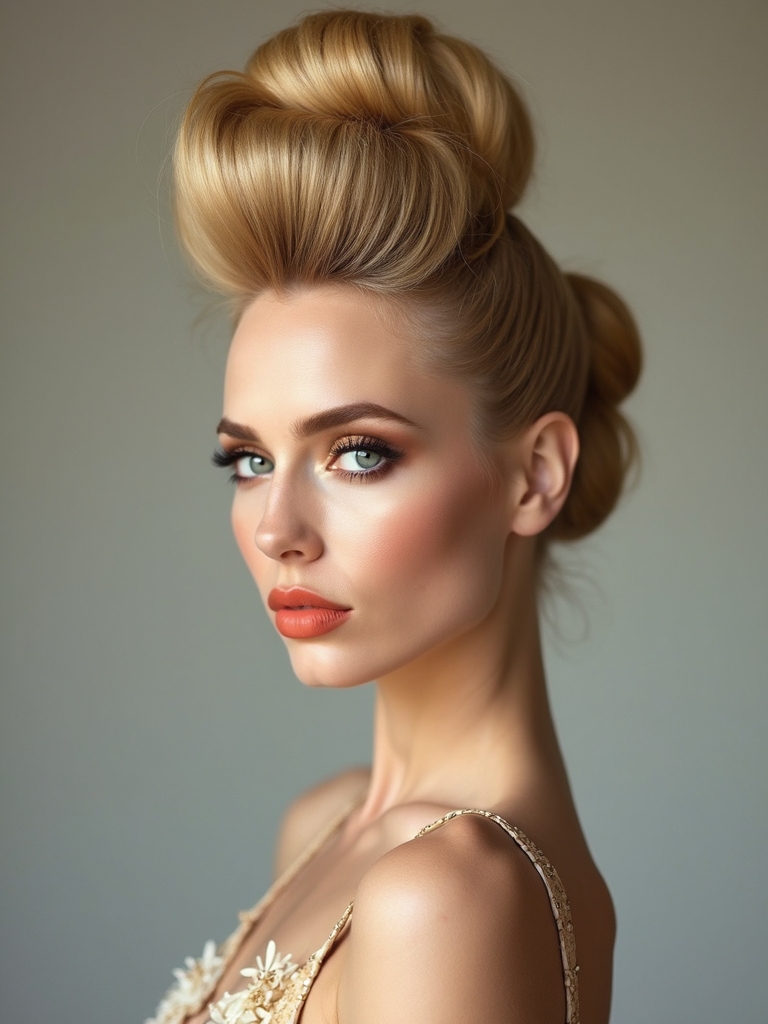
The Ballerina Bun
This is the high, smooth knot dancers wear, and it works on almost everyone because it lifts the face. It wants clean tension and a little product to behave.
- Brush everything up to the crown and tie a tight high ponytail, smoothing the front with a wet brush and a pea of gel.
- Twist the ponytail into a rope, wrap it around the base, and tuck the tail under.
- Pin in a circle with two bobby pins set in a criss-cross, then a mist of hairspray and a damp palm dragged over the surface to kill flyaways.
The Everyday Messy Bun

If I had to name the bun clients ask me to teach most, it’s this one. Day-old hair works far better here than a fresh wash, since a little grit gives the knot something to grip. Gather a loose ponytail, twist, and wrap it without trying to make it perfect, then pull a few face-framing pieces loose at the end.
It takes about two minutes and forgives almost everything. For finer hair, mist dry texture spray through the lengths first so the bun looks fuller. If you want a lower, slouchier version that leans more weekend than gym, the low messy bun rides lower on the neck and asks for even less precision.
Not sure where to place your bun? Match your day to a knot.
1You want to look instantly more awake and lifted
Go high, a ballerina or top knot sits above the crown and opens the face.
2You have a formal event or photos
Go low, a chignon at the nape reads refined and photographs cleanly.
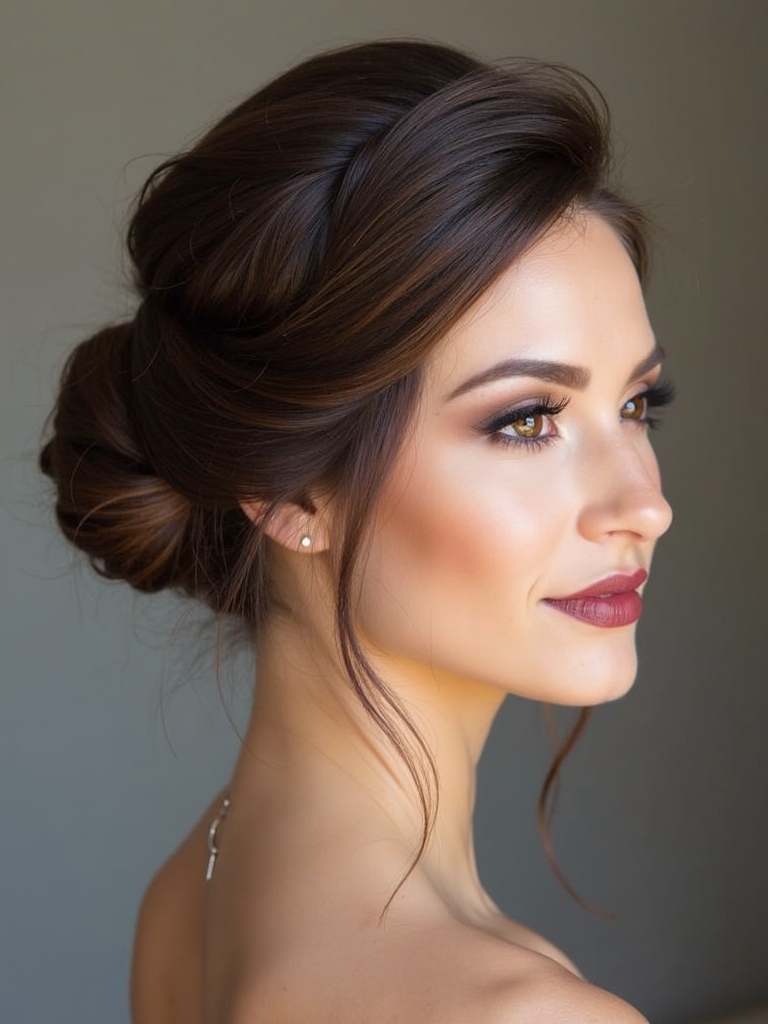
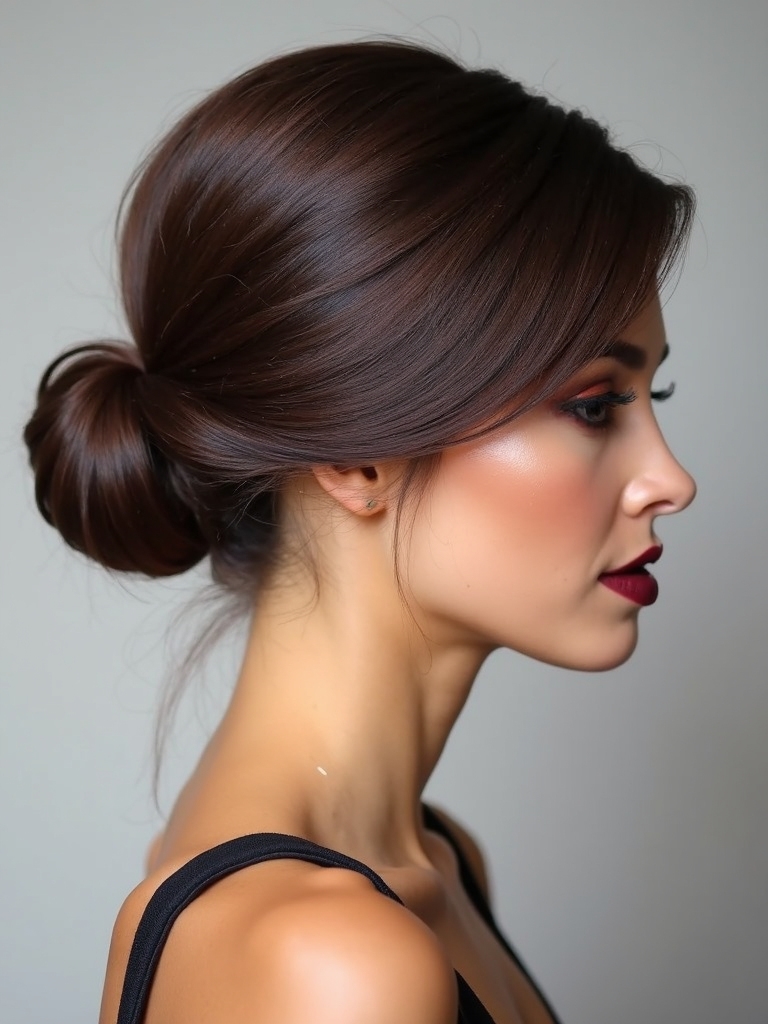
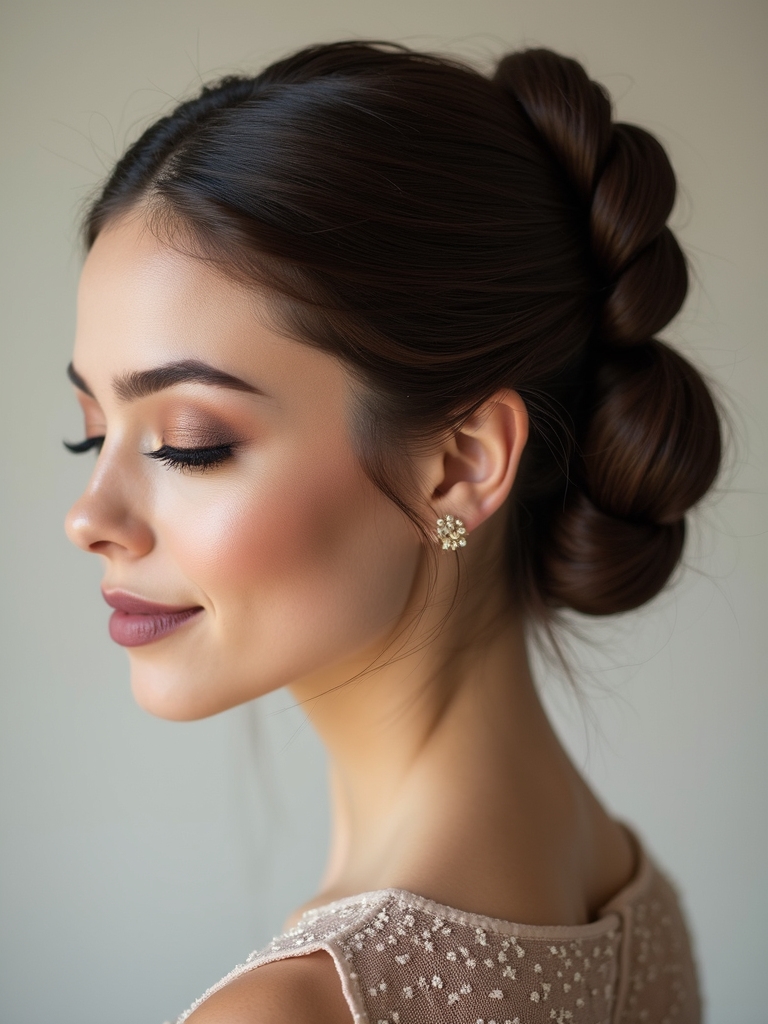
Low Chignon, the Quiet Classic
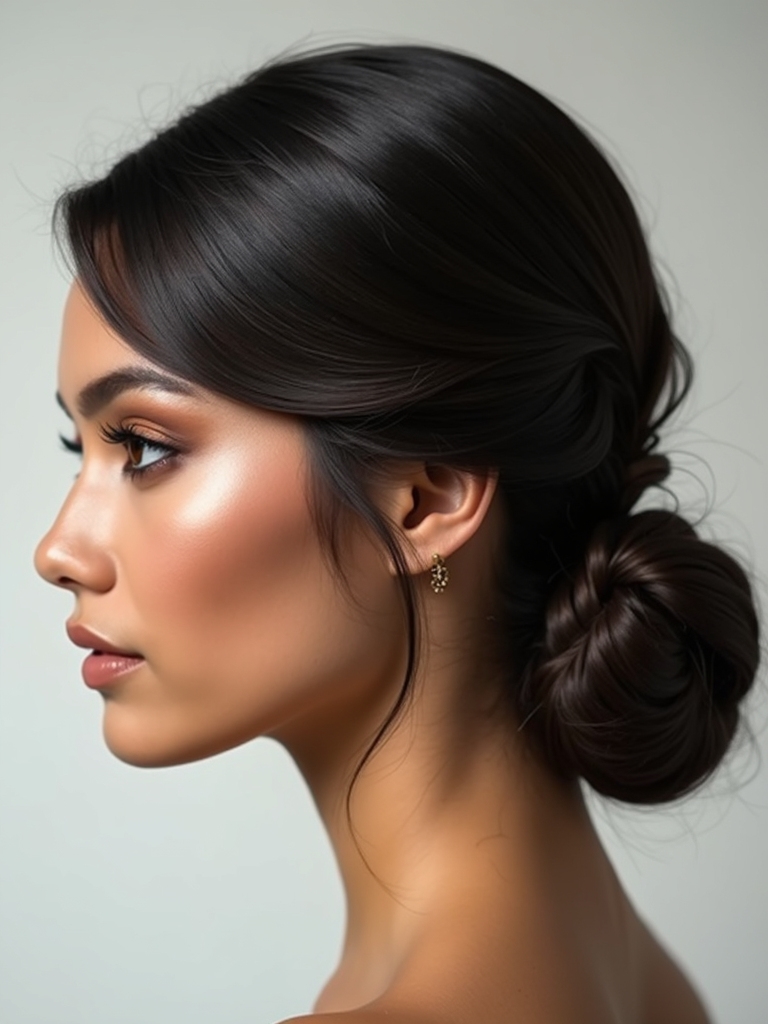
The chignon is the bun I recommend most for brides and wedding guests, because a low knot at the nape photographs beautifully and never looks like it’s straining for effect. It comes across grown-up and calm in a way a high bun doesn’t.
Best for fine to medium hair
Part your hair where you normally would and gather everything into a low ponytail, then fold the lengths under and pin the fold flat to your head. Keep the tension medium so it softens your jaw rather than dragging at it.
A salon will set this for around $45 to $85 for an event, but it’s very doable at home with a hair net and a dozen pins once you’ve practiced twice.
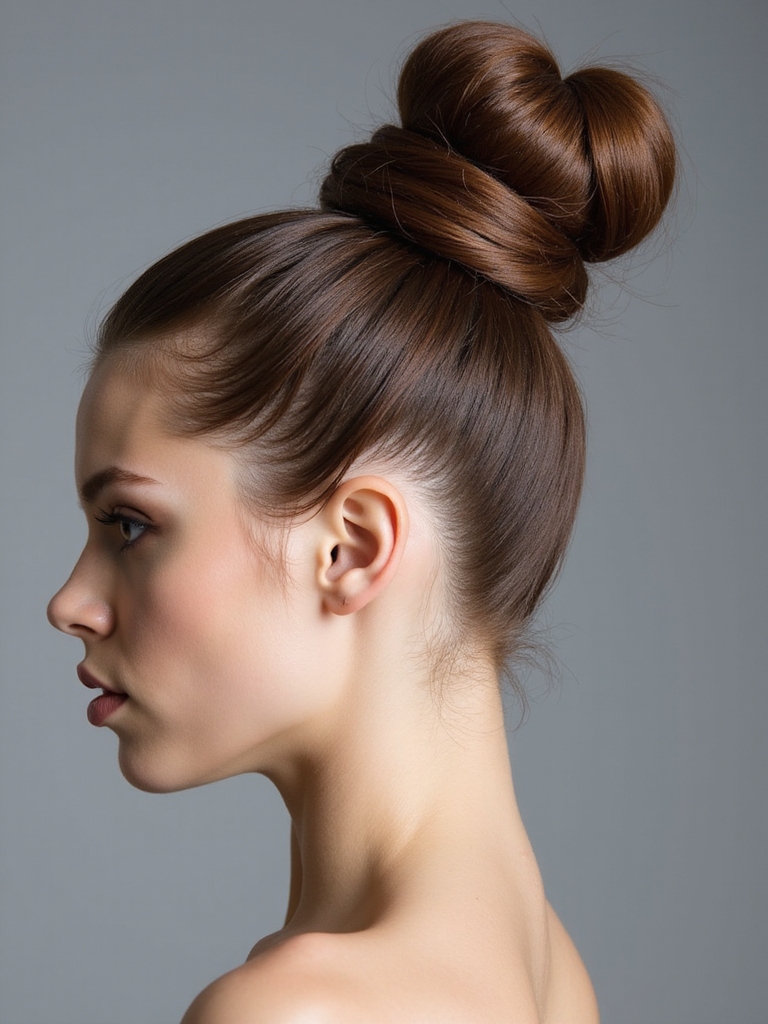
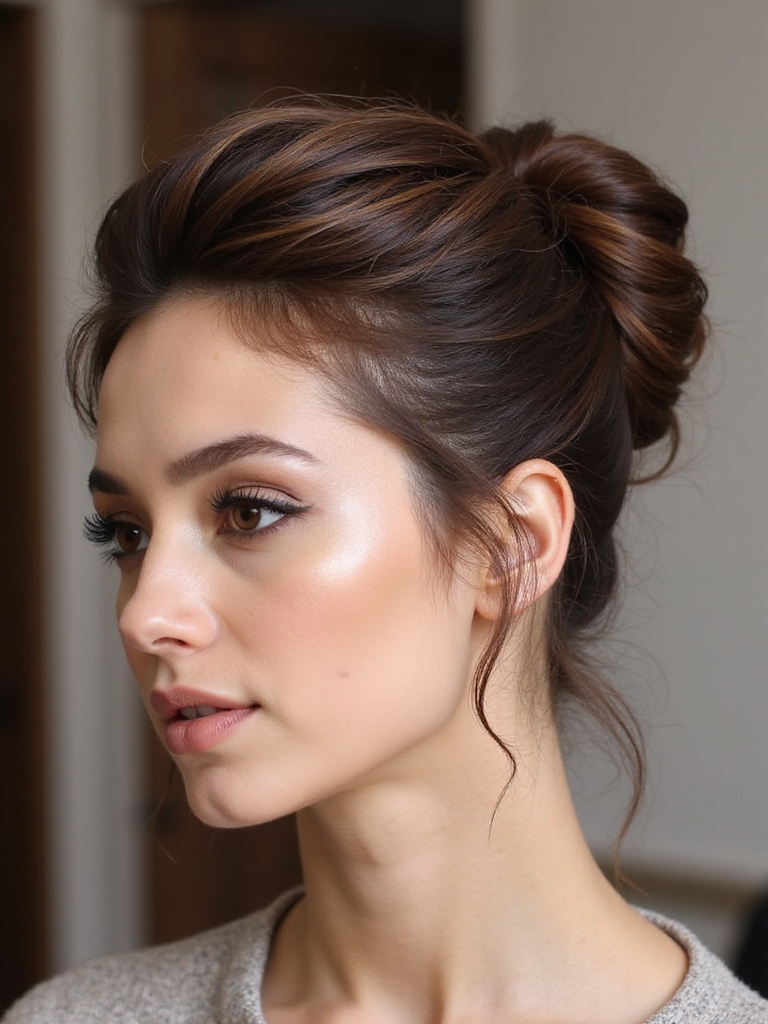
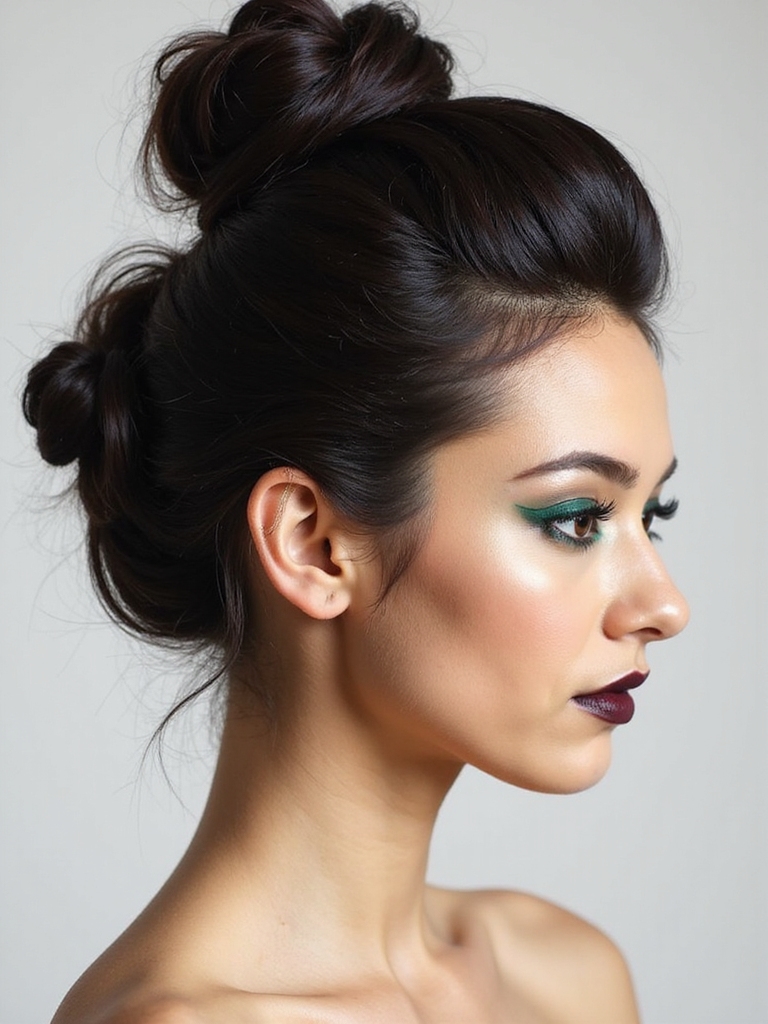
The High Bun
A bun set above the crown is the most awake-looking option, which is why I love it for long days that run from desk to dinner. The height draws the eye up and gives an instant mini-facelift effect along the cheekbones.
Tip your head forward, brush everything toward the top of your skull, and secure the ponytail there before twisting it into a knot. Working upside down keeps the back smooth and bump-free.
Tension is the catch here. Pulled too tight every day, a high bun stresses the hairline, so alternate placement and let it sit looser on back-to-back wears. For more height-focused variations, the dedicated high bun guide breaks them down further.
💡Pin It Right
Push bobby pins in with the wavy side against your scalp, not the flat side. The ridges grip far better and your chignon will survive a night of dancing.
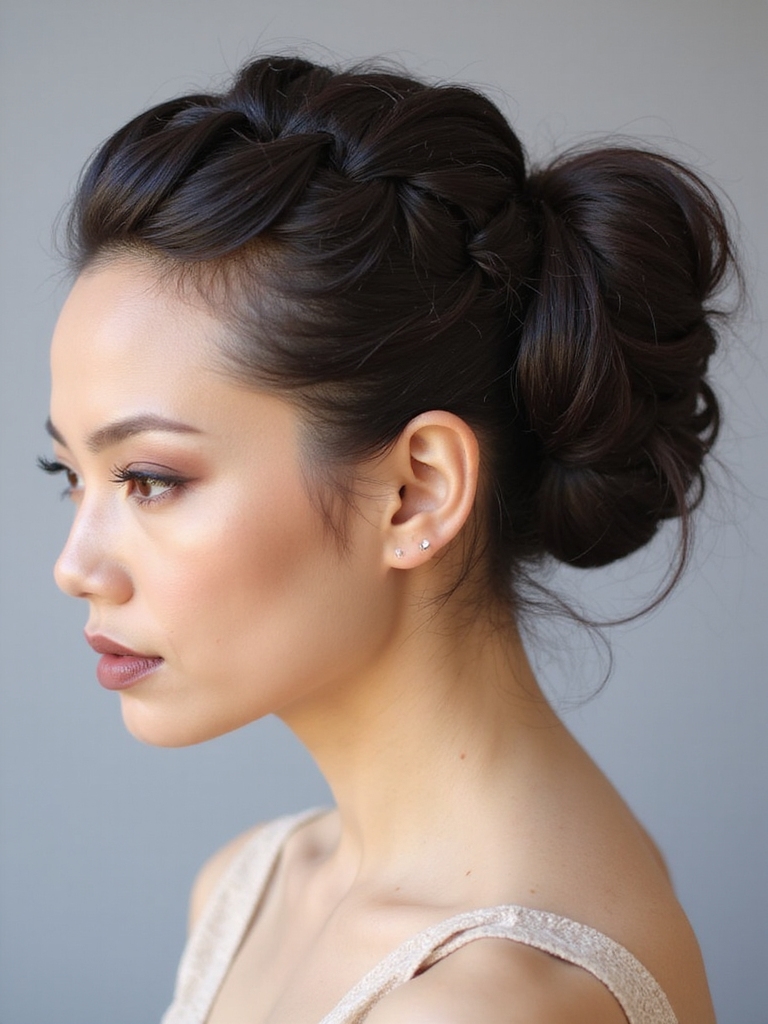
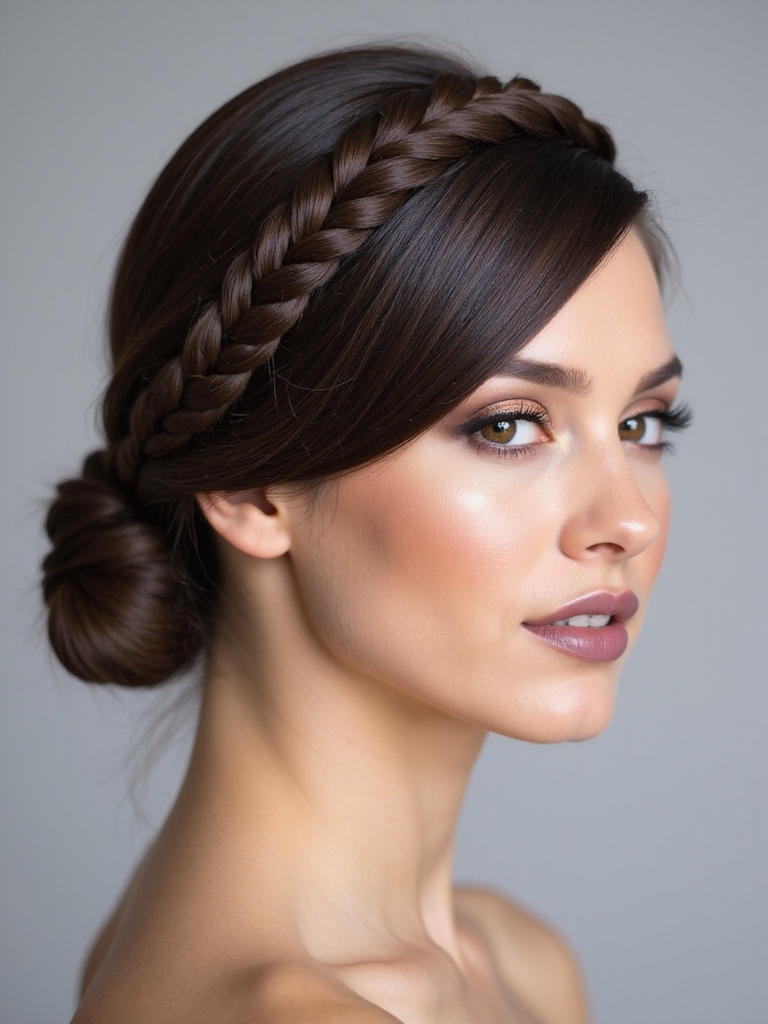
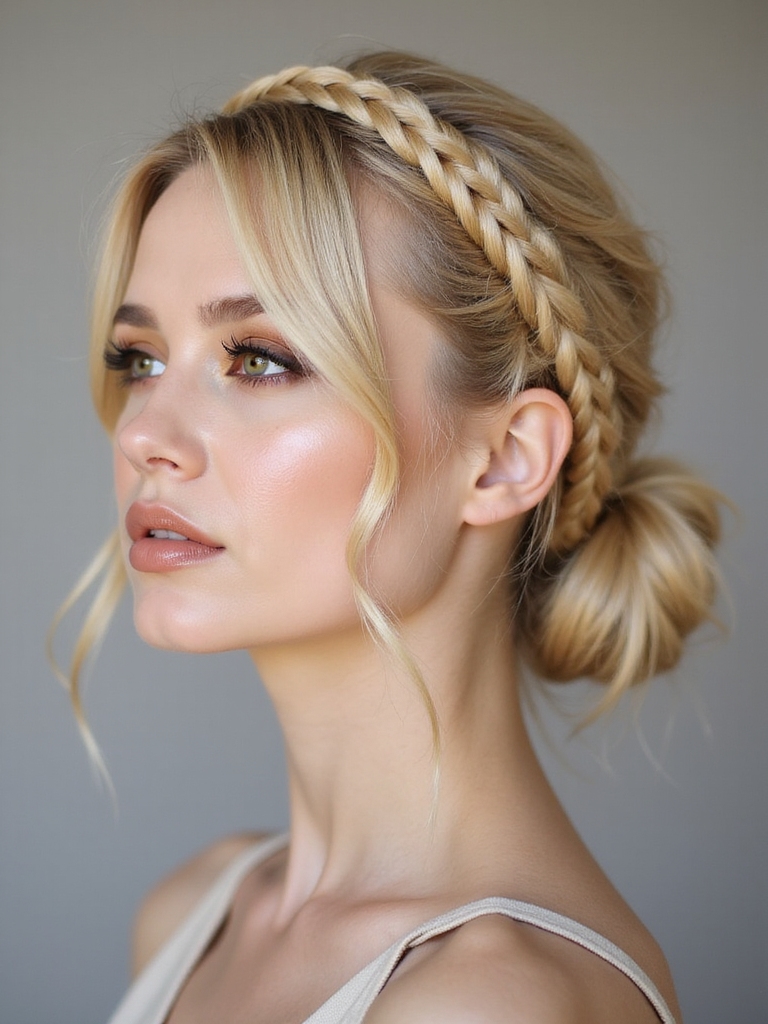
Dutch Braid Bun
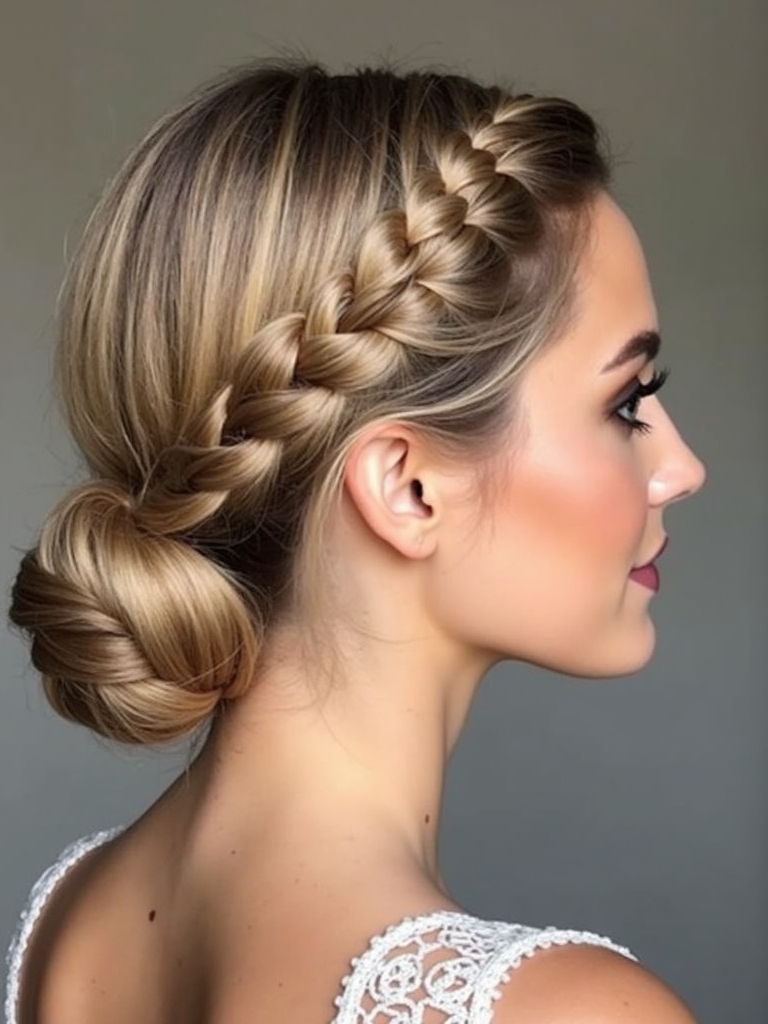
A Dutch braid runs along the scalp and then collects into a bun, so the braid does the decorating for you. It holds through a full day and looks intentional with very little finishing.
- Start a Dutch braid at your hairline, crossing sections underneath so it sits proud of the scalp.
- Braid to the nape, then gather the rest into a low ponytail and coil it into a bun.
- Gently tug the braid edges wider for that woven, full look, and pin the coil to hide the ends.
Sleek Top Knot
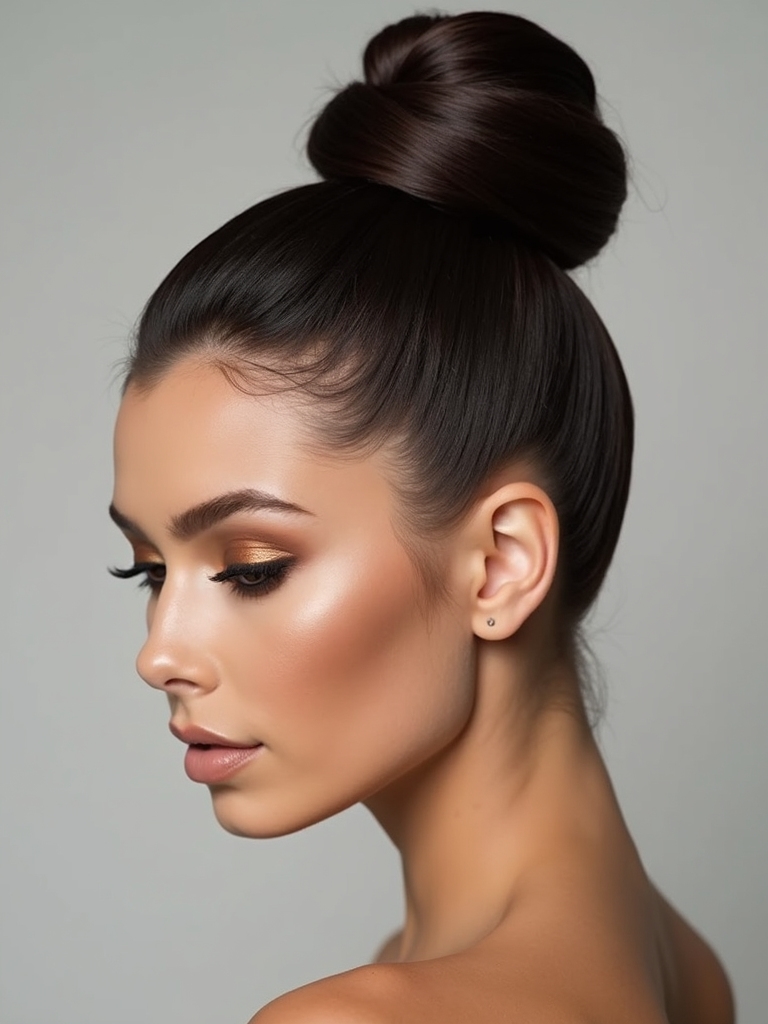
Think of the top knot as a crisper, fully slicked take on the high bun: no loose pieces, all polish. It’s my go-to when an outfit is doing the talking and the hair just needs to stay out of the way. Clean and quiet.
- Wet the front lightly and comb everything into a high ponytail with zero bumps.
- Smooth a small amount of pomade or edge control along the hairline with a fine brush.
- Wrap the ponytail into a tight knot, pin, and set with a strong-hold spray for an all-day finish.
A bun isn’t about hiding your hair. It’s about choosing where you want the eye to land, then pinning the rest out of the way.
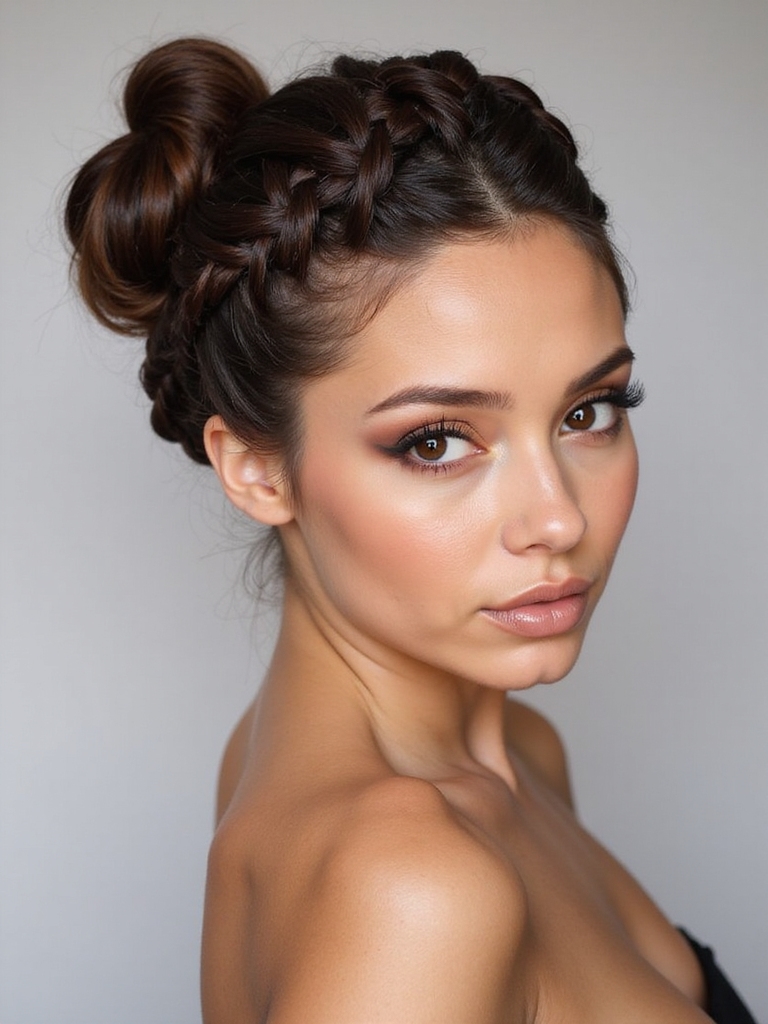
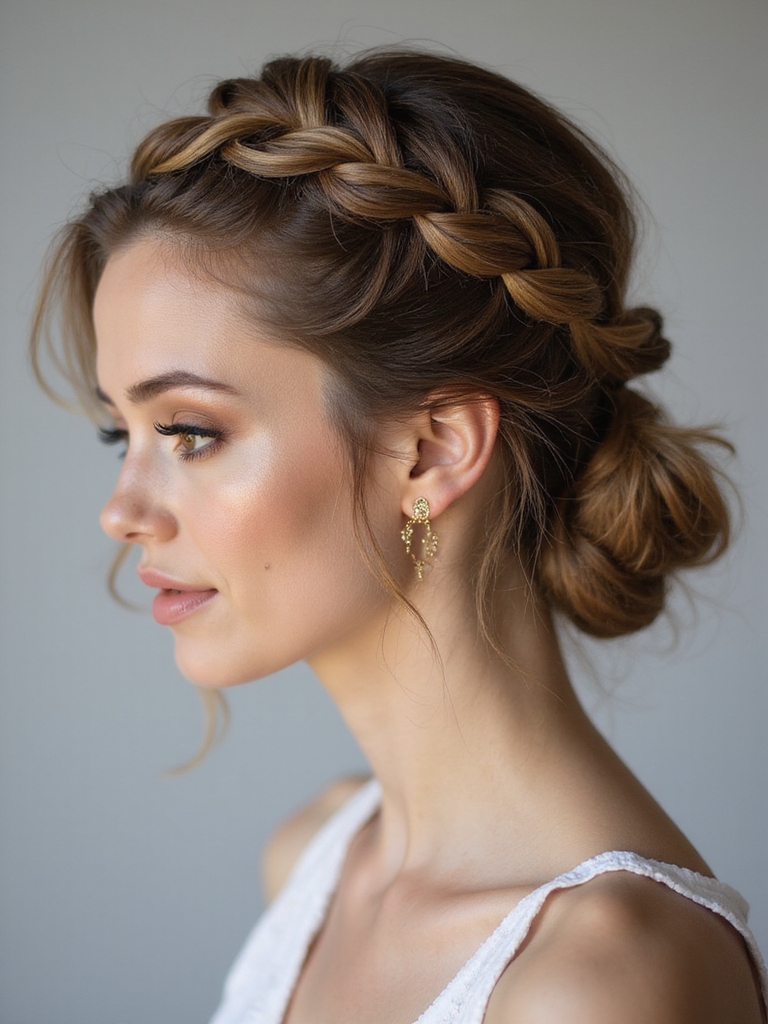
Braided Crown Bun
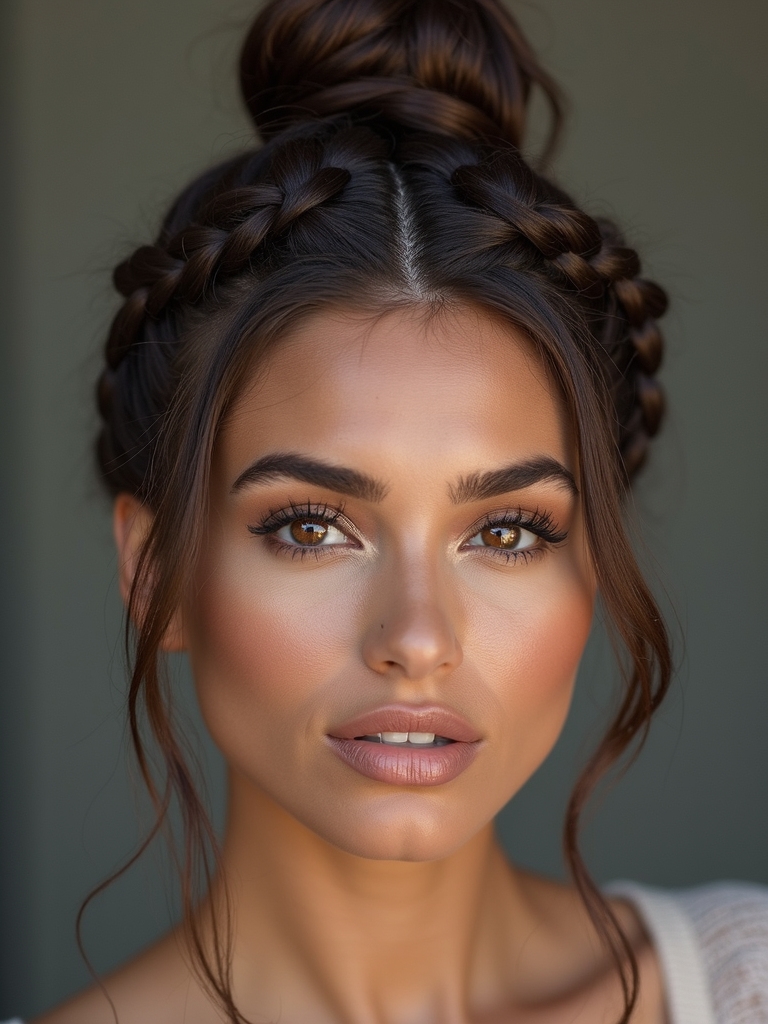
A crown braid that ends in a tucked bun feels festival one day and bridal the next, depending on how tidy you keep it. It frames the whole head, so it’s flattering from every angle in photos.
Split the hair, braid each side back toward the opposite ear, and pin the braids across the crown before coiling the leftover length into a small bun at the nape.
This one rewards a little practice. Once your fingers know the path it takes ten minutes, and a single braided bun base can be dressed up with a few small flowers for an event.
The Look of Elegance
Whatever bun you choose, the difference between home-amateur and polished comes down to three finishing moves. None of them cost anything, and they’re what I quietly do at the end of every updo before a client sees the mirror.
- Run a teasing comb lightly under the bun to add a little lift so it doesn’t sit flat against your head.
- Set the shape with a flexible-hold spray, then warm it with your palms so it doesn’t go crunchy.
- Tuck stray ends with a single pin; more product only makes flyaways worse.
ℹ️Good to Know
Braided buns hold longest on second-day hair. A little natural oil and grit give the braid grip, so washing right before a crown braid actually works against you.
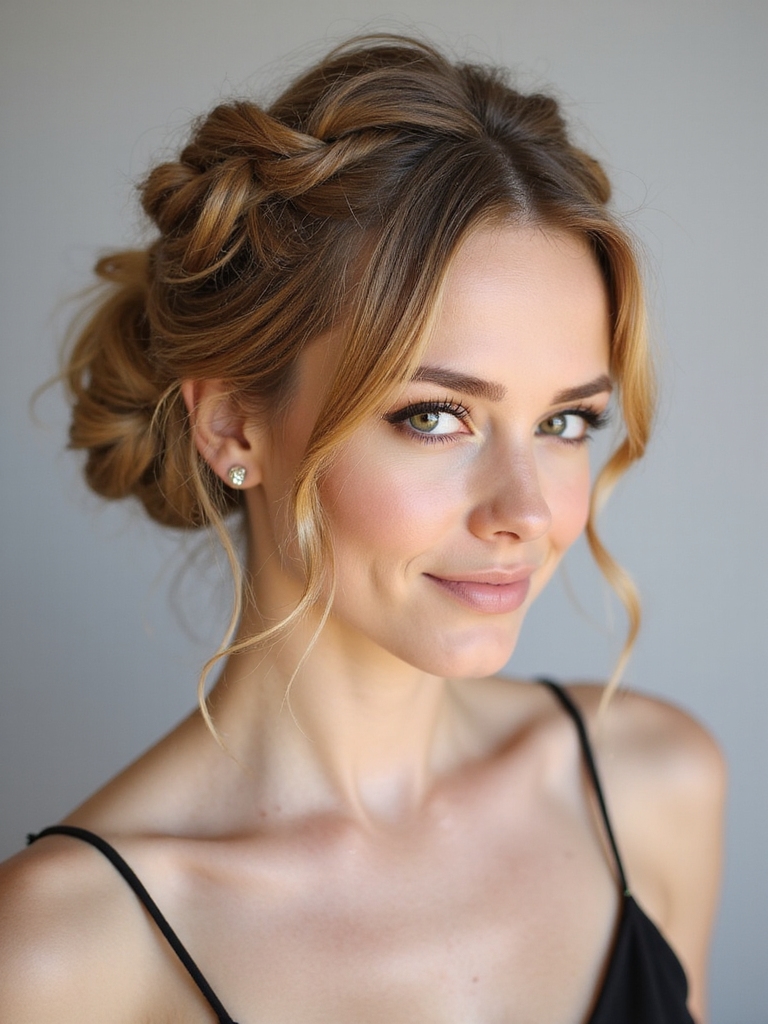
The Knotted Updo
The knotted updo is a series of small knots, like tying your hair in soft pretzels, that build into a textured shape. It looks intricate but it’s mostly repetition once you get the first knot down.
Why it works on thick hair
Split the back into two sections, tie them in a simple overhand knot, then keep knotting down the length and pin as you go. Each knot hides the pin from the one before.
I like this for medium to thick hair because the knots need a little body to hold their shape. On very fine hair they can slip, so add texture spray first.
Side-Swept Bun
Sweeping the bun to one shoulder softens a strong jaw and adds a little old-Hollywood romance. It’s my pick when a client wants something gala-worthy that still feels relaxed.
Commit fully to the diagonal. A bun that drifts back to center looks like an accident, so anchor it firmly behind one ear.
- Create a deep side part and sweep all the hair toward the opposite low side.
- Twist into a loose bun behind the ear and pin it at an angle.
- Leave a soft tendril down the bare side of the neck for balance.
Double Buns
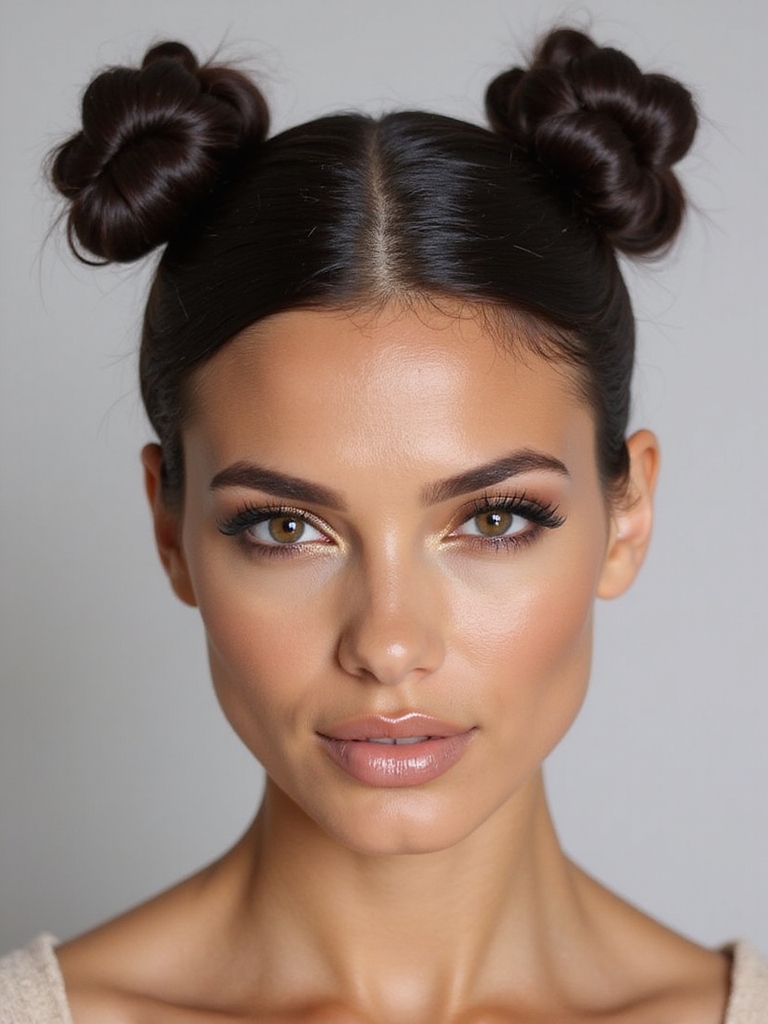
Space buns, two small knots set high on either side, are pure fun and feel young and playful. They live in festival and weekend territory, well away from the office, and they take the pressure off needing every strand smooth.
- Part straight down the middle and tie two even high ponytails.
- Twist each into a small bun and pin, leaving them a touch messy on purpose.
- Pull out a few baby hairs at the front to keep it soft and a little undone.
Curly, Textured Bun
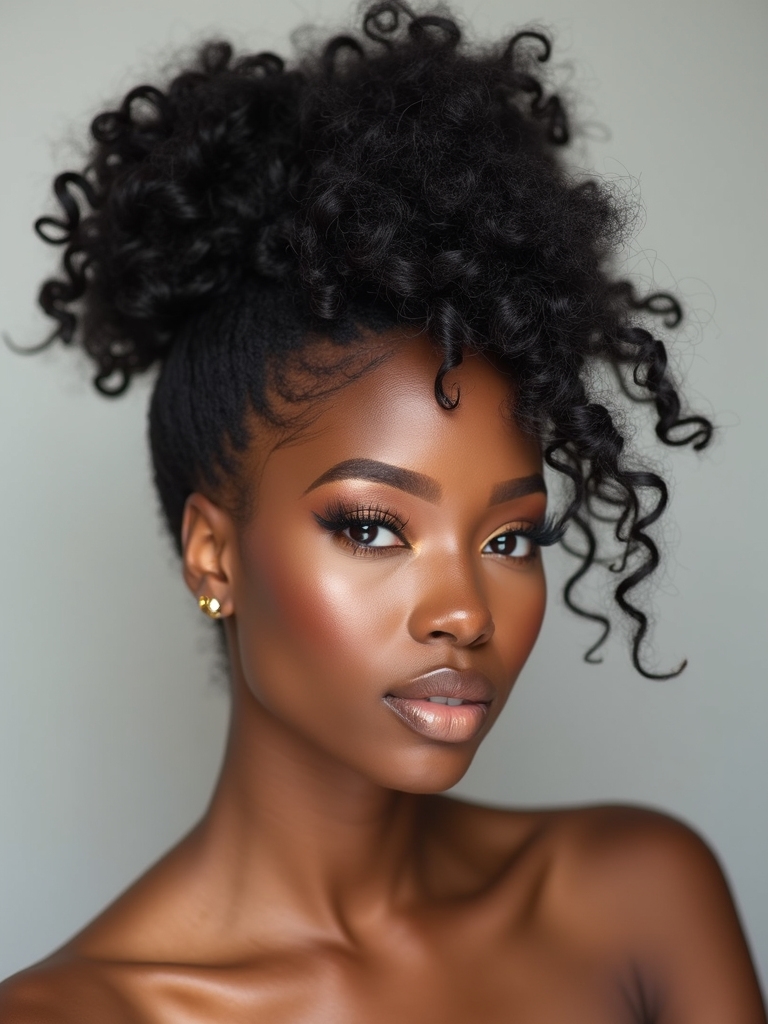
On curly, coily, and natural hair, a bun is one of the kindest protective styles you can wear, because it tucks your ends away and keeps your length from snagging through the day. The goal here is not to flatten your texture but to gather it, so your curls still show around the knot.
Protective without flattening your curls
Work on damp or refreshed hair with a little leave-in, gather to your chosen height using a soft scrunchie that won’t dent the curl, and shape the bun without combing the texture out of it. A satin scrunchie protects the strands at the gather point.
Watch the tension at your edges. Any pulling or stinging at the hairline means it’s too tight, and that steady pull is what wears edges thin down the line, so ease it off. For more looks made for textured hair, the curly bun roundup and the bun styles for Black hair go deeper.
Rope Braid Bun
A rope braid is the easiest braid there is, just two strands twisted around each other, and coiled into a bun it gives you a roped, textured surface without real braiding skill.
It’s a good starter if traditional braids fight you. The twist also grips itself, so it stays put with fewer pins than a smooth coil.
- Tie a ponytail wherever you like the height, split it in two, and twist both halves firmly the same way.
- Wrap the two twisted halves around each other so they lock.
- Coil the rope around the base and pin the end under.
Infinity Braided Bun
This one weaves the hair in a looping, figure-eight path before gathering into a bun, so the finished knot has a woven detail running through it. It’s an event style, the kind worth twenty patient minutes for a wedding or milestone birthday.
- Split the back into two ponytails, upper and lower.
- Loop the upper through the lower and back in a figure-eight, adding small sections as you go.
- Gather the woven length into a low bun and pin, then gently widen the loops for fullness.
Retro Vintage Bun
A vintage bun leans on volume and a smooth, rolled surface, the kind of shape you’d see in a 1950s portrait. It pairs beautifully with a red lip and works for themed parties or anyone who loves a polished, old-school finish.
Tease for height first, then smooth the outside, so you get body underneath and a clean surface on top.
- Backcomb the crown at the roots to build height, then lay the outer layer back over it.
- Roll the lengths into a wide, structured bun with real presence.
- Finish with shine spray for that glossy, photo-ready surface.
From Ponytail to Bun
Half the buns I do start life as a ponytail, and learning to convert one into the other is the single most useful skill for fast mornings. A high ponytail becomes a top knot, a low one becomes a chignon, same hair, different mood.
Tie the ponytail at the height you want the bun, then either twist and wrap for a smooth knot or backcomb and pin loosely for a messy one. The ponytail base gives you a built-in anchor so the bun rarely sags.
This is also the gentlest path for fine hair, since the elastic carries the weight and spares your scalp the dig of pins.
A Bun for Any Occasion
One bun base can travel across a whole day if you know how to shift its register. Here’s how I redress a single low knot from morning errands to an evening out without starting over.
- Daytime: loose knot, a few pieces down, no accessories.
- Office: tighten the knot, smooth the front, skip the loose pieces.
- Evening: add a metal cuff or a small pin and tug a little volume back into the crown.
Fishtail Braid Bun
A fishtail braid coiled into a bun gives the most detailed, woven-looking knot of any style here, because the braid itself is so fine and intricate. It looks like real effort even though a fishtail is just crossing small outer pieces to the center, over and over.
Braid a loose fishtail from a low side ponytail, gently pull the edges to fan it out and make it look fuller, then wrap it into a bun and pin. The slightly undone braid is what keeps it romantic and loose, which is why it suits relaxed weddings and dinners so well.
The Bow Bun
The bow bun is made entirely of hair, shaped into a bow at the back of the head, and it’s the showstopper of the bunch. It’s a novelty look, best saved for a costume, a themed shoot, or a playful party.
Save it for playful occasions
Make a looped half-bun, split the loop into two, and pull a thin strand across the center to form the bow’s knot. It needs medium-length, fairly smooth hair to show clearly.
Be honest with yourself about the occasion. It’s adorable in photos but high-concept for a workday, so I file it under fun rather than functional.
Loop Bun
The loop bun leaves the ponytail pulled only halfway through on the last wrap, so you get a soft loop with the tails tucked around the base. It’s polished but quick, a nice middle ground between a messy knot and a full chignon. I like it for medium to long hair on a day when a plain ponytail feels too casual but I don’t have time to actually style anything, since the loop gives a finished shape in well under five minutes.
- Make a ponytail, and on the final pass through the elastic, stop halfway to leave a loop.
- Spread the loop slightly so it looks like a soft bun.
- Wrap the loose tails around the base and pin them out of sight.
Minimalist Bun for Short Hair

Short hair can absolutely wear a bun, it simply becomes a small, low knot at the nape, and honestly that minimalism is its charm. If your hair grazes your shoulders or a long bob, you have enough to work with.
The pieces too short to reach the bun are a feature, so let them frame your face and soften the line. For more on this, the short-hair messy bun guide covers the slippery bits.
- Add grip with a little texture paste, since short hair is often too smooth to hold.
- Gather what you can to the nape and twist into a tiny knot.
- Pin firmly and let the front pieces stay loose.
Half-Up Bun

The half-up bun gives you the lift and the off-the-face feeling of a bun while keeping your length down, which makes it the easiest day-to-night style on this list. Gather only the crown section, twist it into a little knot, and leave everything below it down.
It suits almost every hair type and length because the bun only needs the top third of your hair to cooperate. Add a wave to the down part and it instantly looks more done.
On shoots, I use this one when we want the hair to look styled while still showing off a fresh color or a good cut underneath.
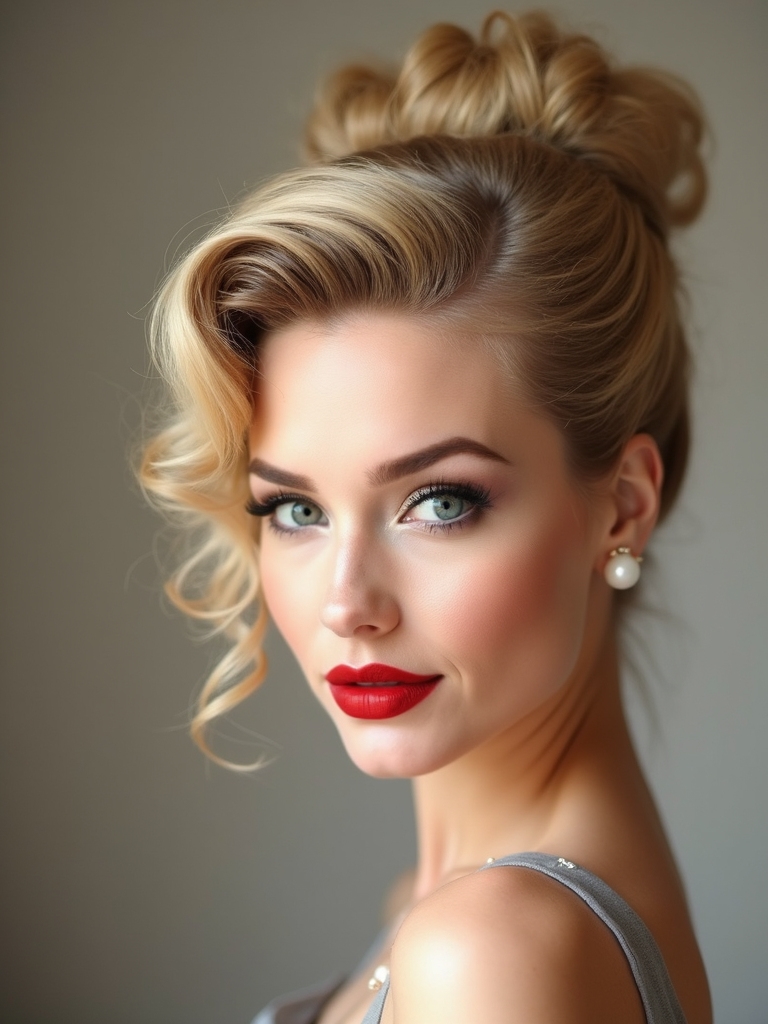
Beehive Bun
The beehive is the tallest, most dramatic bun here, built on serious teasing at the crown for that towering retro silhouette. It’s a statement for themed events and bold brides, not a Tuesday.
Volume is everything, and the surface needs to stay smooth over all that backcombed body underneath, so go gentle on the top layer.
- Tease the crown heavily in small sections for maximum height.
- Smooth the very top layer over the teased base without flattening it.
- Gather into a high bun and lock it down with plenty of pins and strong-hold spray.
Twisted Halo Bun
The halo bun wraps twisted sections around the head like a soft crown, giving a romantic, goddess-like finish that suits garden weddings and brunches alike.
- Start with a sleek ponytail, then divide it into a few sections.
- Twist each section and wrap it around your head, pinning as you circle.
- Mist with texturizing spray for hold, and pull a few pieces loose to soften the halo.
Asymmetrical Bun
An asymmetrical bun sits deliberately off to one side, which gives a modern, slightly edgy line that breaks up the symmetry most updos rely on. It’s a small change that makes a familiar knot feel current.
Part your hair hard to one side, sweep everything across, and set the bun behind the opposite ear. Tease the lengths a little before you twist so the off-center shape has some volume to it.
Whether you finish it as a clean ballerina knot or a boho-soft messy version, the placement is what does the work, so commit to the angle and pin it securely for the night.
How to Ask Your Stylist
If you’re booking a bun for an event, bring two or three photos that include the back, because a single front-on image rarely shows it, and the back is what everyone behind you sees all night. Tell your stylist where you want the height, how much you want your face framed, and whether you’ll be wearing a veil, a hat, or a heavy earring, since all of those change where the knot should sit.
Be honest about your hair’s real behavior, too. Say if it slips out of pins by noon or if your last updo gave you a headache, so they can adjust tension and product. A practiced stylist would rather hear all of that up front than redo the set an hour before you walk out the door.
Find the Knot That Fits Your Morning
The best bun isn’t the most intricate one, it’s the one you’ll actually wear. Start with the everyday messy knot until your hands know the motion, then borrow steps from the chignon or the braided crown when an occasion calls for more.
Give yourself permission to practice on a low-stakes day rather than the morning of an event. Once a bun lives in your muscle memory, it stops being the fallback and becomes the one you turn to because it works.