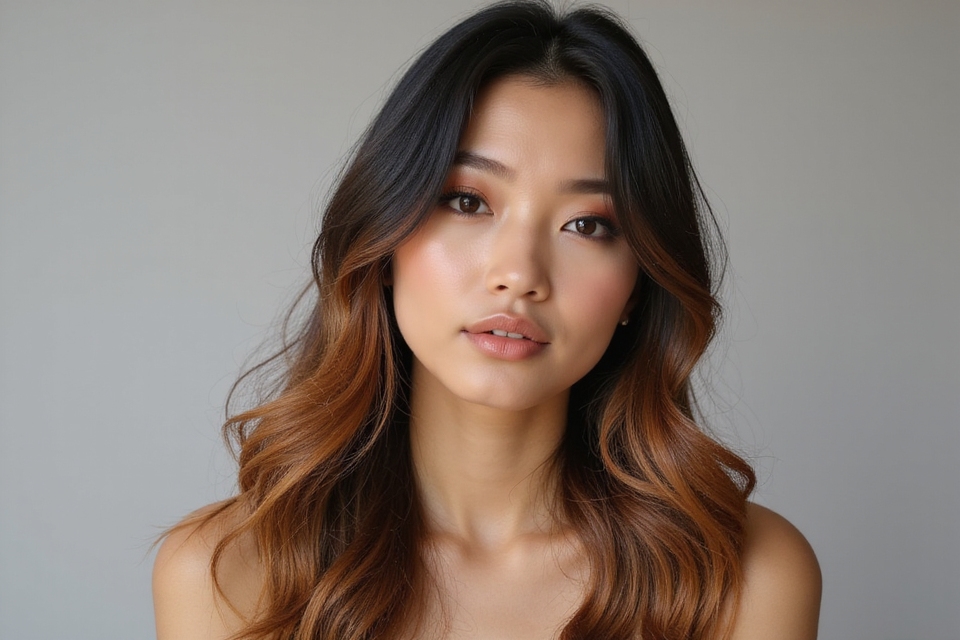
Here’s the honest truth about the messy bun: the good ones take more thought than they look, and the bad ones just look like you gave up. The whole art is making long hair look casually thrown together when it’s actually pinned to stay, and that gap between undone and unkempt is all in a few small moves.
Long hair is the dream canvas for this, since there’s enough length to twist, wrap, and leave pieces out for that lived-with softness. Below are 16 messy buns that look like you barely tried, from a two-minute everyday knot to a pull-through that fakes serious volume, each with the trick that keeps it from sliding flat by noon.
Easy Messy Buns for Long Hair at a Glance
A great messy bun comes down to three things: a secure anchor so it actually holds, deliberate face-framing pieces left out for softness, and a gentle pull-apart at the end to fake volume and that undone texture. Get those right and even a thirty-second bun looks intentional.
Long hair has the length to play with but also the weight to pull a loose bun down, so the fixes here lean on second-day texture, a hidden elastic or two, and strategic pins. Work on day-old or texturized hair, leave a few pieces out on purpose, and never aim for perfectly smooth, since a little mess is the entire point.
The Easy Everyday Messy Bun

This is the one to learn first, the no-occasion bun you can do half-asleep that still looks like you meant it. It’s the foundation every other style here builds on.
Pull the hair into a loose, mid-height ponytail, twist the length loosely, coil it around the base, and pin it with the ends left peeking out. Don’t wrap it tight or tuck every end, since the loose loops and stray pieces are what make it read soft and relaxed.
Once it’s pinned, gently tug the bun wider and pull a few face-framing pieces down. That ten-second finish is the difference between a sad knot and a bun that looks styled.
Intentional Flyaways That Sell It

The secret nobody tells you is that the flyaways aren’t an accident, they’re the whole look, placed on purpose to soften the face and fake that undone ease. Smoothing every strand back is what makes a bun look stiff and dated:
- Free a few strands at the temples and just ahead of each ear before you set the bun.
- Leave the very front shorter pieces out so they frame the face naturally.
- Curl or wave the loose pieces slightly so they read soft and deliberate.
The Side-Swept Messy Bun

Sweeping the bun low and to one side instantly makes it softer and more romantic, and it’s flattering on just about everyone. It’s my go-to when a centered bun feels too severe for the day:
- Gather all the hair low and to one side, just behind the ear, before you twist.
- Coil it into a loose knot there and pin it, keeping the opposite side clean and swept.
- Leave a soft piece out on the bare side so the asymmetry looks intentional and balanced.
The Twisted Rope Bun

The twisted rope bun gives long hair a beautiful texture without a single braid, since the twist itself creates that rope-like dimension once it’s coiled. It looks intricate but is really just twisting and wrapping.
Divide a ponytail in half, give each half a firm twist the same way, then cross the two halves over one another the opposite way down to the ends to form a rope. Coil that rope into a bun and pin it, and the twisting gives it instant body. My classic bun hairstyles guide has more structured options.
Because the texture is built into the rope, this one holds its shape on fine, slippery long hair better than a plain coiled bun does. For more on the twisting motion, my easy braided hairstyles guide covers the related techniques.
The Braided Messy Bun
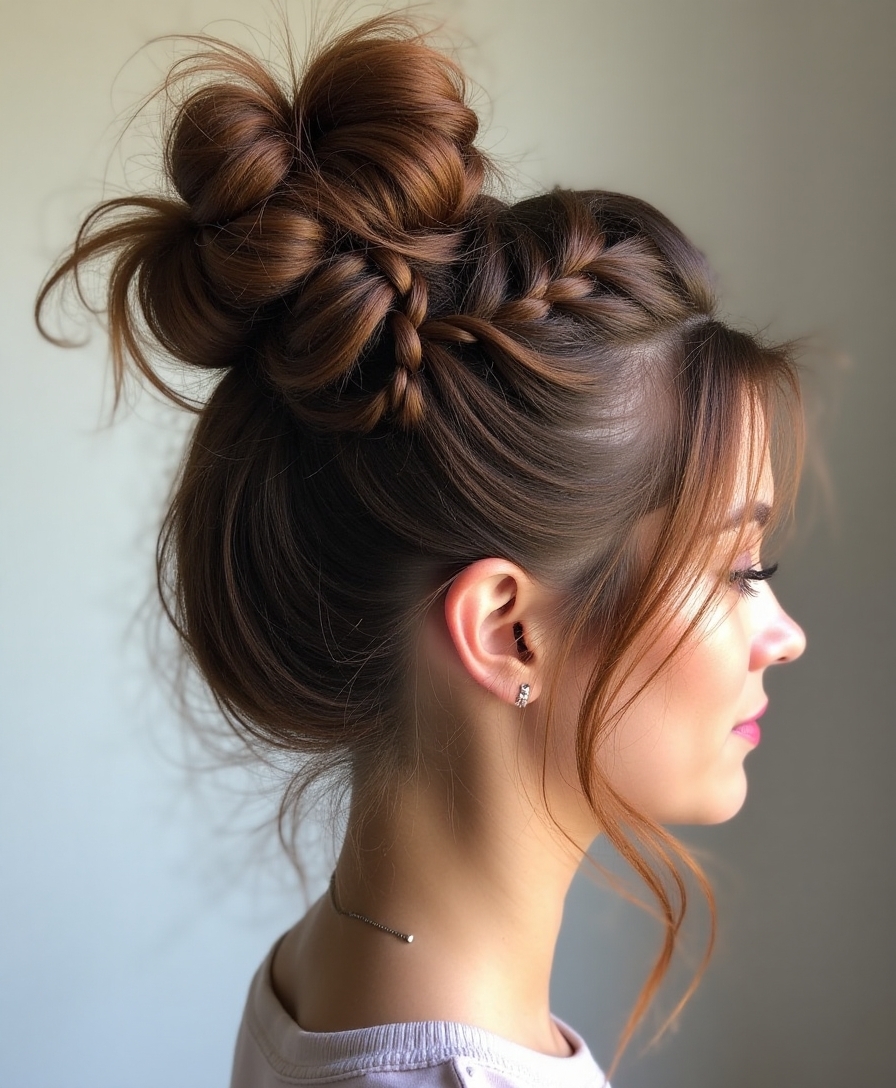
Adding a braid before you bun gives you rich texture and extra hold, which is a smart trick for long hair that tends to slip loose. The braid does double duty: it looks pretty and it grips:
- Braid a loose three-strand from your ponytail, then pull the edges of the braid wider.
- Coil the widened braid around the base into a bun and pin it in place.
- Tug a few loops loose so the braided bun looks soft and undone, not tightly wound.
The Quick Topknot

When you want everything up and off your neck in under a minute, the topknot delivers, and long hair makes a satisfyingly full one. It’s the busy-day, hot-weather, wash-day-tomorrow hero:
- Flip your head over, sweep it all up high at the crown, and wind it into a knot.
- Wrap and pin, letting the ends stay loose and a touch wild for that casual finish.
- Pull the knot wider and ease a couple of strands down by the face so it doesn’t look too tight.
The Half-Up Messy Bun

The half-up messy bun gives you two things at once: the face kept clear up top, the length flowing free down below. It’s the trendy, youthful version that works for long hair especially because there’s plenty left to show off.
Why the half-up bun flatters long hair best
Take the upper section from ear to ear, wind it into a small bun, and pin it, letting the lower length hang loose and waved. The little bun gives you that pulled-up look while the length stays in play.
Keep the bun deliberately small and a little messy, and let some front pieces fall, so it reads easy and casual.
The Low Twisted Chignon

The low chignon is the most elegant member of the messy-bun family, sitting soft and low at the nape for something that works from the office to dinner. Long hair has the length to make a full, pretty one.
Keeping a chignon casual instead of formal
Twist the hair into a loose, low knot at the nape, pinning it so it sits soft and a little tousled. The trick is keeping it loose and a little tousled, so it stays in the casual family well short of formal.
Tease out a couple of soft strands by the cheekbones, widen the knot gently, and the low chignon lands polished without a hint of stiffness; my low messy bun guide goes deeper on this relaxed shape.
💡Quick Tip
The single biggest messy-bun upgrade is doing it on second-day or texturized hair, never freshly washed. Clean, slippery long hair refuses to hold a loose bun and slides flat within the hour, while day-old hair or a quick mist of texturizing spray gives the strands the grip they need to stay put and look full. If your hair is squeaky clean, fake the texture with dry shampoo before you start.
The Scrunched Bun for Volume

If your long hair is fine and your buns always come out small and sad, the scrunched bun is the fix, because scrunching builds the volume your hair won’t make on its own. It’s all about adding texture before you pin.
Mist the lengths with a texturizing spray and scrunch them in your hands to rough up the surface, then build your bun from that pre-textured hair. The grit gives the bun grip and visual fullness at once.
Pull the finished bun wide and don’t smooth it, since the whole goal here is maximum casual volume from minimum actual hair.
The Double-Twist Low Bun

The double-twist bun is a slightly more polished take that still counts as easy, using a pair of twists for extra dimension. It’s a pretty step up when you want a little more than the basic knot.
Part the hair into two halves, twisting each one back toward the neck, then wrap and pin both twists together into one low bun. The two-piece construction gives it a fuller, more deliberate shape while staying soft and loose.
🅰️Two-Minute Everyday
The basic messy bun or quick topknot, twisted up and pinned with pieces left out. Fast, forgiving, and perfect for errands or a busy day, though it’s more casual than polished.
🅱️Five-Minute Polished
A pull-through, braided, or low twisted chignon bun. A few extra minutes and a little more volume or texture, ideal when you want the bun to look intentional for dinner or work.
Playful Messy Space Buns

Space buns are the playful, festival-ready option, and the messy version keeps them from looking too costumey, especially on grown-ups. Long hair makes nice full ones with plenty to work with.
Part the hair down the middle, make two high ponytails, and twist each into a loose, messy bun, leaving ends and pieces out. The key is keeping them soft and a little undone rather than tight and precise.
Pull a few face-framing pieces loose and tug each bun wider, and you’ve got a fun look that still feels current and wearable.
The Pull-Through Bun

The pull-through bun looks like a salon updo but is built from simple elastics and loops, no braiding skill required, which makes it the best volume-faker for long hair. It creates a big, full bun from a series of pulled-through sections.
How the pull-through fakes a huge bun
Make a ponytail, then a second one below it, and pull the top tail through the gap; repeat down the length, then tuck and pin the loops into a full, rounded bun. Each pull-through adds another puff of volume.
Gently tug each loop wider once it’s pinned, and the result is a dramatically full bun that took elastics and two minutes, no real skill required.
ℹ️Good to Know
Long hair is heavier than it looks, and that weight is the real reason loose buns slide down. The fix is distributing the load: anchor into the elastic, use an X-cross of pins at the base, and consider a hidden second elastic to take some of the weight off the bun itself, so it stays put without straining your scalp.
The Sock Bun for Long Hair

The sock bun, built over a donut form, is the classic trick for a full, round bun, and long hair wraps around it beautifully for serious volume. A slightly messy version keeps it from looking too perfect and ballerina-stiff.
Pull the hair through a bun donut at the crown or nape, spread it to cover the form, then pin and let a few pieces fall loose. The donut does the volume work, so even fine long hair gets a full, shapely bun without the strain of piling it all up yourself.
A Chic Casual Twist

This one lives between a twist and a bun: you twist the hair up and pin it loosely, leaving the ends out for an artfully undone finish. It is the throw-it-up move for when even a bun feels like too much.
It works on long hair precisely because the leftover length fans out into the loose, casual tail that makes the whole thing look intentional:
- Twist all the hair up toward the crown and pin it midway, leaving the ends loose and free.
- Don’t tuck the ends in; letting them fan out is what gives it that casual, undone charm.
- Pull a few pieces around the face loose so it frames softly and looks deliberate.
| When | Best bun | Why |
|---|---|---|
| Rushed weekday | Easy everyday bun or topknot | Under two minutes, holds all day, very forgiving |
| Date or dinner | Low twisted chignon | Soft and elegant but still casual and quick |
| Fine hair, want volume | Pull-through or sock bun | Builds a full bun your hair won’t make alone |
| Playful or festival | Messy space buns | Fun and current when kept soft and undone |
Strategic Bobby Pin Placement

Half the battle with a messy bun on heavy long hair is the pins, because the right placement is the difference between a bun that holds all day and one that slides out by lunch. A few smart pins beat a dozen random ones.
It is worth learning where they actually grip, since the same three pins placed well will outlast a whole handful jabbed in at random:
- Cross two pins into an X at the base of the bun for the strongest anchor.
- Push each pin in against the scalp, then flip and slide it under the bun so it grips, not just sits.
- Anchor into the elastic underneath rather than just the hair, so the weight has something solid to hold.
Scrunching for Casual Volume

Whatever bun you’re making, a quick scrunch of texture first is the universal upgrade for long hair, since slippery, smooth strands are exactly what makes a bun fall flat by lunch. This is the prep step worth never skipping:
- Mist the lengths with a texturizing or dry-shampoo spray before you start.
- Scrunch the hair in your hands to rough up the cuticle and build grip.
- Build your bun from this textured hair, and it’ll hold fuller and longer all day.
Messy Buns for Long Hair, Answered
?How do I keep a messy bun from falling out of long hair?
Anchor it properly: cross two bobby pins into an X at the base, pin into the elastic underneath rather than just the hair, and start with second-day or texturized hair for grip. Long hair is heavy, so distributing the weight with a hidden second elastic helps more than pinning tighter.
?Why does my messy bun look messy in a bad way?
Usually because it’s done on slippery clean hair, smoothed too flat, or not pulled apart at the end. A good messy bun needs texture (second-day hair or texturizing spray), a few pieces left out on purpose, and a gentle widening once it’s pinned, that’s what reads casual instead of careless.
?What’s the easiest messy bun for very long, thick hair?
A twisted rope bun or a braided bun, because twisting or braiding the length first tames the bulk and builds in texture that holds. For fine long hair the pull-through or sock bun add volume, but for thick hair the goal is containing the weight, which a braid or rope does best.
The Art of Looking Like You Didn’t Try
The messy bun is the rare style where doing less, on purpose, looks like more, and once you know the three moves, a secure anchor, pieces left out, and a gentle pull-apart, you can fake casual on any long-hair day. From the thirty-second everyday knot to the volume-packed pull-through, every one of these is built to look undone while quietly staying exactly where you put it.
Start with the basic everyday bun until your hands know it cold, then branch into a twisted rope or a low chignon when you want a little more. Lean on second-day texture, leave a few pieces down, and leave it a little undone, because with a messy bun, the imperfections are the style. For more quick options, my everyday easy hairstyles and medium-length easy styles guides have plenty more.
More Worth Saving