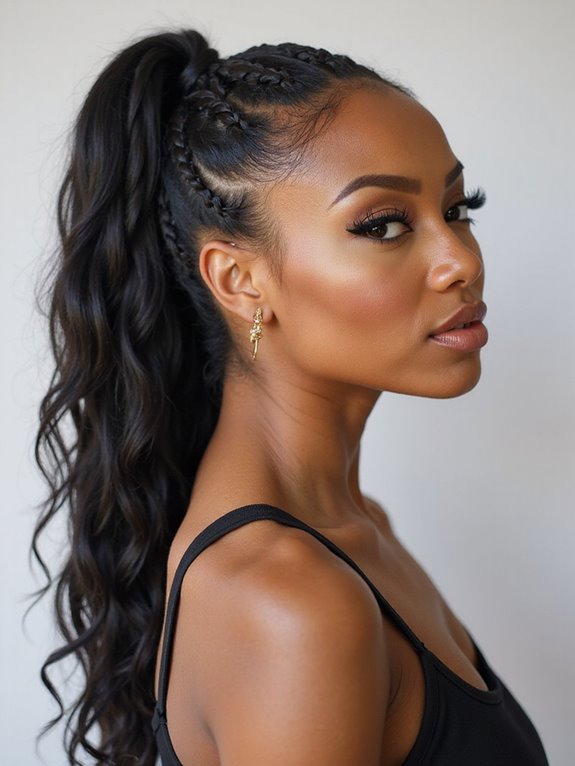
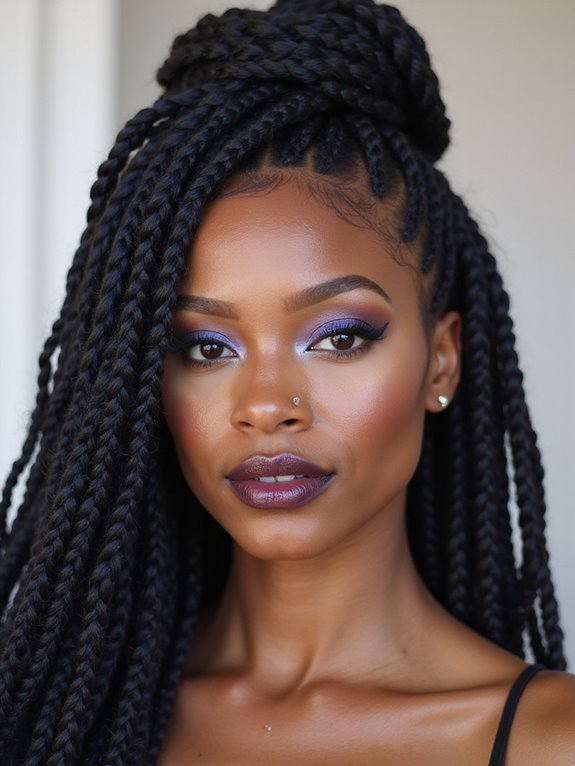
Walk into a braiding shop on a Saturday morning and you hear it before you see it: the soft snap of hair being parted, beads clicking, somebody’s playlist running low. Baddie braided hairstyles live in that energy. Bold, deliberate, built to turn heads while quietly protecting your strands underneath.
This isn’t a list of looks you scroll past. It’s how each baddie braided style actually wears, what it runs at the chair, how long it holds, and which one fits the way you live. The look does the talking; here’s what’s behind it.
Baddie Braids at a Glance
What makes a braid read as baddie? Clean parts, a soft but sharp hairline, and a finish that looks intentional: sleek knotless, crisp feed-in cornrows, or jumbo box braids with attitude.
How long do baddie braids last? Most protective braid styles hold six to eight weeks with nightly care. The hairline and edges usually want a refresh sooner.
What do they cost? Roughly $60 to $150 for cornrows and feed-in styles, and $120 to $300 for knotless or box braids, depending on length and braider.
Sleek Knotless Braids That Sit Light

Knotless braids begin with your natural hair at the root and bring the added length in a few strands at a time, so no hard knot sits at the base tugging on your scalp. That one change is why they sit lighter and look smoother from the part down. A full set of knotless braids usually runs $150 to $300, with four to seven hours in the chair, depending on length and how small you go. They’re the look most people picture now when they say baddie braids.
When a client lands in my chair for knotless braids, the first thing I check is the tension at the front. Sleek should never mean sore.
If your scalp aches that night, the braids went in too tight, and a good braider keeps the hairline soft enough that you can sleep on it the same day. Length is the other lever. Mid-back braids photograph dramatic but add real weight, while a shoulder-grazing set feels almost weightless and stays far kinder on a fine hairline.
- Best for length and swing without the weight of traditional box braids.
- Style them in a high pony, half-up, or a low bun; the smooth root takes updos cleanly.
- Smooth the edges with a light gel and a soft brush every few days to keep the front polished.
Classic Box Braids, Modern Versatility

Box braids are the foundation everything else borrows from: squared-off parts, even sections, a structure that holds for weeks. Budget $120 to $250 for a medium-length set, and expect it to hold six to eight weeks with good upkeep. They have carried generations of Black women through busy seasons. Once they’re in, they ask almost nothing of you.
What keeps them current is how you wear them. Jumbo box braids look loud and cut your install time; smaller ones give more styling range but a longer chair day. I’ve watched the same client rotate from waist-length braids one month to a blunt braided bob the next, same technique, completely different mood.
- Jumbo braids install faster, around three to five hours, and make the bigger statement.
- Smaller braids hold detail better for updos but can run six to eight hours.
- Tuck the ends, dip-seal them, or leave them raw, depending on the finish you’re after.
📋Before You Book Knotless Braids
- ✓Bring a photo so you and your braider agree on size and length first.
- ✓Wash and deep-condition the day before, not the morning of.
- ✓Speak up the moment tension feels sharp; a comfortable install is the goal.
Feed-In Braids for a Natural Hairline

Feed-in braids build cornrows flat against the scalp, adding hair little by little so the front looks like it grows straight out of your own head. It’s the technique behind clean braided ponytails and stitch braids, and the reason they look grown-in and flat at the root.
Because the hair is layered in gradually, the base stays slim and comfortable, which is what lets feed-in styles sit so close under a ponytail or wrap. Done well, the parts look like ruler lines and the whole front stays polished from any angle.
- Start with stretched, moisturized hair so the rows lie flat and even.
- Hair gets added gradually after the first few stitches, never all at once at the root, for that grown-in finish.
- Use them as a base for high ponytails, buns, or a braided crown when you want height.
- They hold about two to three weeks, shorter than box braids but a much quicker install at $60 to $150.
Bold Protective Braids With Cultural Roots

Styles like Fulani braids and tribal-inspired cornrows carry real heritage, patterns passed down through West African braiding traditions and often finished with beads or cuffs. Wearing them well means understanding that the center cornrow, the side-swept rows, and the beadwork speak to specific families and regions; the pattern carries meaning. A detailed Fulani braids set runs about $100 to $200, with three to five hours in the chair.
When a client wants this look, I talk through placement first, because where the parts fall changes the whole face-framing. Beads add weight, so for finer hair or fragile edges we keep the front rows lighter. Done with care, the look lands bold and intentional, and it photographs beautifully. If you love the linework, plain cornrow braids give you the same crispness for less.
Braid size changes everything: install time, styling range, and how the set feels on your scalp. Here’s how to choose.
🎯Micro and small
The most styling range and the most natural drape, but plan for a long chair day.
🎯Medium
The all-rounder: balanced install time, holds updos, flatters most face shapes.
🎯Jumbo
Boldest look, fastest install, and the lightest on your scalp for a fresh set.
Graceful Goddess Braids With Natural Movement

Goddess braids leave curly or wavy pieces loose along the length, so the style moves with you. They split the difference between a sleek protective braid and a softer, romantic finish. Think boho energy with real structure underneath.
Styling Goddess Braids Day to Day
These work especially well if you miss seeing your texture while you’re protected. The loose curls soften a strong jaw and add a little height at the crown. Plan on five to seven hours and roughly $150 to $280, since every loose piece is placed by hand.
The honest trade-off: those loose curls tangle faster than fully sealed braids. Plan to finger-detangle them every couple of days, smooth a little lightweight oil through the curly pieces, and re-dip the ends in hot water if they start to frizz around week three. Because of that upkeep, goddess braids usually look their freshest for about four weeks rather than the full six to eight you’d get from sealed box braids.
Braided Ponytails That Sit High and Sharp
A braided ponytail is the baddie move when you want all the drama up and off your neck. Sleek the front with a brush and a little gel, gather the braids high, then tuck one braid over the elastic and pin it out of sight. The pull-back gives an instant lifted-cheekbone effect that looks expensive without costing anything extra.
It works over almost any base: knotless, box braids, or a fresh set of feed-in cornrows. Clients ask me for it constantly. Just watch the tension when you gather everything up high, because a heavy ponytail pulls on the same edges all day. If your set is on the longer side, split the pony into two and pin for a style that holds its shape from morning meetings through the evening out.
Braided Bobs and Quick Everyday Updos
Not every baddie braid has to graze your waist. A braided bob lands at the jaw or collarbone, frames the face hard, and feels lighter on the scalp than a long set. It’s my go-to suggestion for anyone nervous about the weight of full-length braids or sitting through an eight-hour install for the first time.
Once your braids are in, the everyday styling is where the real value shows up. A few pins and a scarf turn the same set into three or four looks across the week, which is exactly why protective styling earns its keep.
- Half-up bun: gather the top half into a knot and let the rest fall for a five-minute fix.
- Low chignon: coil the braids at the nape and pin for something dressier.
- Side part with a deep sweep: instant face-framing with zero heat.
Finishing Touches: Beads, Cuffs, and Clean Edges
The details are what tip a good braid set into baddie territory. Small things, big payoff. Gold or silver cuffs at the ends, a handful of wooden beads, or a couple of rings spaced down one section add personality without changing the install. Keep the metal pieces few so they catch the light, and cluster them where your hair naturally falls forward.
Edges are the other half of the finish. A soft-bristle toothbrush, a dot of edge product, and a satin band laid over the front for ten minutes give you that crisp, laid hairline. Refresh it every couple of days and leave it alone between, then always wash the product out at your weekly cleanse so it doesn’t build up along the part.
What to Expect: Time, Cost, and Care
Protective braids cost time and money up front and pay it back in low-effort weeks afterward. Budget a real chair day, since most full sets run three to eight hours, and somewhere between $60 and $300 depending on the style, the length, and your braider’s skill. Tip your braider; this is detailed, physical work.
Here’s the part too many people skip, and I tell every first-timer the same thing: braids should never hurt. Tightness at the hairline is not proof they will last longer. It’s traction, and over time it thins your edges.
If your scalp throbs or you spot little bumps along the part the next day, the install was too tight. Keep your scalp moisturized, wrap your hair in satin at night, and give your hairline a few weeks of rest between sets. That break is what keeps protective styling actually protective.
Baddie Braid Questions, Answered
?Can I wash my hair with braids in?
Yes, and you should. Dilute a gentle shampoo in a squeeze bottle, aim it straight at your scalp section by section, then rinse and let the braids air-dry fully so the roots don’t loosen or hold a smell. Once a week is plenty, and a dry shampoo or witch hazel on a cotton pad handles the in-between days.
?Do braids actually help my hair grow?
They won’t speed things up, but they help in a real way. By tucking your ends away and cutting out daily combing, heat, and manipulation, braids let you hold onto the length you already grow. The growth happens on its own at the scalp; braids simply stop the day-to-day damage that usually erases it.
?How do I stop frizz at the roots after a week?
A little edge product smoothed with a soft brush plus a satin wrap at night handles most of it. Touch up the front every couple of days and leave it alone in between, and resist the urge to re-braid loose pieces yourself, because tugging the same roots over and over is exactly where tension damage gets started.
?Which baddie braid is best for a first-timer?
Medium knotless braids, almost every time. They’re lighter than box braids, much gentler at the hairline since there’s no knot pulling at the root, and they take ponytails and buns cleanly. Start there for your first set, see how your scalp handles a full install, then size up or down on the next round.
Pick the Braid That Matches Your Mood
Baddie braids aren’t one look; they’re a whole range, from glassy knotless to beaded Fulani rows to soft goddess curls. The right one is simply the style that fits your week, your budget, and how much time you can give the chair.
If you’re new to protective braids, start with a medium knotless set. It’s the most forgiving on your scalp, the easiest to style, and the gentlest way in. Save a photo of the look you love, book a braider who listens when you talk about tension, and try that first before you go bigger.
More Hair Ideas